Welcome to Objects and Order Exhibitions!
You’re ready to create an outstanding digital exhibition with your object data, content, and media. We’ll walk you through the process step-by-step. Whether you’re putting together a digital version of a past exhibition project, or building something born-digital, our system makes it easy to create an exhibition highlighting your objects.
- Have a question? Use the Get in touch tab at right.
- Check out the handy Digital Exhibitions Glossary.
- If you don’t have a Base yet, start one with up to 100 object records (no credit card required). A Base is your space for organizing collection objects and for creating and sharing digital exhibitions. Learn more in Base Basics.
- With a Level 01 Base, you can create up to three exhibitions for free.
- To publish an exhibition, your Base needs an active subscription plan (Level 02, 03, or 04).
Step 1: Set Up an Exhibition Blueprint
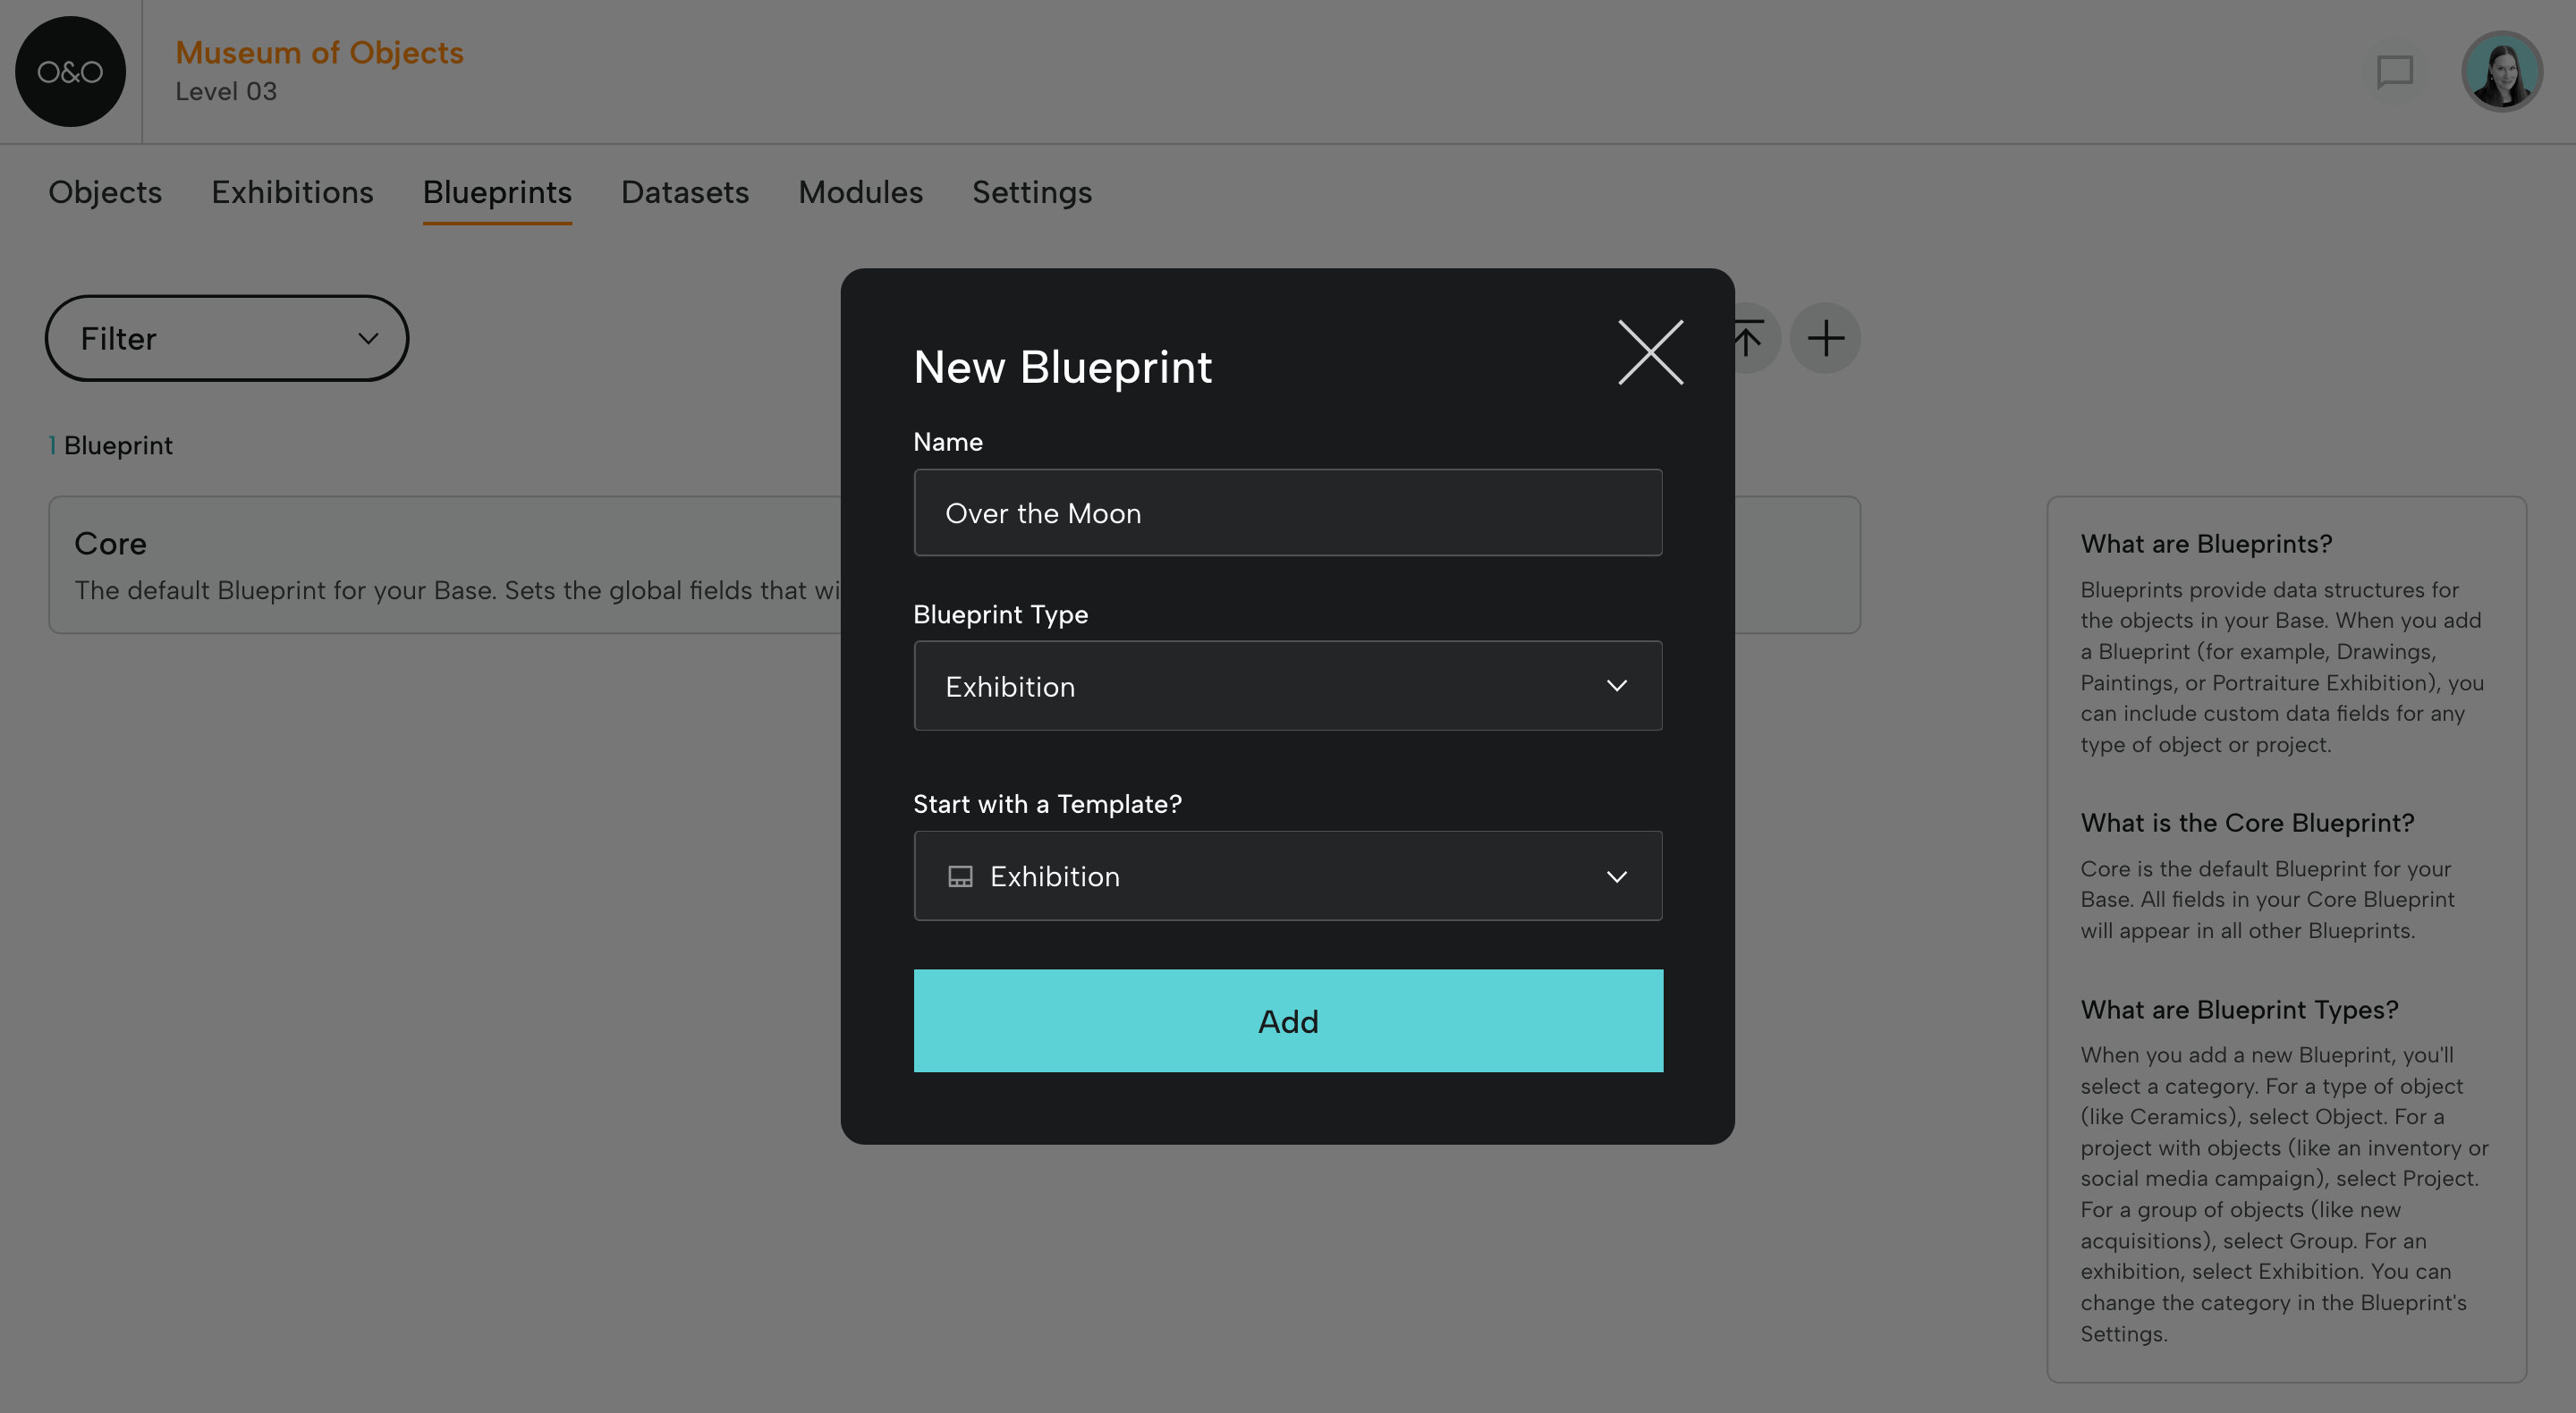
The first step is to set up an Exhibition Blueprint for your digital exhibition project.
The Exhibition Blueprint should contain all necessary fields for object information and interpretive content. For example, form fields for tombstone information (artist, date, medium, etc.), credit lines, and the object label.
You can build your own Blueprint or get started with a template. We'll begin with the Exhibition template. Our sample digital exhibition is called Over the Moon.
Customize the Exhibition Blueprint
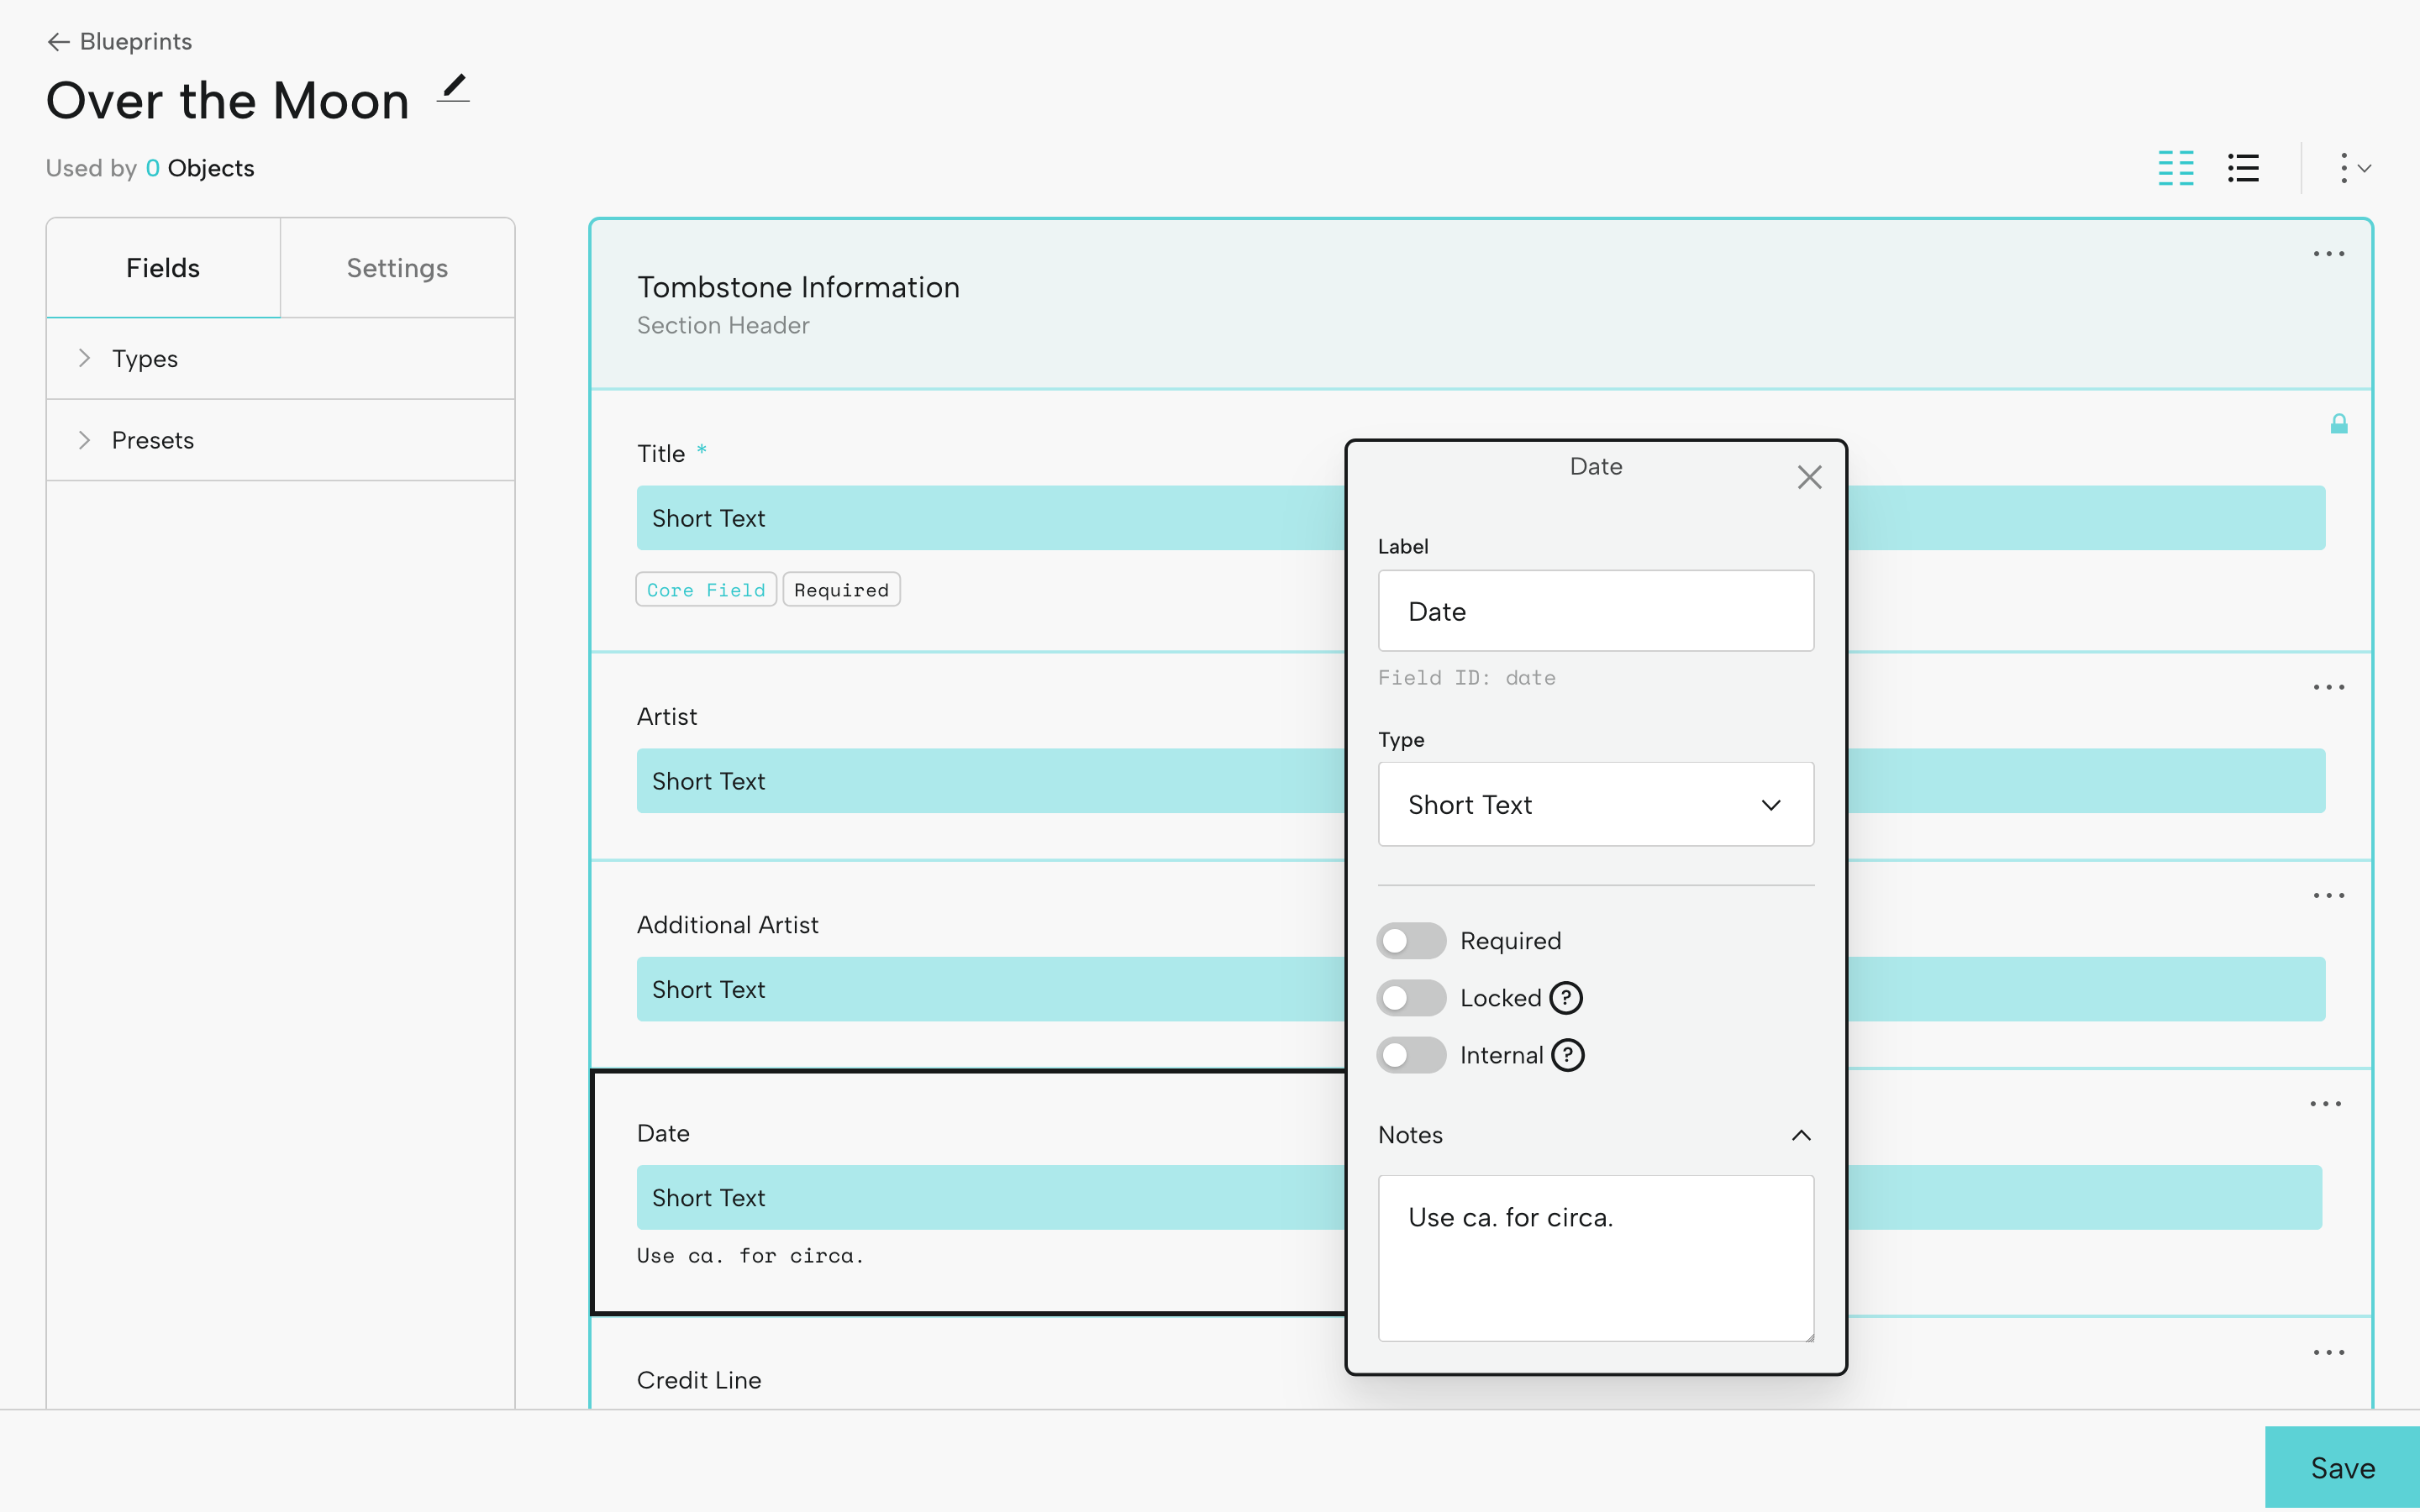
Whether you create your own Blueprint or start with a template, you can always make updates as your project evolves. Change field labels, field types, add data entry notes, and reorder fields and rows, and add and delete fields. Remember to save along the way.
- Is there a field you don’t need? Click the ellipses icon (…) in the upper right hand corner of the field and delete it.
- Want to rename a field? Click the field and update the label. For example, you might change “Accession Number” to “Object Number” or “Artist” to “Creator.”
- Want to add new fields or section headers? Add fields using the Preset and Type options at left.
- Need to move things around? Drag and drop fields and rows.
Keep in mind that you don’t enter information in a Blueprint; instead, you’re setting up the fields in which information will be entered at the object level.
For more on Blueprints, see Art of the Blueprint and Setting Up Blueprint Fields.
Naming Exhibition-Specific Fields
In any Blueprint fields for object information that will be specific to a single exhibition (for example, Label Text or Audio Guide), we recommend including the exhibition title (or a short version or other identifier) in the field label.
For example:
- Label Text (Portraits in Paint)
- Label Text - OTM
- Audio Guide - Over the Moon 2025
Why? Because you might include the same object in two different exhibitions, and it will likely have its own label text or audio file in each.
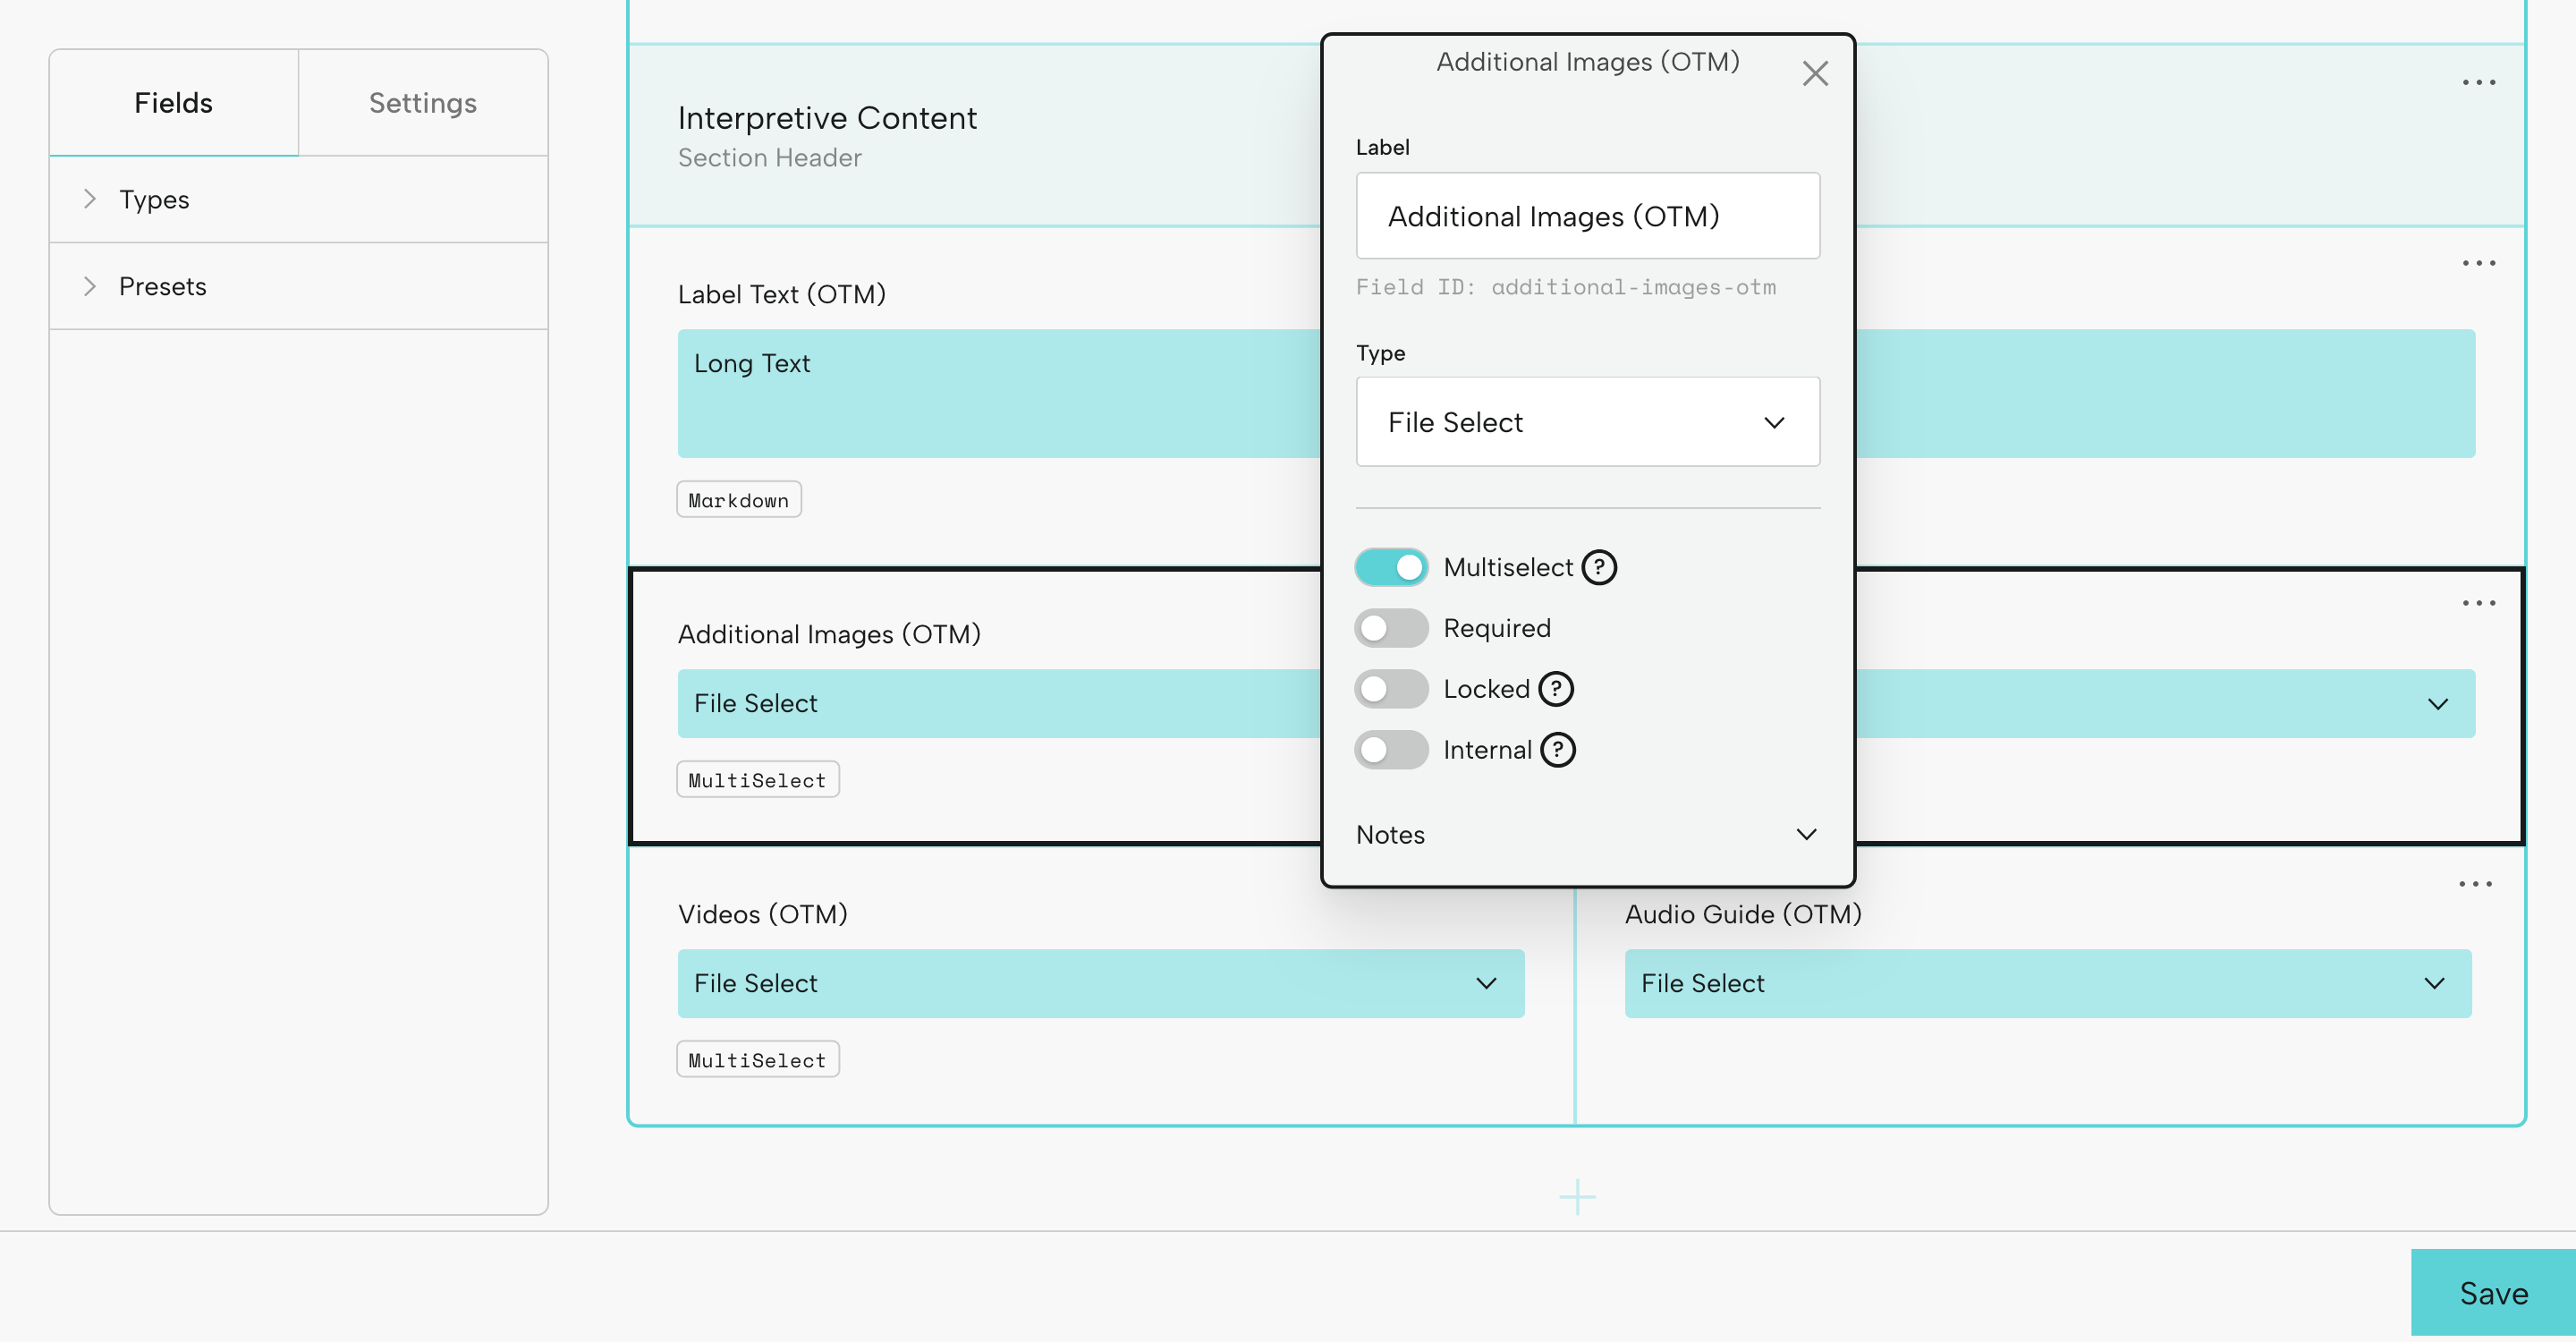
For media (images, audio, and video files), if you'll be displaying multiple images (in addition to the primary image), videos, or audio files for some or all of your objects, set up fields for selecting files (Type: File Select).
For example:
- Additional Images (OTM): here you might toggle on the Multiselect option so you could display several images.
- Audio clip (Portraits in Paint): if you will be including audio.
- Video - Over the Moon: if some of your objects have a related video.
You'll choose the additional files you want to display in your exhibition at the object level.
Step 2: Select Objects and Add Info and Files
Once you’ve set up your Exhibition Blueprint, it’s time to organize your Exhibition Objects.
If you’re new to Objects and Order, you may not have any objects in your Base yet. Check out Adding Objects.
Select Existing Objects
If the objects for your exhibition are already in your Base, from the Objects page:
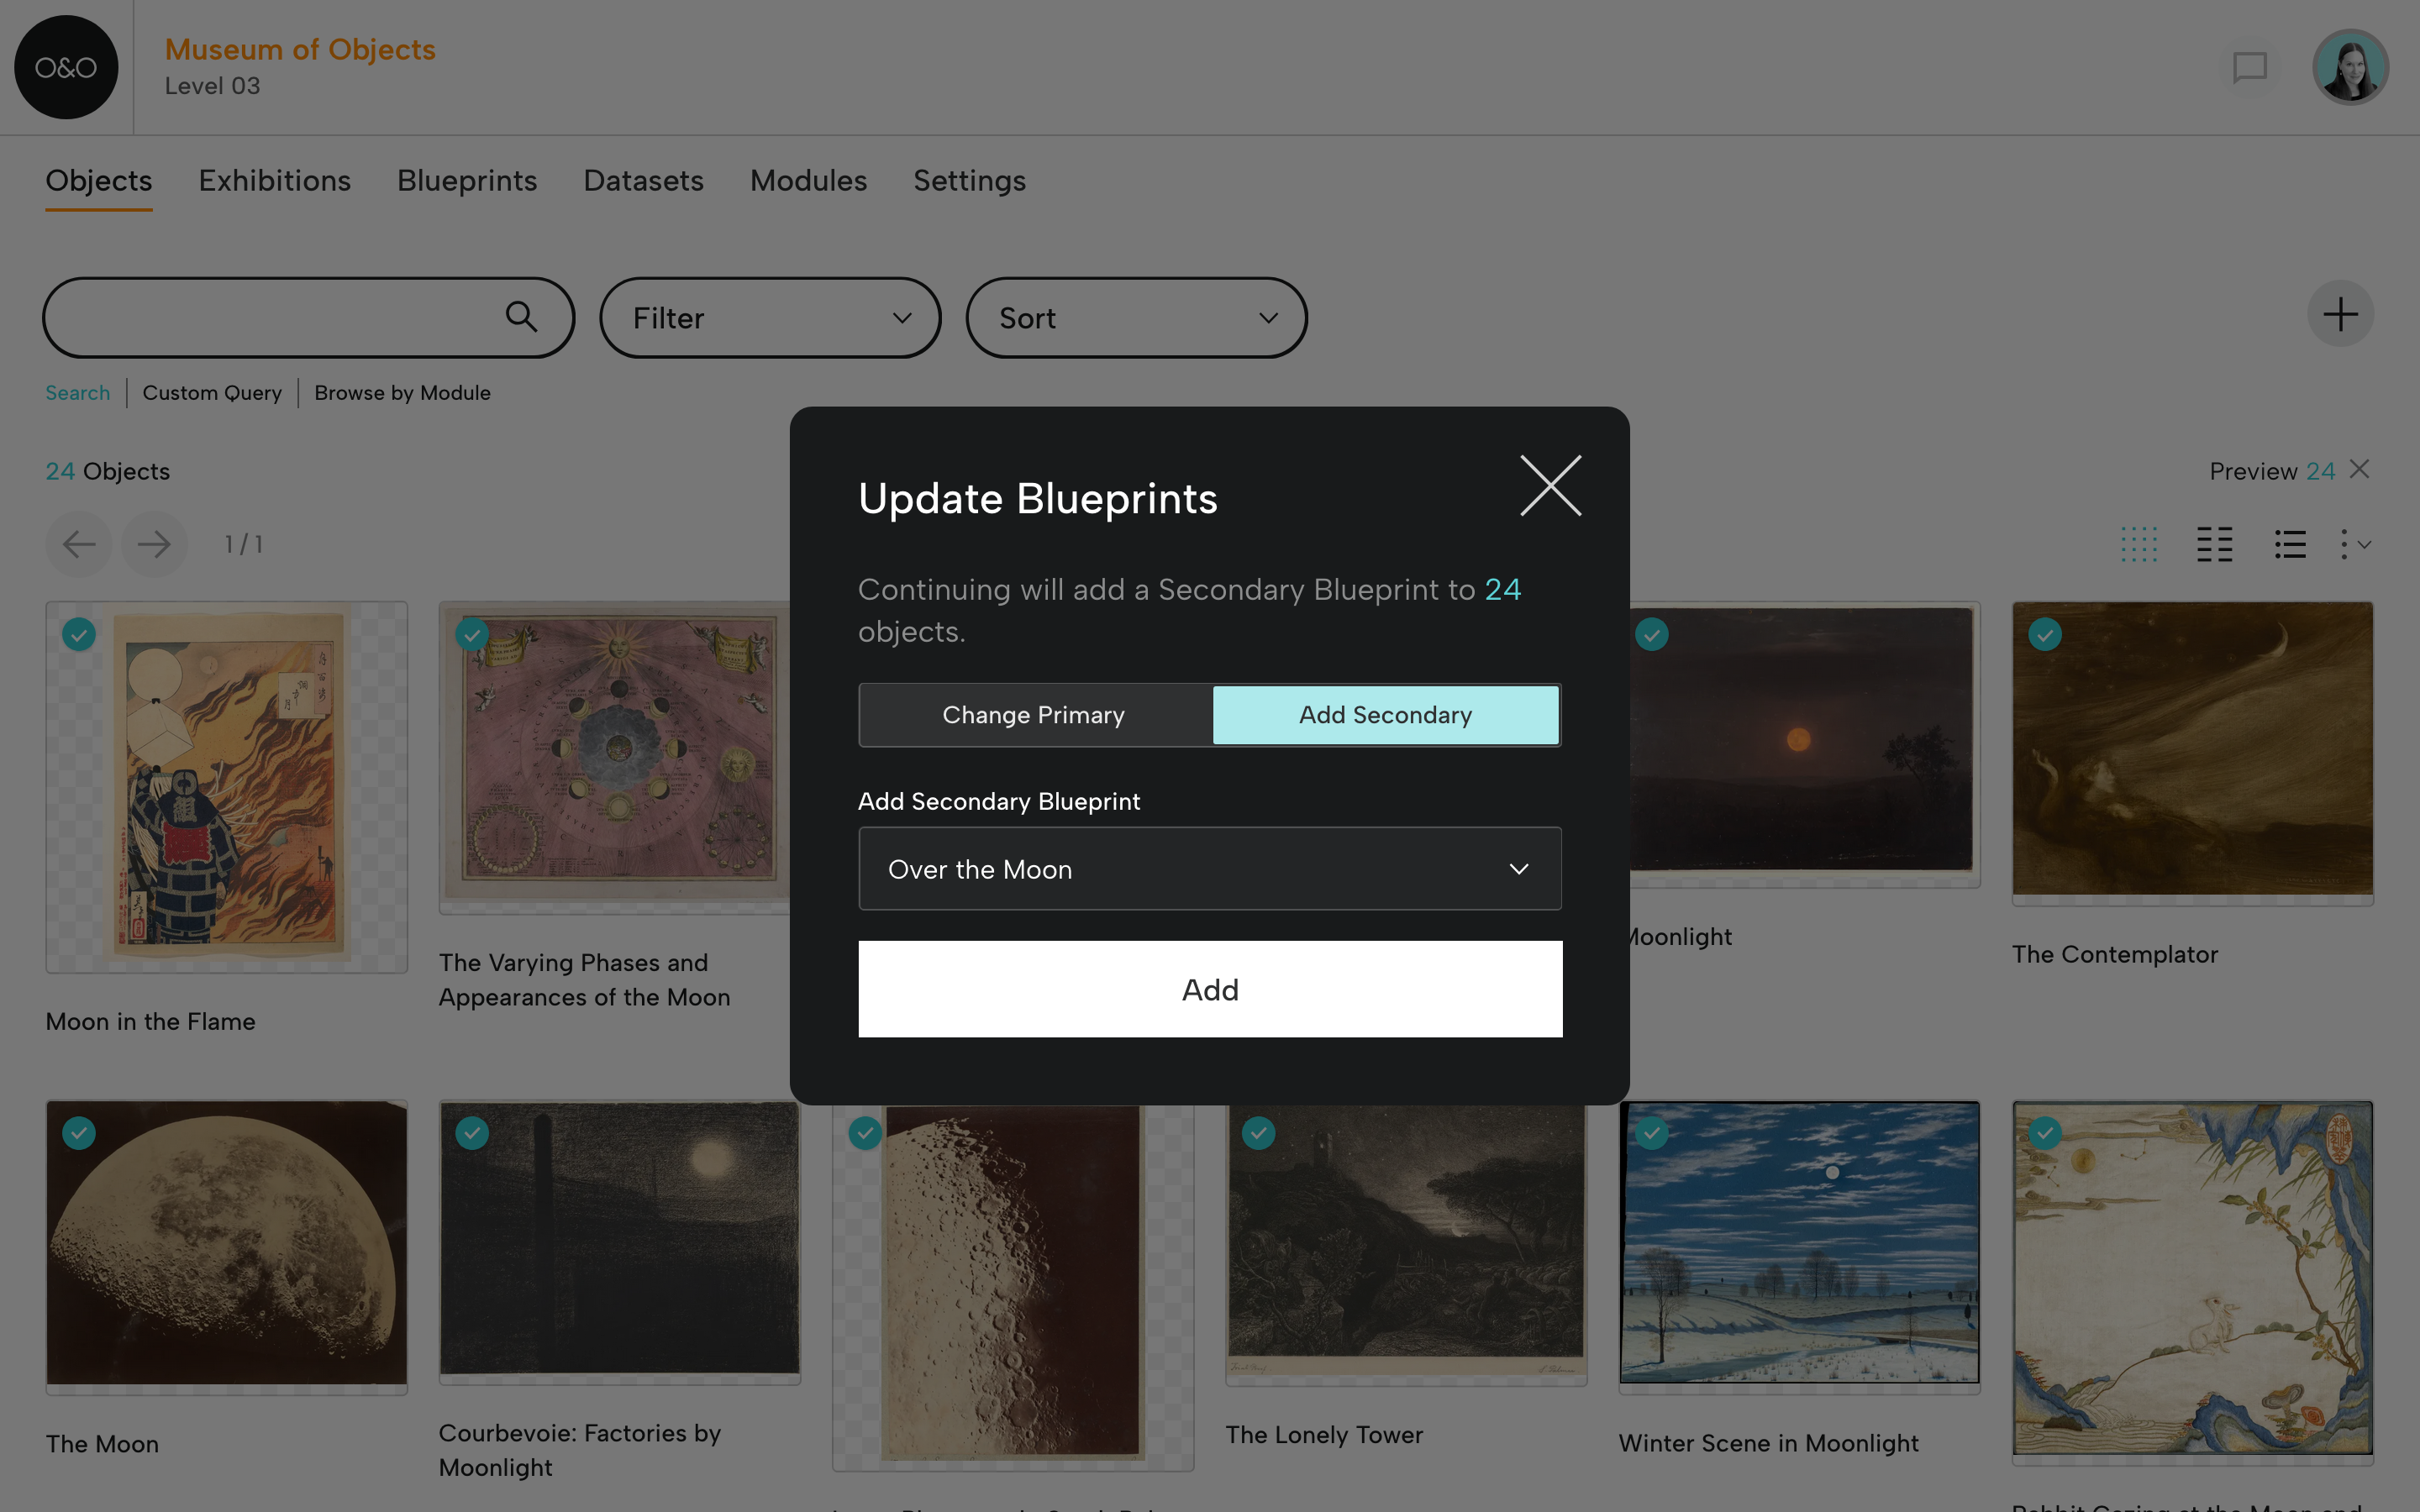
- Select exhibition objects by clicking the check mark in the upper left corner.
- From the Actions menu, choose Update Blueprints.
- Choose Add Secondary.
- Choose your Exhibition Blueprint as the Secondary Blueprint.
- Click Update. Your objects will be associated with the exhibition.
Now you can easily filter using your Exhibition Blueprint to see all your exhibition objects.
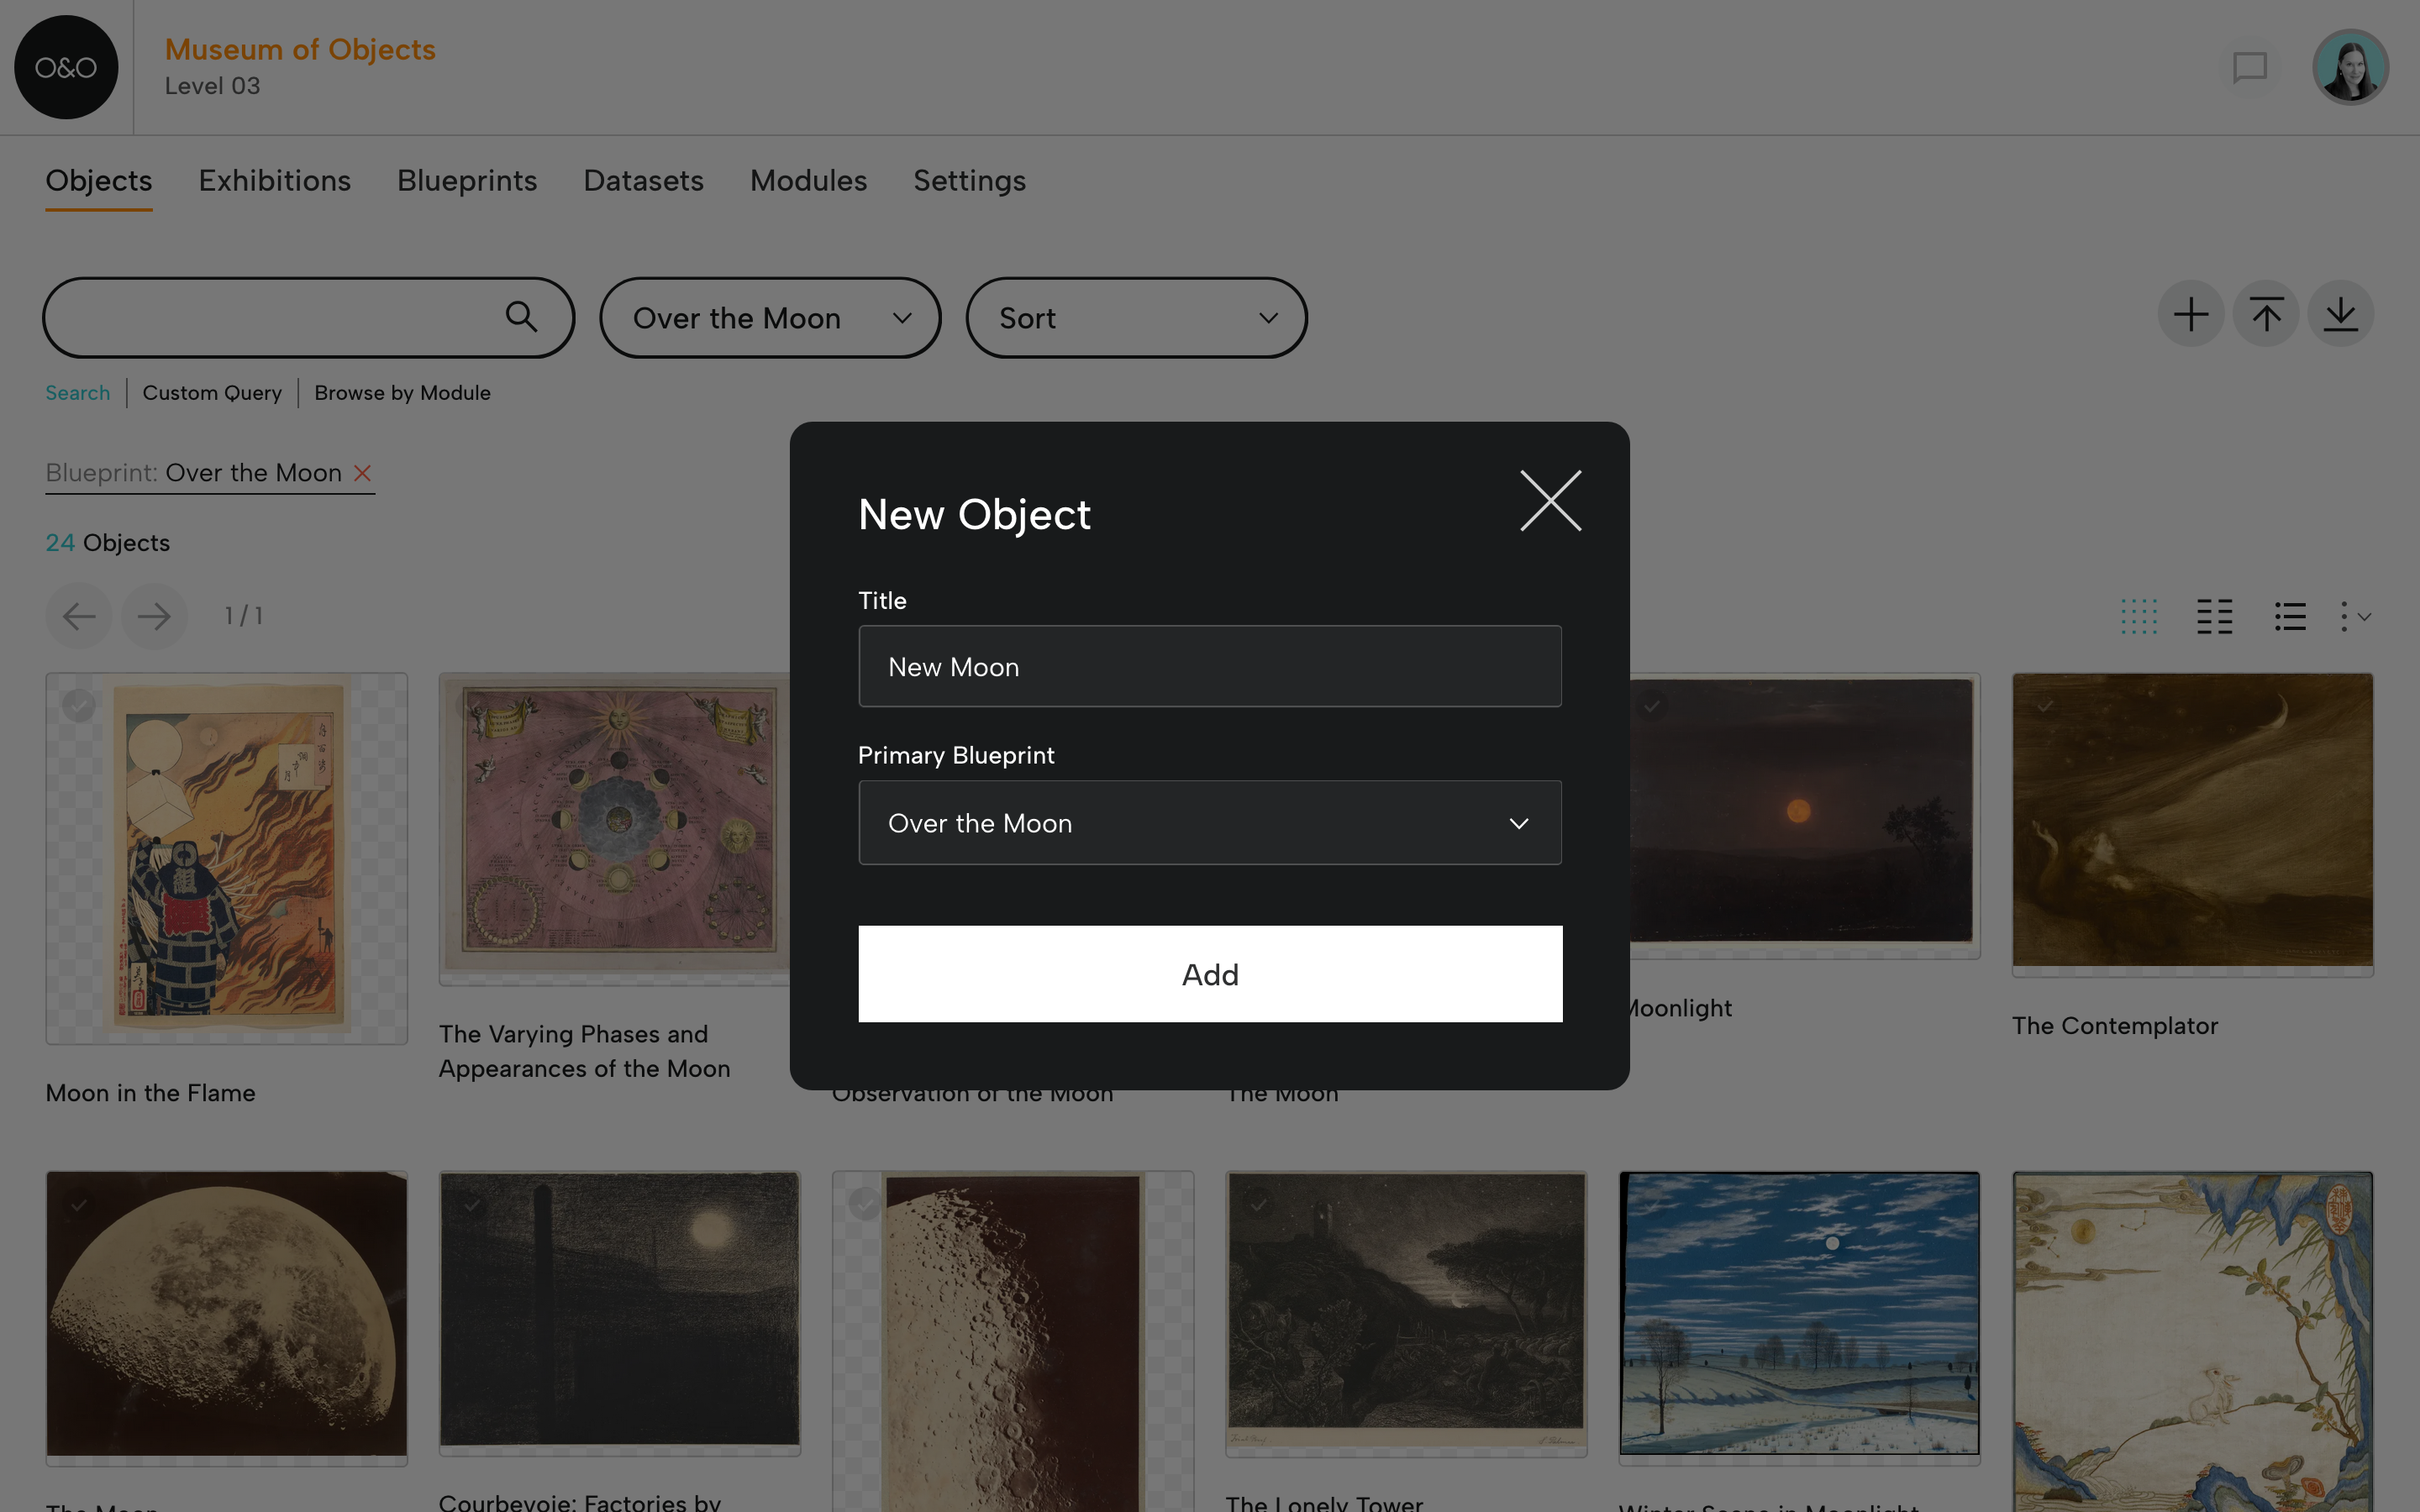
Add an Individual Object
- From the Objects page, click the plus sign.
- Enter the title.
- Select your Exhibition Blueprint as the Primary Blueprint.
Add a Group of Objects via CSV
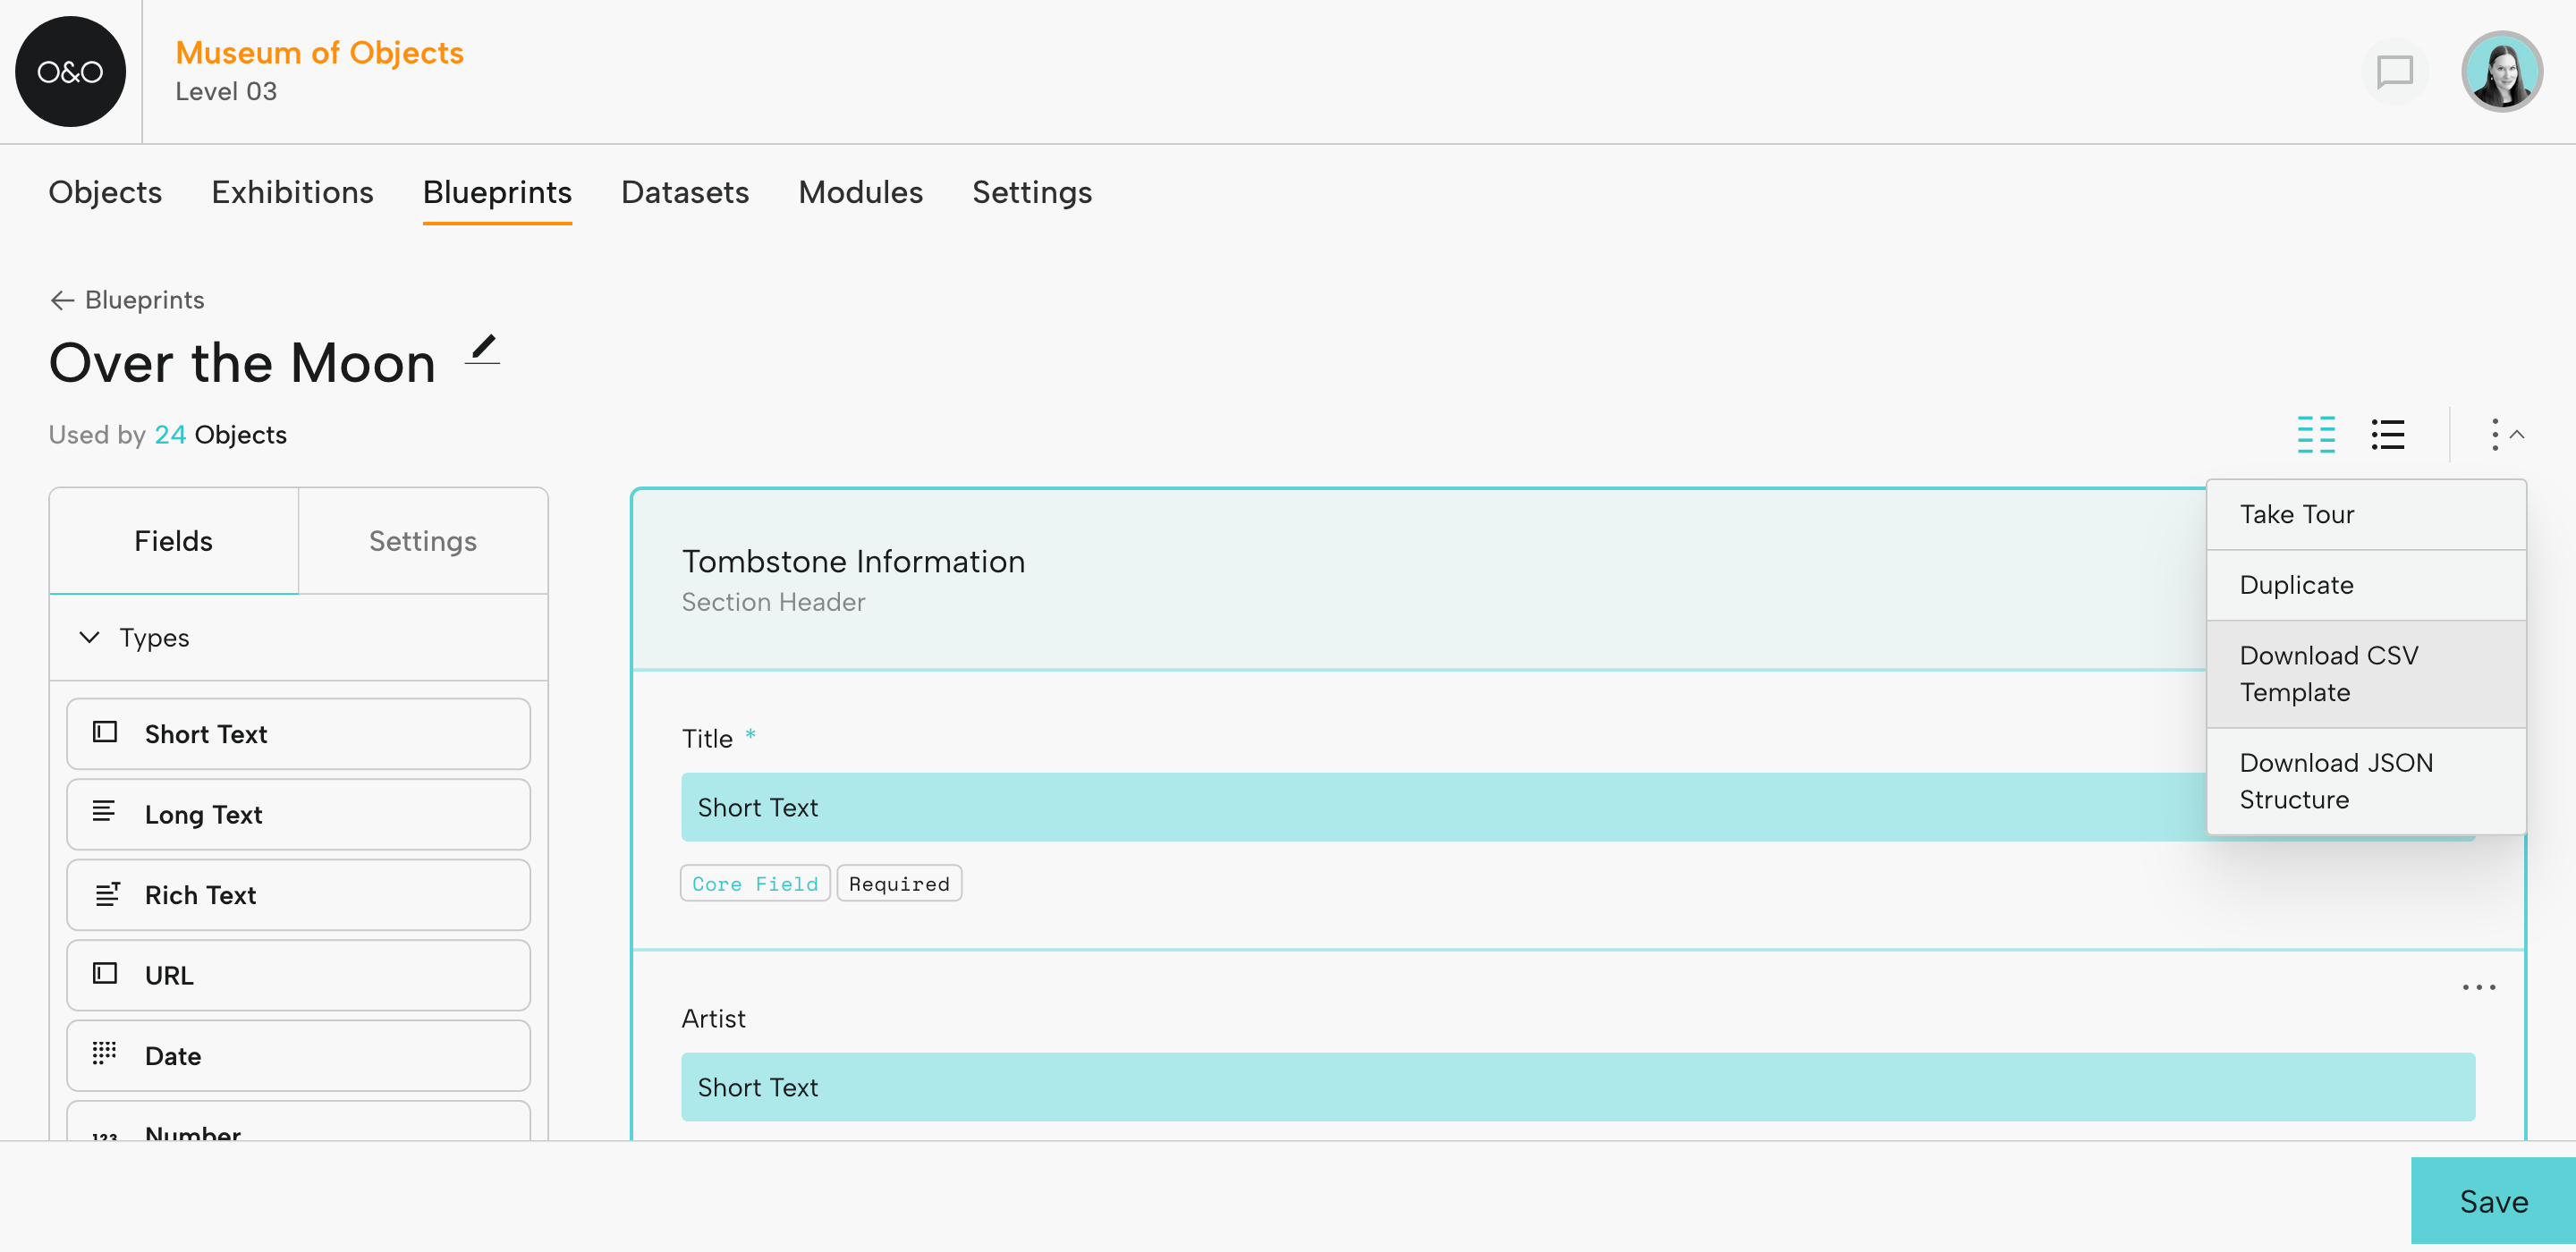
To add a group of objects via CSV:
- In your Exhibition Blueprint, using the menu at upper right, select Download CSV Template.
- The CSV template will include columns for the Blueprint, the Blueprint ID, and all Blueprint fields.
- Add data for your exhibition objects (each row must have Blueprint name and Blueprint ID).
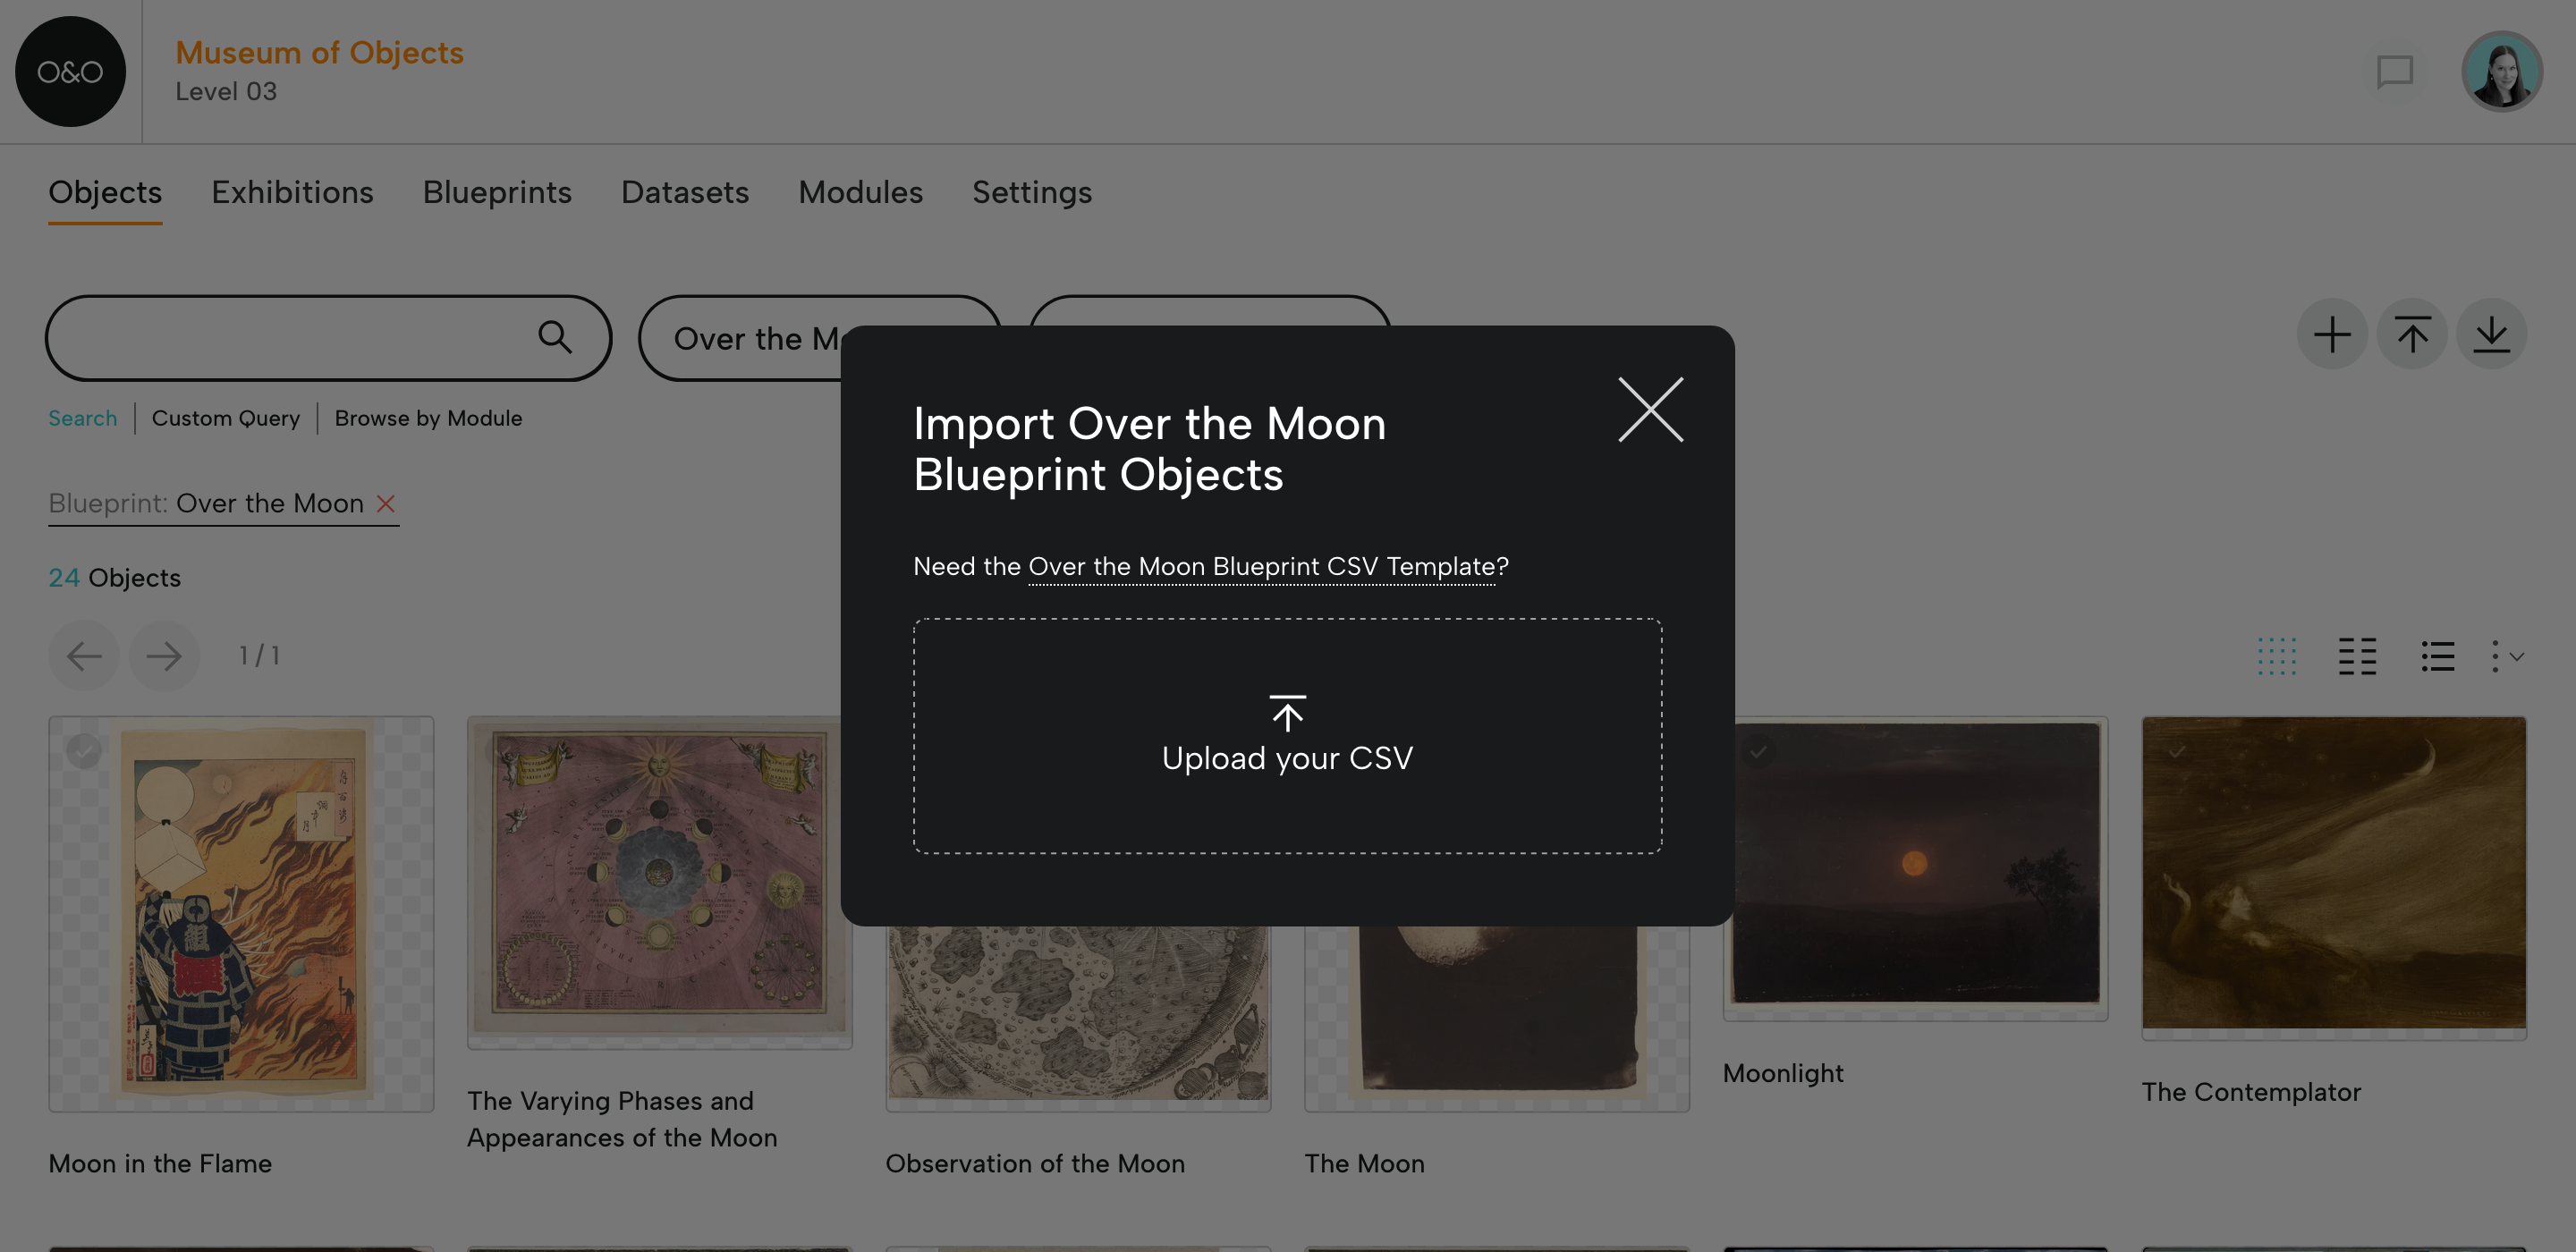
- Save as a CSV (UTF-8 format).
- Go to the Objects page (click Objects in the menu).
- Filter by your Exhibition Blueprint.
- At right, click on the upwards pointing arrow to upload your CSV.
For more on CSVs, see CSV Guidelines.
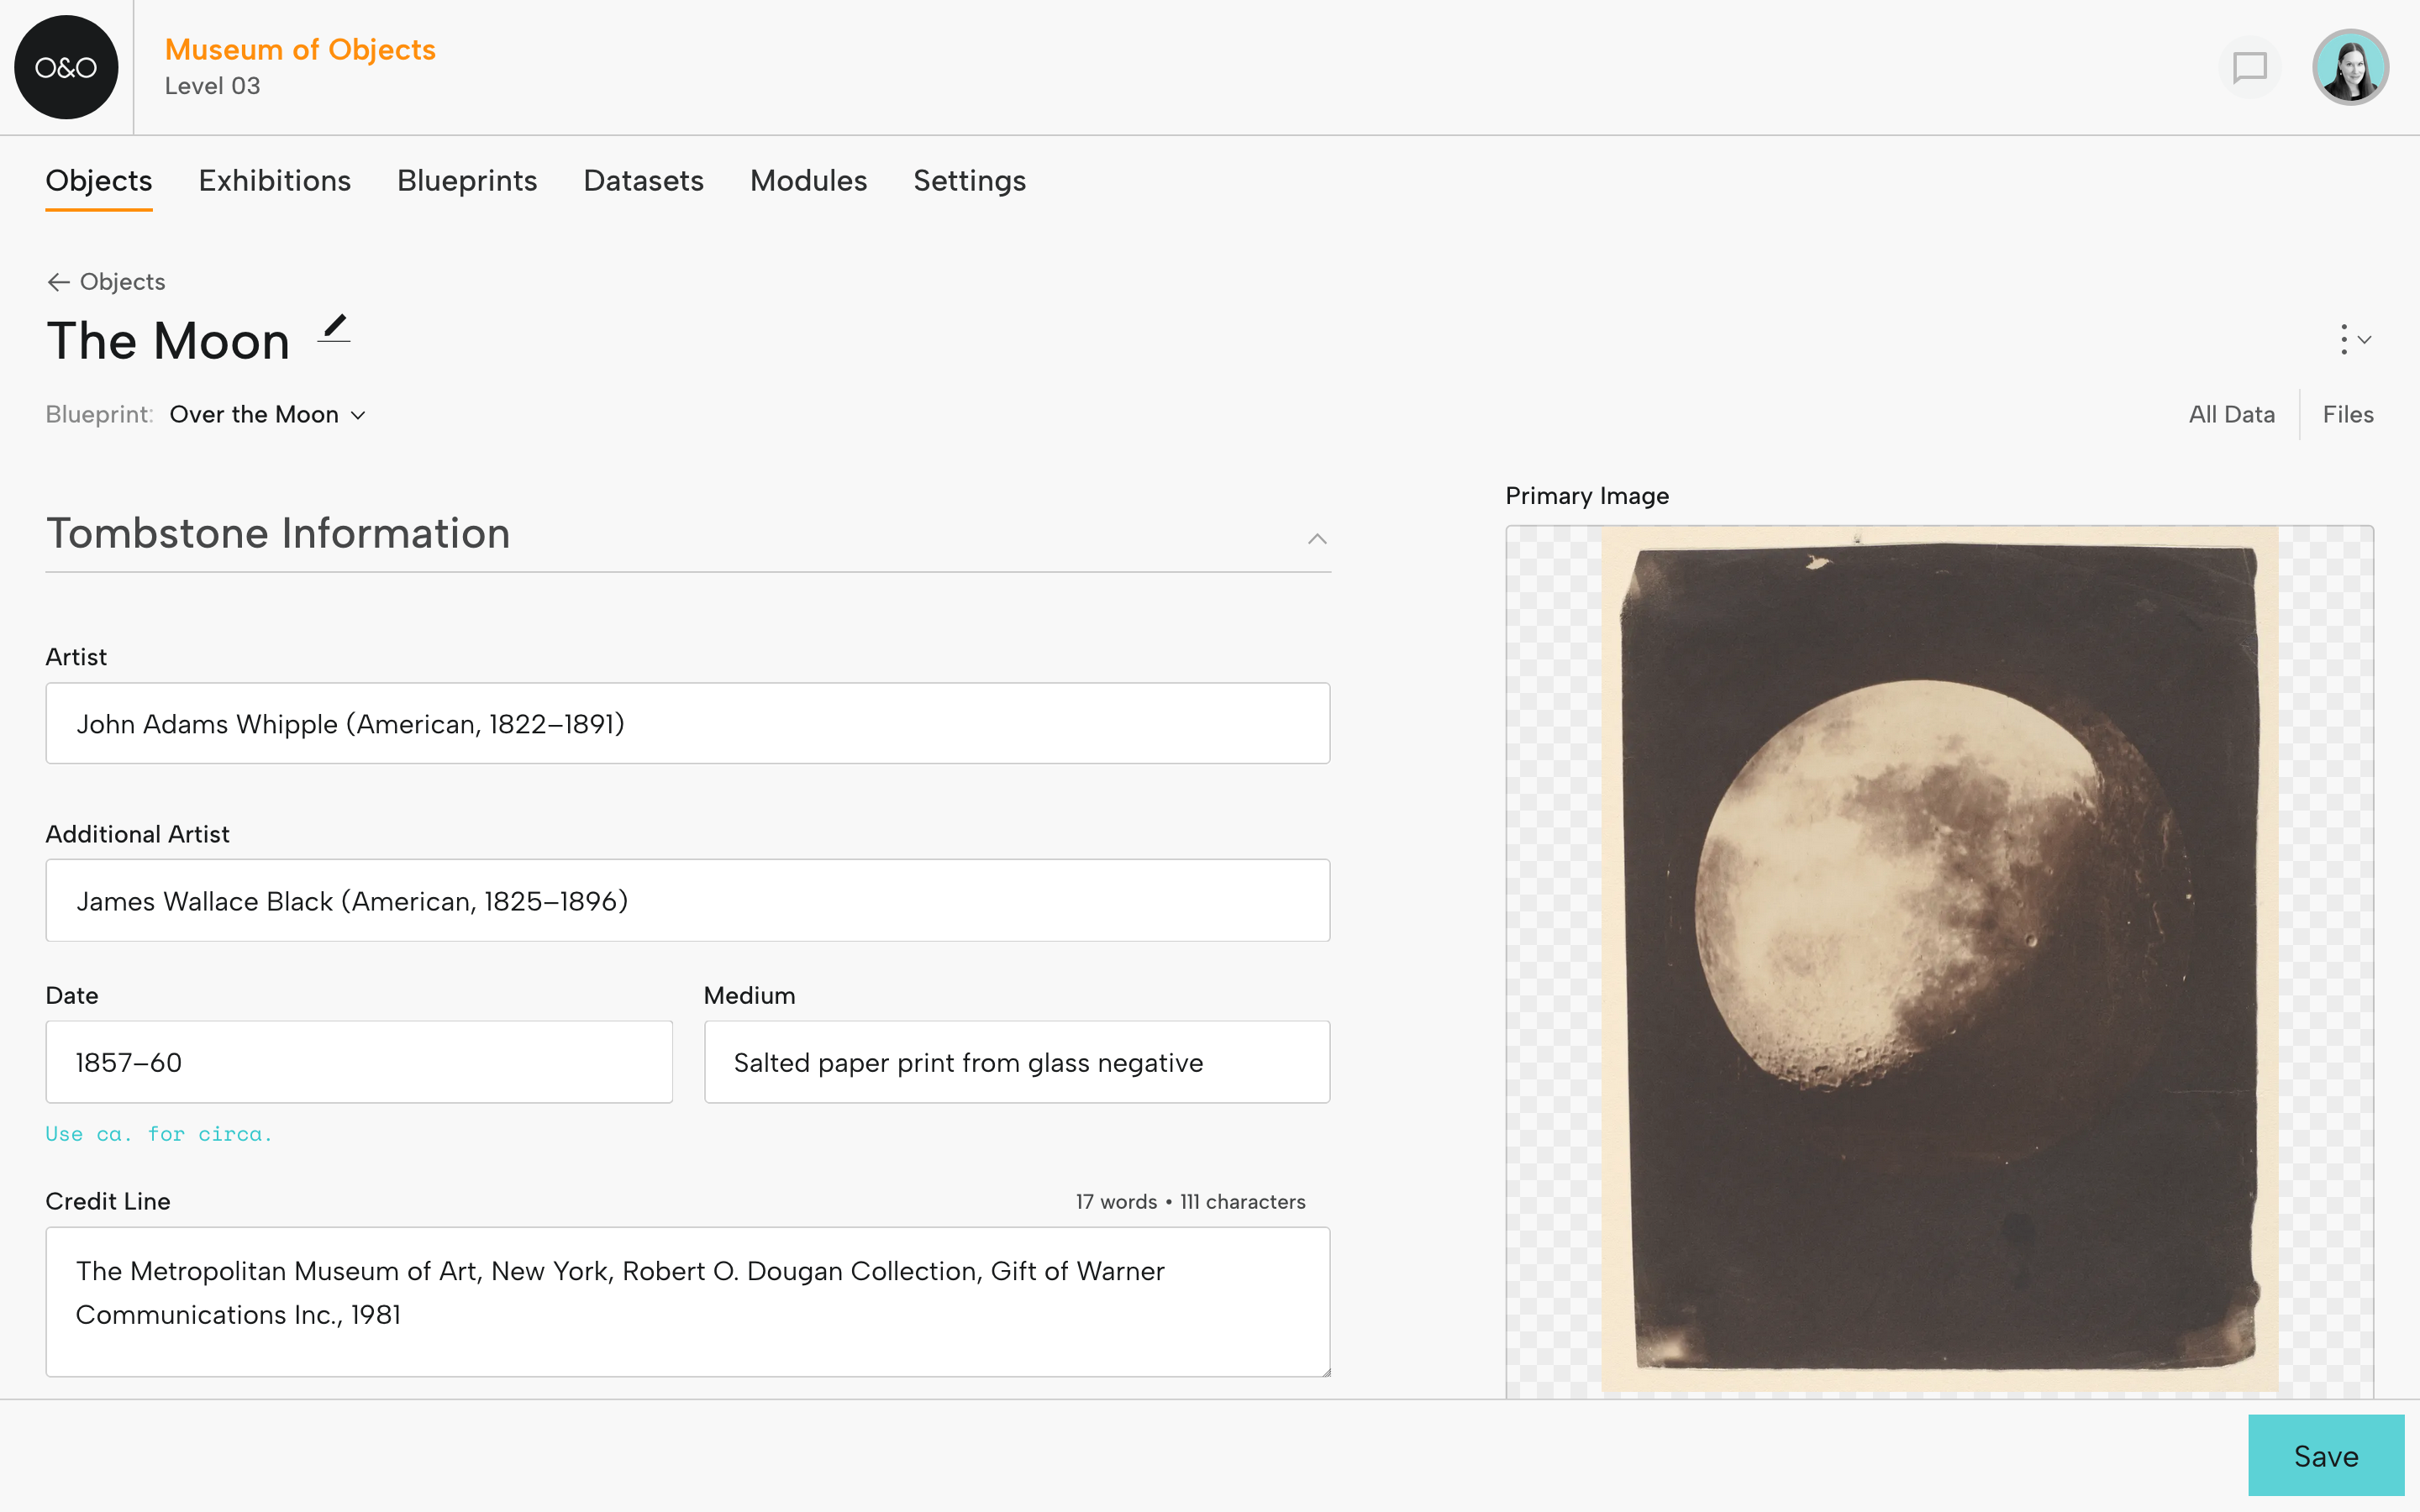
Add Object Data
For each object, select your Exhibition Blueprint to display the form fields for your exhibition. You can enter or update object information anytime. Remember to Save.
The information you enter in these fields will be available for selection when you create the digital exhibition (unless a field has been designated as Internal in your Blueprint, in which case, you'll see a padlock on the field).
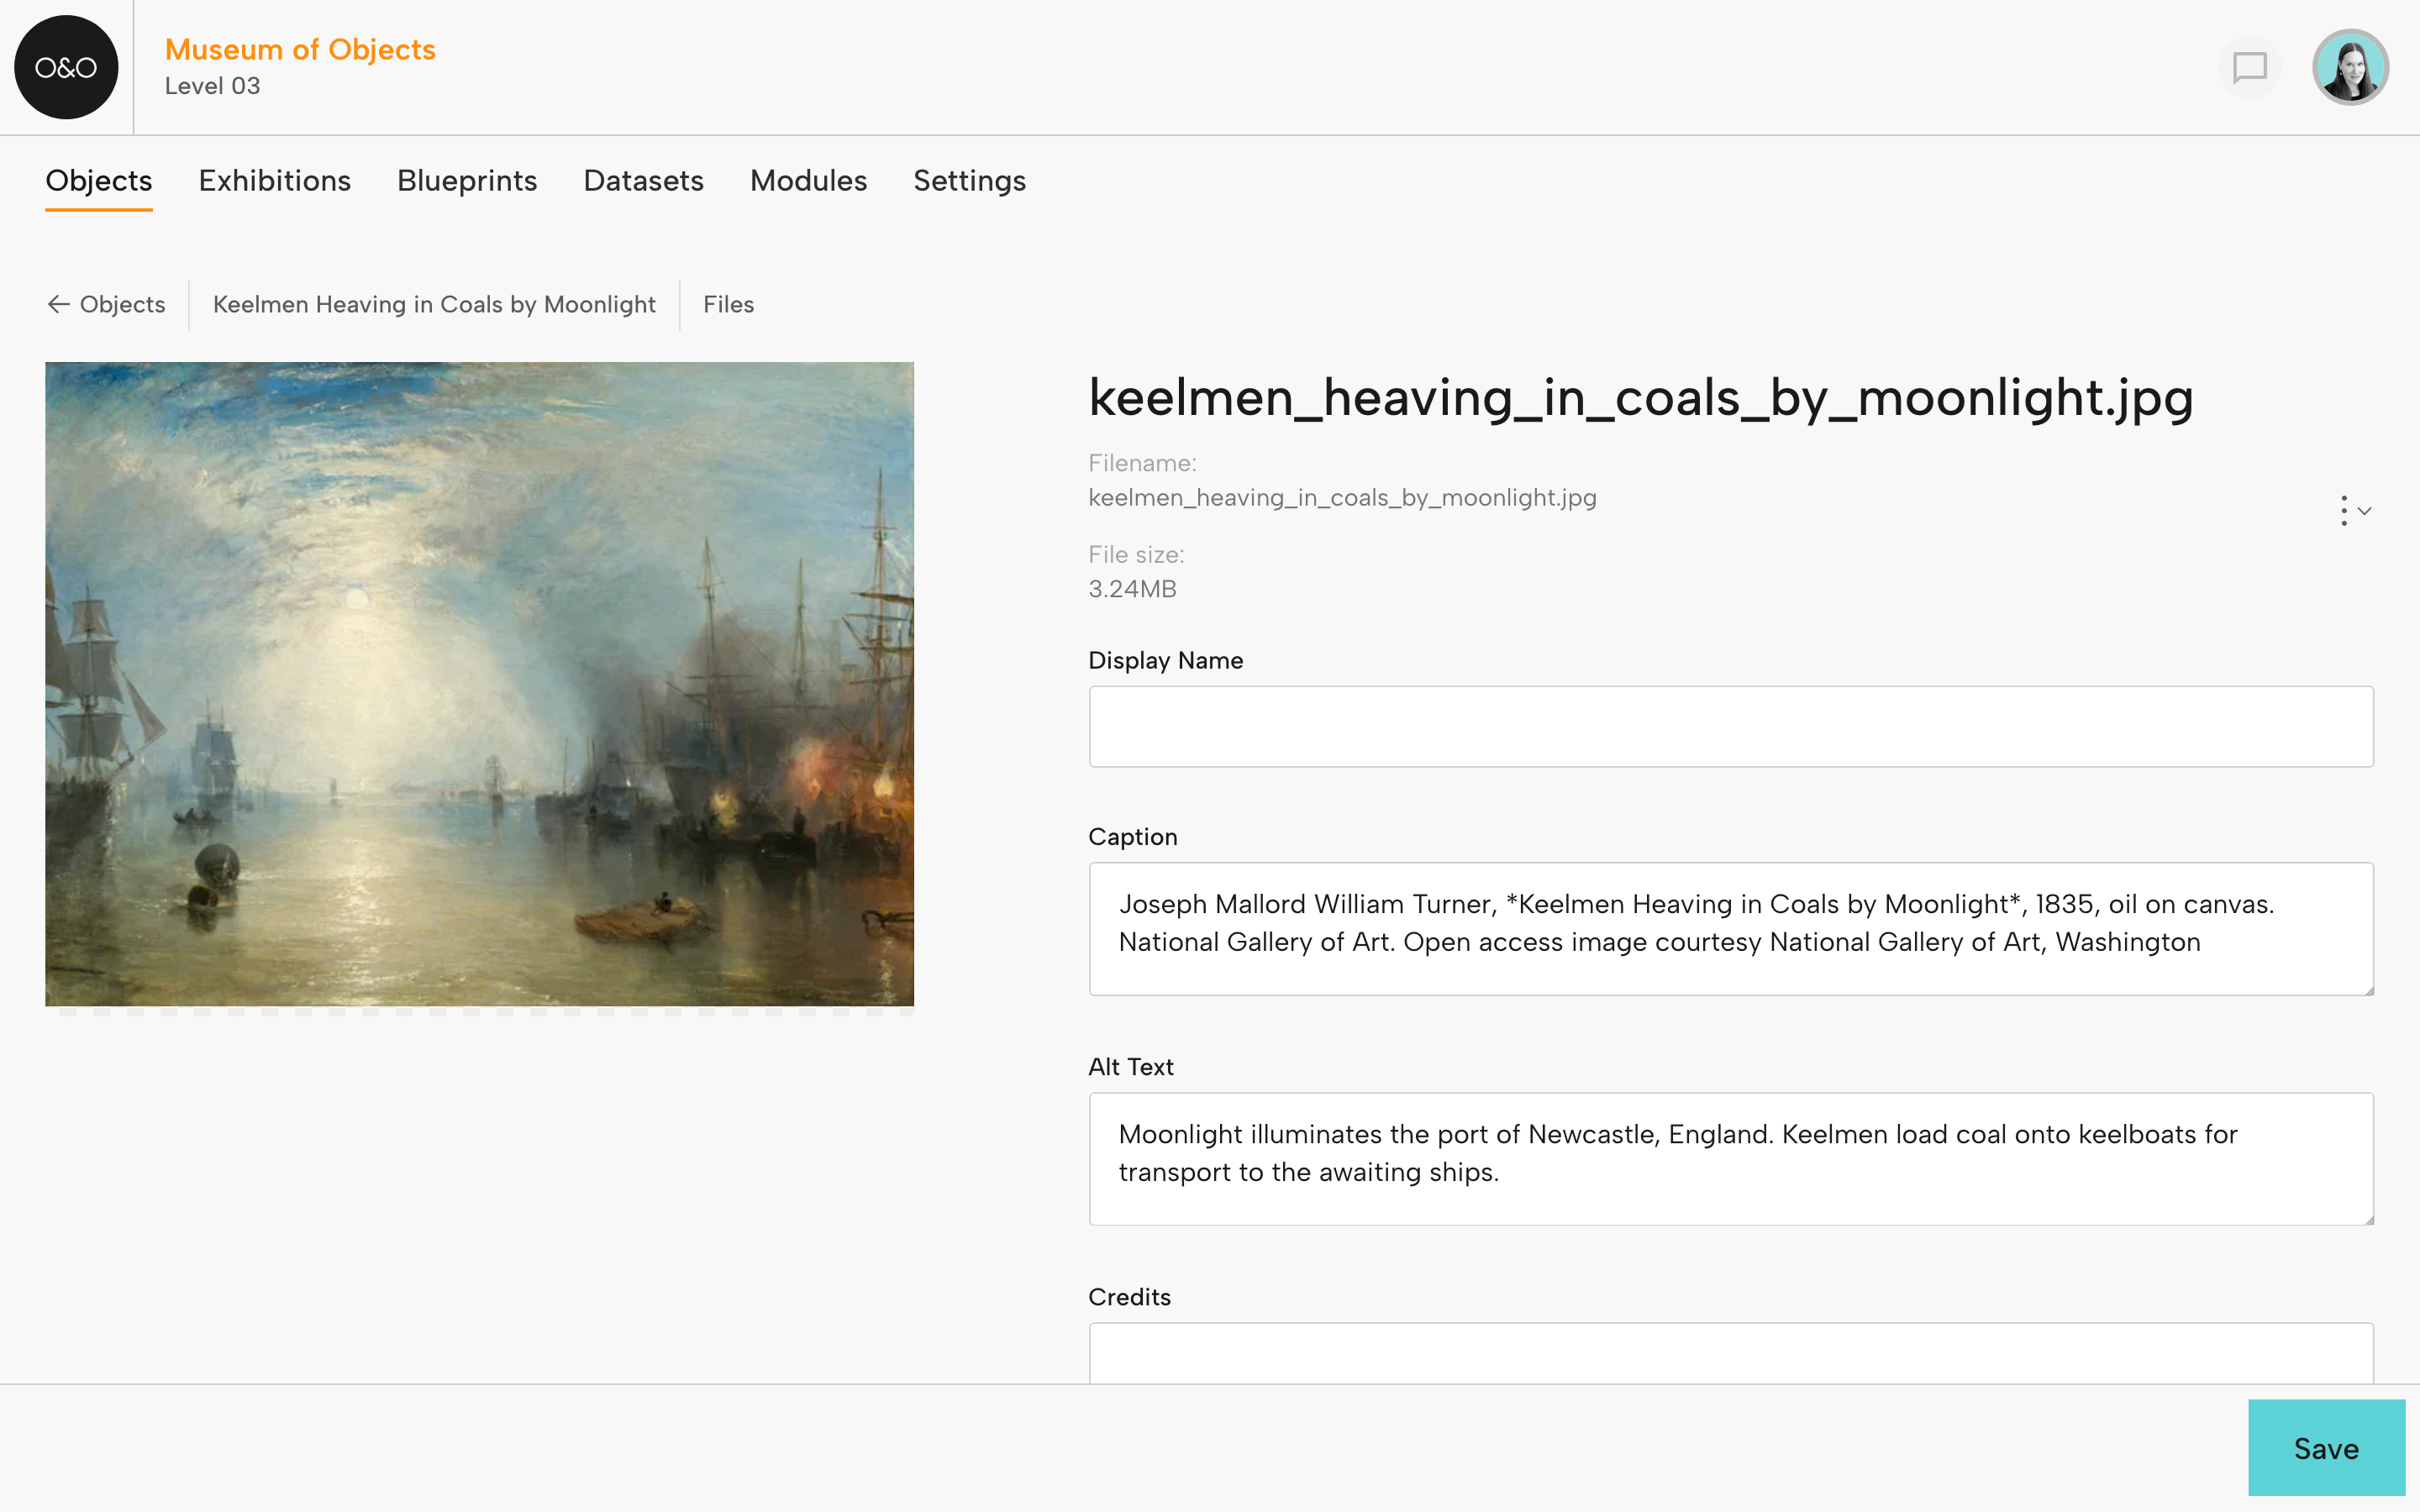
Add Files
For each object, add image, audio, video, and other files.
For each file, you can add caption, alt text, and rights information. Captions and alt text will be available in the digital exhibition.
Notice we've added asterisks around the title Keelmen Heaving in Coals by Moonlight. This Markdown formatting will italicize the title when it's displayed in an exhibition.
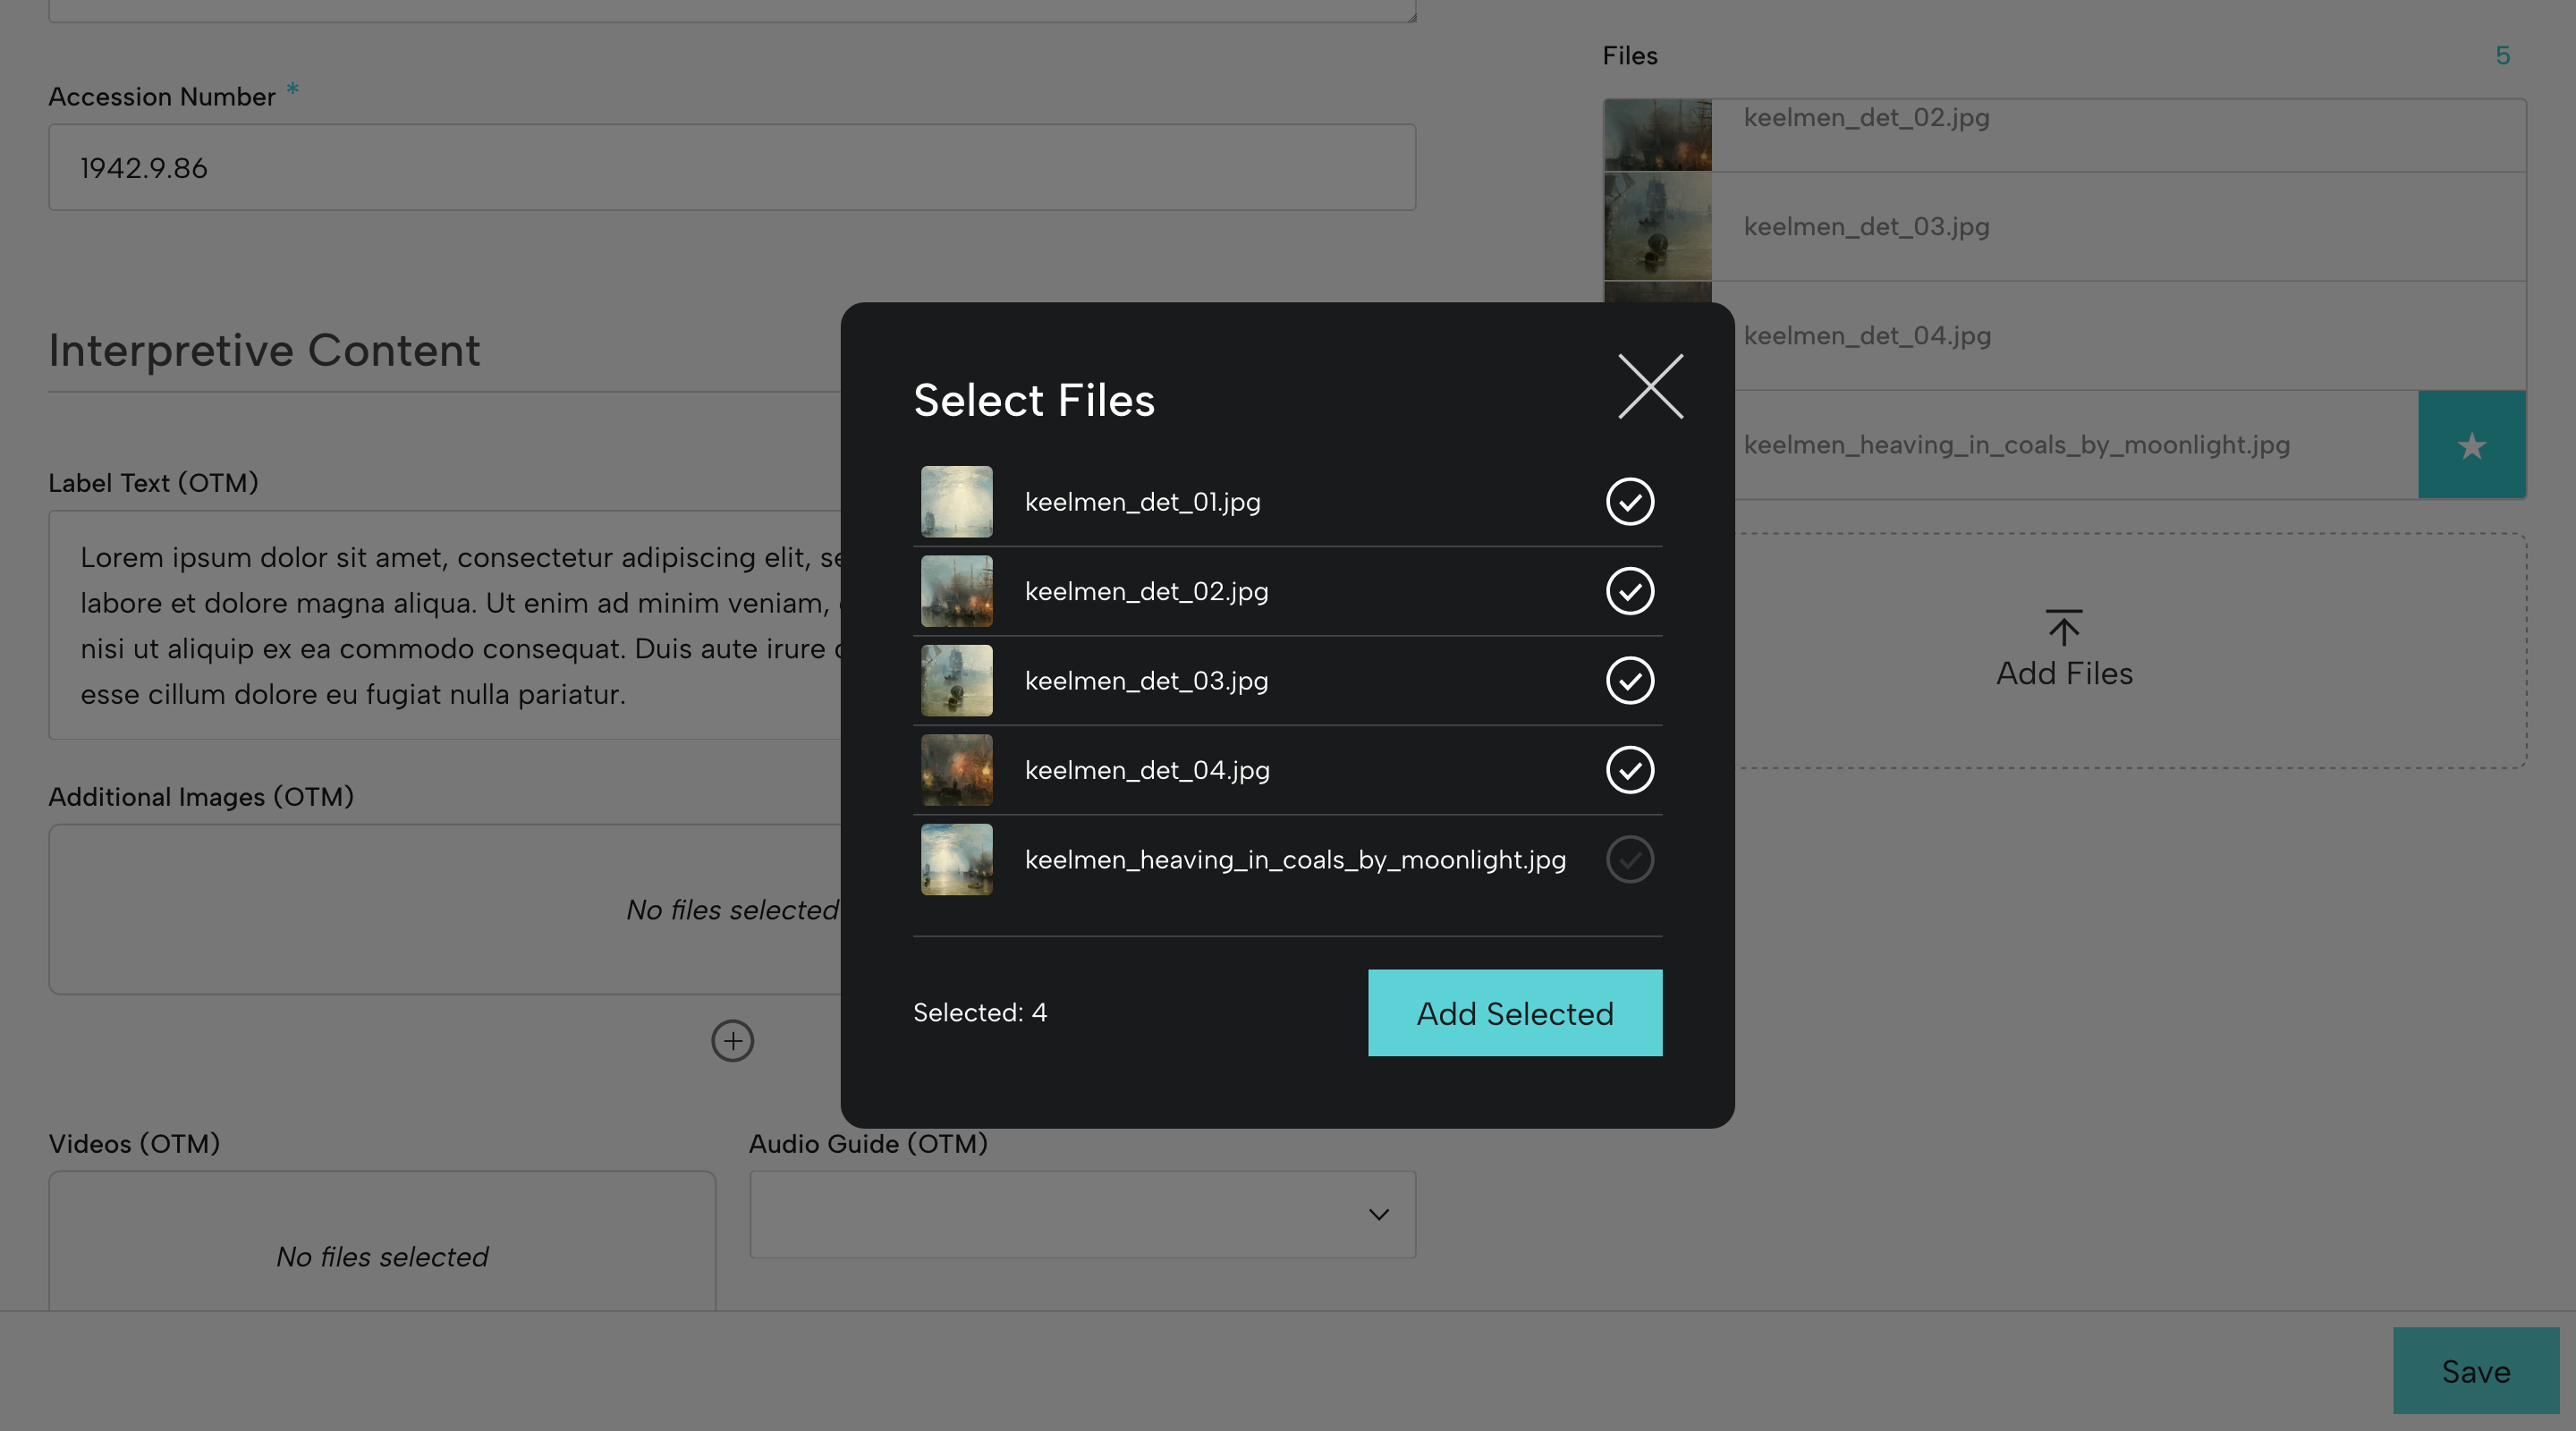
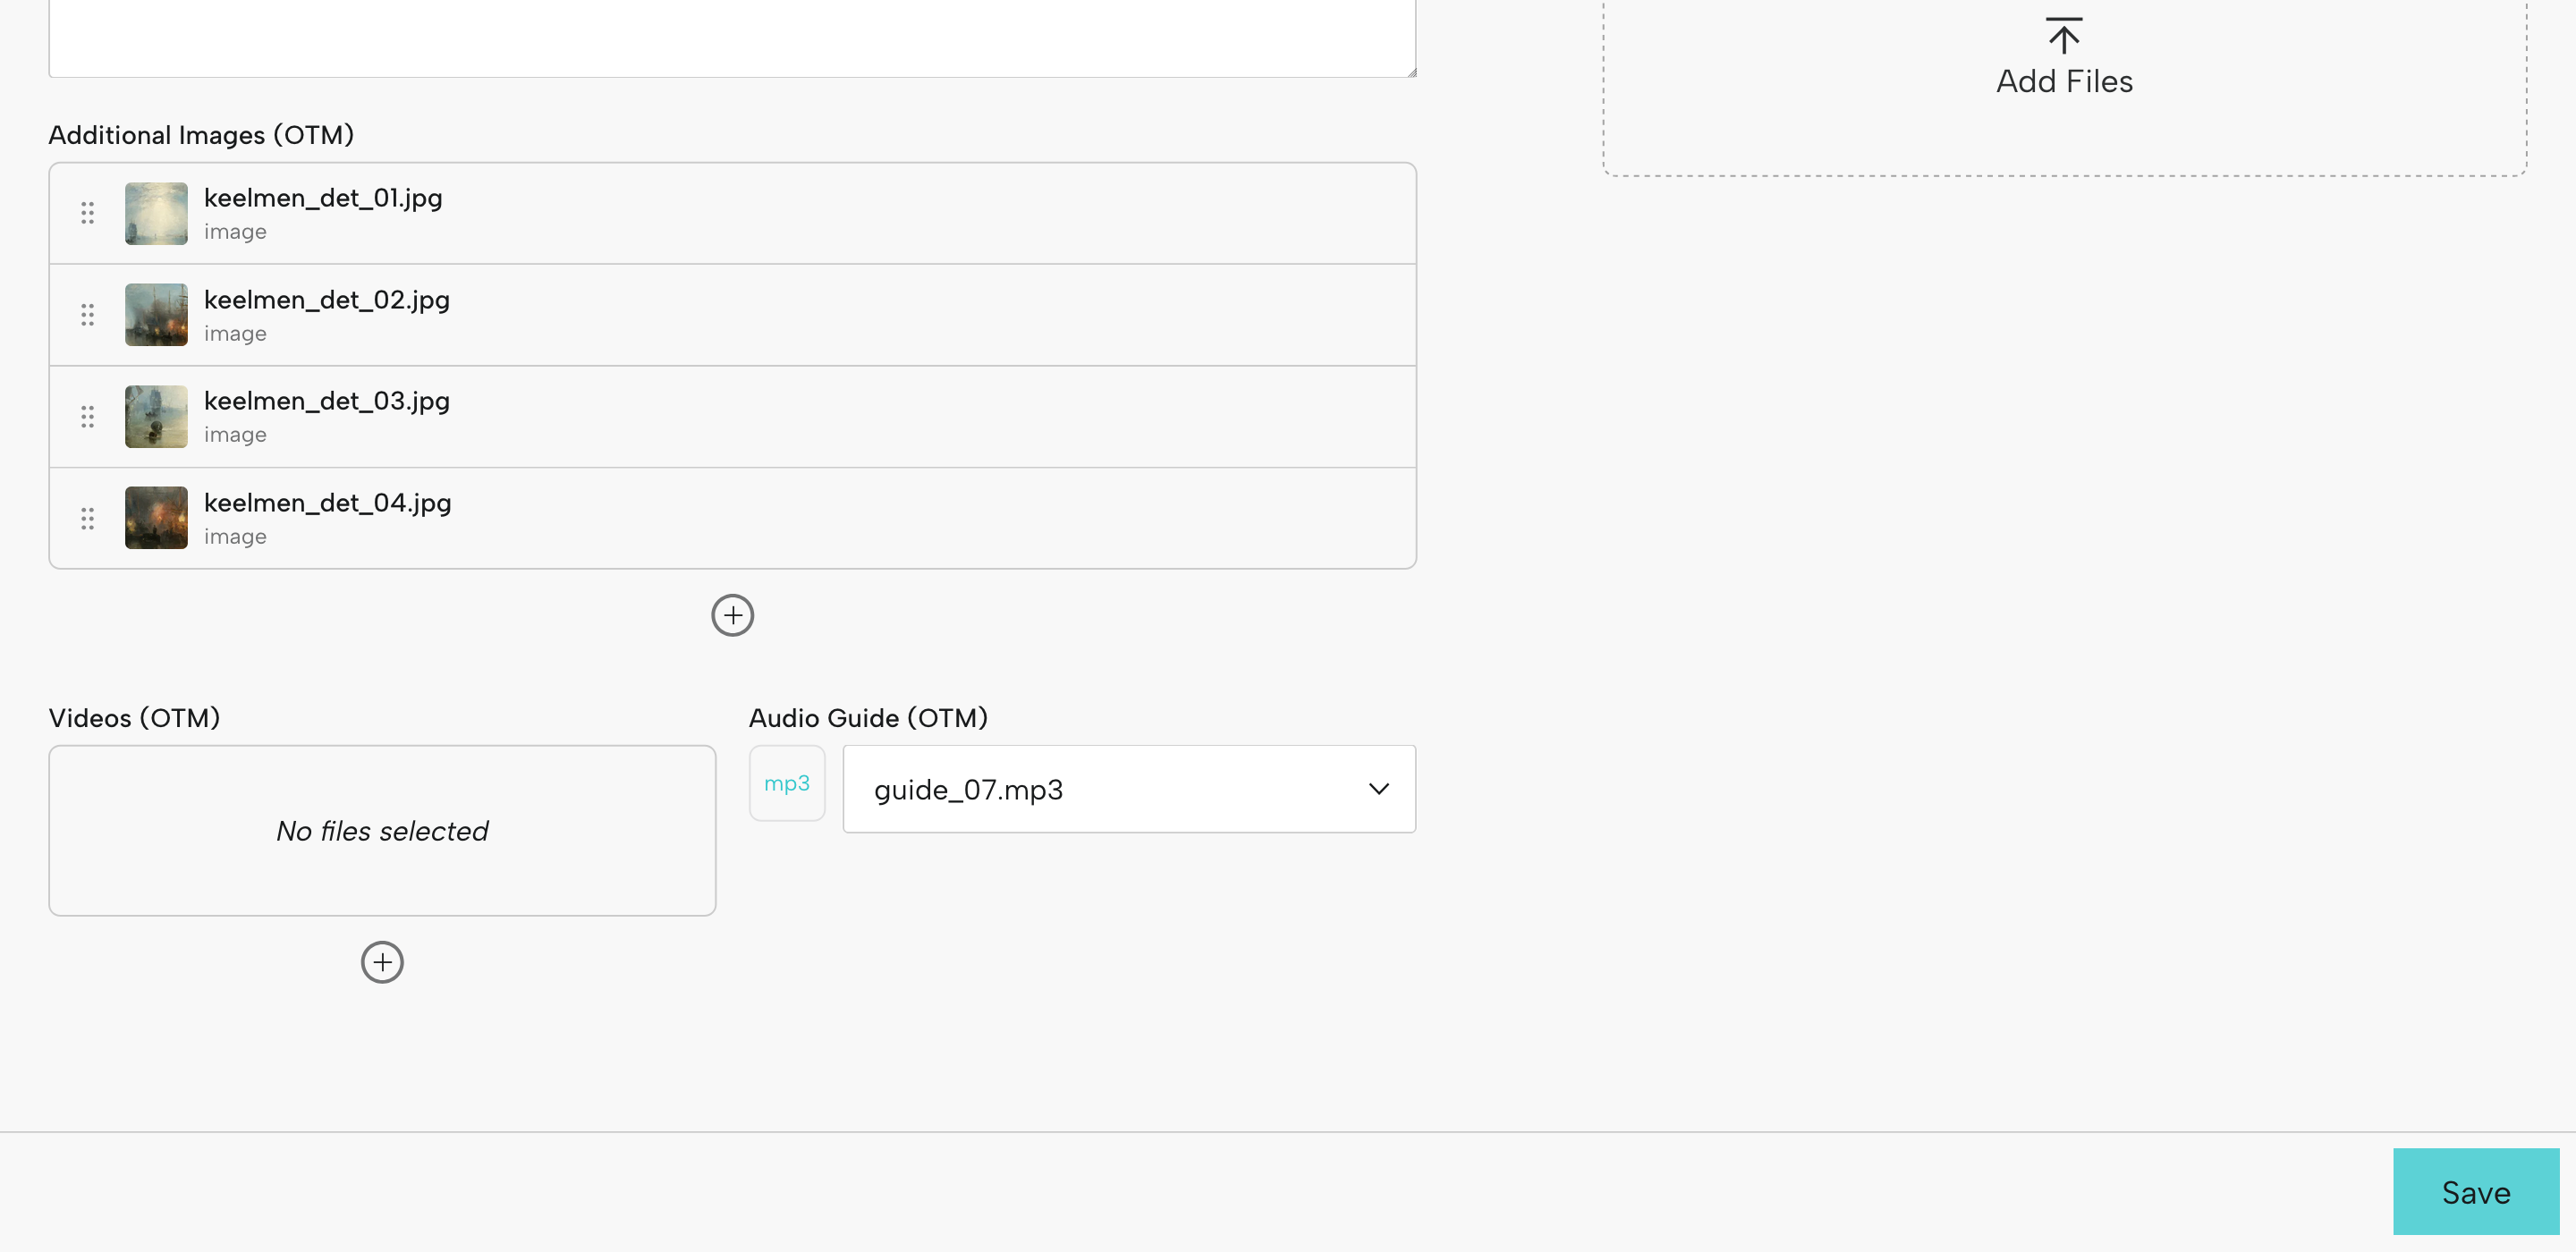
Select Exhibition-Specific Media Files
If you added fields for selecting additional files (in addition to the Primary Image), choose exhibition-related files for your objects. In this example, we're selecting 4 additional images for the Additional Images (OTM) field.
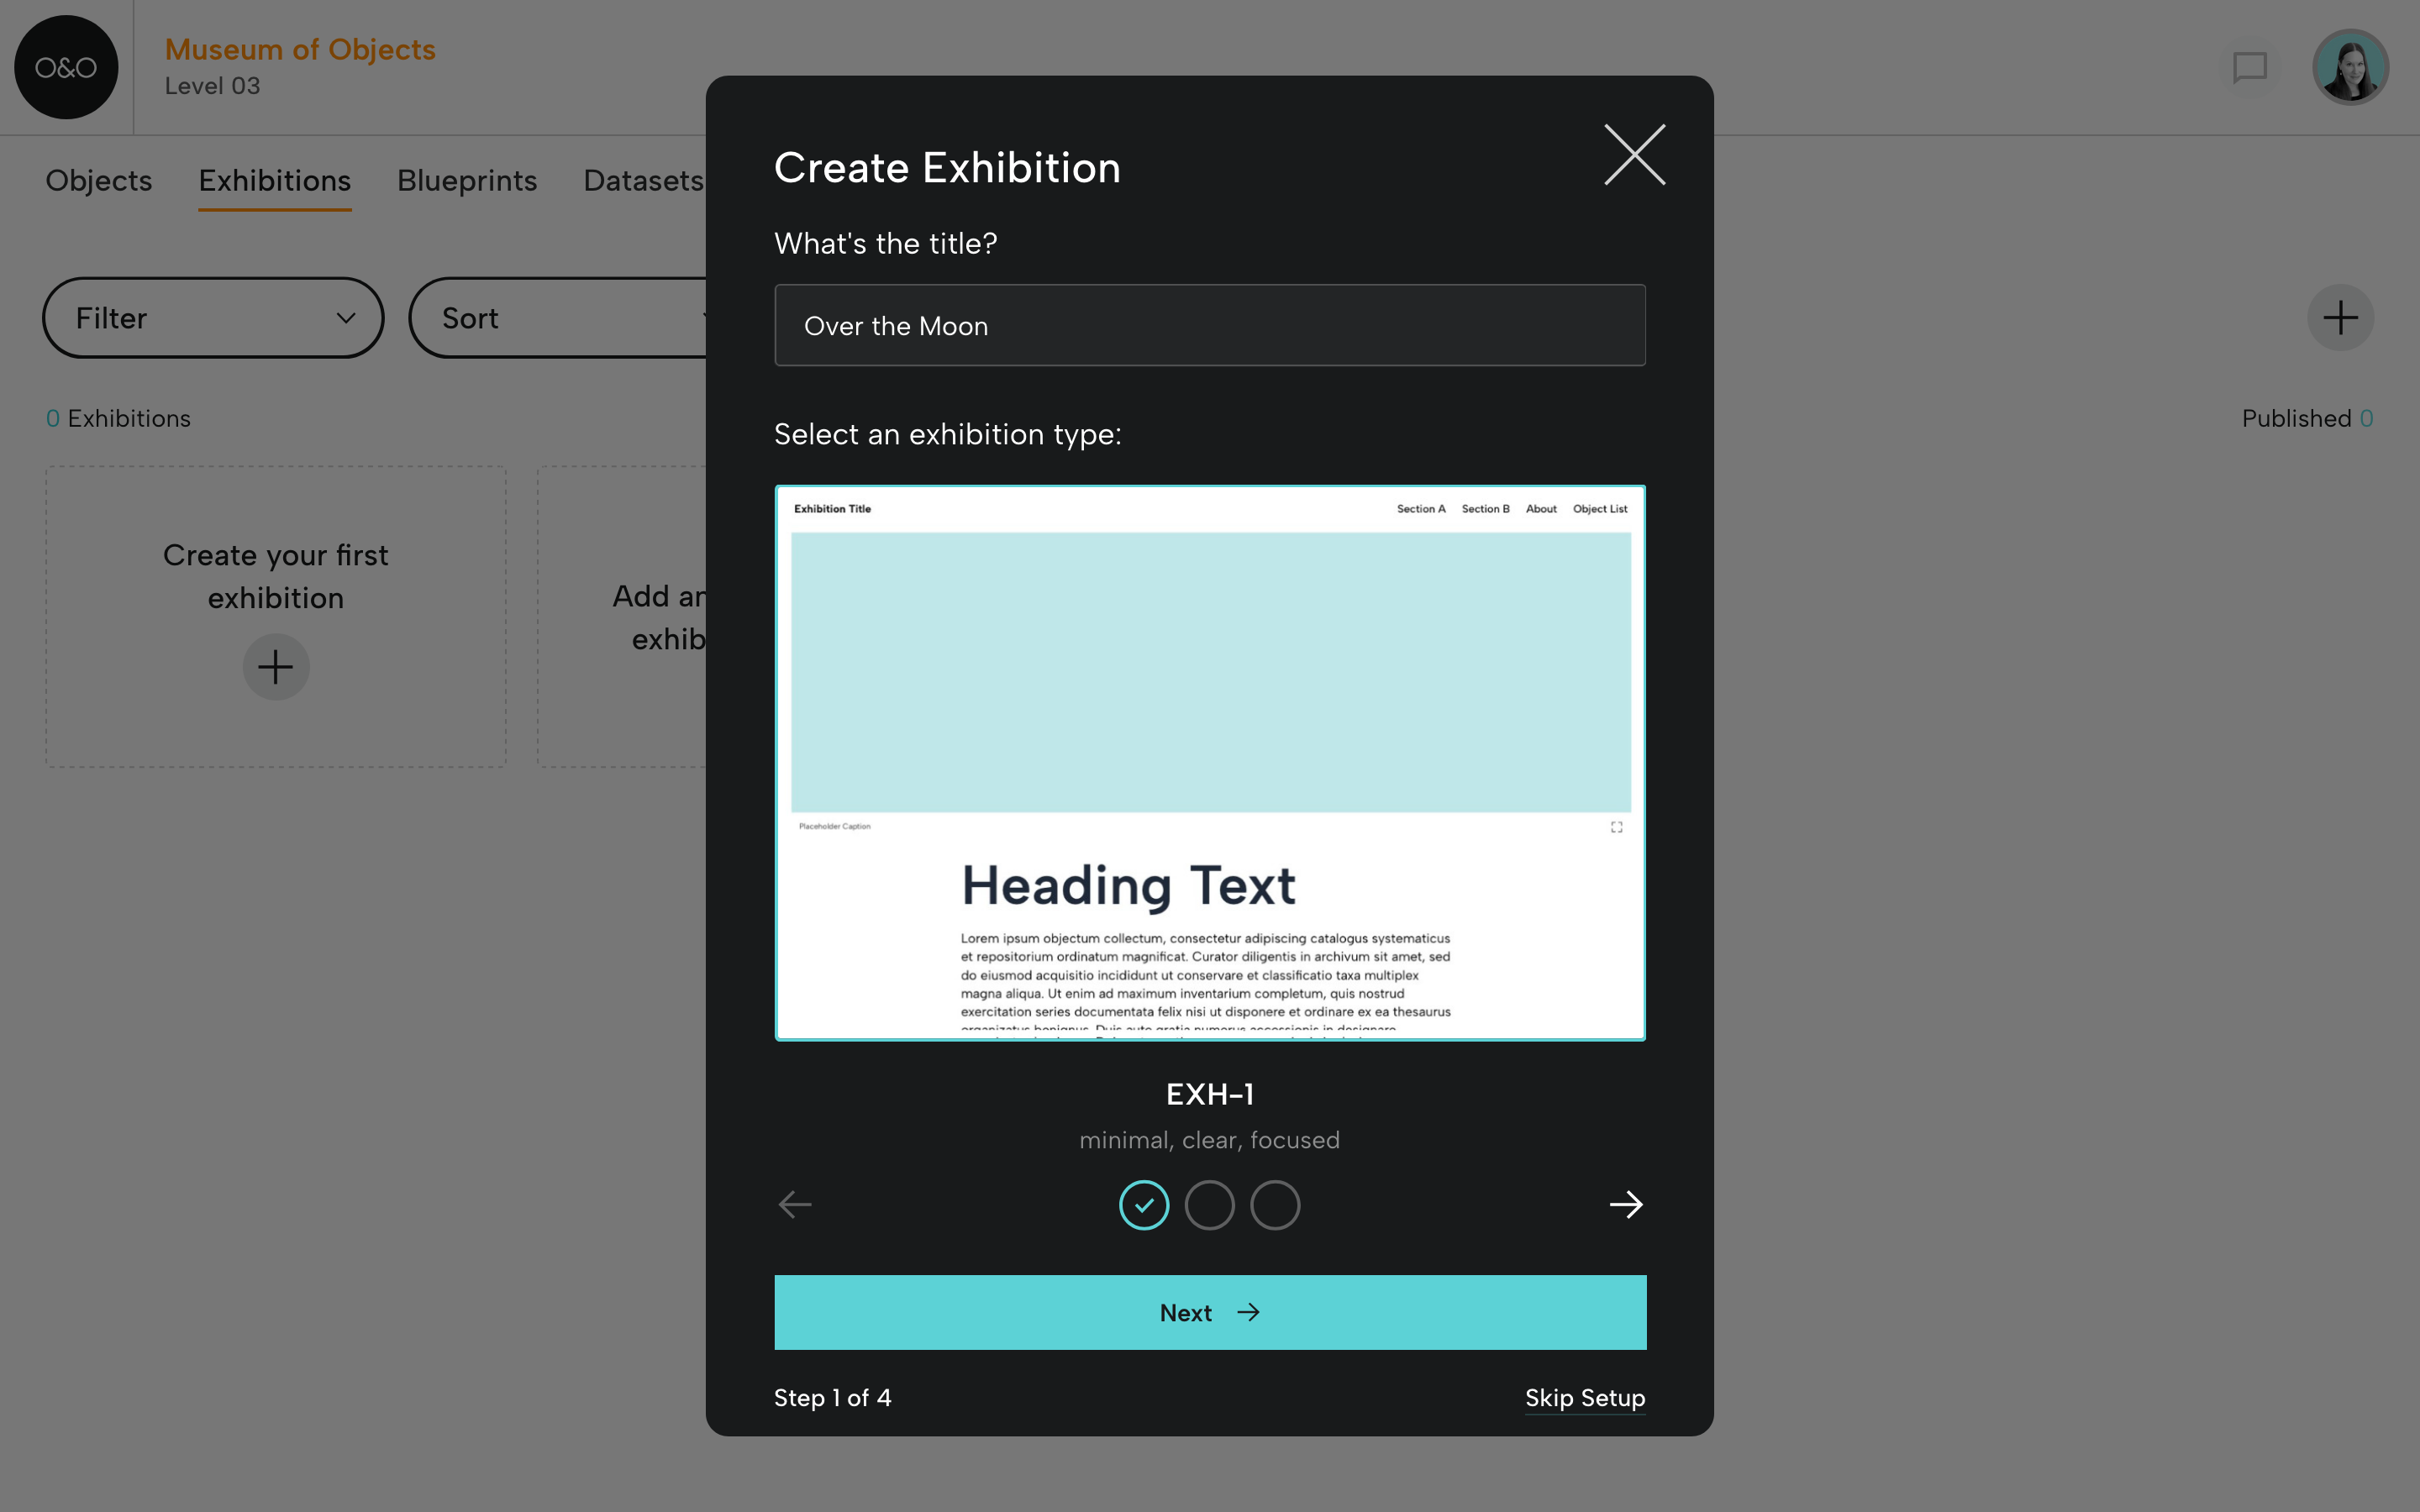
Step 3: Create A New Exhibition
Go to Exhibitions in the menu, then click the + icon at upper right. Follow the steps to set up your new exhibition.
This process will help you get started. The selections you provide here can be updated later.
Step 1 of 4: Add your title and select an exhibition type. More types coming soon!
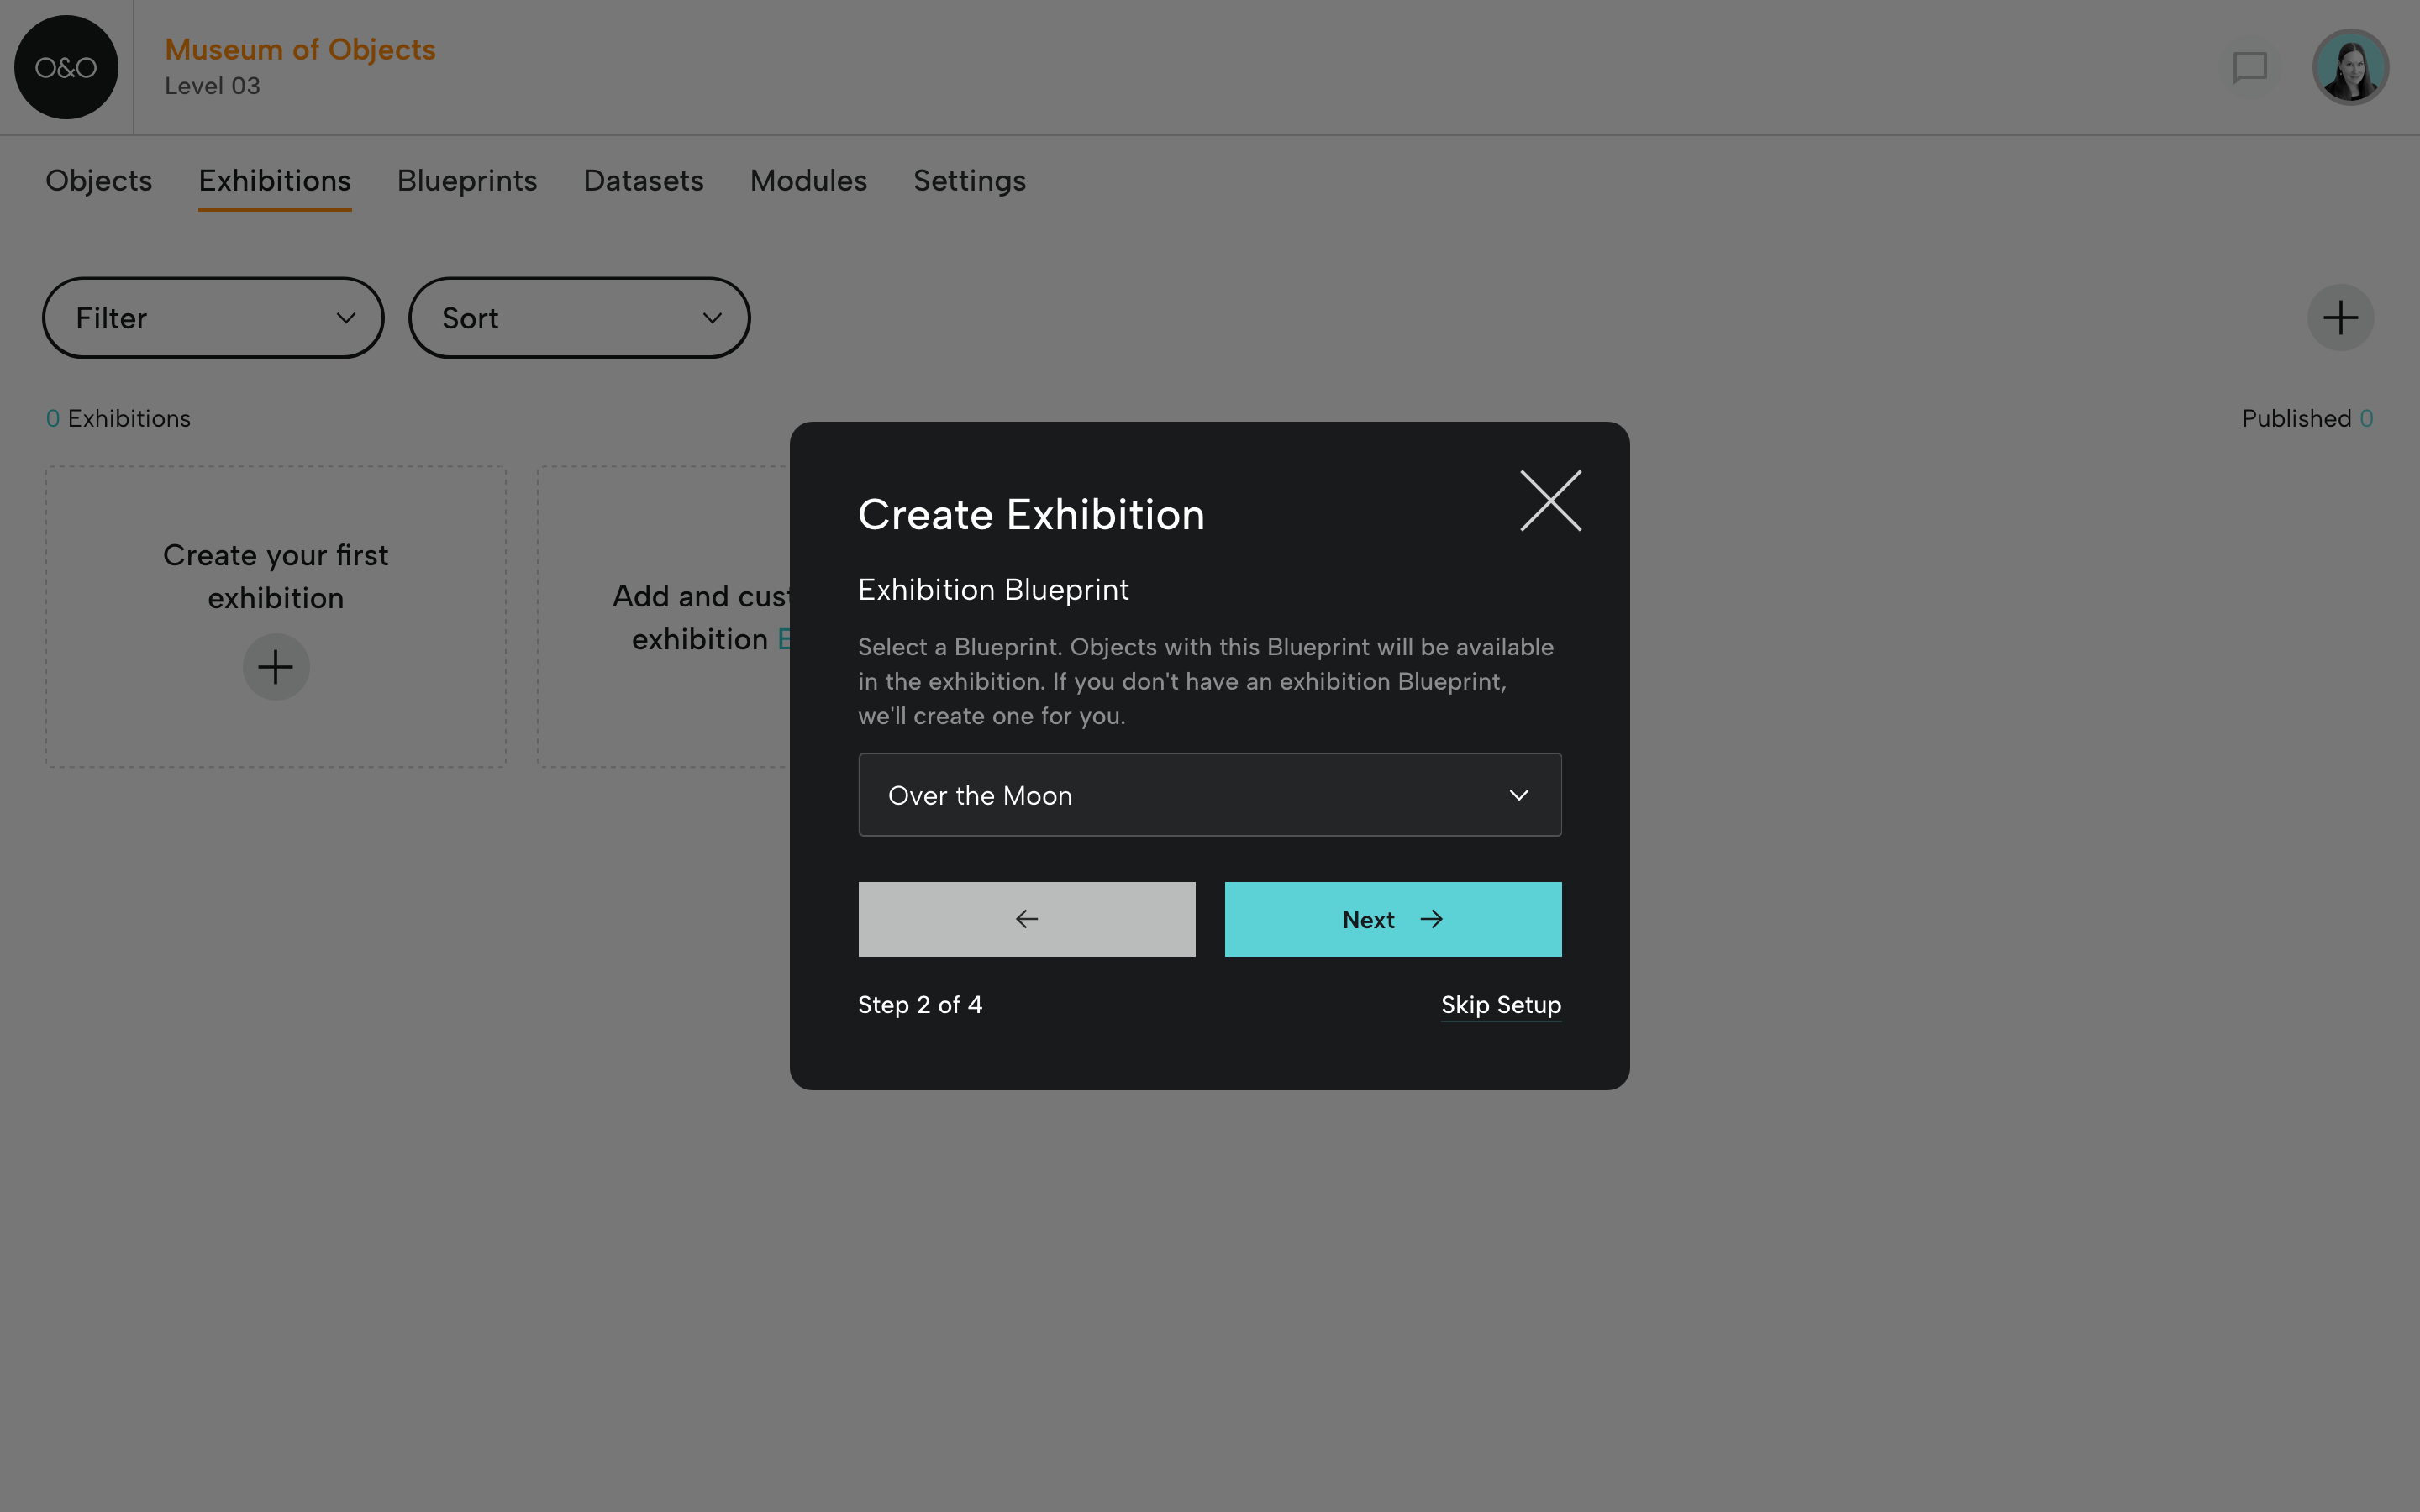
Step 2 of 4: Select your Exhibition Blueprint.
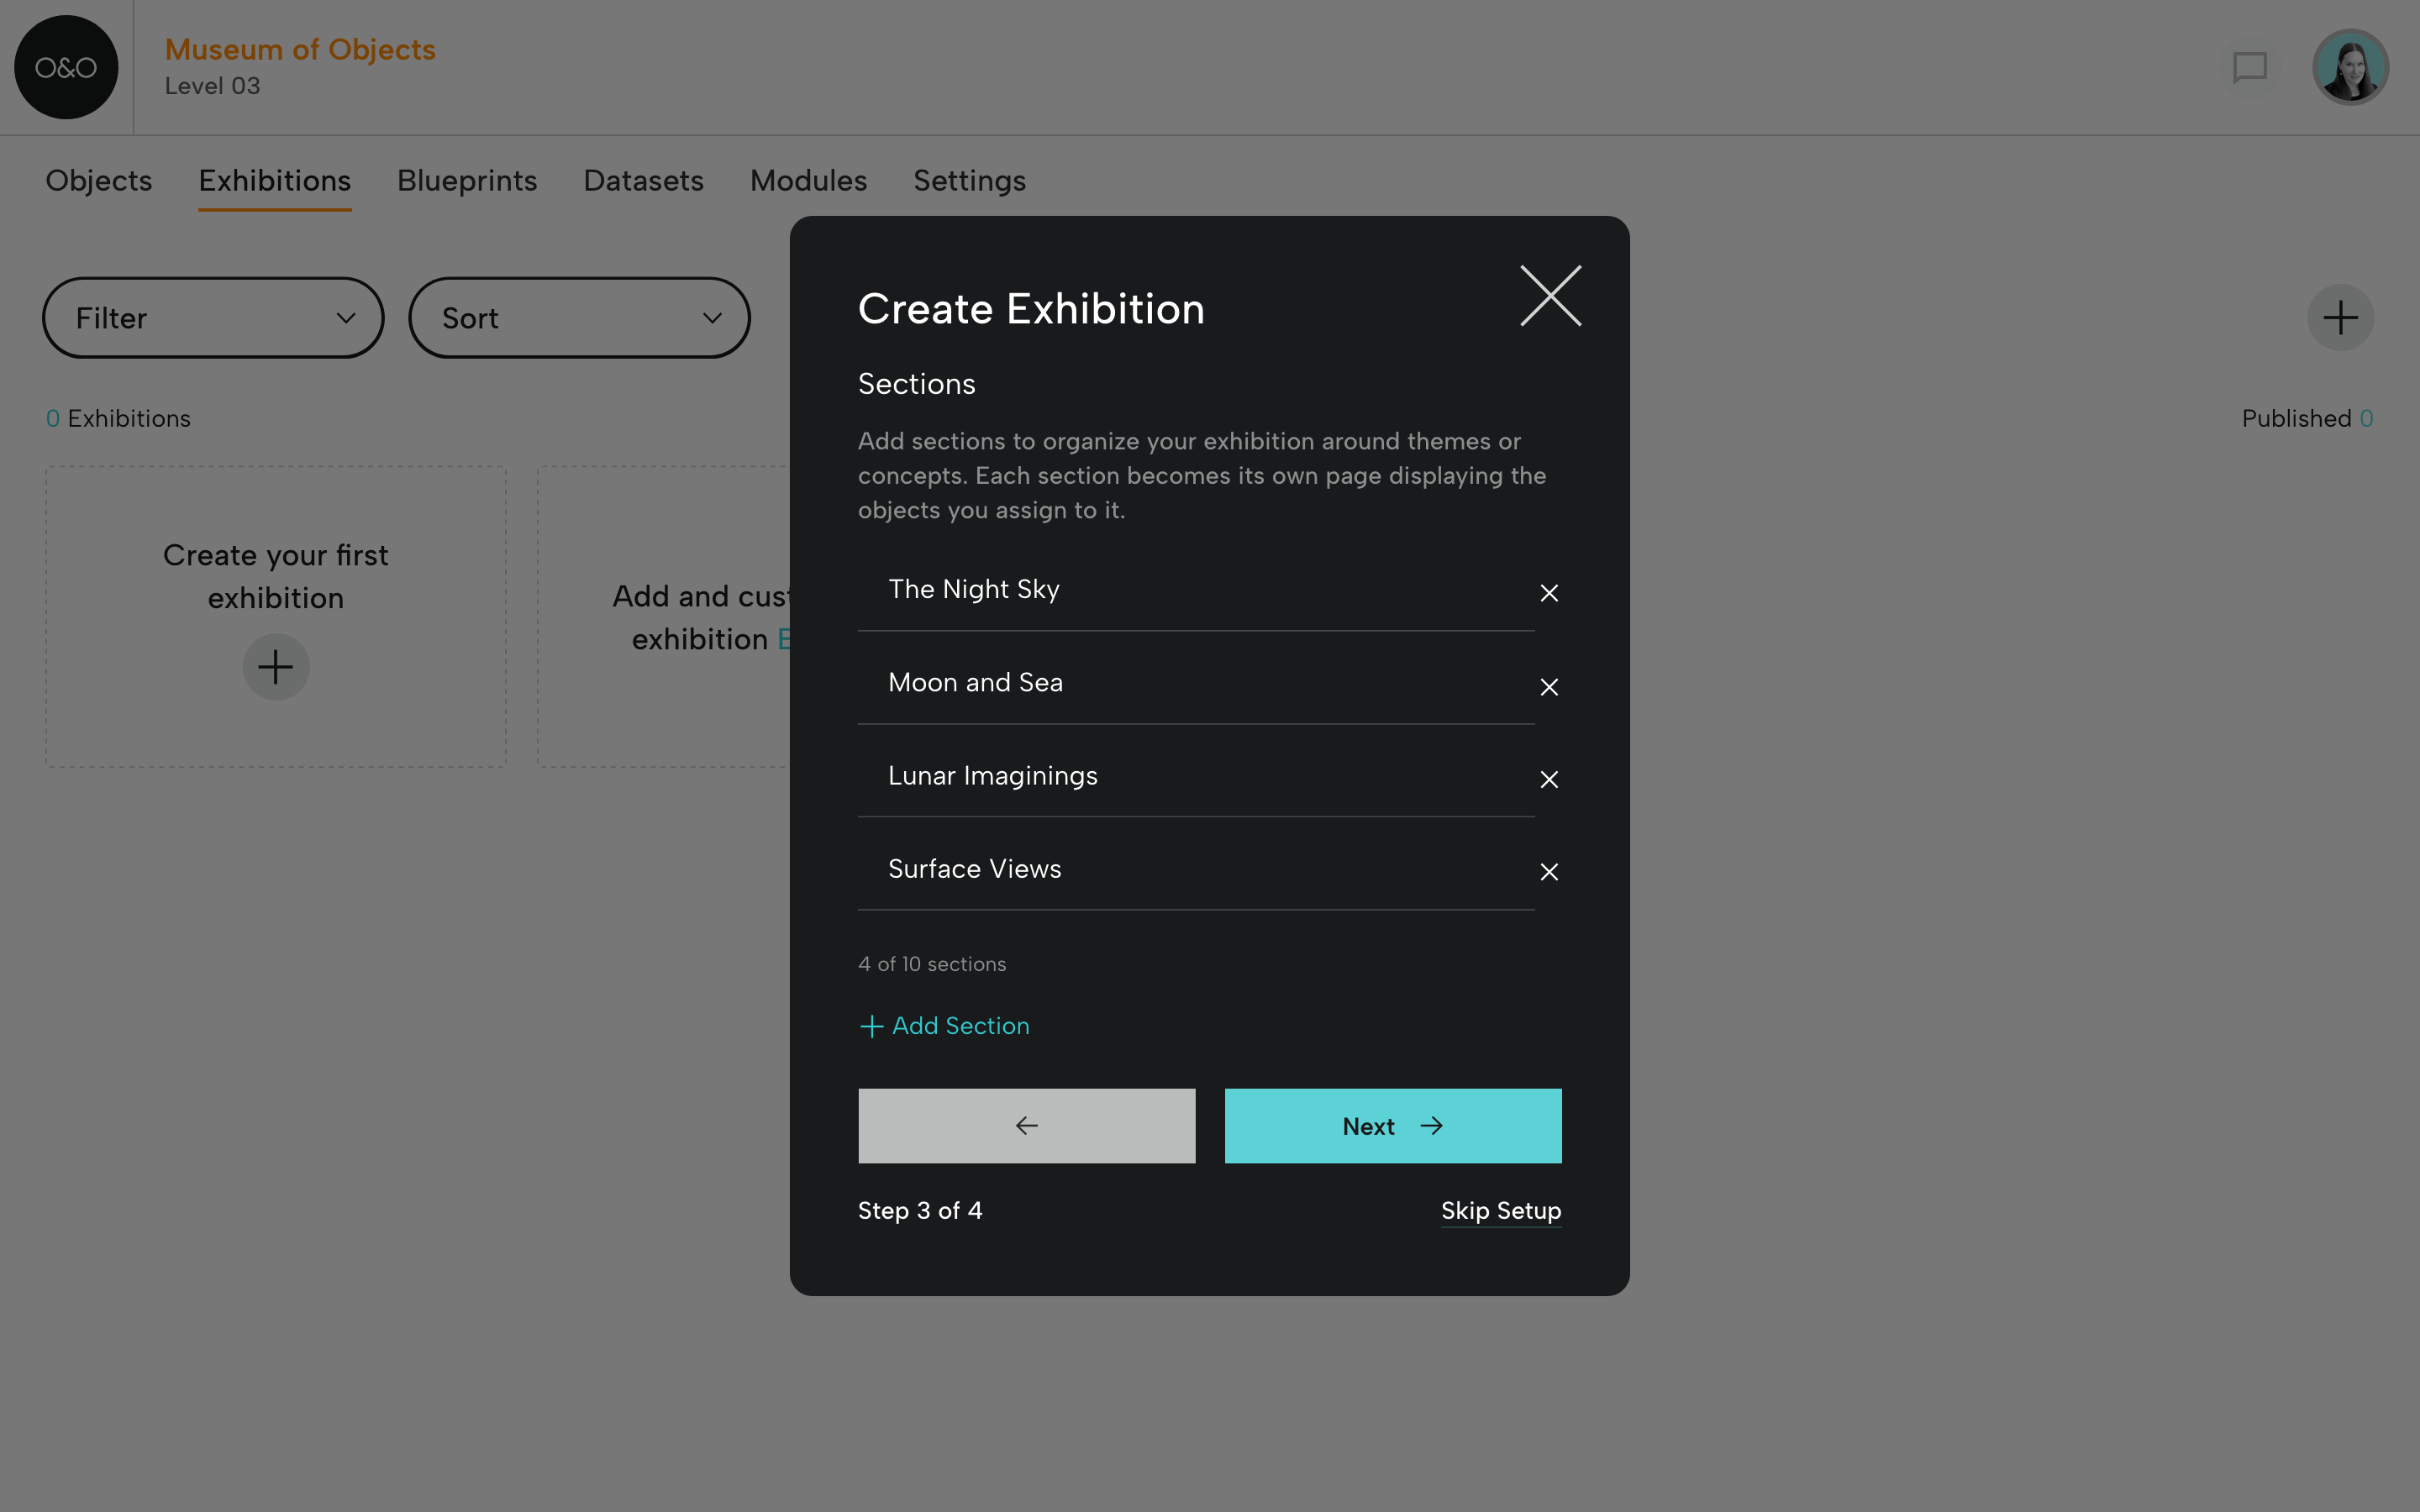
Step 3 of 4: Add exhibition sections (if you have them).
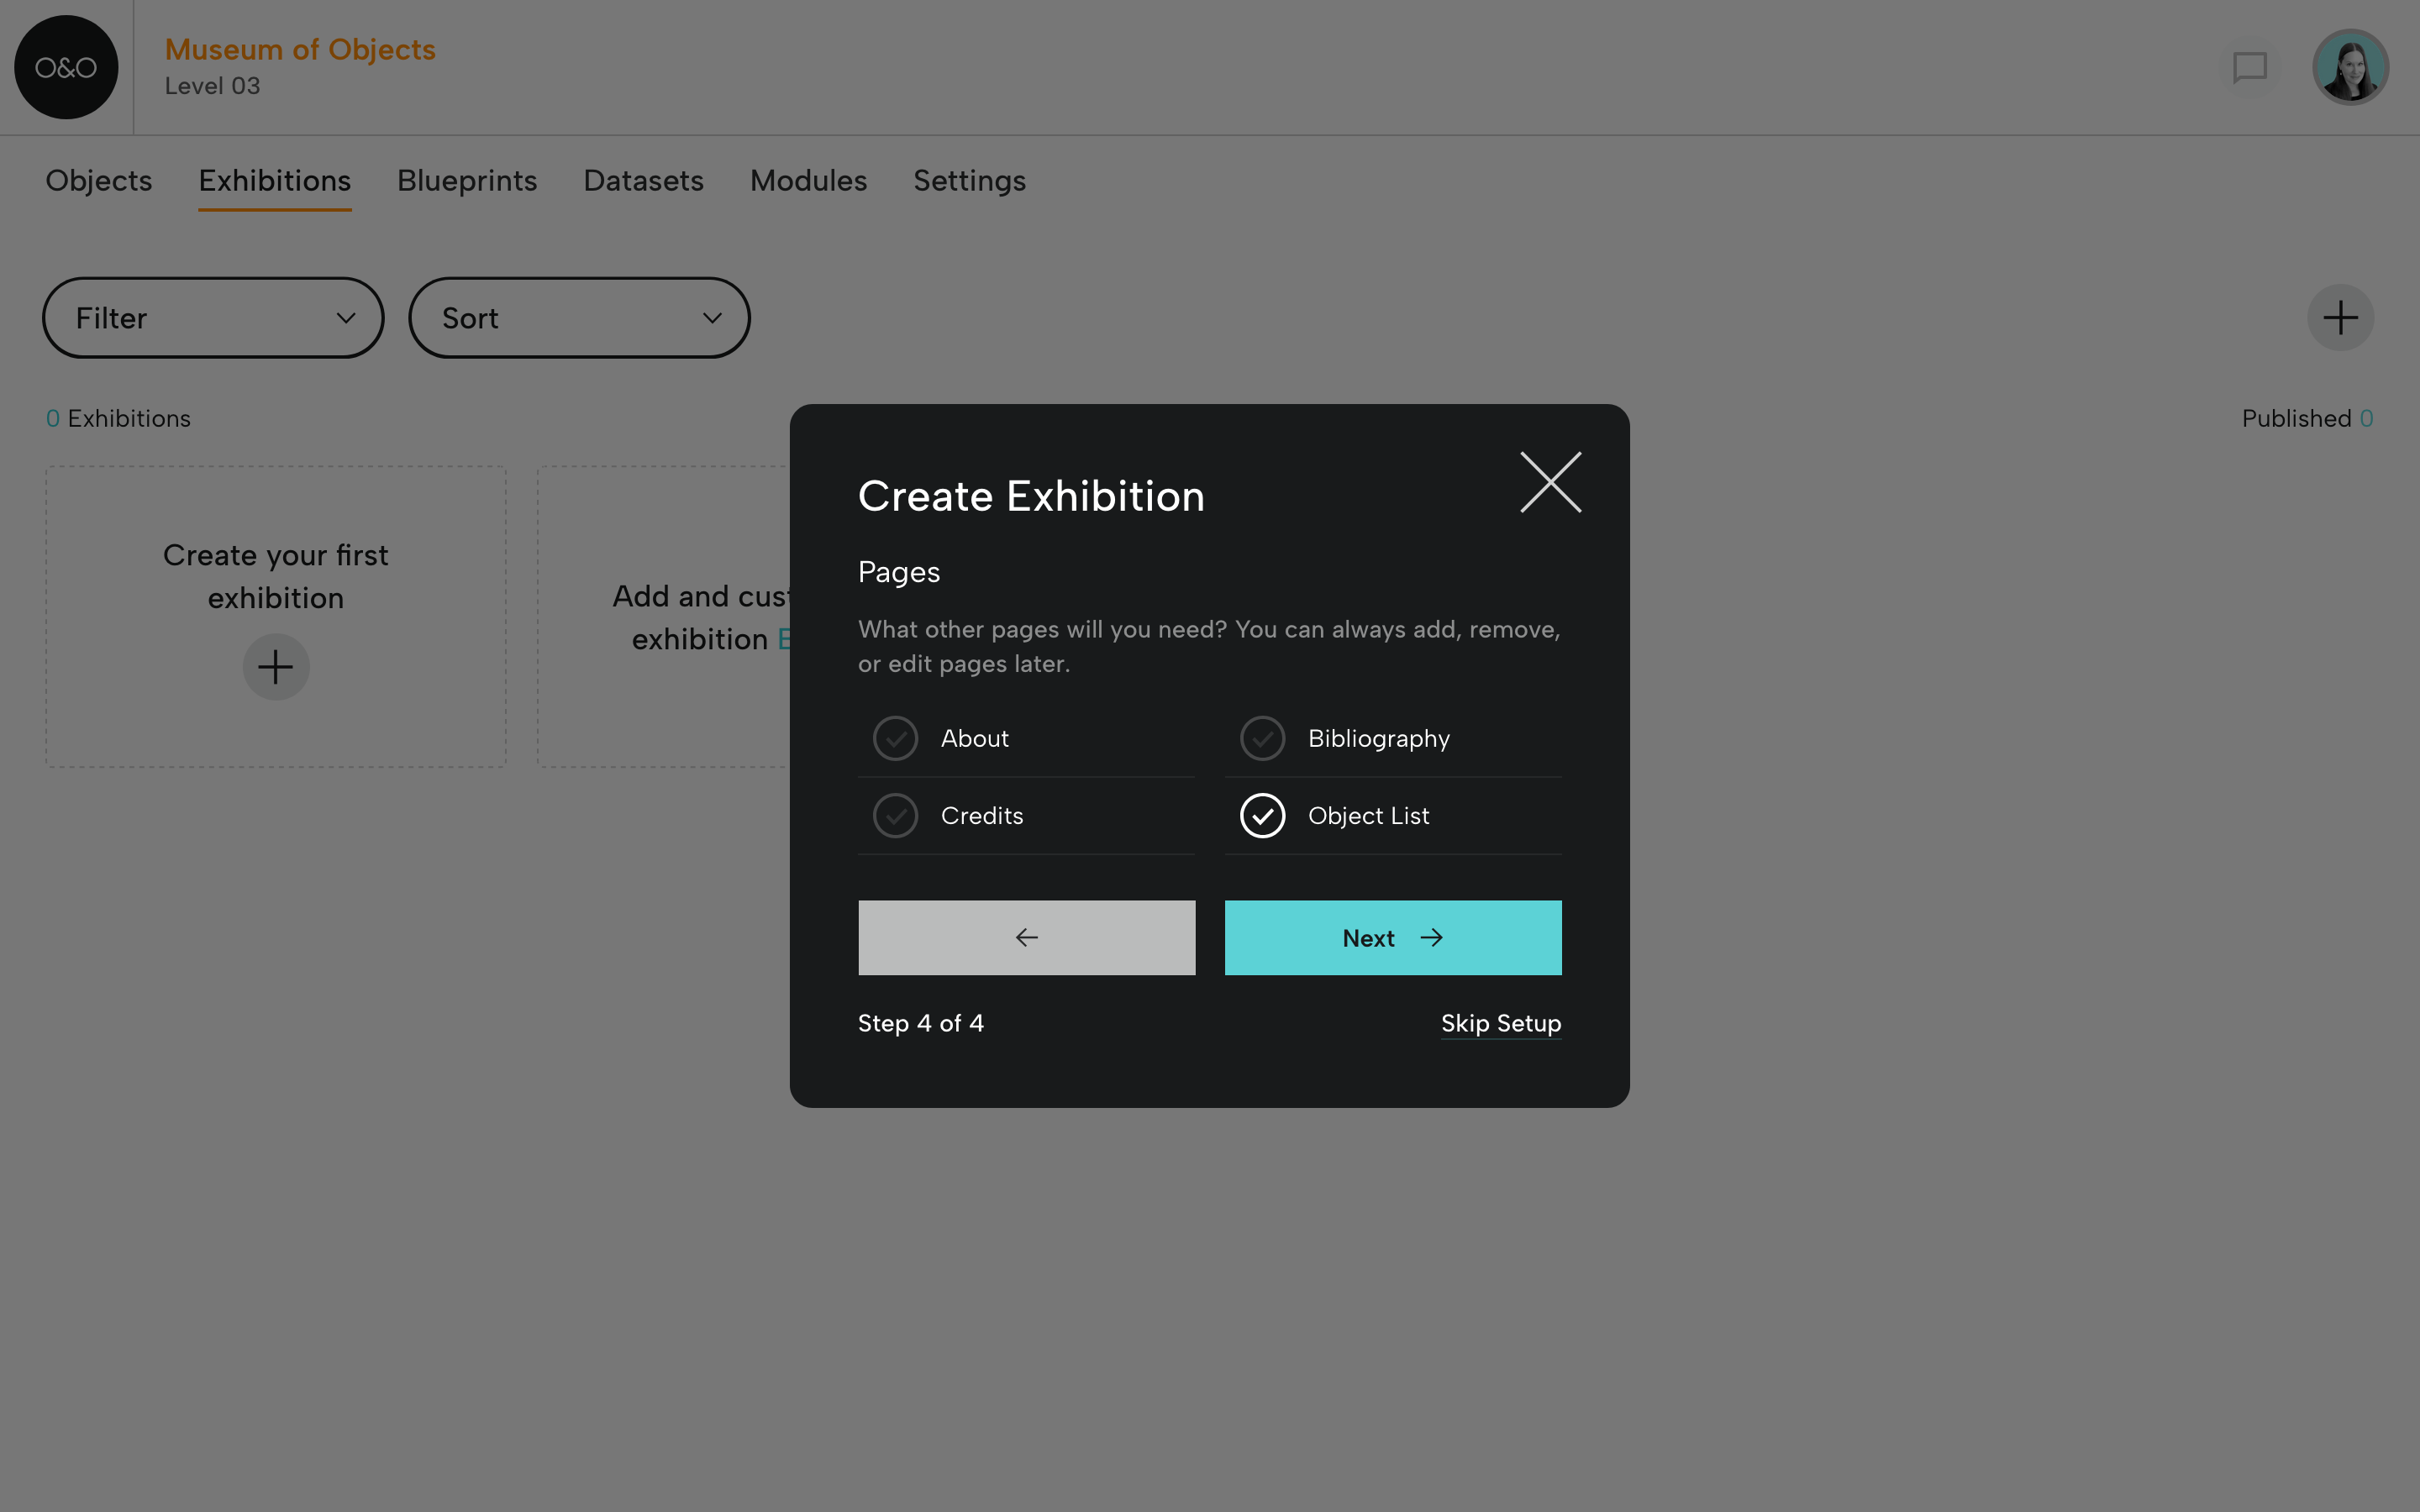
Step 4 of 4: Add exhibition pages (you can change these names and add other pages later).
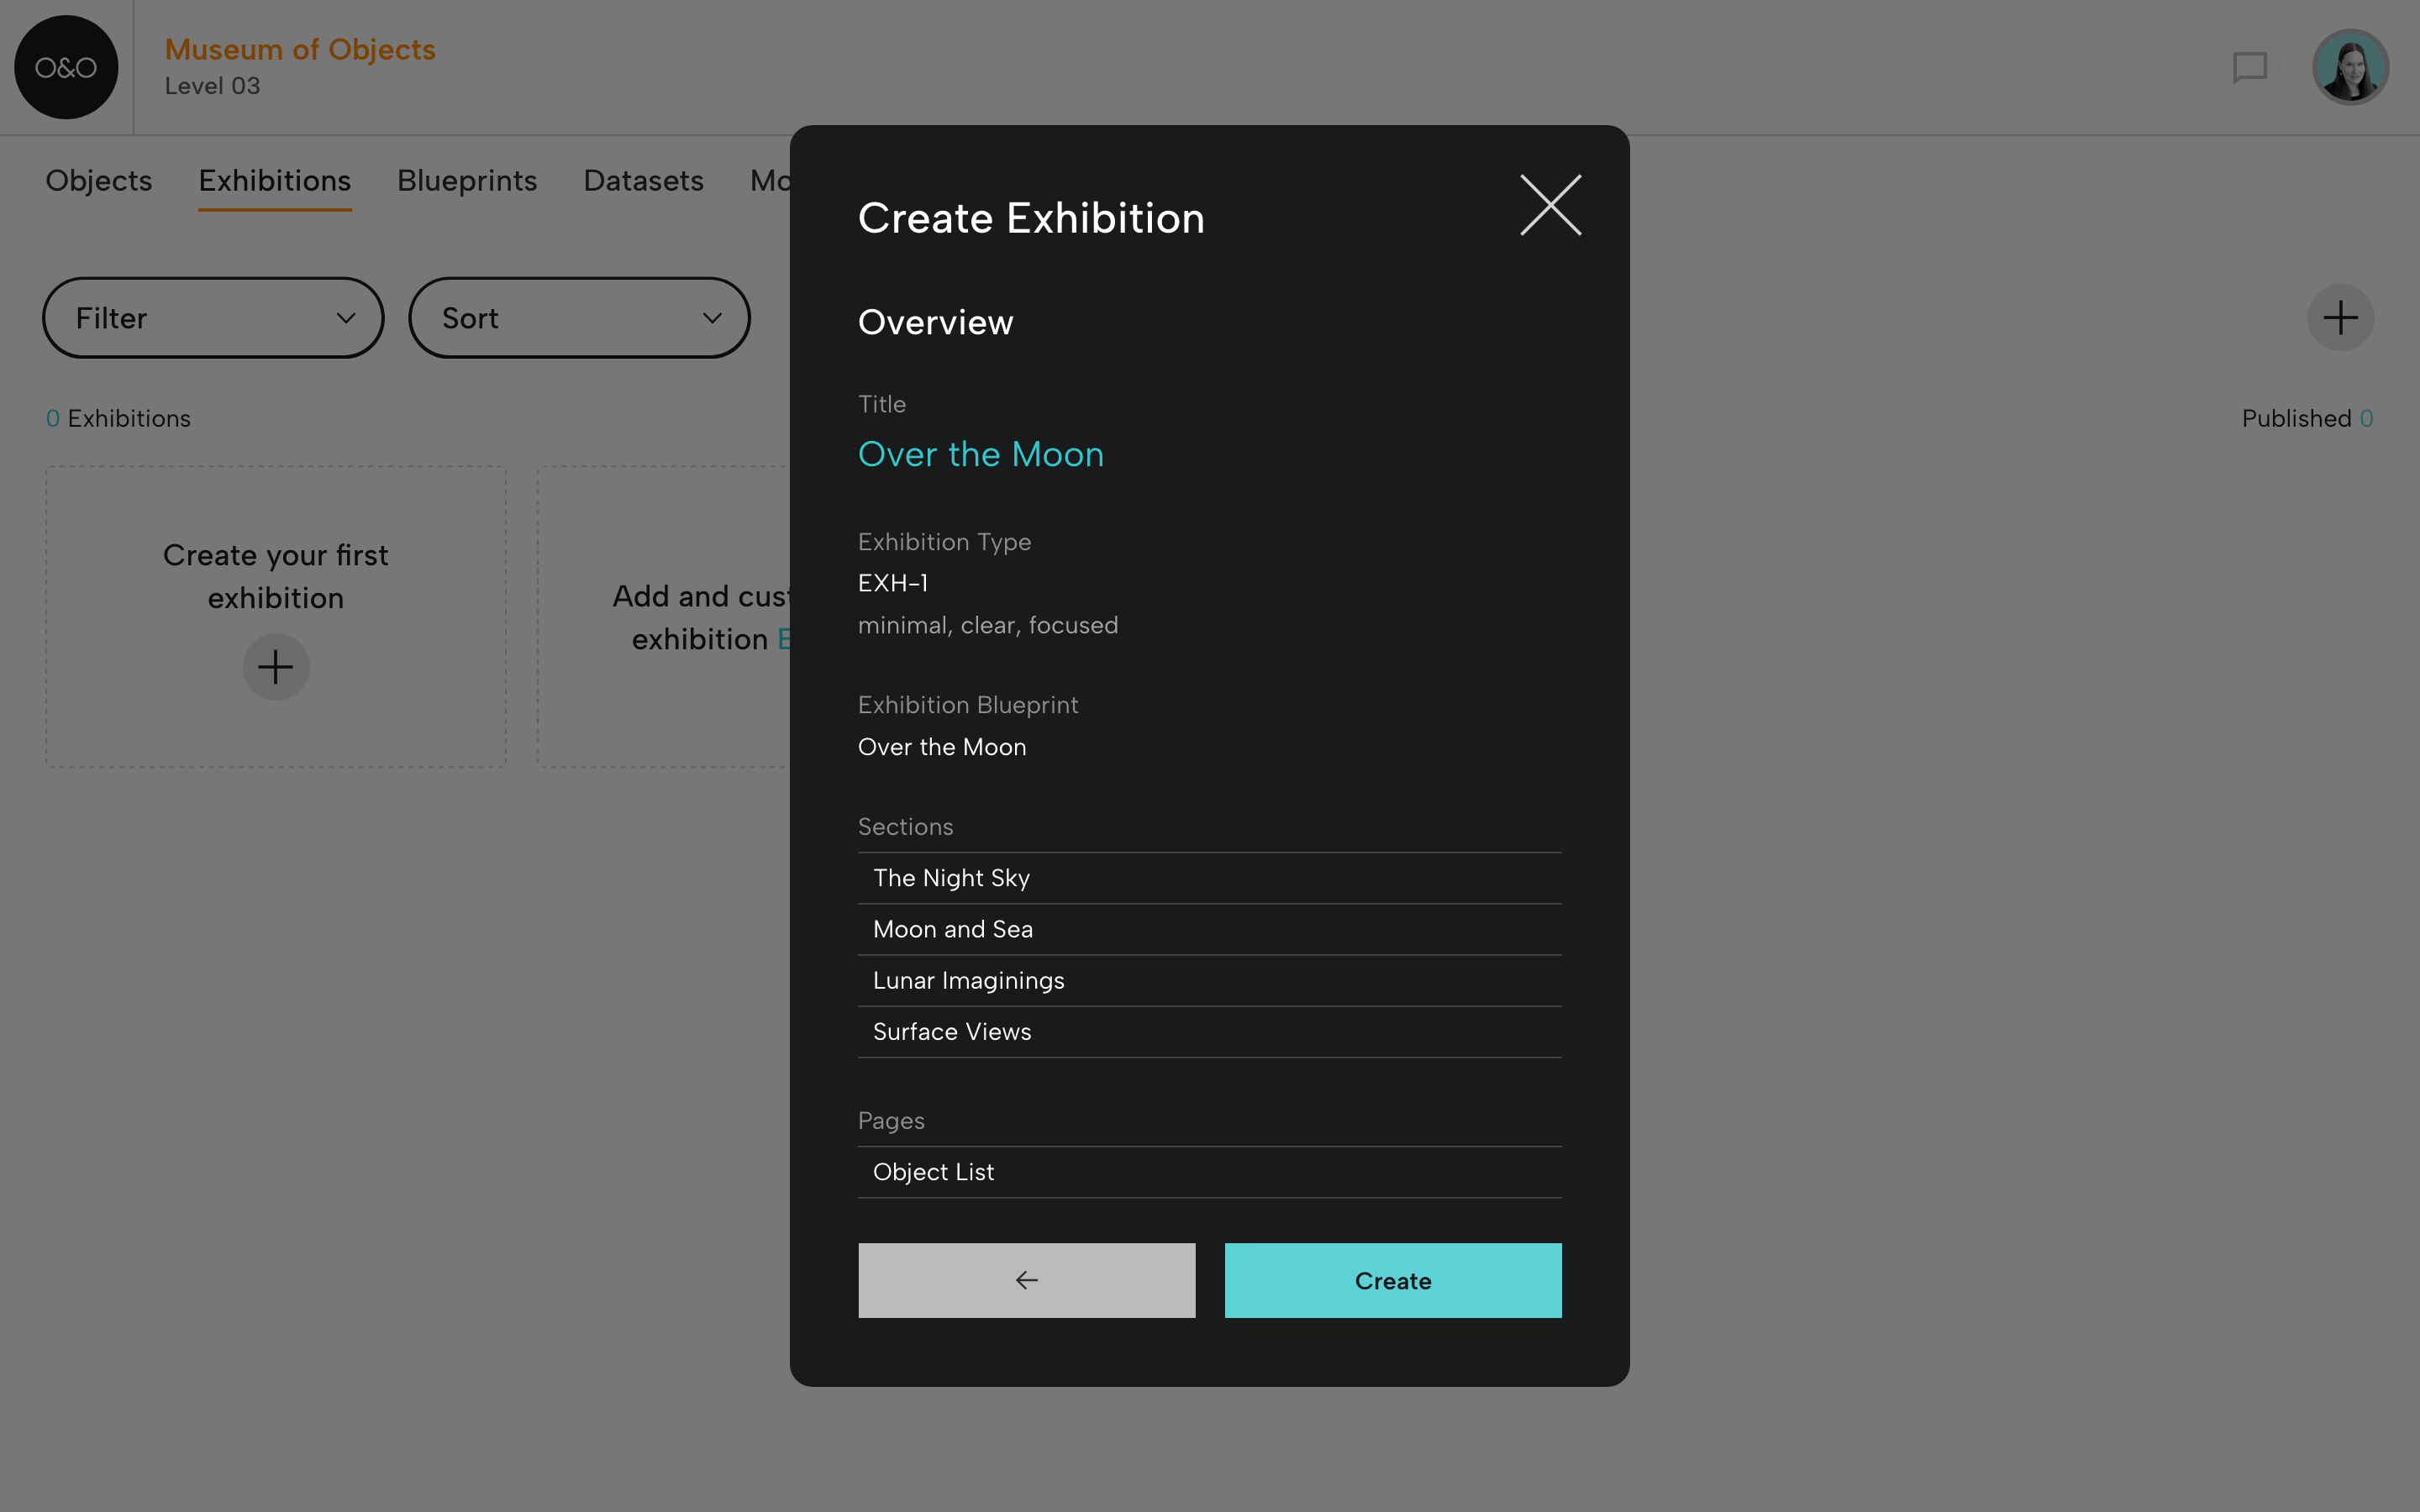
Review your exhibition information and click Create.
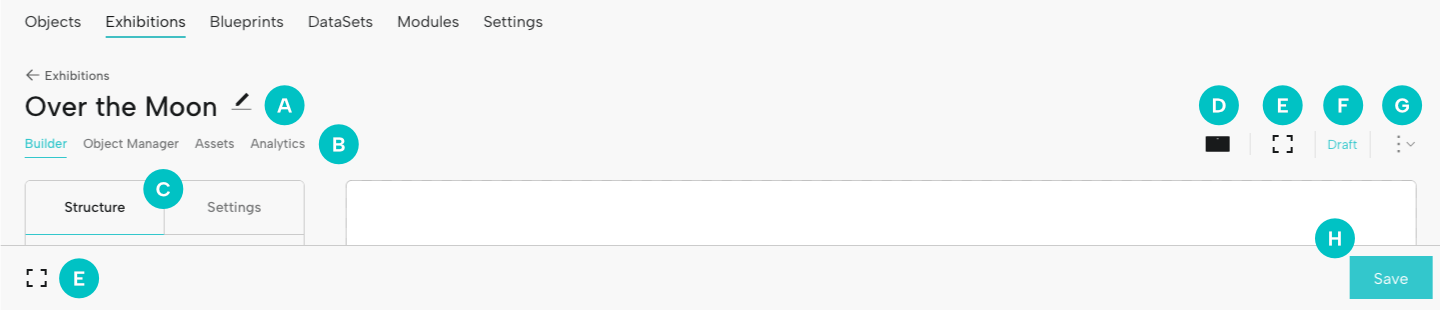
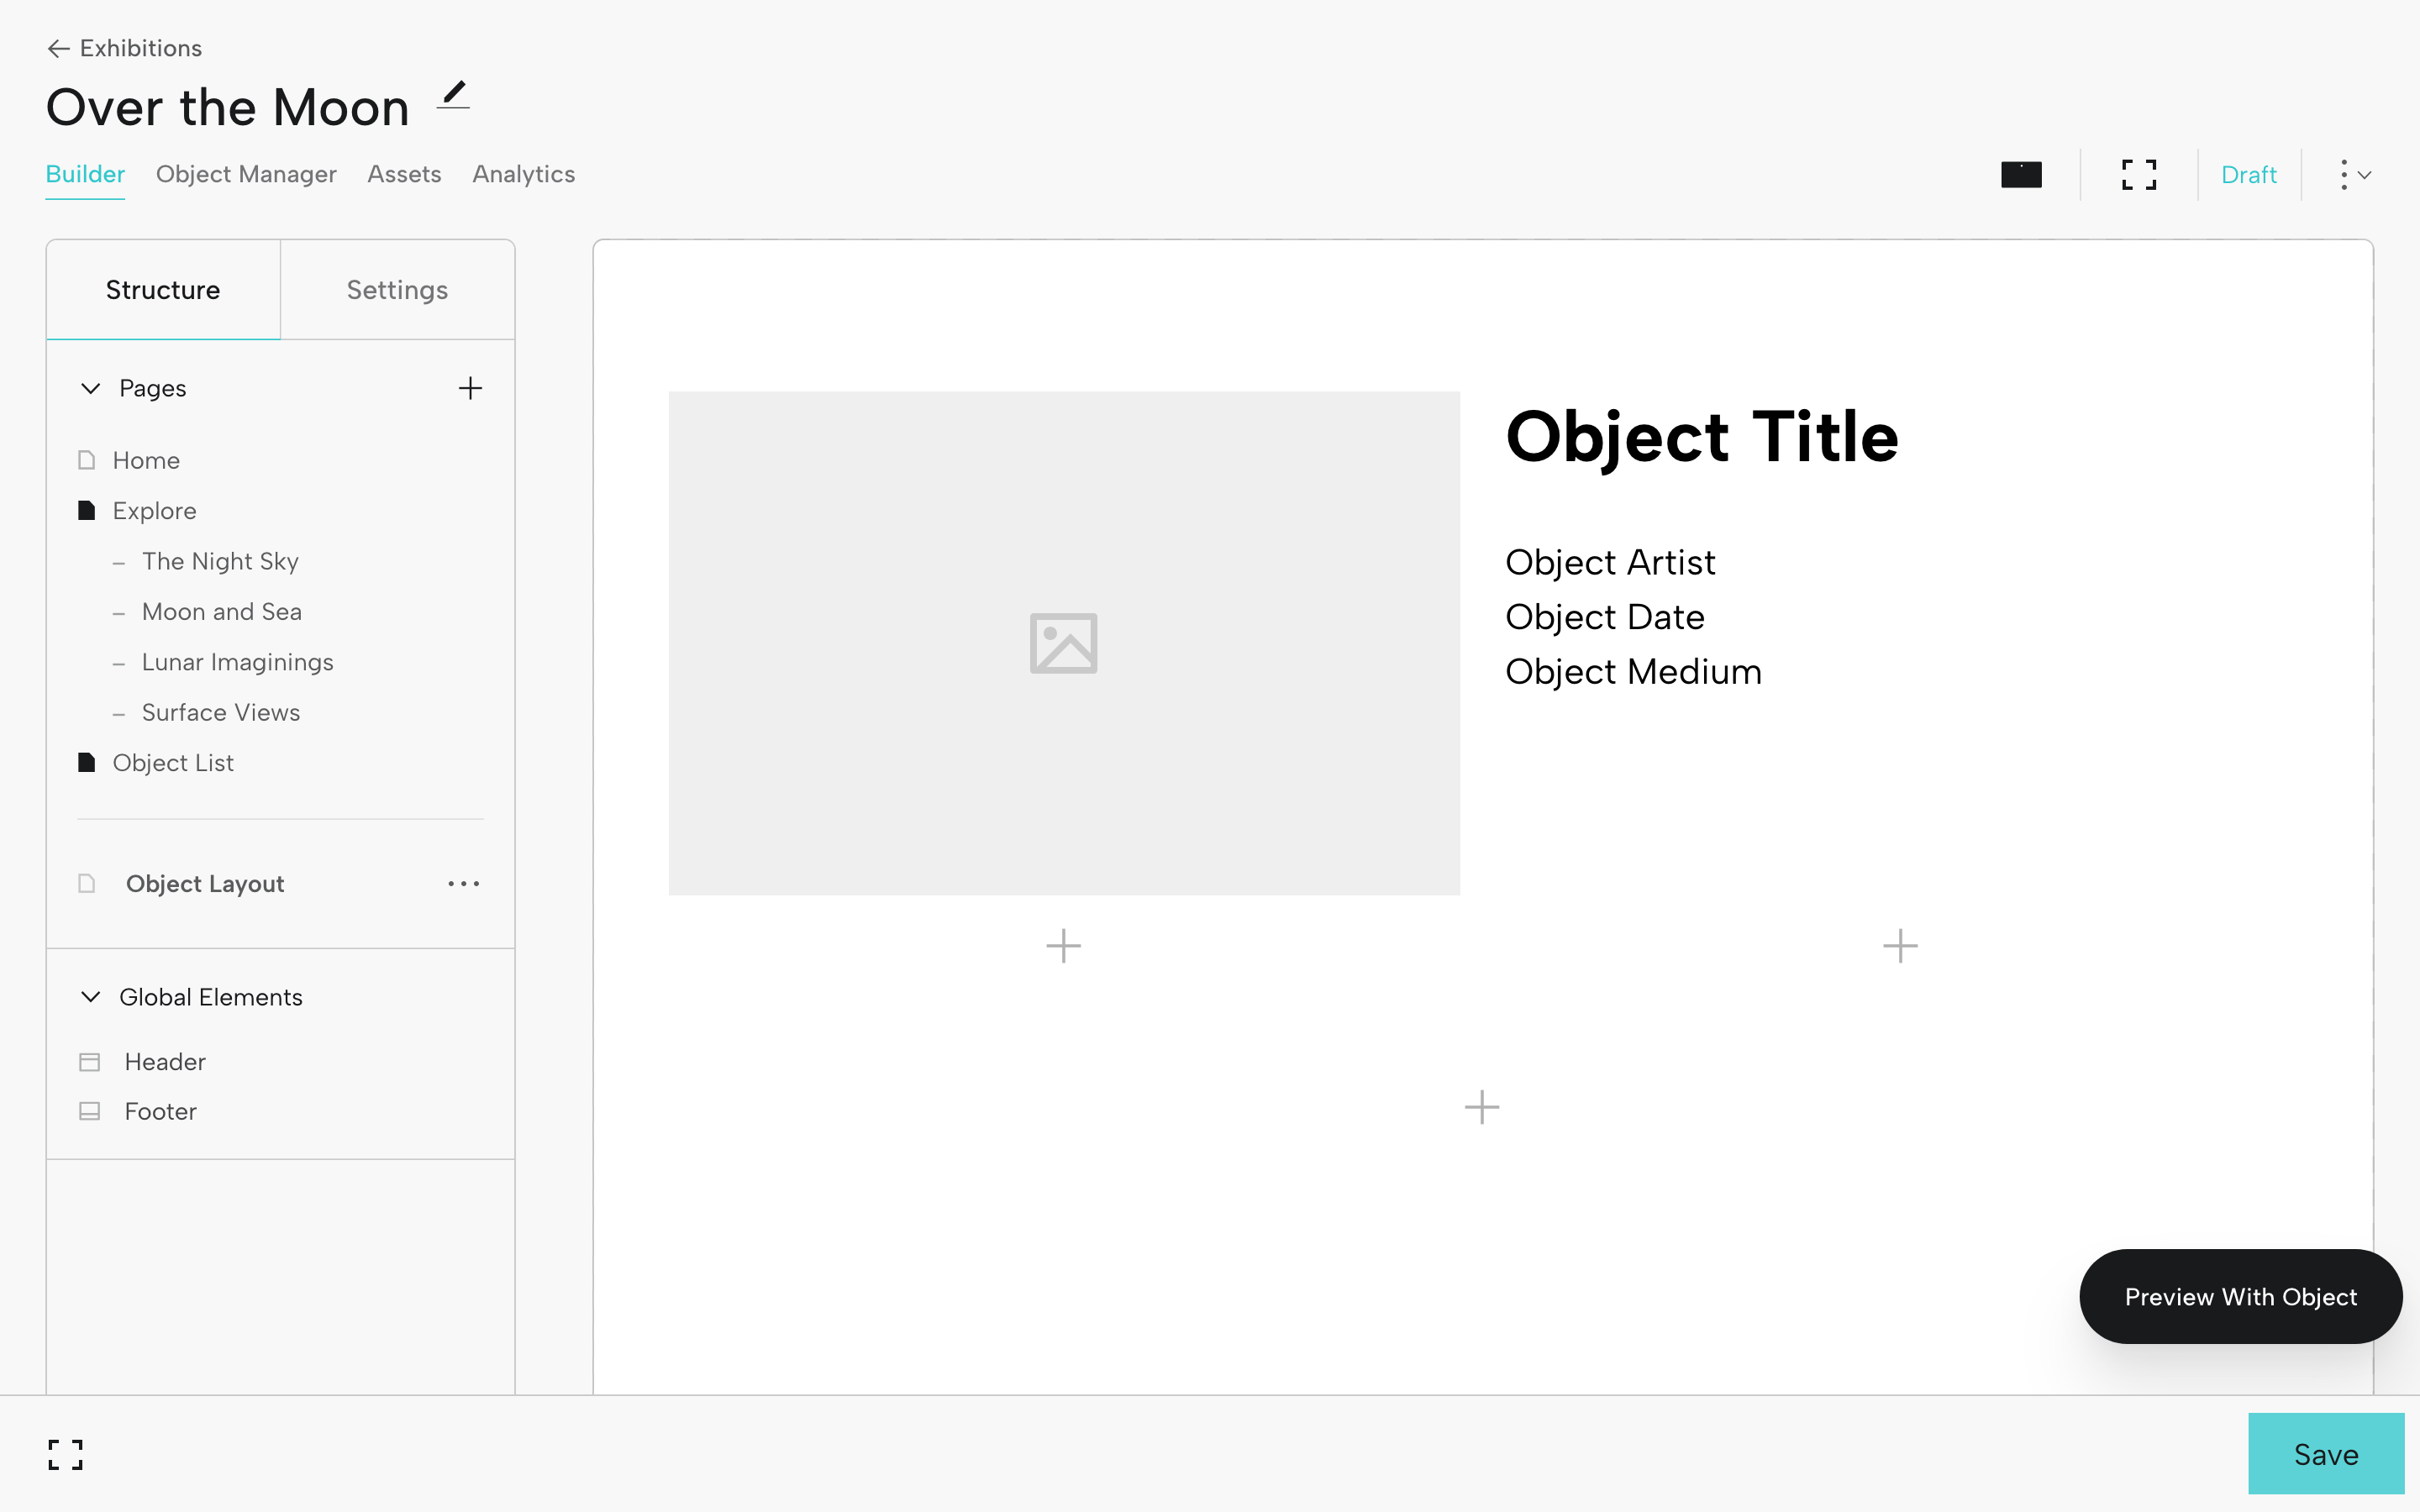
Let's take a look at the UI elements you'll encounter after you click Create:
A: Exhibition title with edit option (after editing, click the green check to save)
B: Exhibitions Menu: Builder, Object Manager, Assets, and Analytics
C: Structure and Settings
D: Desktop or Mobile Toggle
E: Preview Mode
F: Draft or Published Status
G: Menu with options to Publish, Take Tour, and Delete
H: Save Button
To take a tour of the UI elements, from the drop down menu (G), select Take Tour.
Step 4: Update Structure and Settings
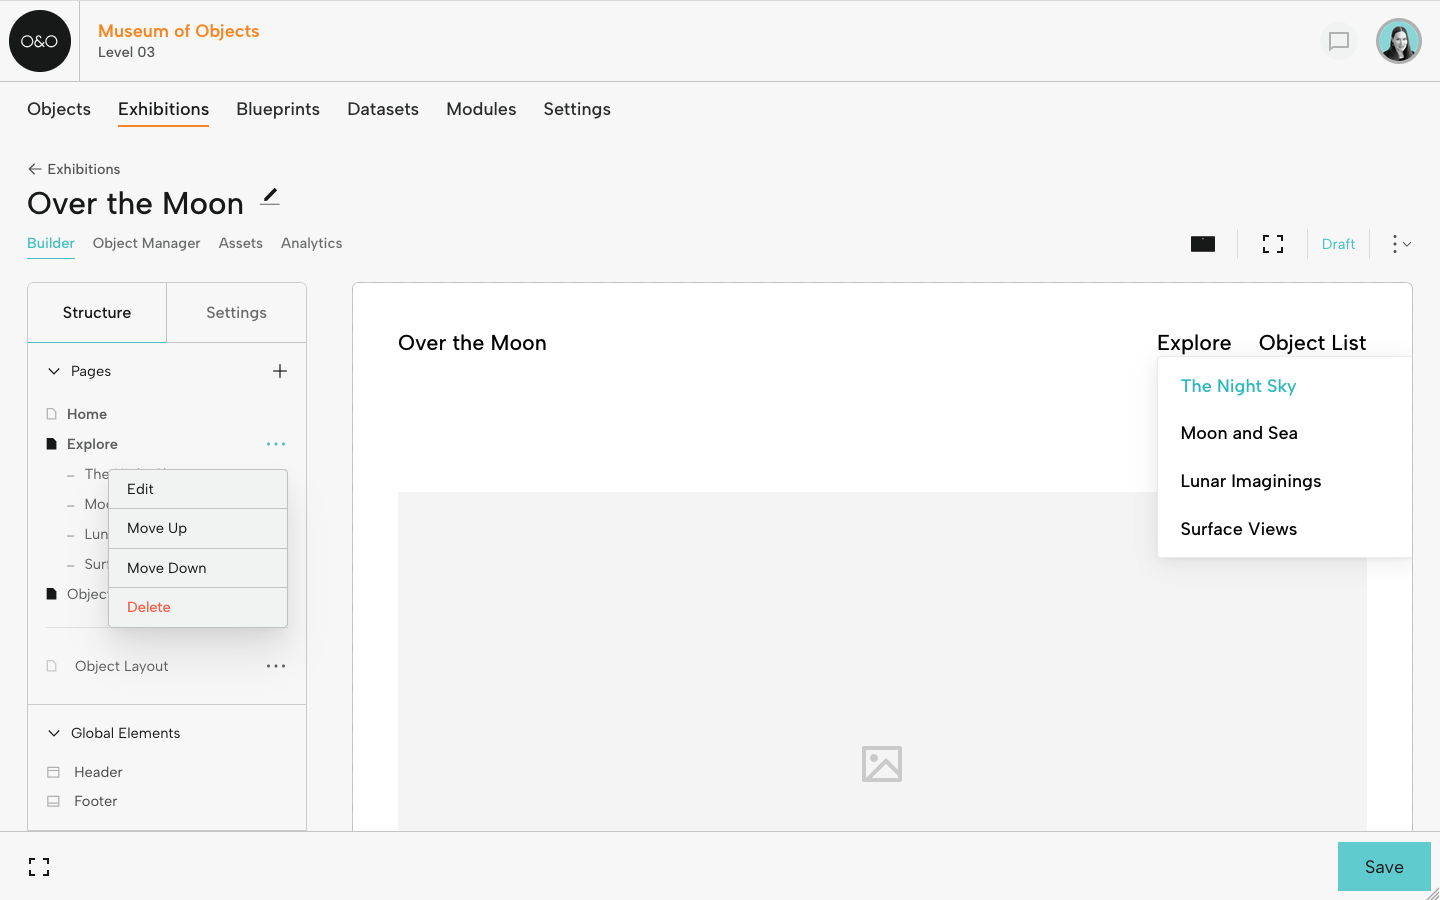
At left, in the Structure tab, under Pages, you’ll see all the pages you added, including your Sections. If you need to reorder pages, just drag and drop.
Click the page icon to the left of the page name to display it in the menu (section pages are displayed by default). When you hover over a page, a menu icon (…) appears at right that allows you to edit, move, or delete it.
You can also add sub-pages. For example, you might add a Sections or Explore page (type: Default Page), and then make Sections A, B, and C sub-pages by dragging them below Sections (sub-pages will display a dash). In the menu for the exhibition, sub-pages will display in the drop down menu.
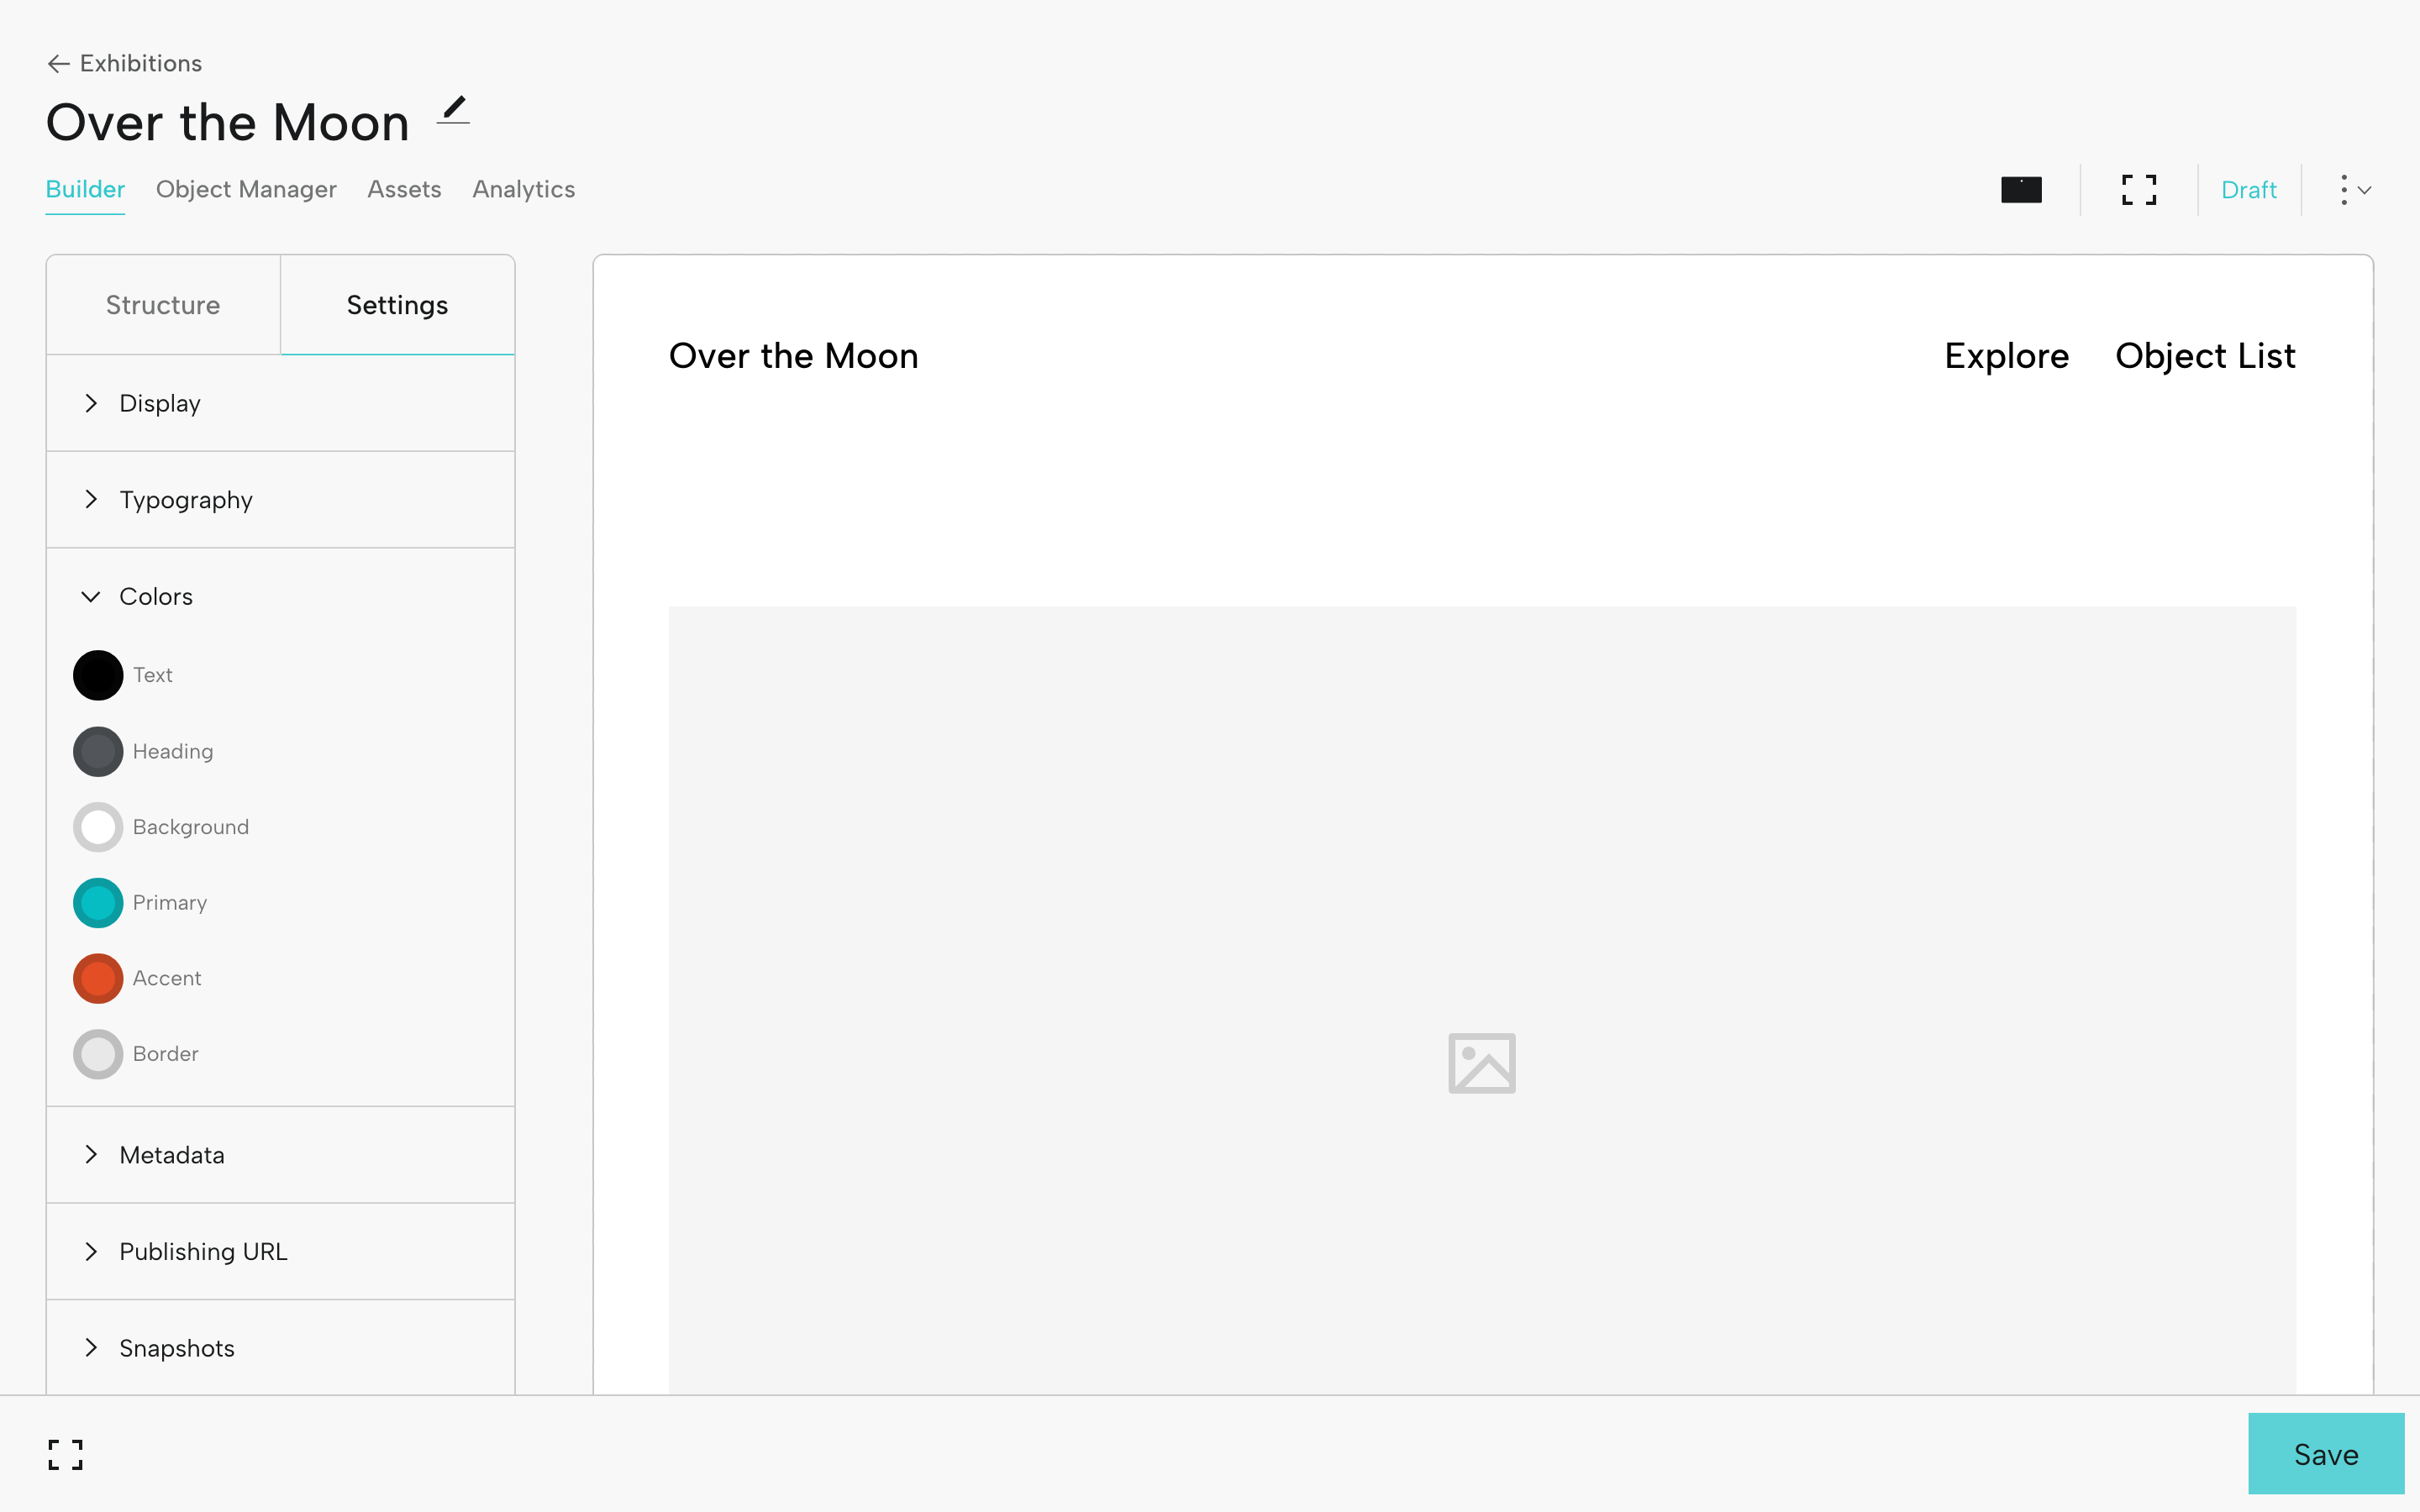
Click the Settings tab to review and update Display, Typography, Color, and Metadata options.
The choices you make in Settings will apply to every page across your exhibition (however, you can still make updates on individual pages to override these choices).
Step 5: Customize Pages with Blocks
Every page is comprised of elements called Blocks. There are Blocks for headings, text, single images, groups of images, audio files, videos, etc.
We'll start by looking an Image Block.
Image Block
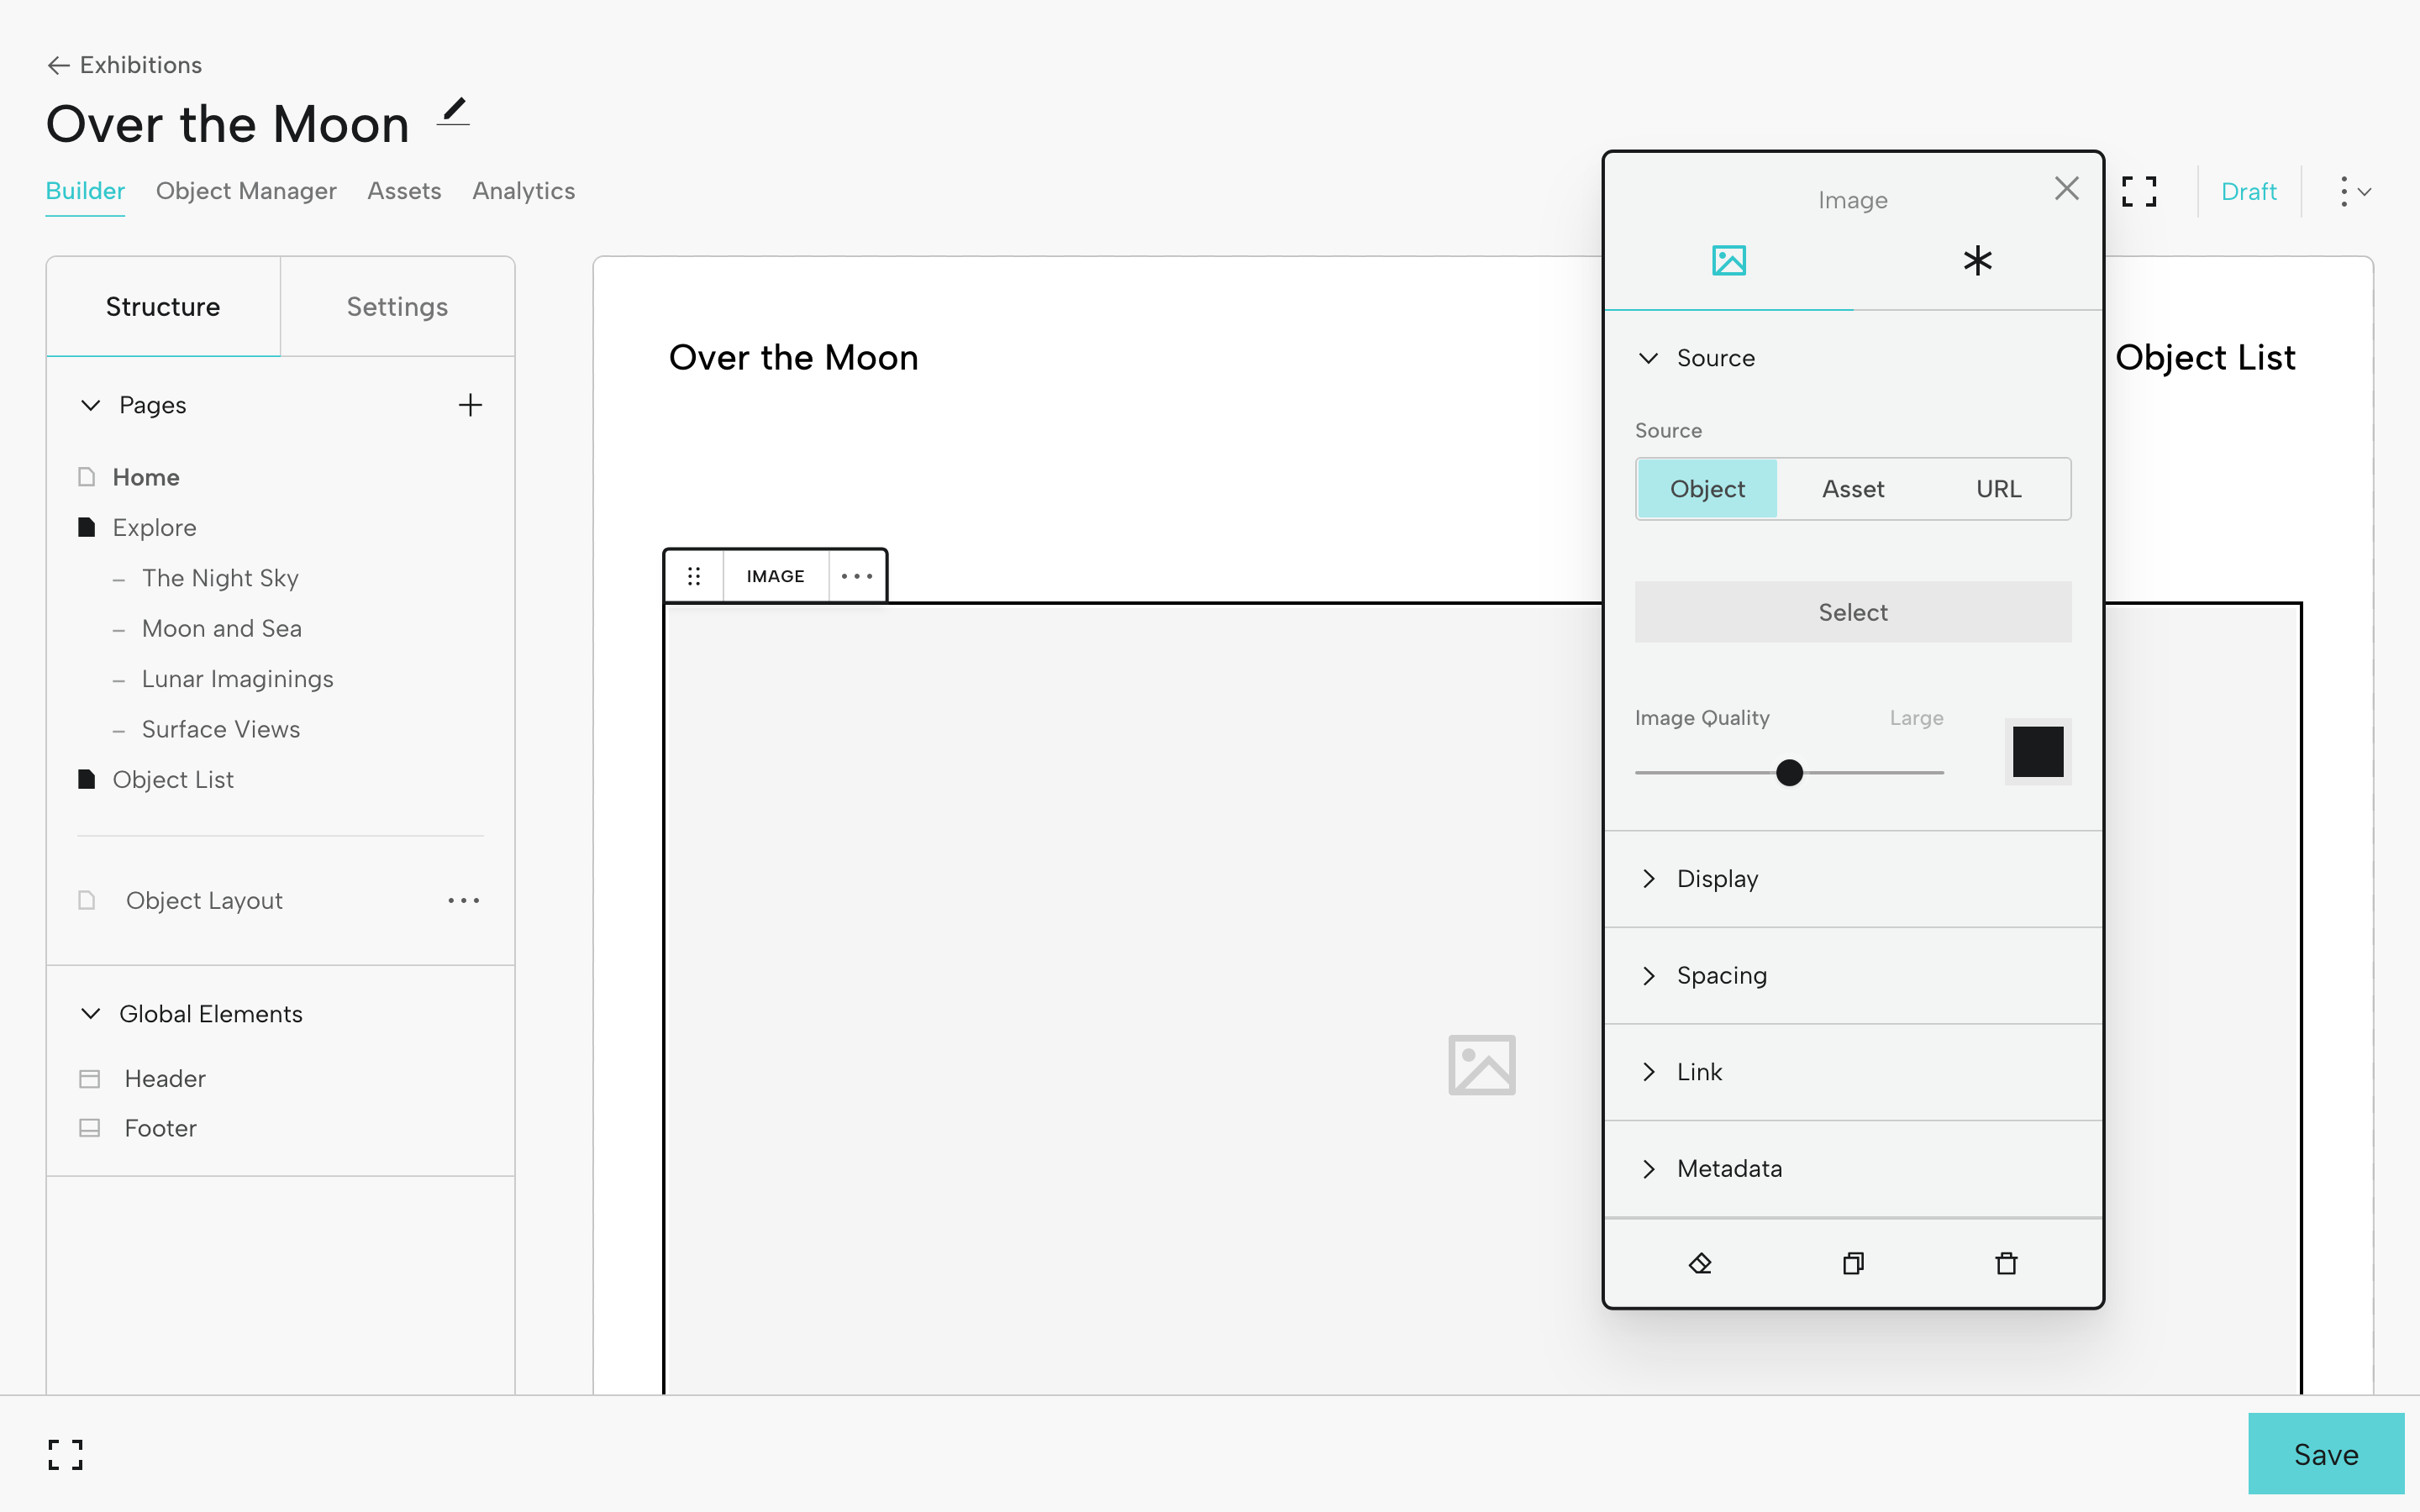
On the home page, click the image placeholder.
Two items will appear in the Viewer:
In the upper left-hand corner of the Image Block, you’ll see the Block Bar. The Block Bar lets you drag the block (six dots, at left) and move, duplicate, or delete the block (menu indicated by three dots, at right).
At right, you’ll see the Universal Editor. It allows you to adjust and style the block. You’ll have different options for each block type to help you customize the display. You can position the Universal Editor wherever you like. Close the Universal Editor by clicking the X in the upper right hand corner.
To delete a Block, use the ... menu in the Block Bar or click the trash can icon in the bottom right of the Universal Editor.
In the Universal Editor, you’ll see three options for choosing the source for your home page image.
- Object: this will allow you to select an image from your exhibition objects.
- Asset: assets are files you add to the exhibition that aren't related to your objects. For example, a title graphic, an artist's portrait, or a map.
- URL: for an image hosted by your Digital Asset Management System (if content is allowed to be displayed).
Let’s select Object, then click Select.
Search for an object, scroll the list, and select an option.
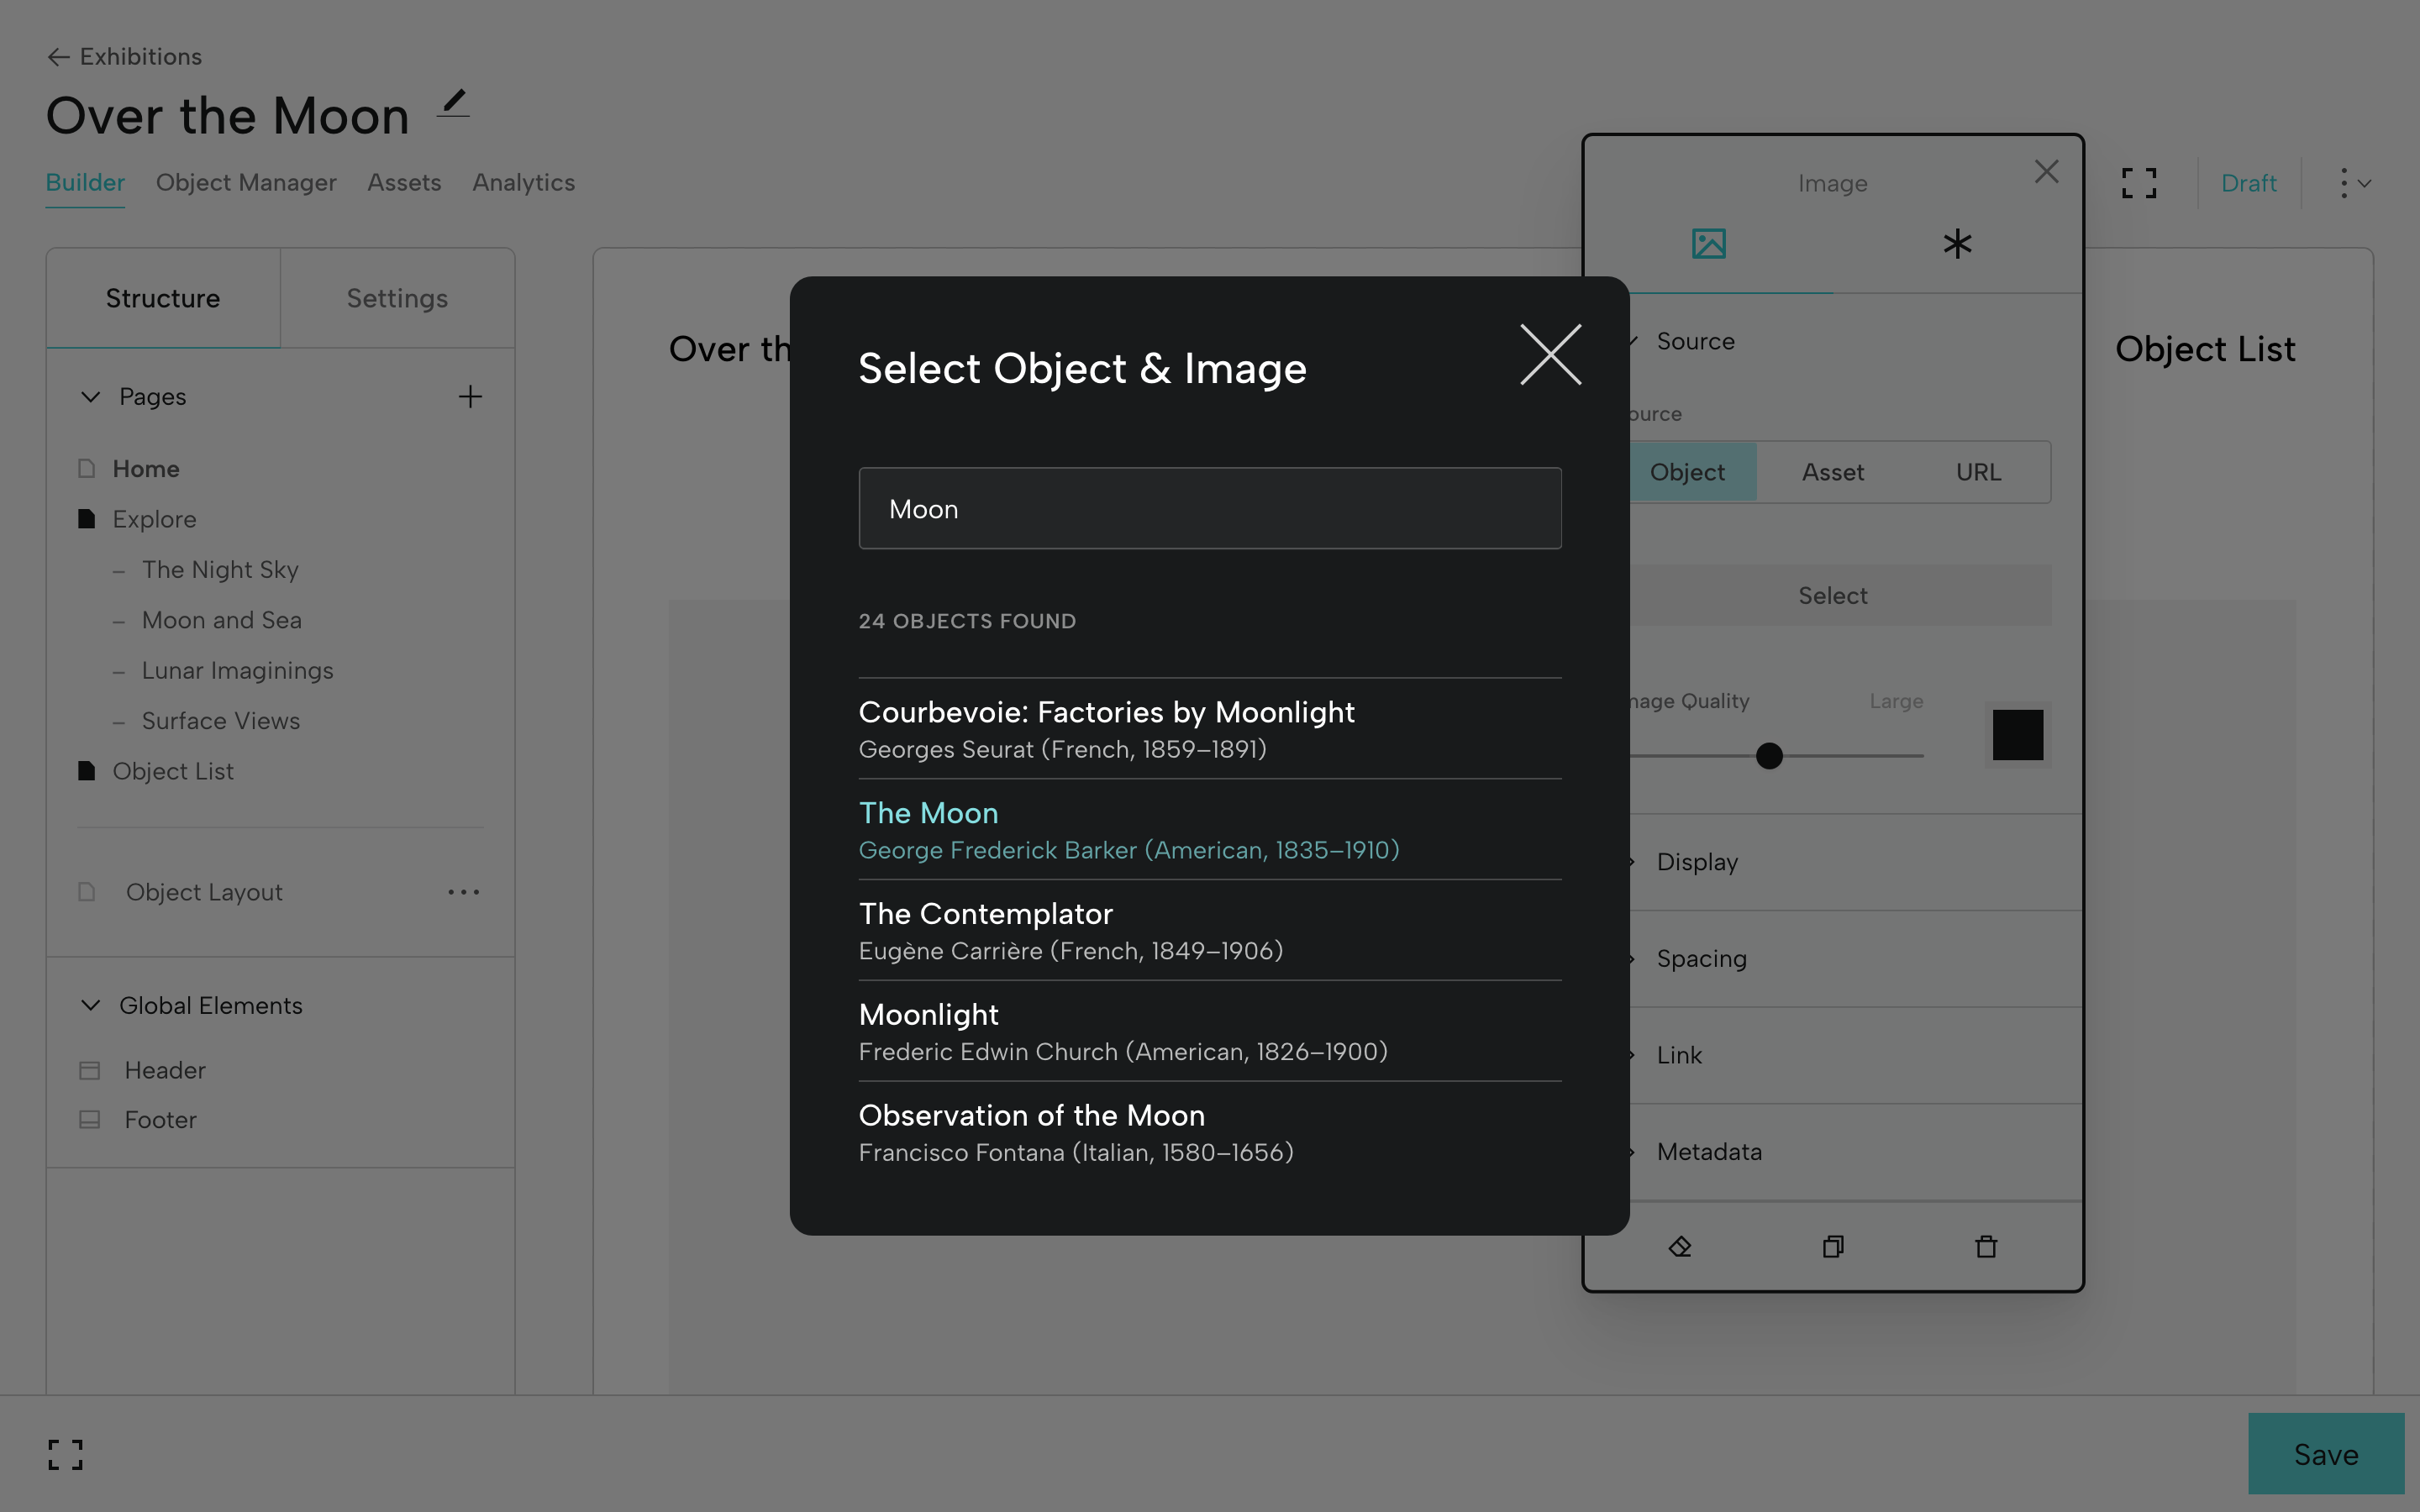
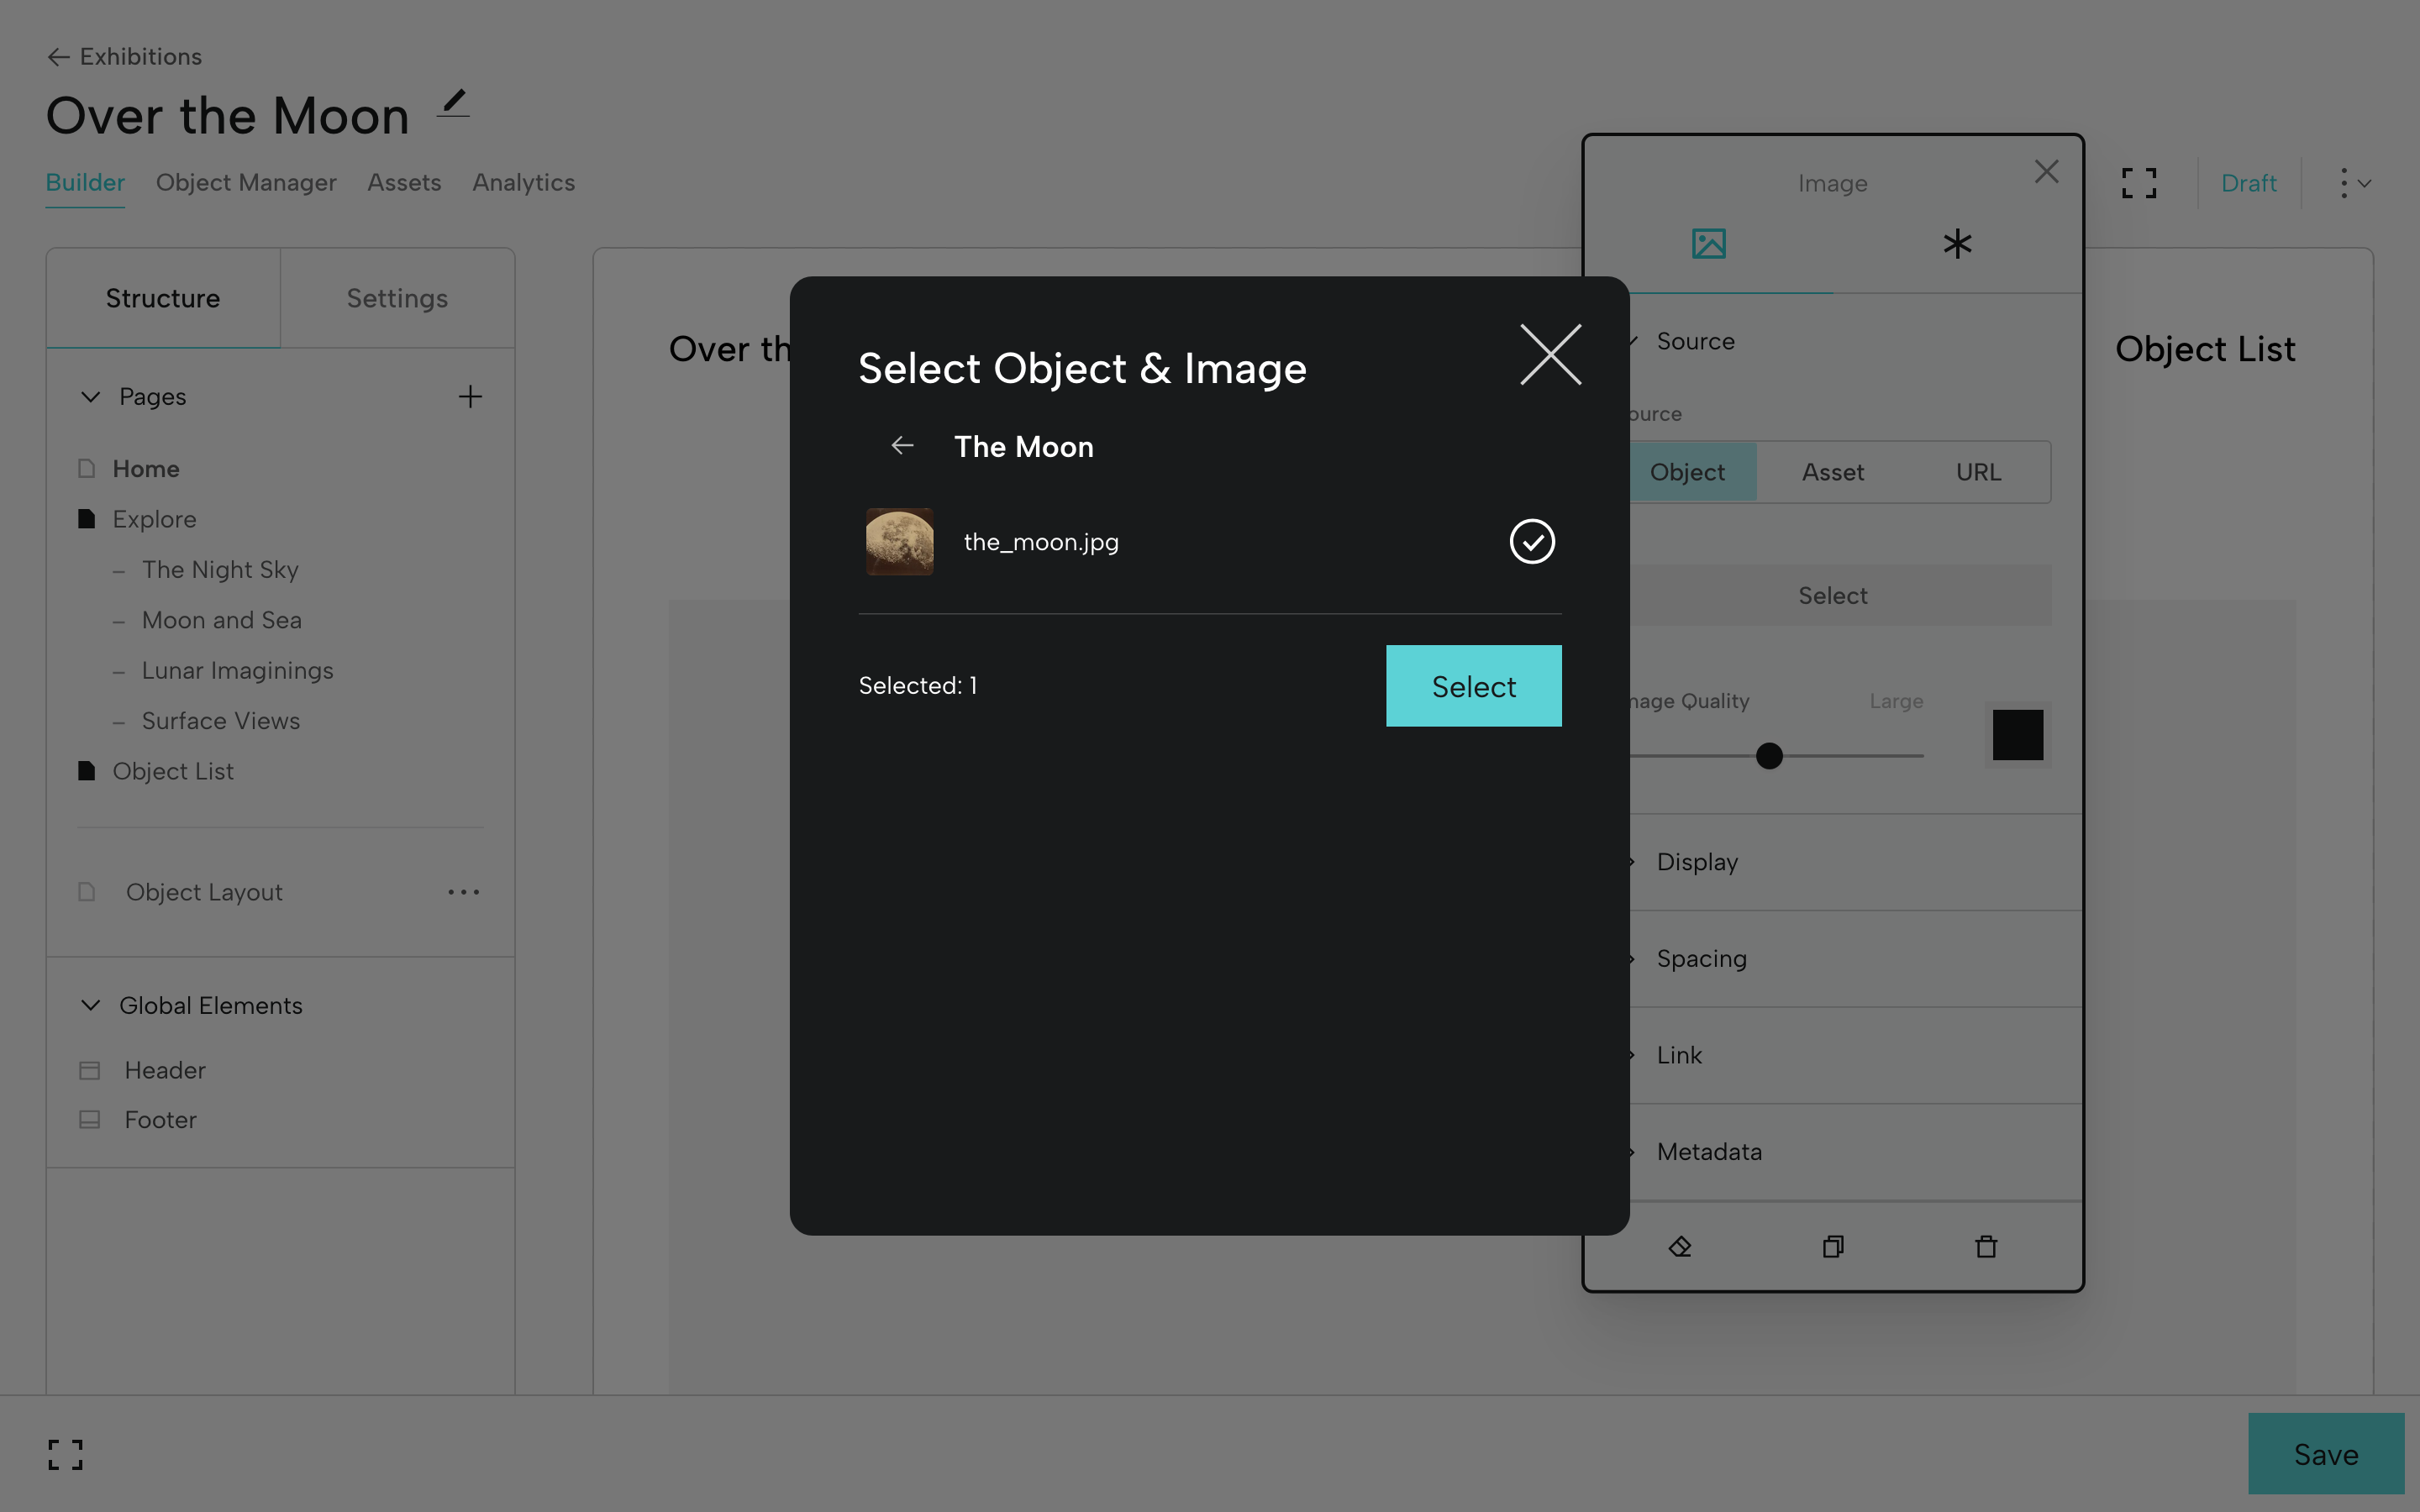
Once you choose an object, you’ll select the preferred image by clicking the check mark at right, then Select.
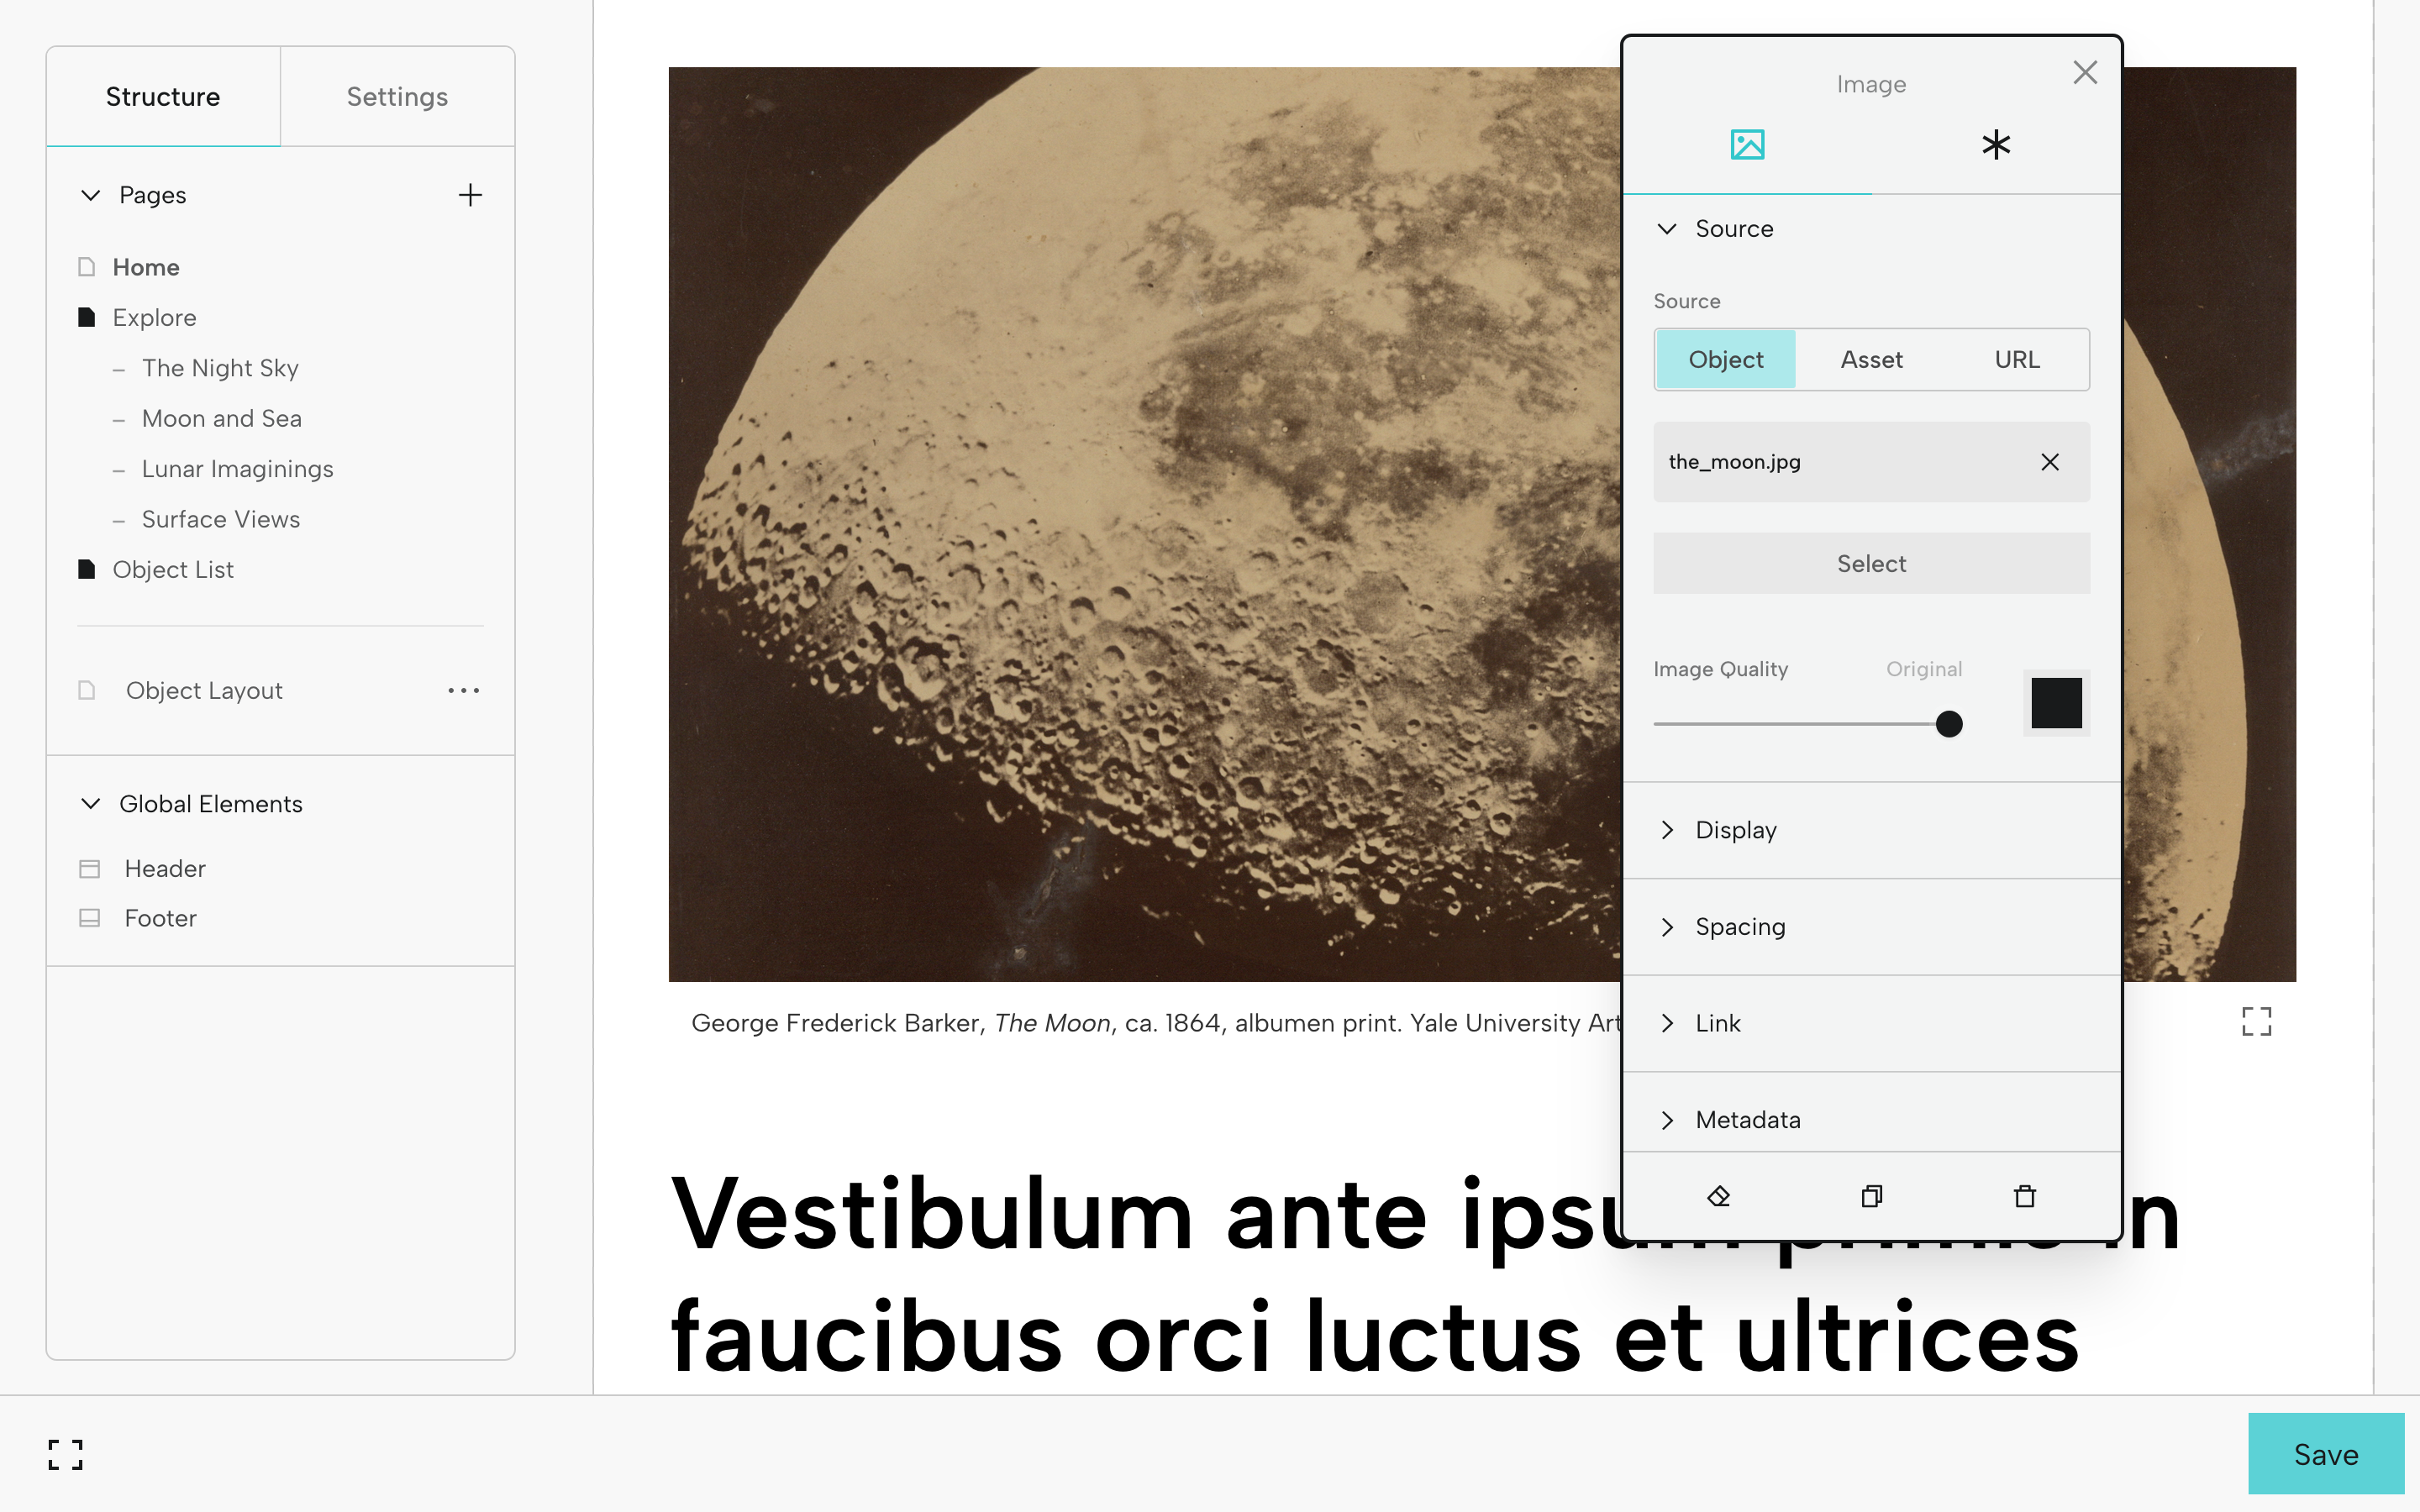
Adjust the slider for Image Quality as necessary. Here, we moved it all the way to the right (Original).
Check out the range of options in the Display and Spacing tabs. In Display, try toggling on Full Width Breakout to resize the image.
Text Block
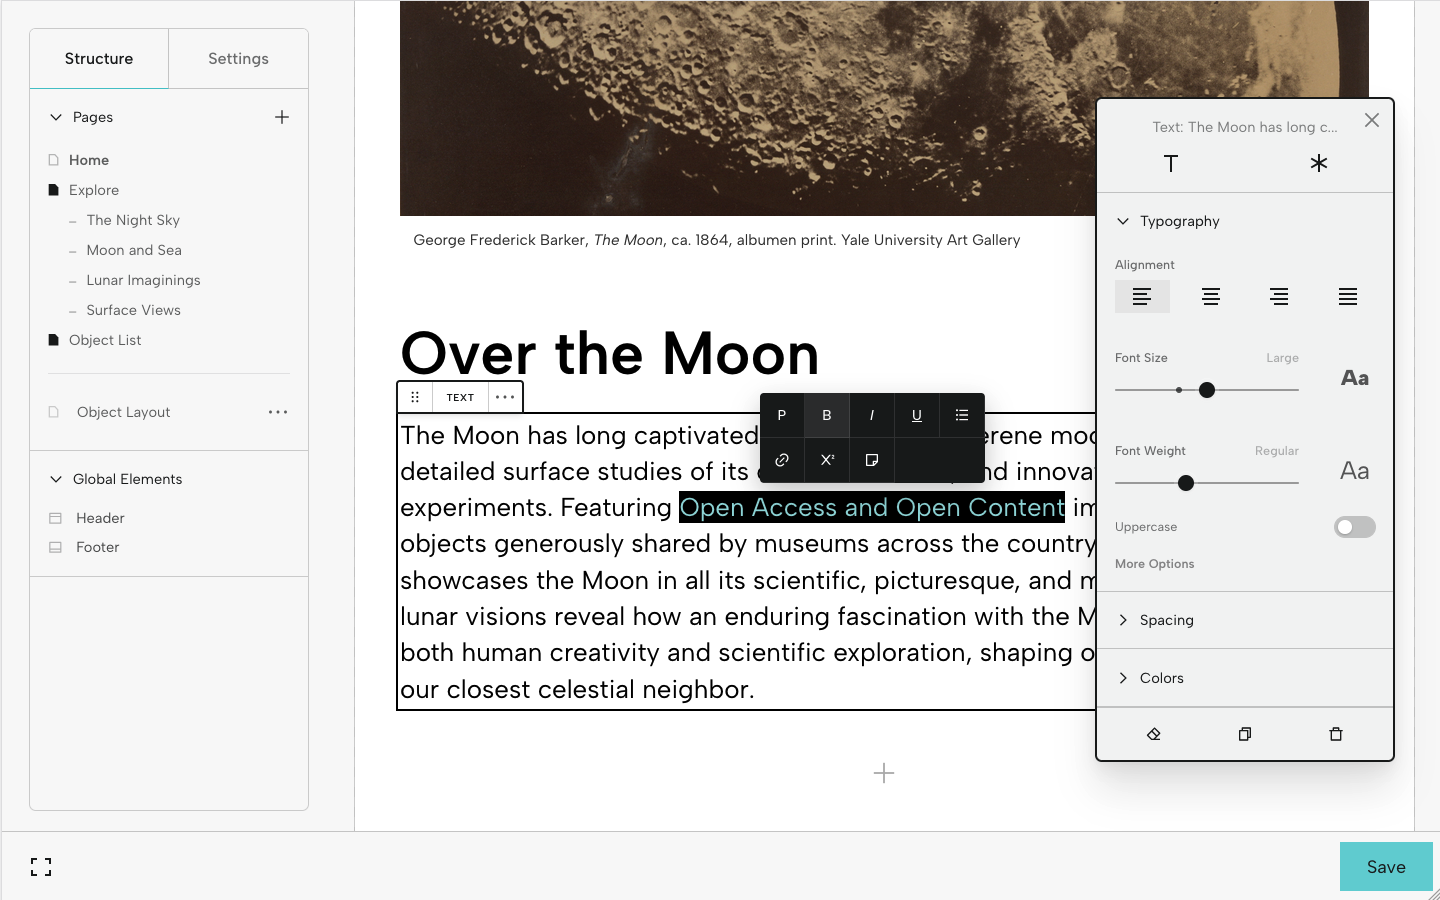
Now that you’ve added an image, click the placeholder text below it. Select a portion of the text to add italics, bold, or underline, or to format as an H2, H3, or H4.
Notice the Universal Editor has changed and now offers options for editing the Text Block. Now you have options for Typography, Colors, and Spacing.
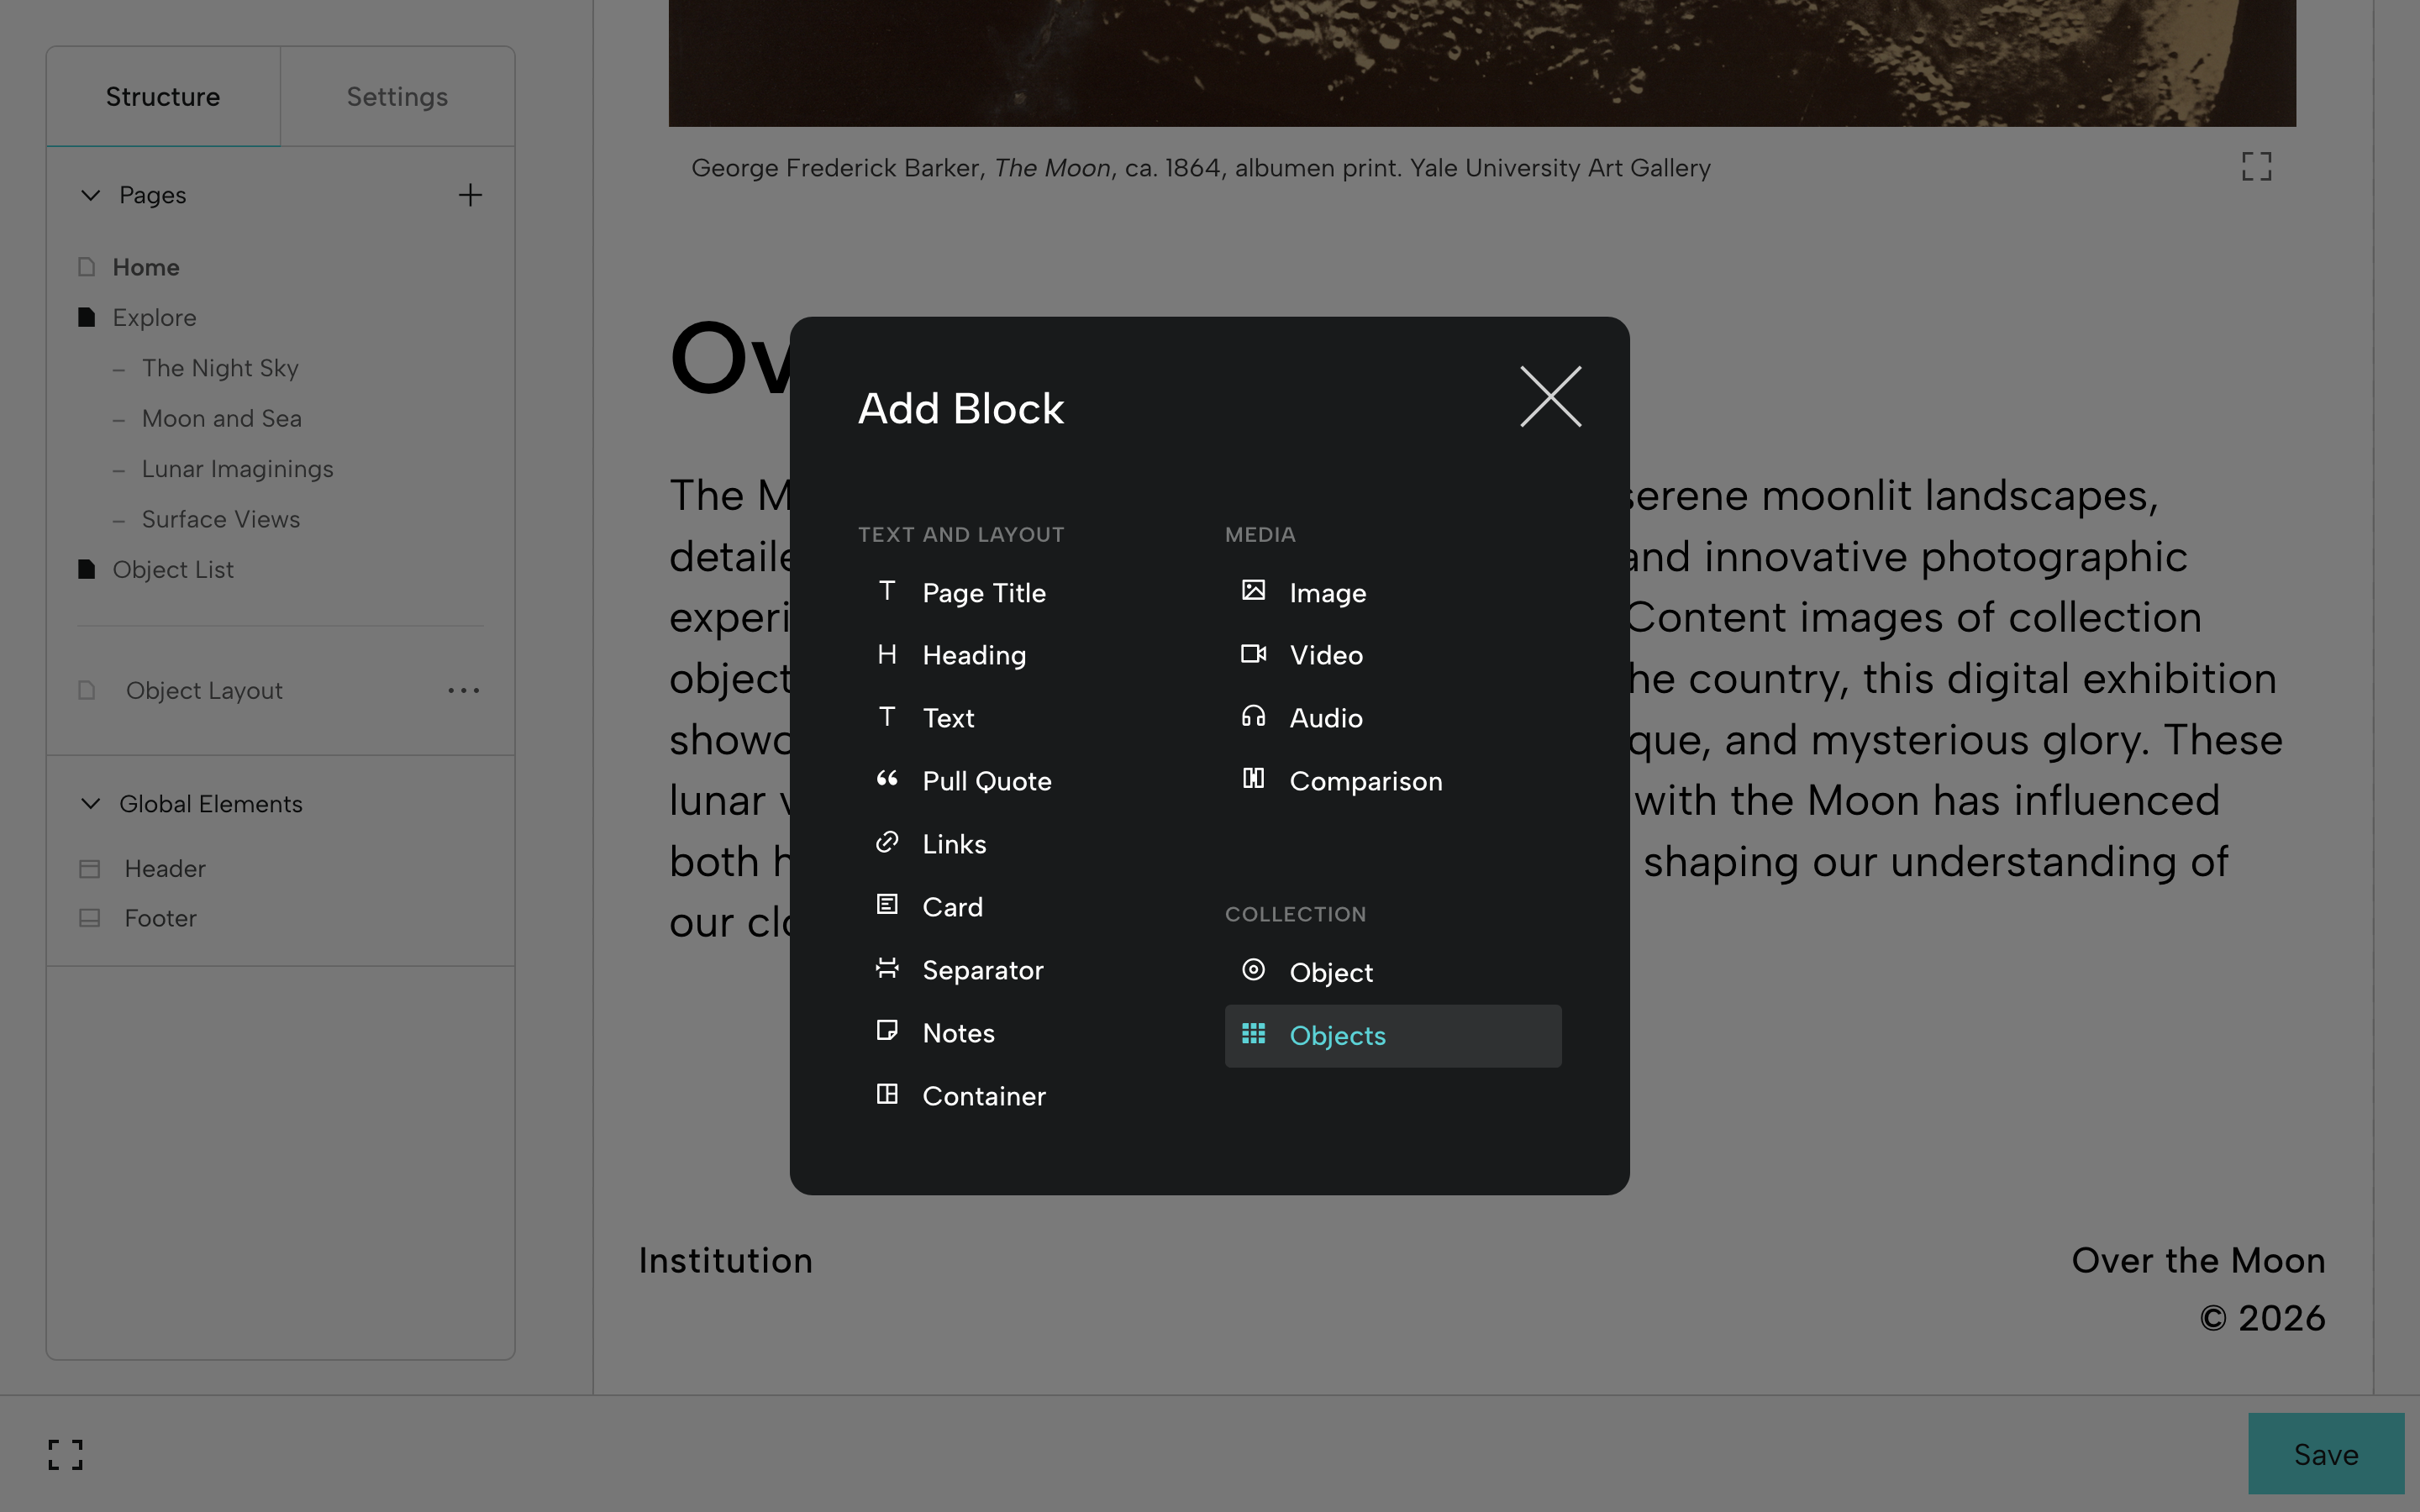
Adding Blocks
To add a new Block, click the + icon toward the bottom of the page and choose a type. Try adding a few different types and check out the Universal Editor options for each of them.
For more on the types and uses of Blocks, see Exhibition Blocks.
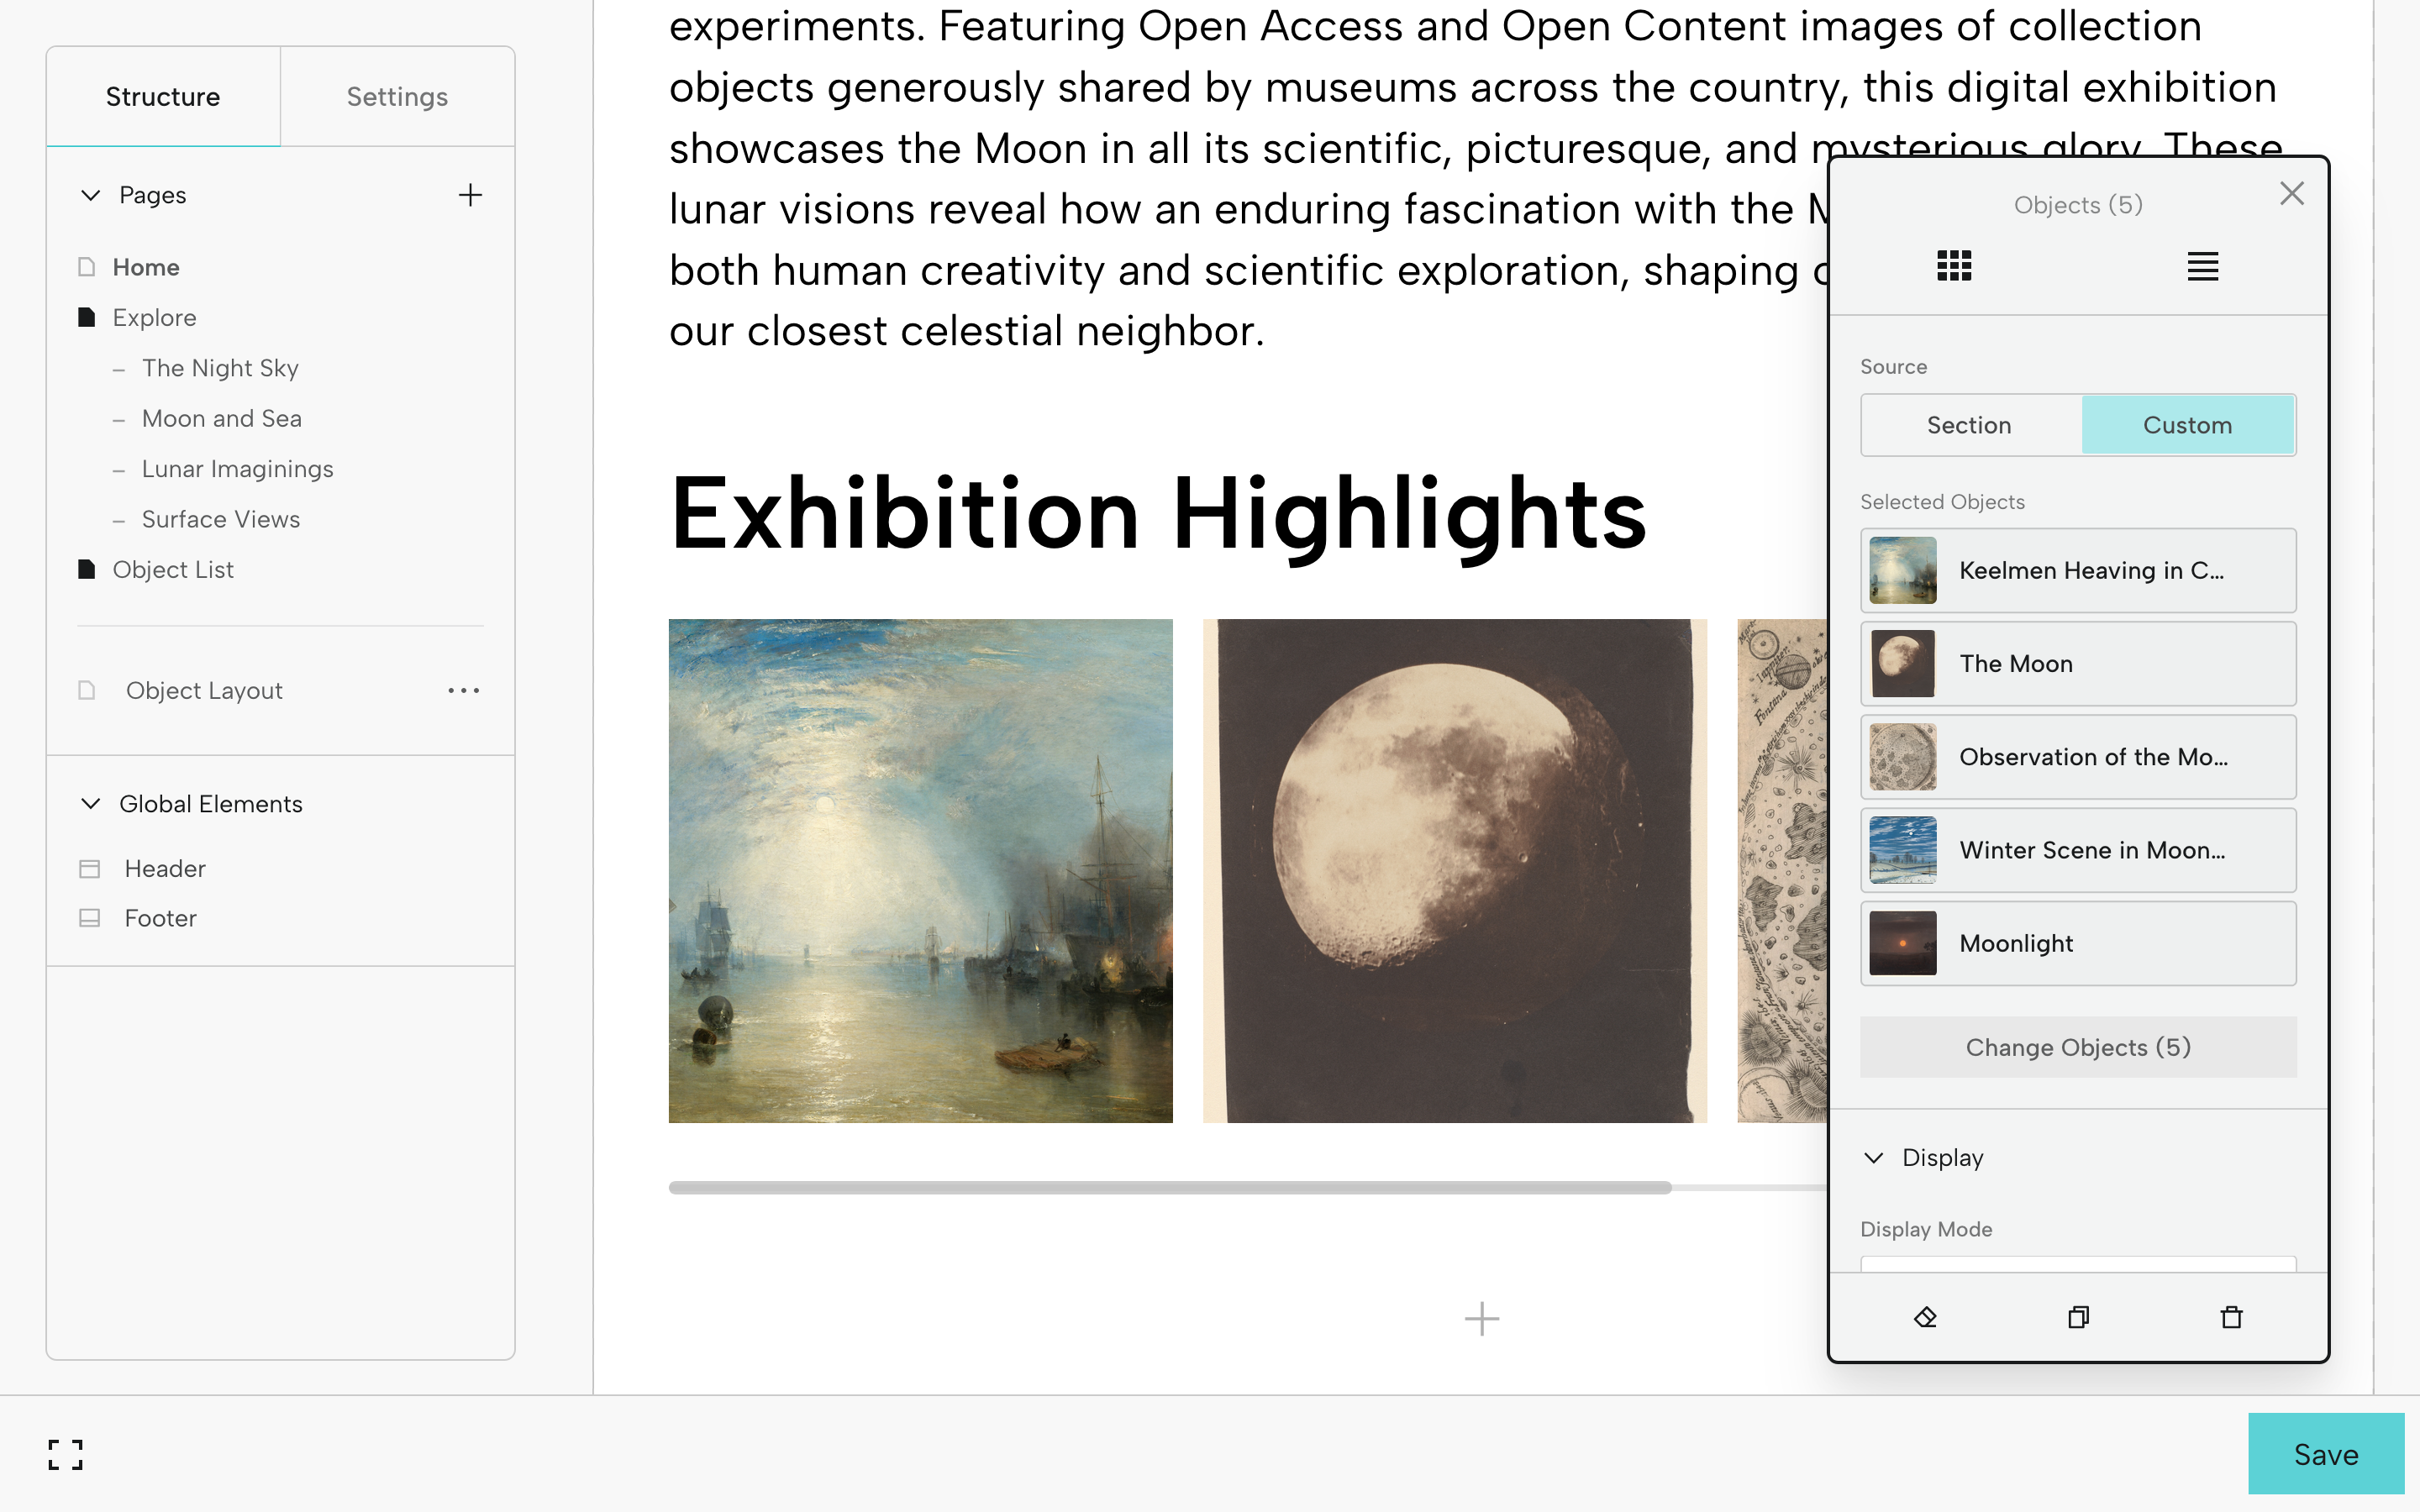
Let's add an Objects Block.
You can choose to use objects from an exhibition section or create a custom group of objects. Here we've selected Custom and added 5 images. Drag and drop the order as preferred.
For the Display Mode, we've selected Carousel view.
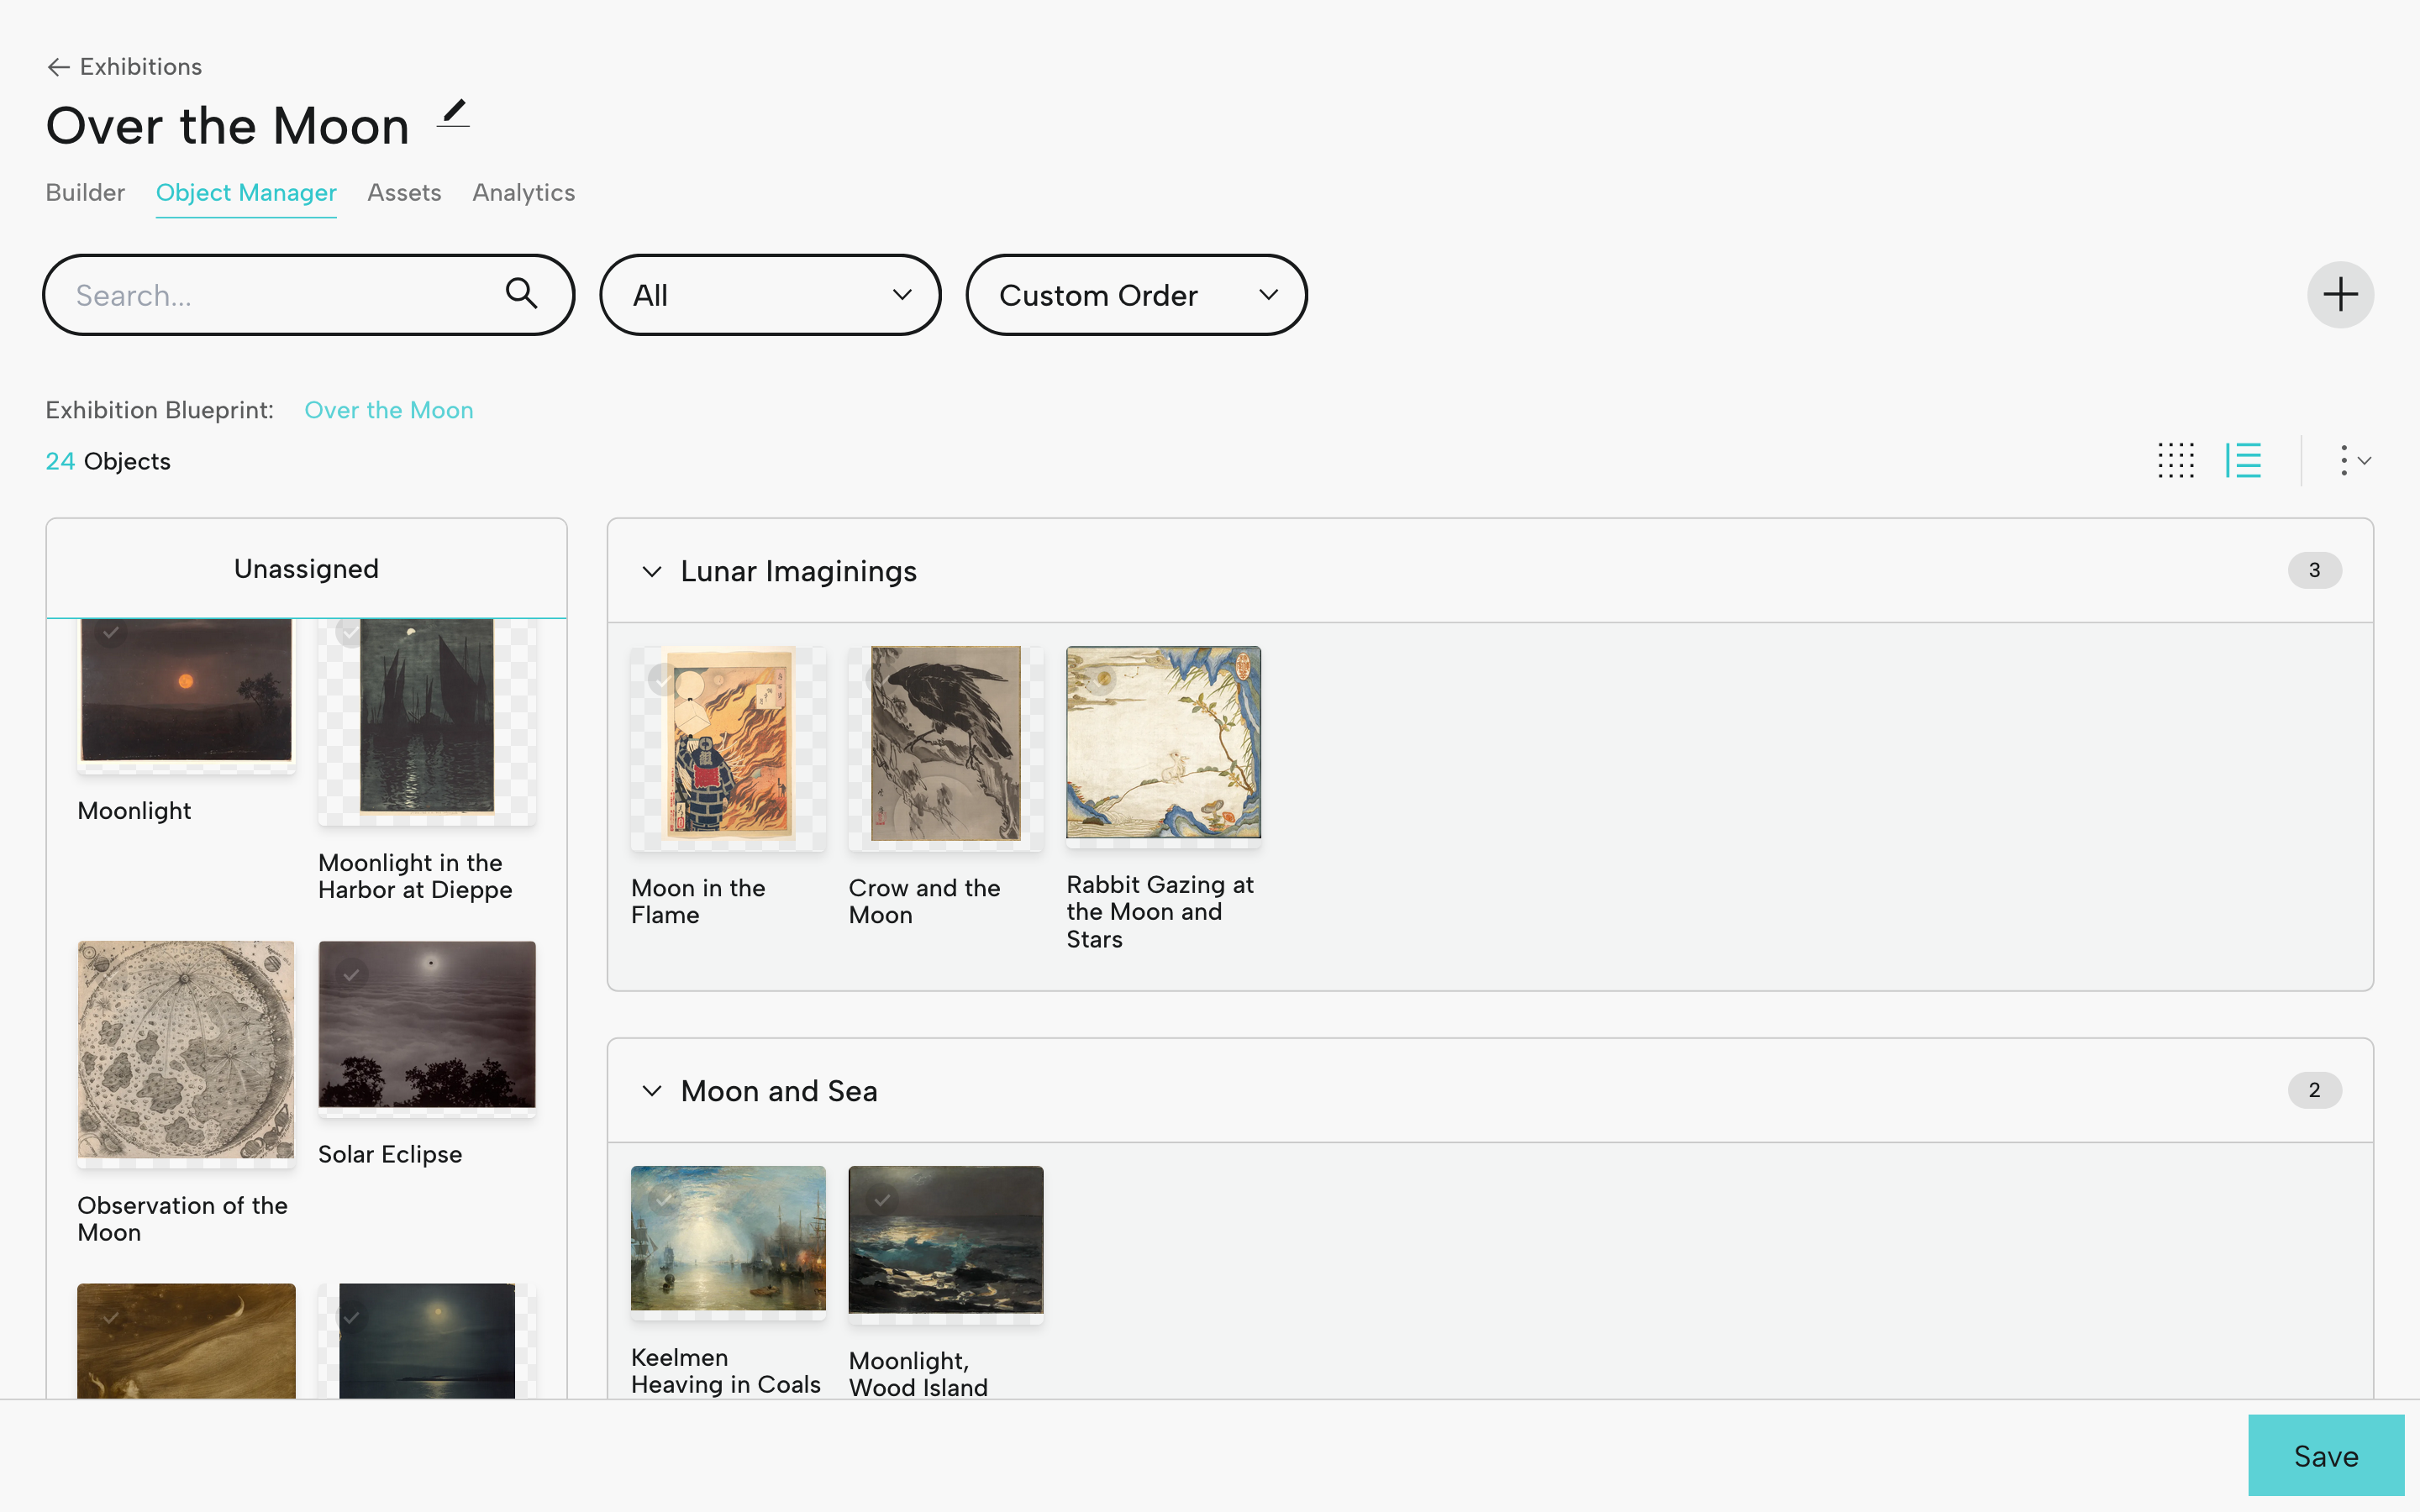
Step 6: Manage Objects in the Object Manager
Visit the Object Manager (in the menu below the exhibition title).
At left, you’ll see the primary images for your exhibition objects. Drag and drop into your sections, and reorder objects as necessary. Save when you’re finished. You can always come back to the Object Manager if you want to make updates.
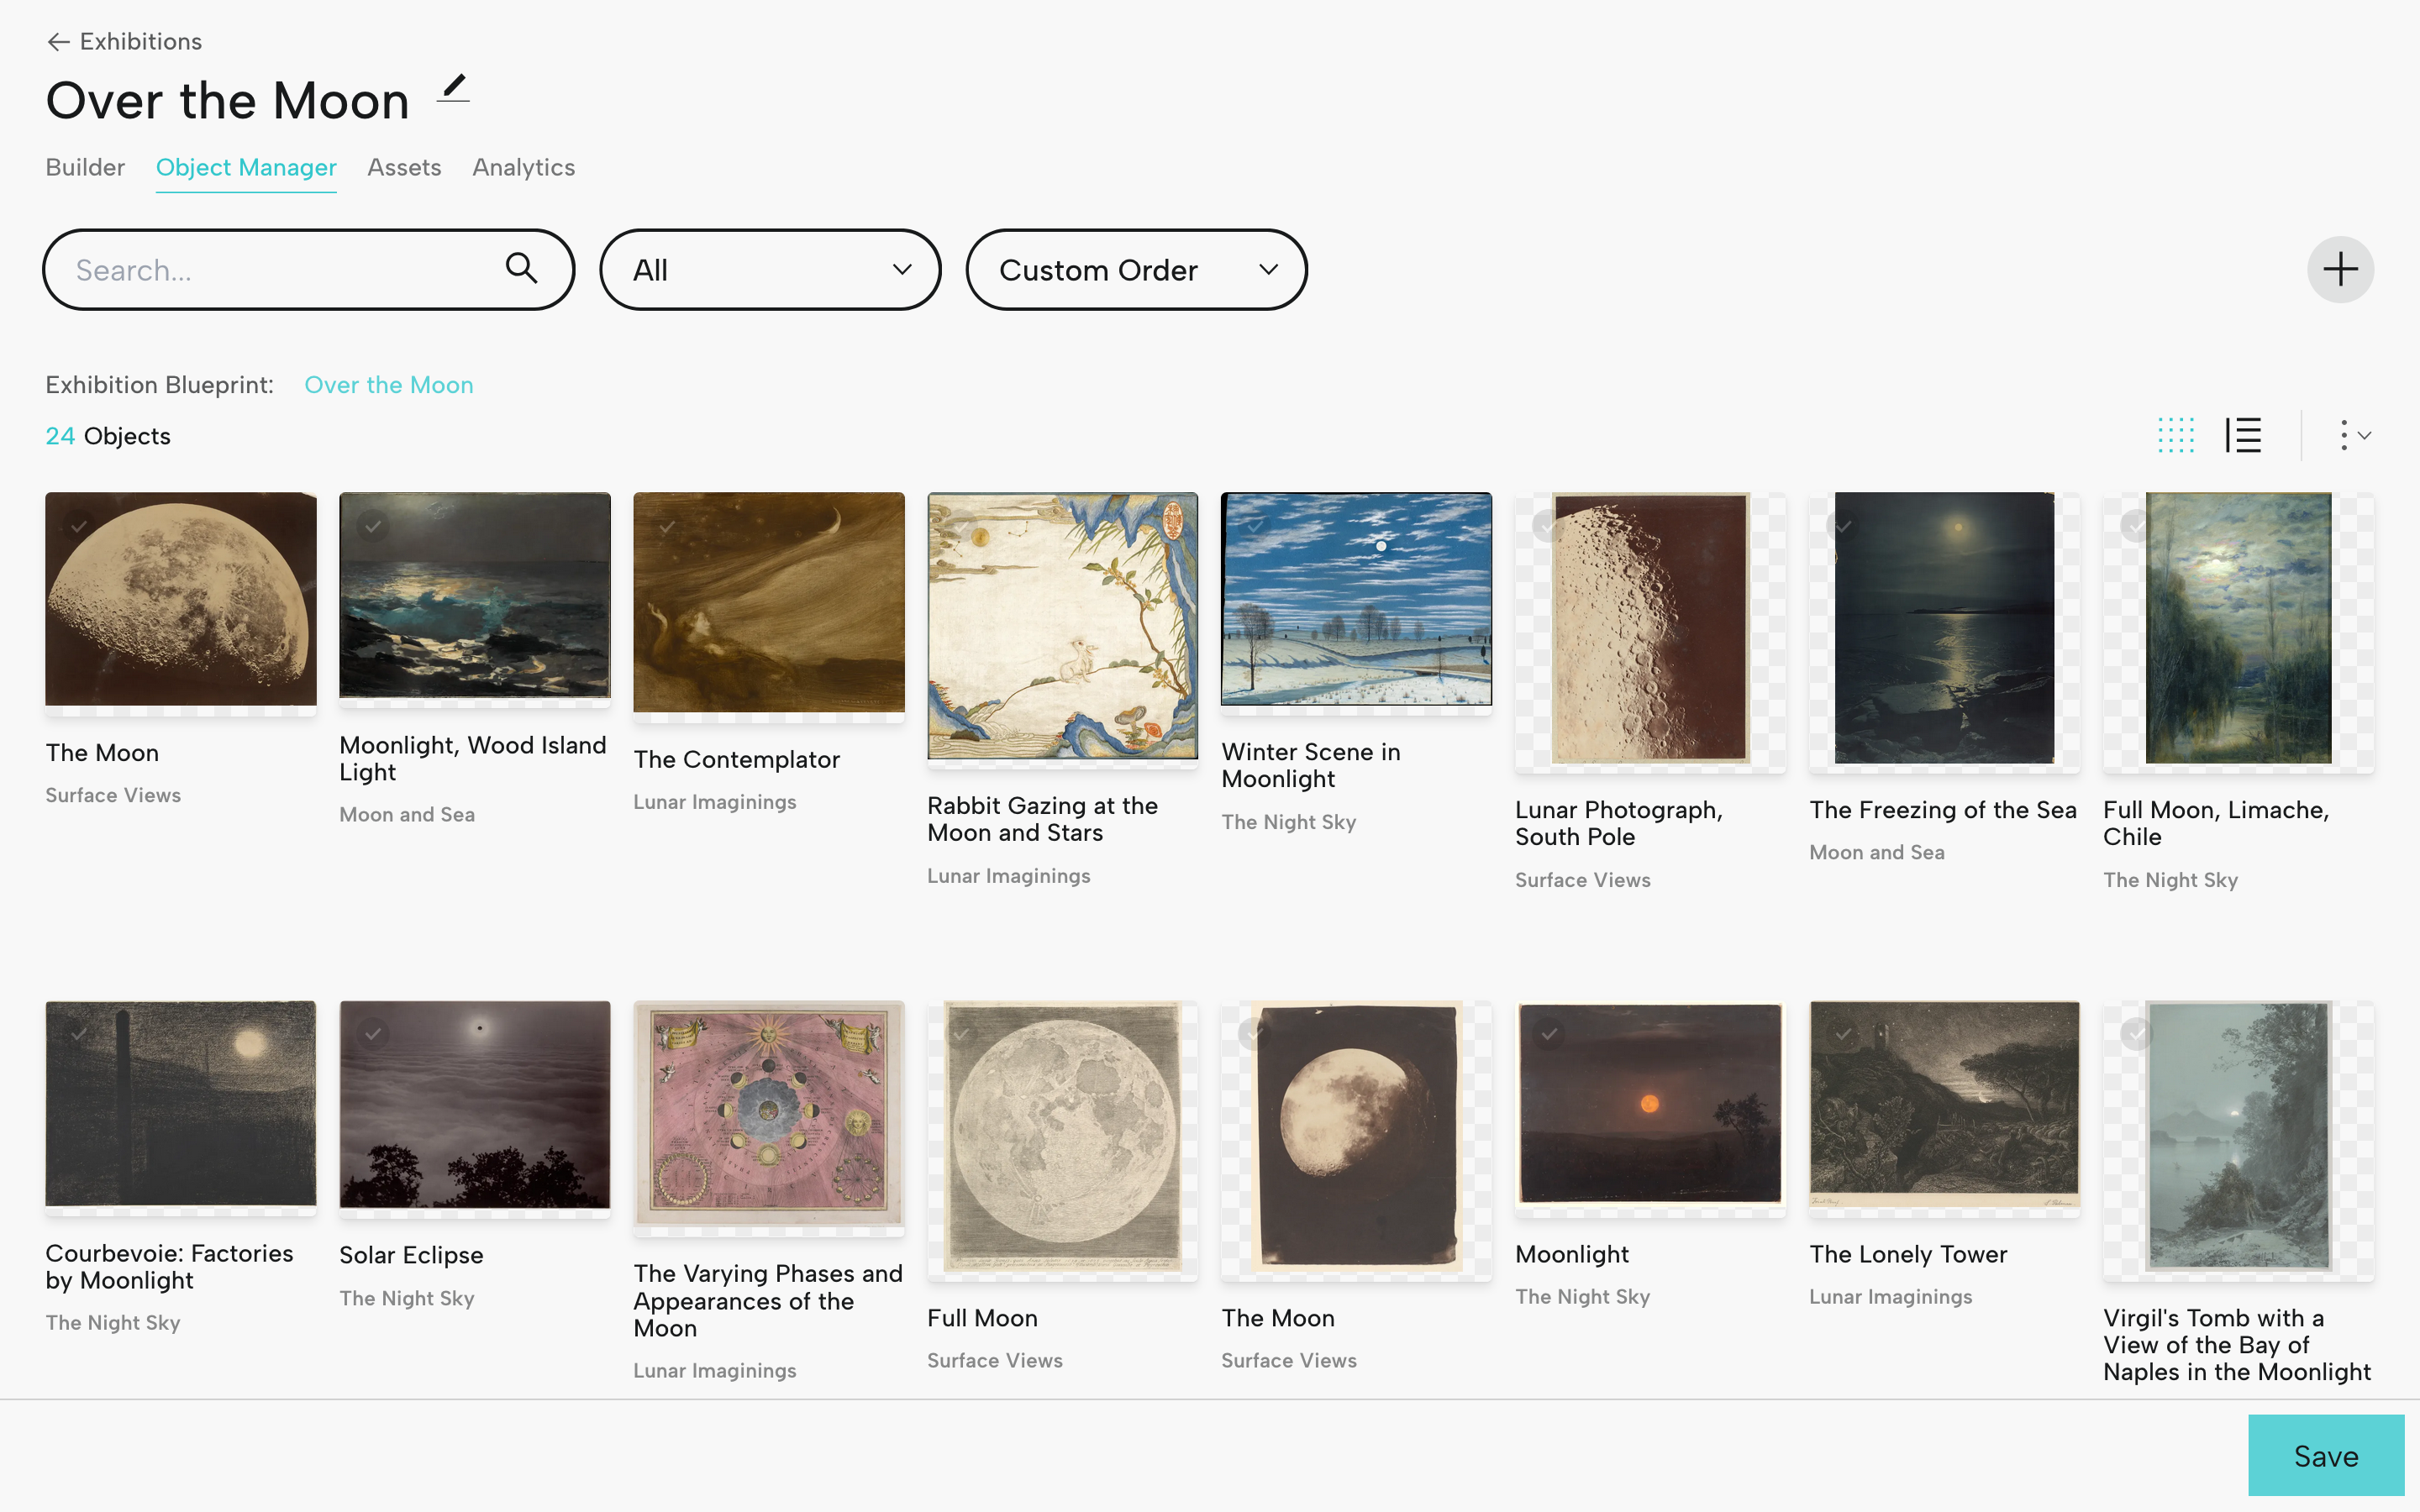
If you need to edit any object data, you can click on the title of the object in the Object Manager to go directly to that object's page.
Click the grid icon at right to view all your exhibition objects. This order will inform how objects are displayed when All is selected in an Objects Block (for example, in the object checklist).
Step 7: Adjust Object Layout
Let’s go back to the Builder (in the menu below the exhibition title), then to the Structure tab at left, and select Object Layout.
This is where you’ll set up the display format to be used for every single exhibition object. Think of this as a template for displaying object information and object media files.
Click one of the Object Fields (Object Artist, Object Date, etc.). This will open the Universal Editor. You can decide whether or not you want show the Field Label (for example, the word "Artist" or "Date"), and you can make updates to Typography, Colors, and Spacing.
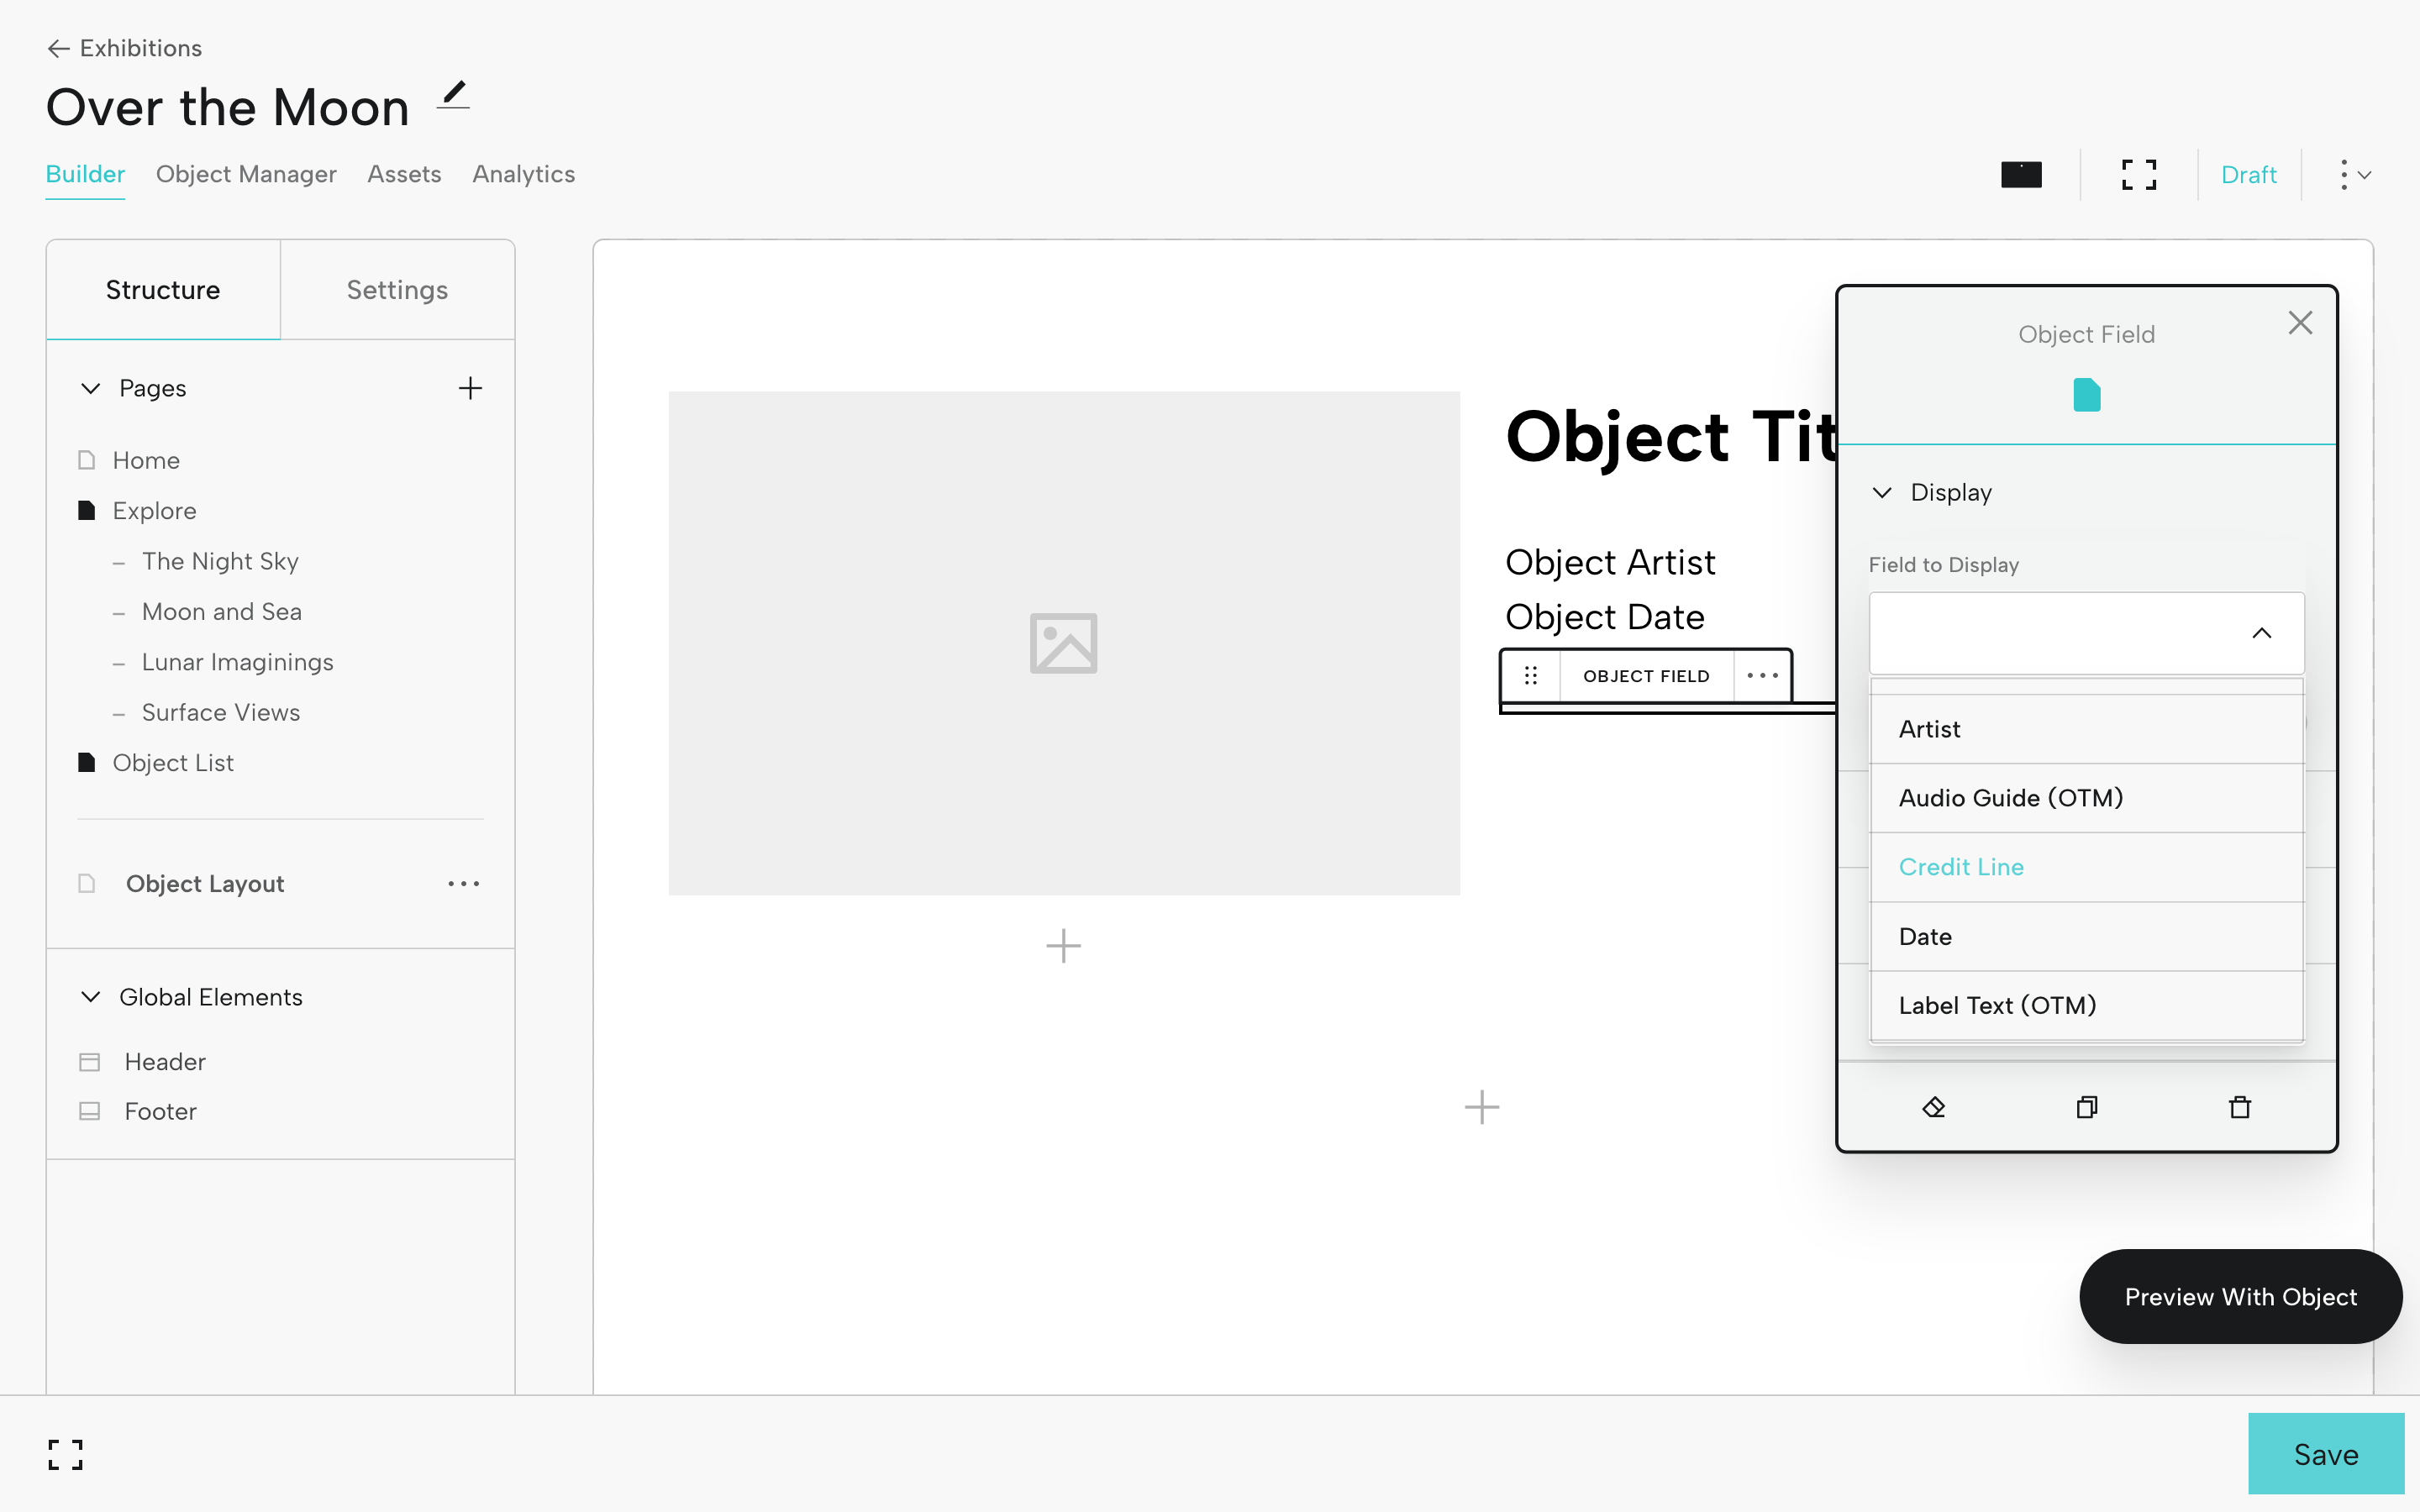
Add a new Object Field by clicking the + icon below. Select Object Field. This will bring up the Universal Editor where you can select a new field for display. The fields you see are generated by the Exhibition Blueprint.
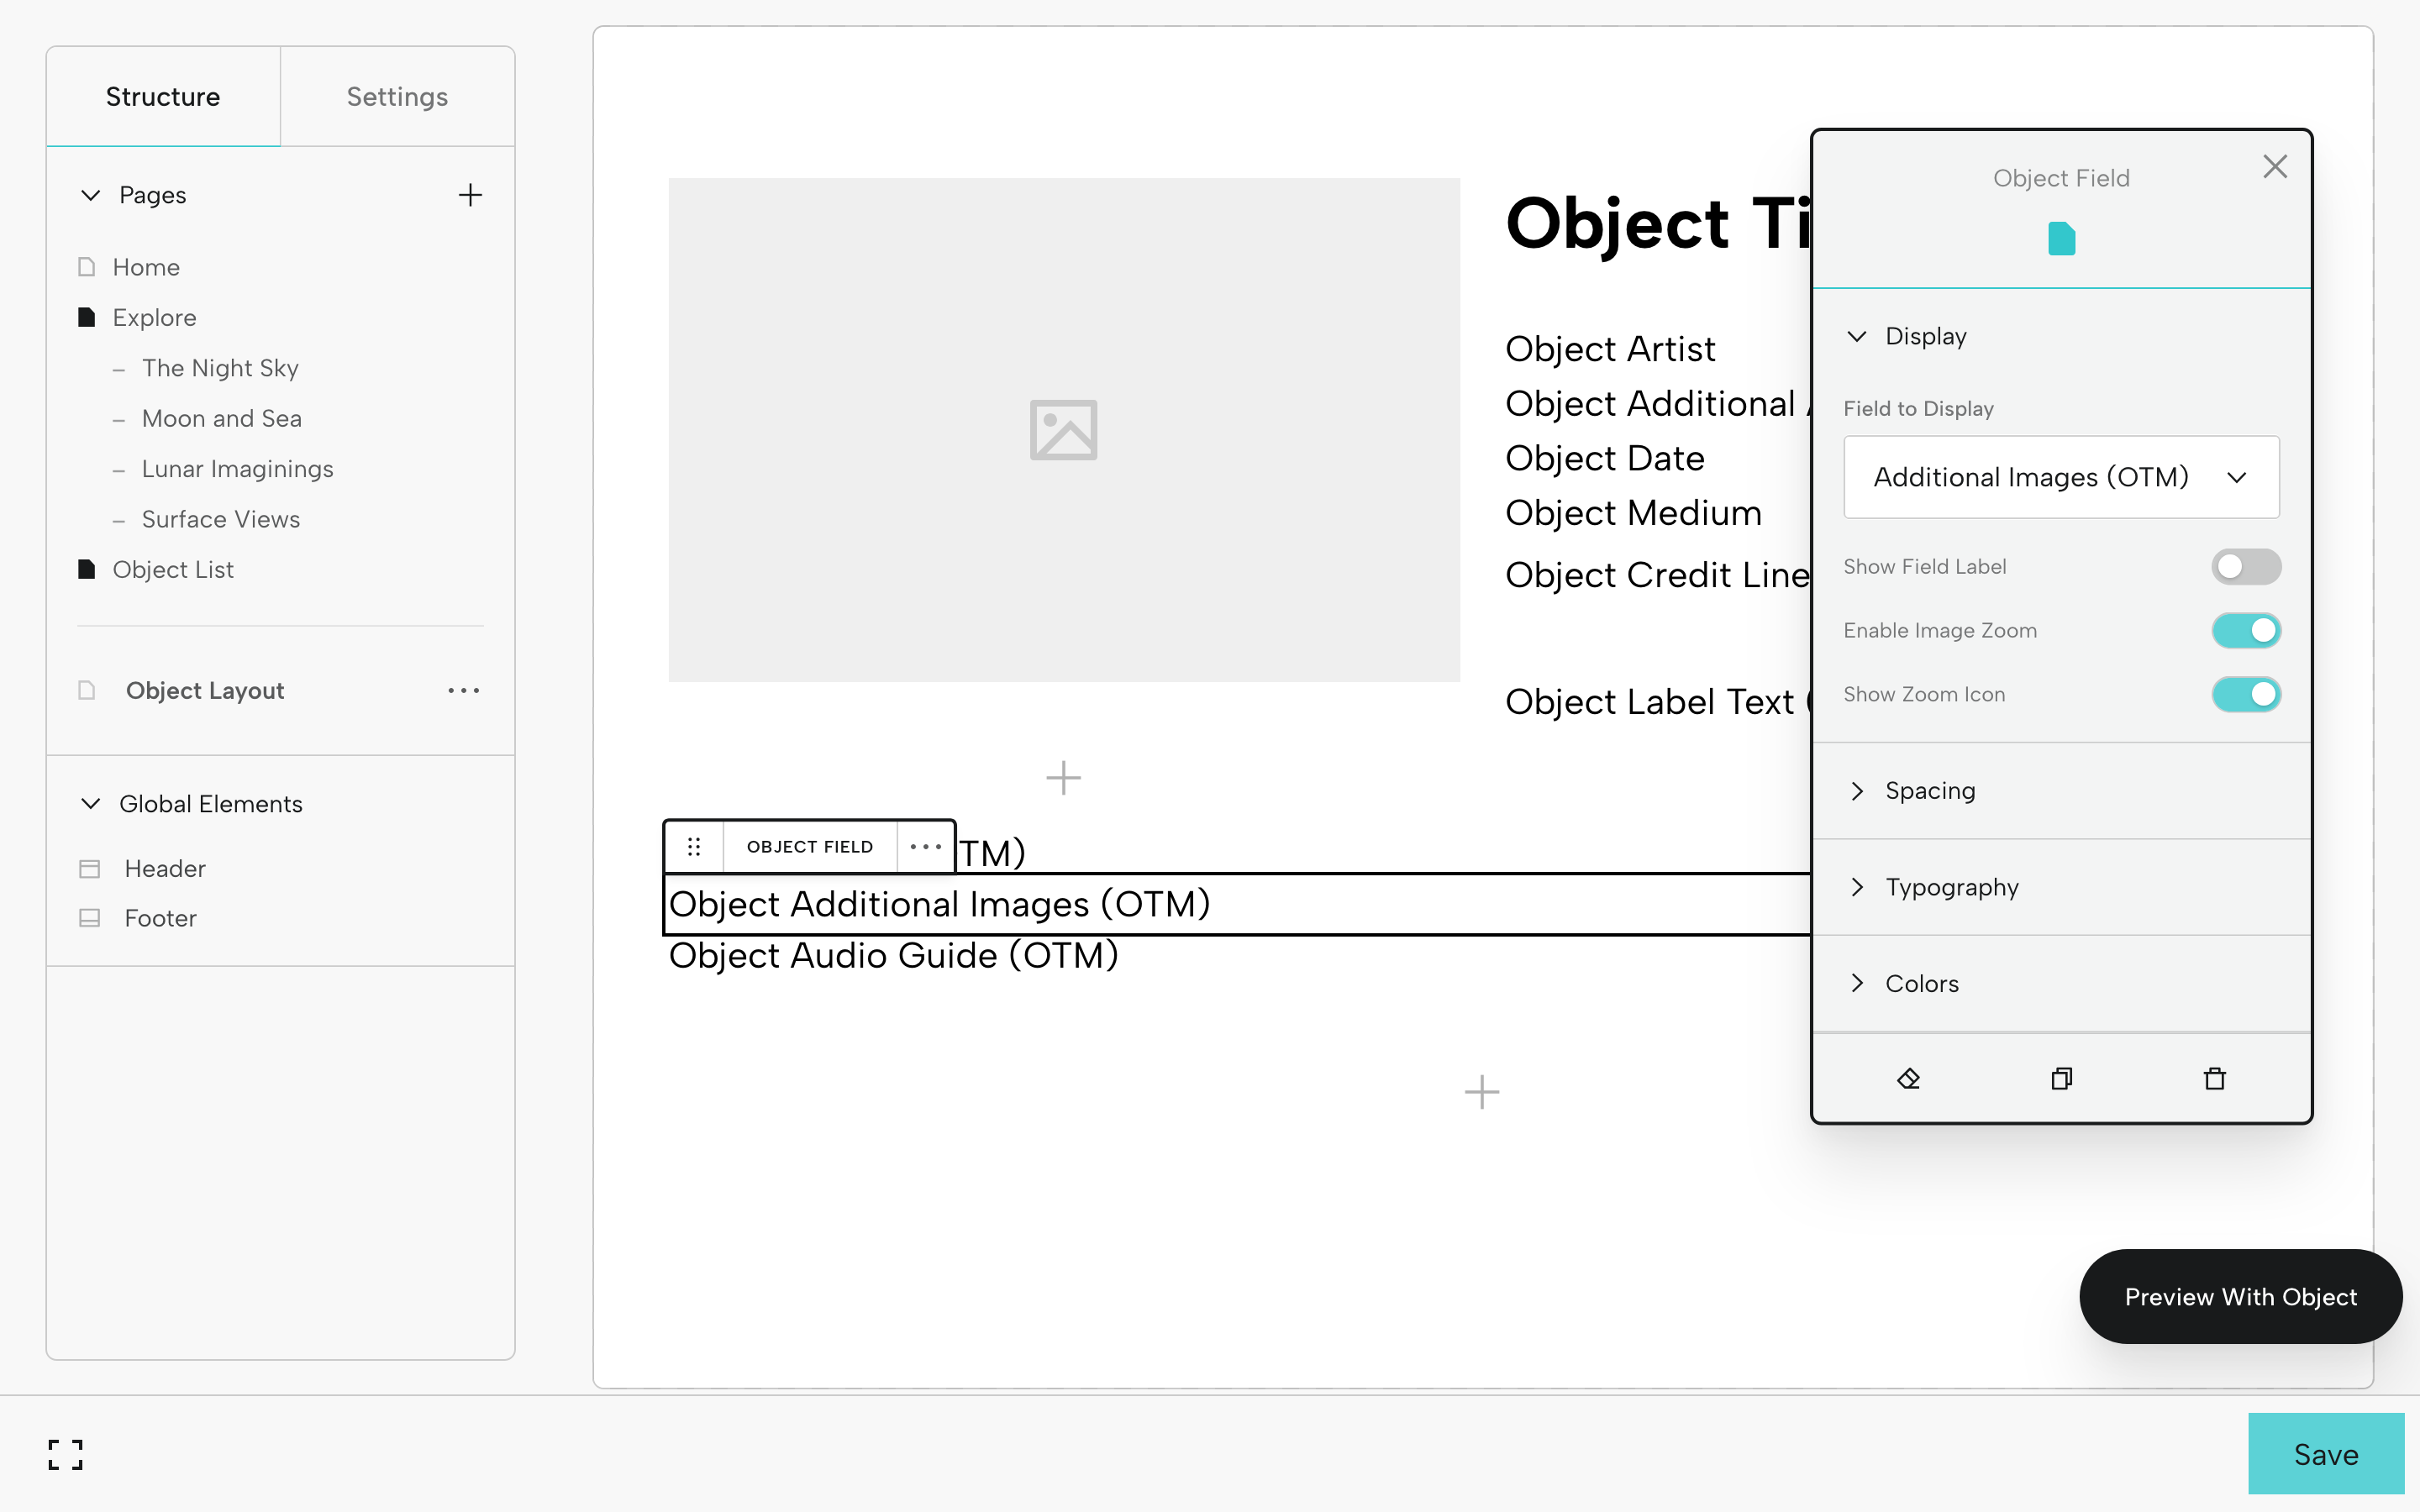
Now click the lowestmost + on the page and add any fields you created for additional files (images, audio, video).
To preview what it will look like when you view an object in the exhibition, click Preview Object in the lower right hand corner, and search.
When you preview an object, you’ll see the primary image, data, and any additional media files you've added.

Step 8: Set Up the Header and Footer
Update the Header and Footer for your exhibition in Global Elements (under the Structure tab).
Your Header and Footer will appear on every page of the Exhibition. If you do not wish them to display on any page, go to Settings, then Display, and toggle off Show Header and/or Show Footer.
Header
Click Header and the Universal Editor will open.
Start by determining your preferred Layout.
You can also update Typography, adjust Spacing, and choose Colors.
Does your exhibition have a graphic title treatment that functions as a project logo? You can add it in Title Image. Once added, this will appear in your Assets.

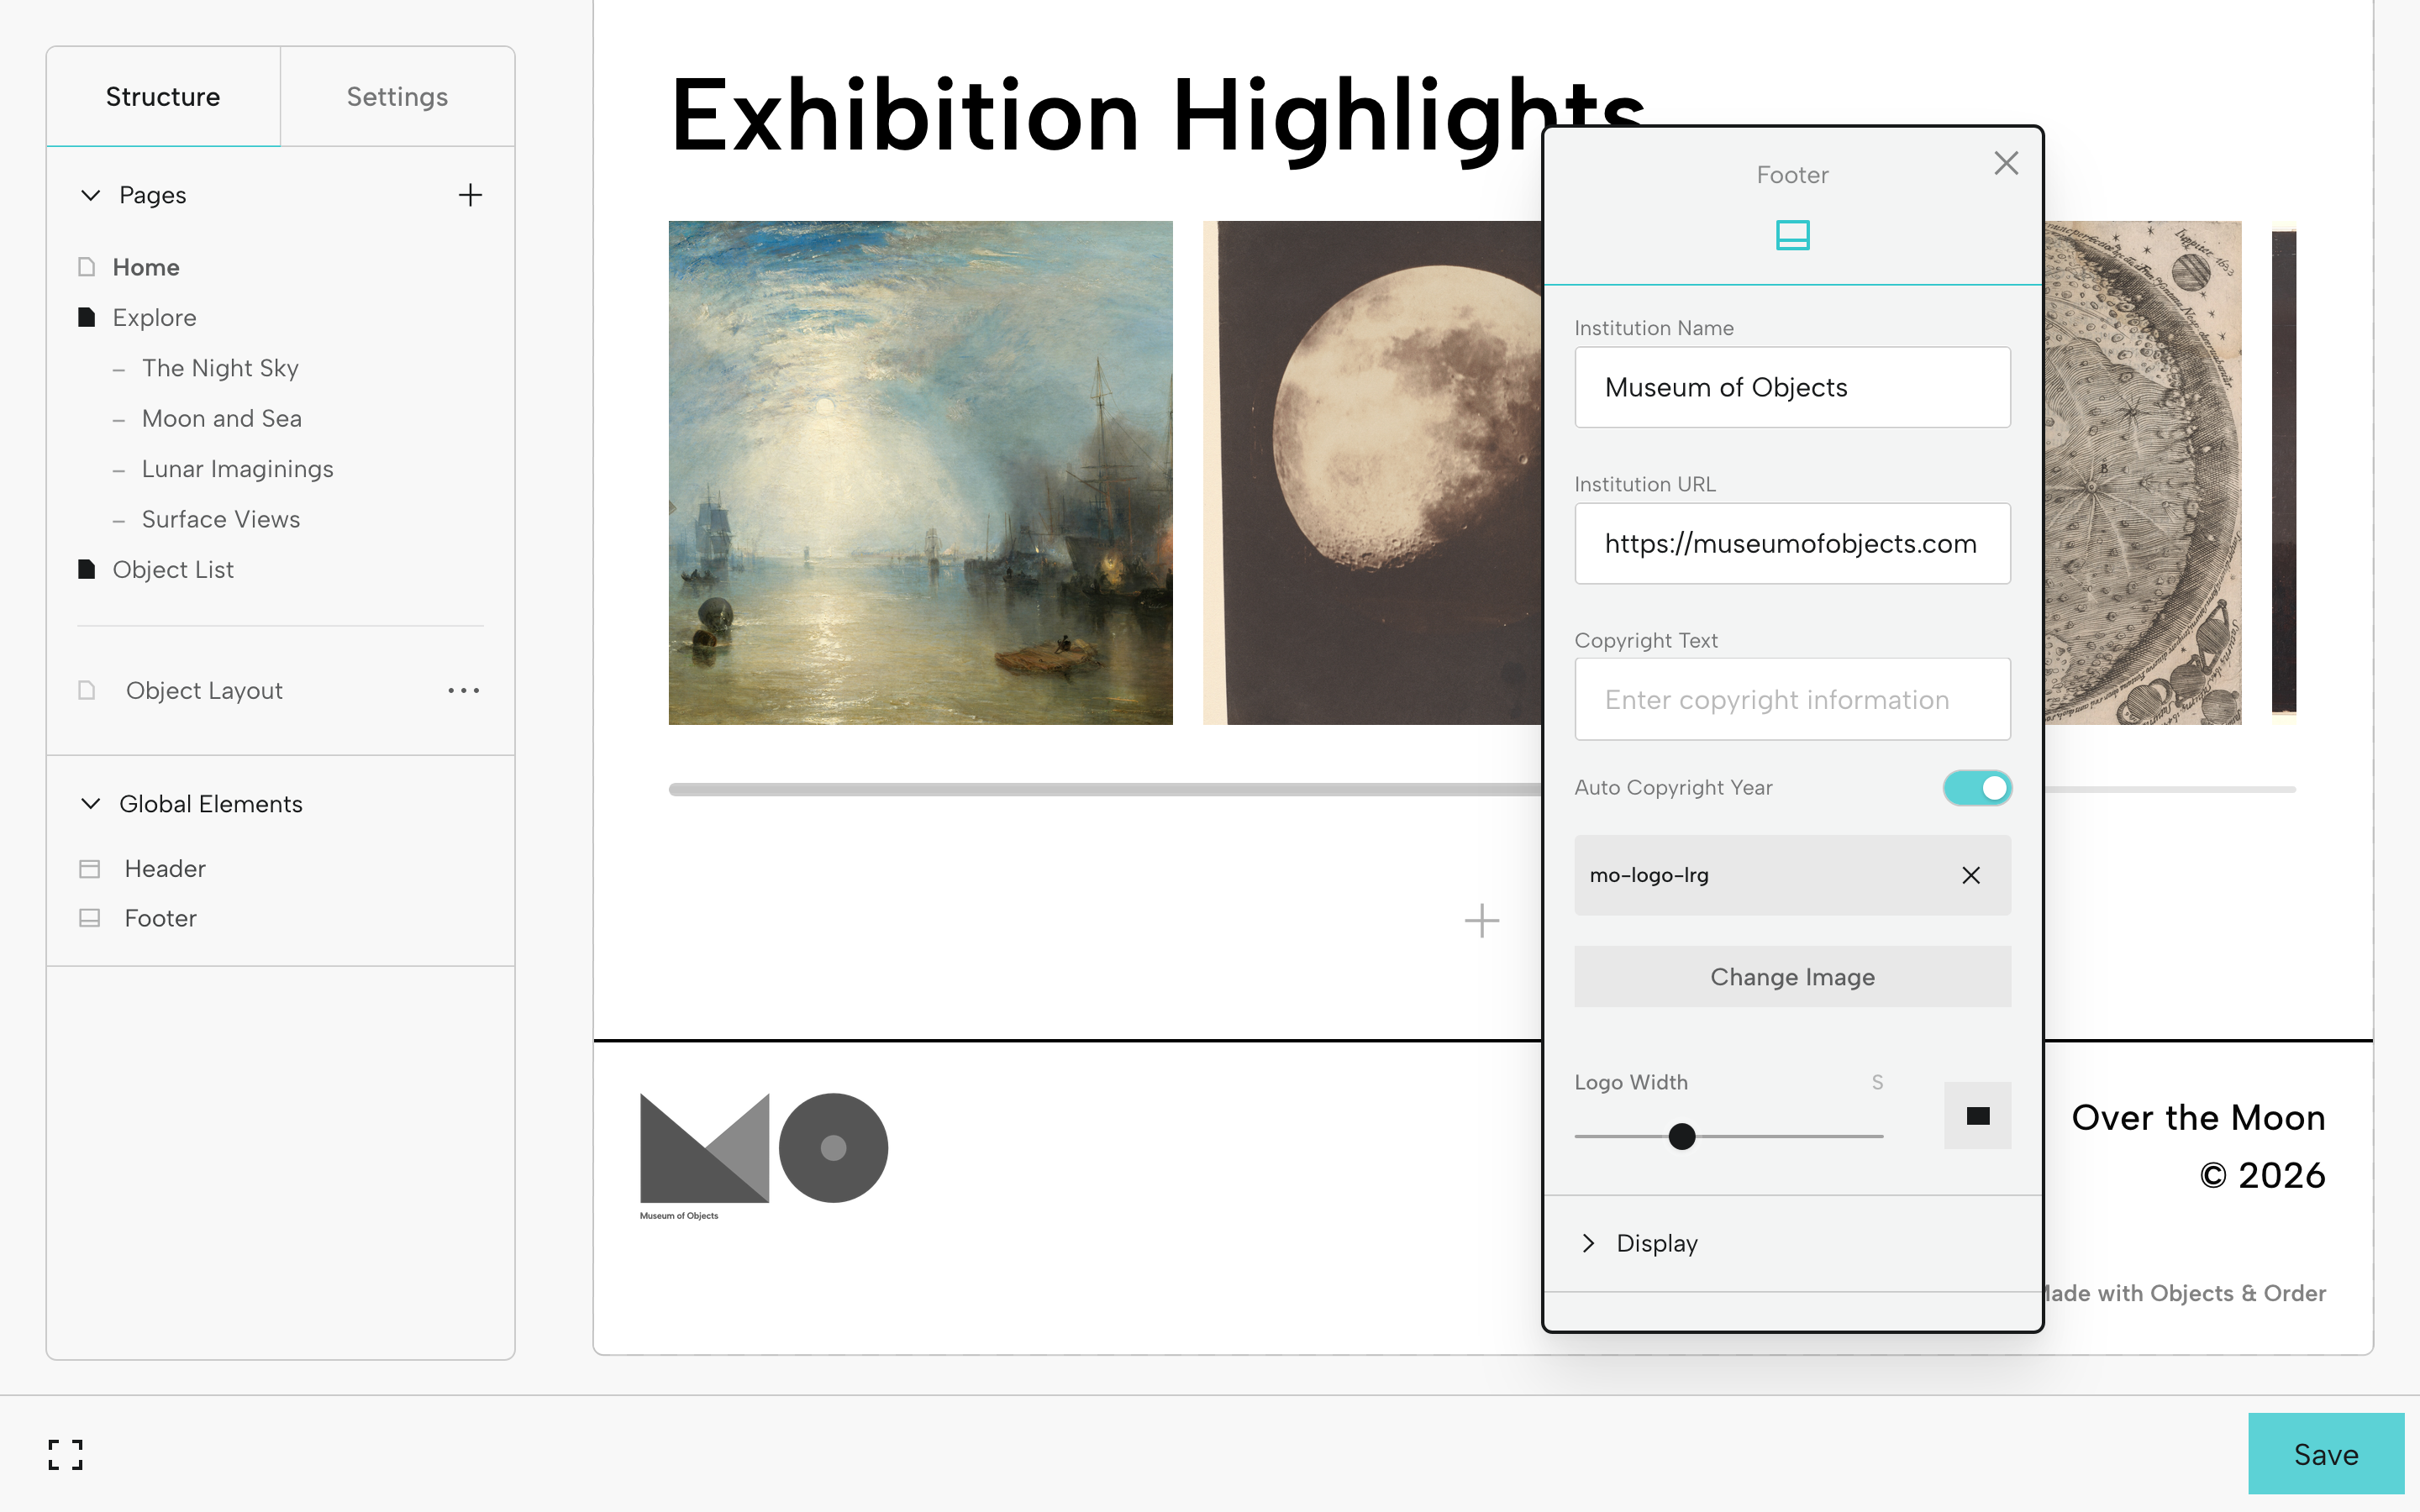
Footer
Click Footer (or just click the Footer area in the Viewer) and the Universal Editor will change.
Add your Institution Name (if applicable), URL, and text for the copyright statement. You can also add an Institution Logo.
Adjust your Display, Spacing, Typography, and Colors.
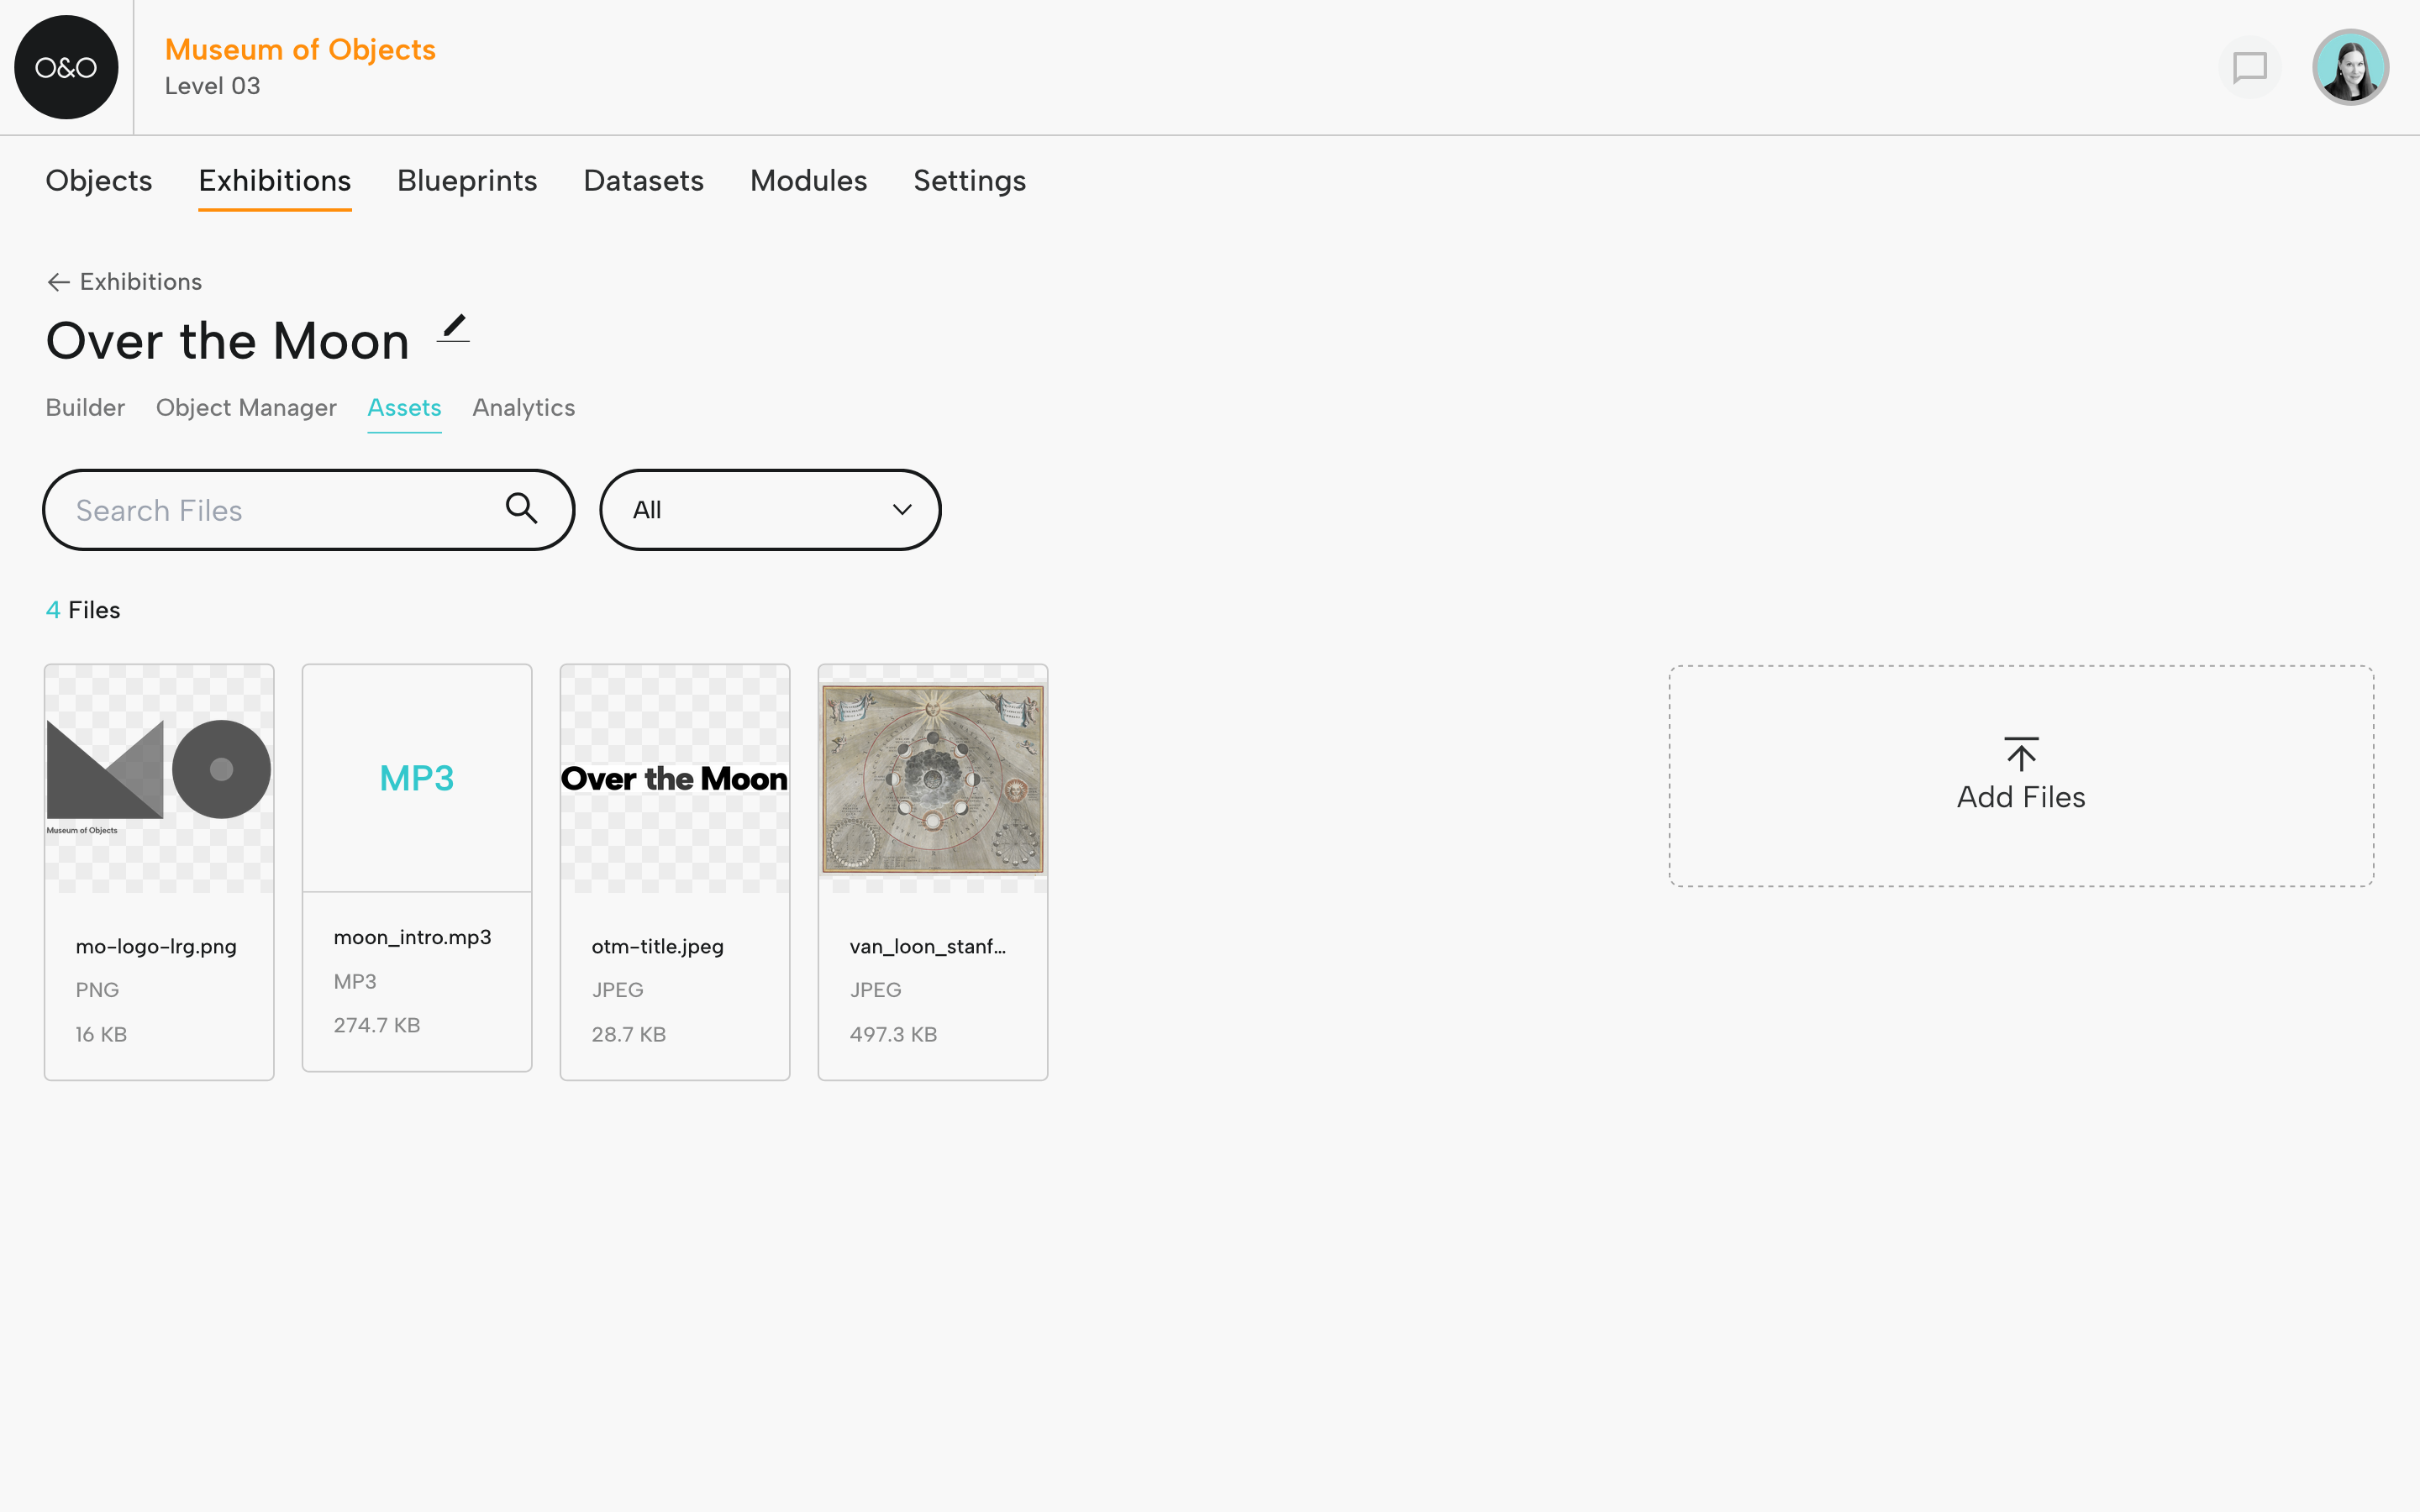
Step 9: Add Exhibition Assets
To add assets for your exhibition, like an institutional logo, a map, a graphic, an artist's portrait, an audio file, etc., navigate to Assets and add files. Click the file to add captions, alt text, credits, and rights information.
Step 10: Set Up Your Pages
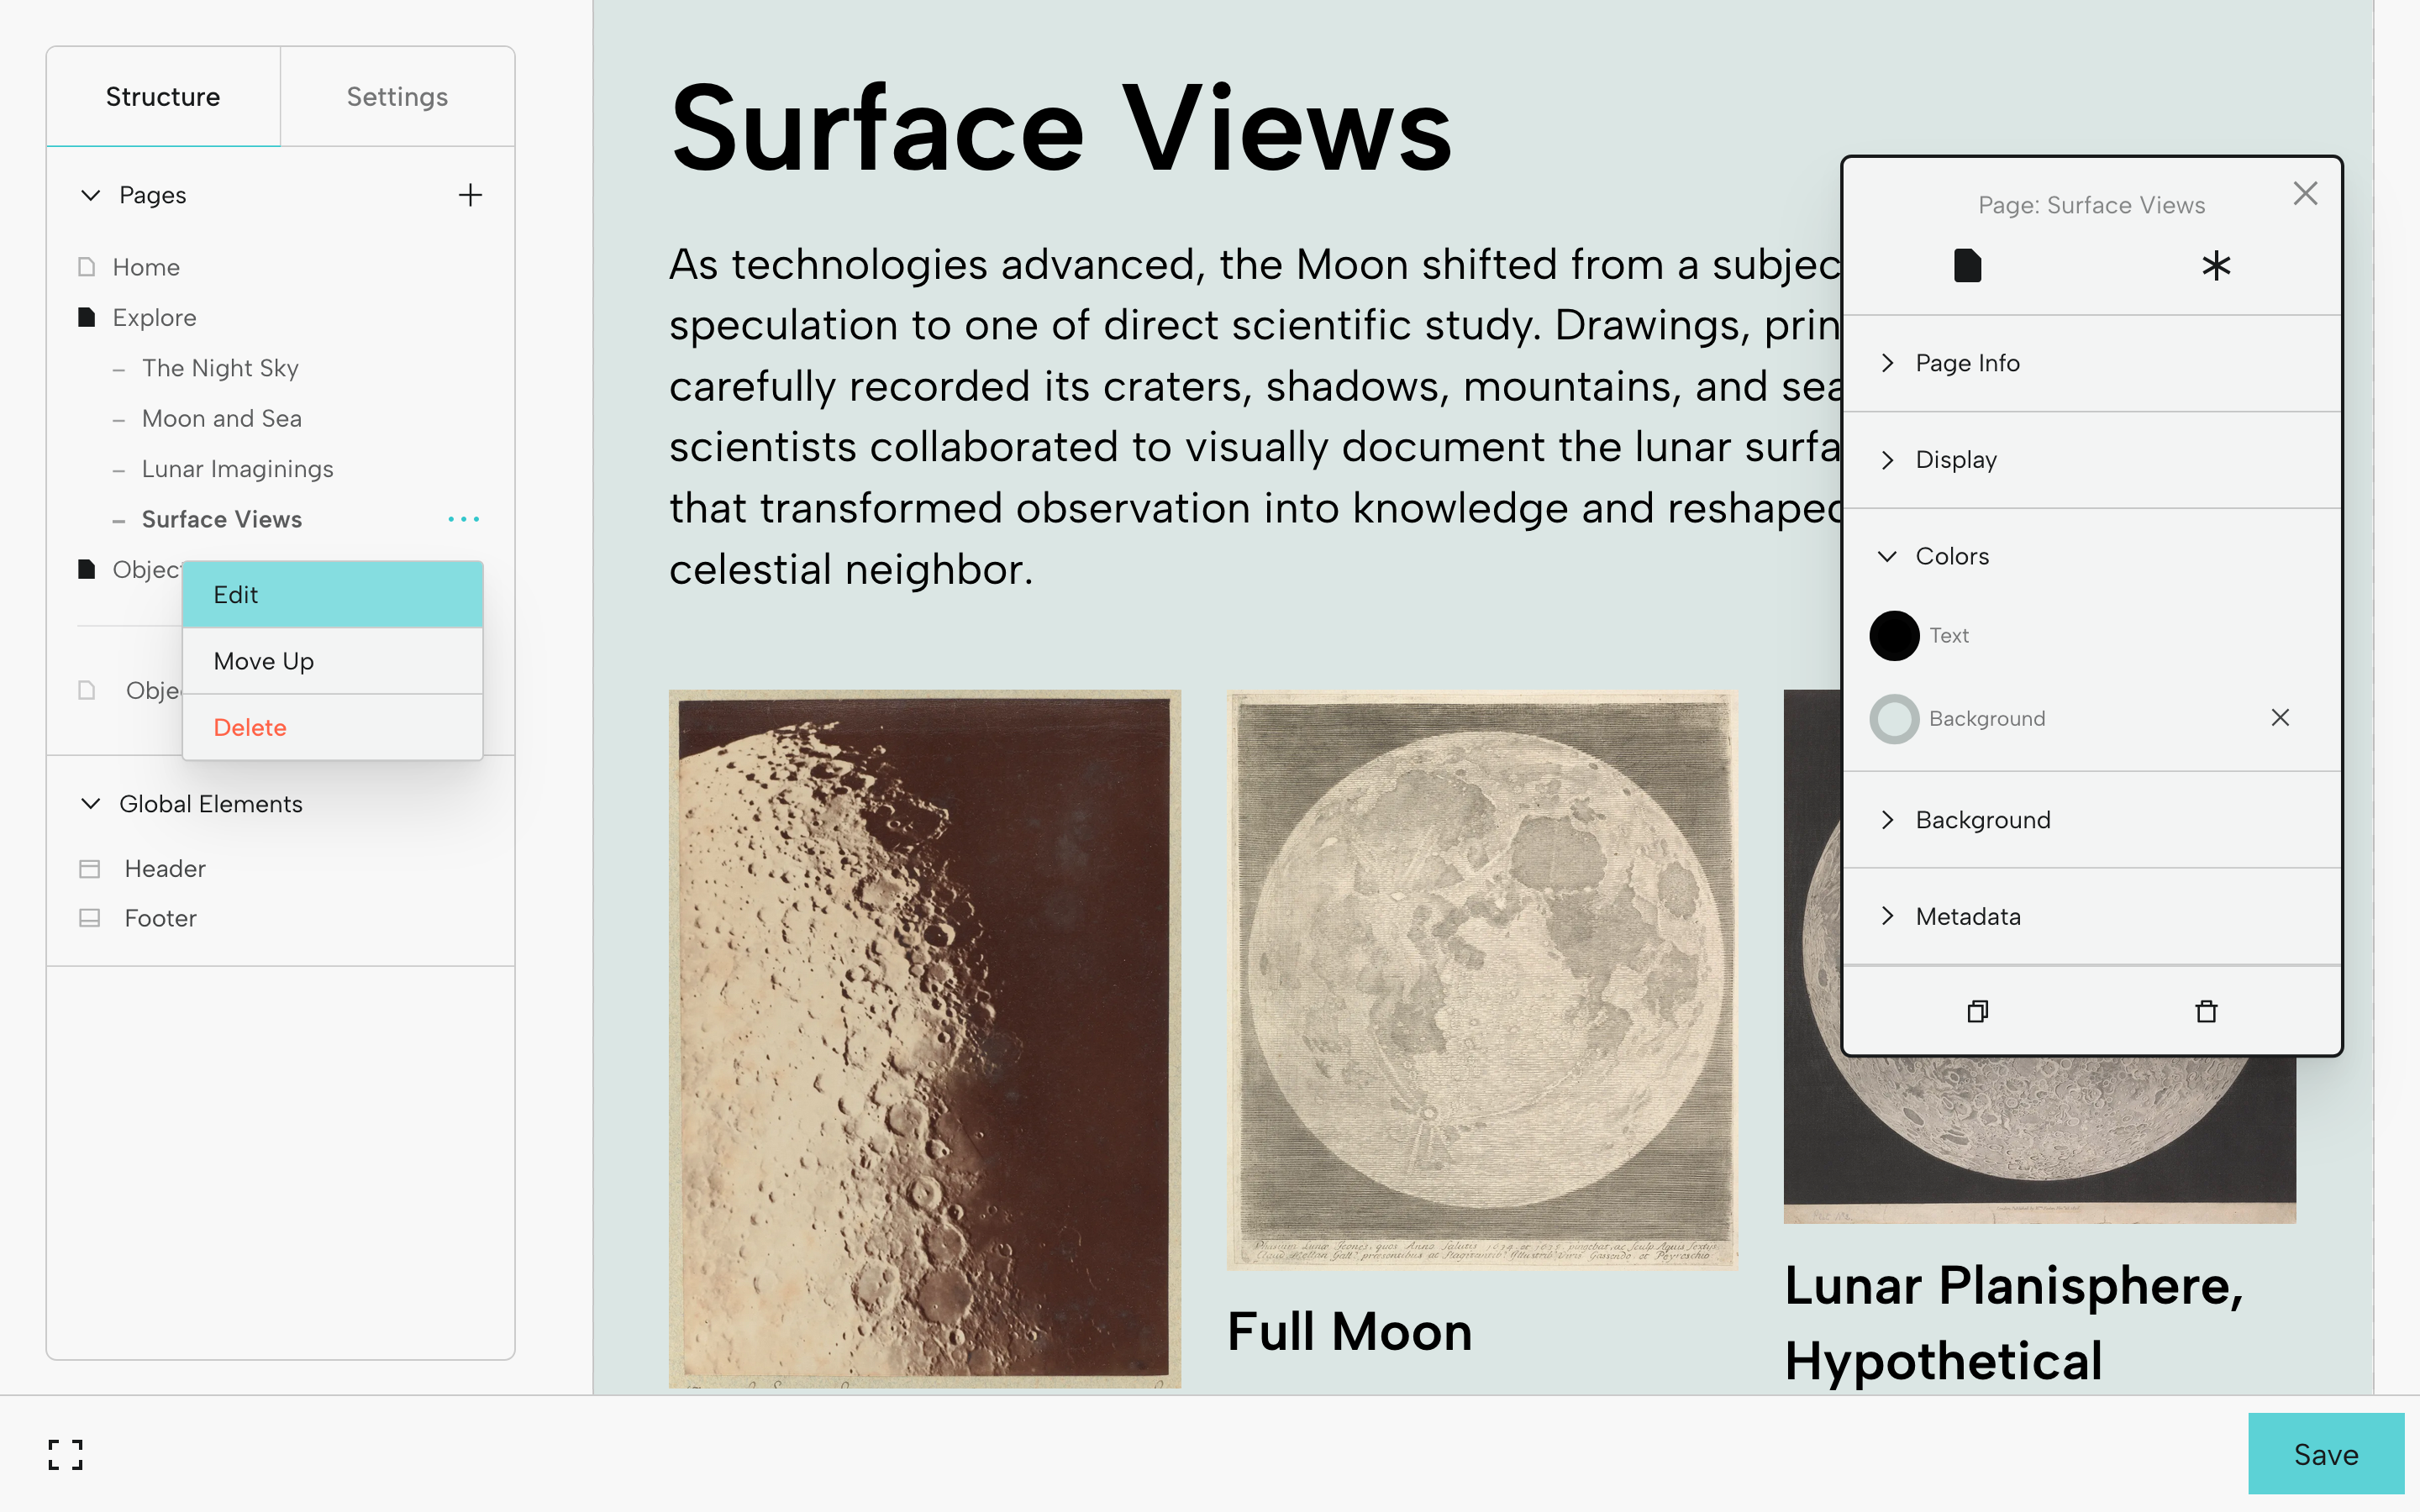
To select a page, below the Structure tab, hover over the page name. You'll see the ellipses icon (...*). Click it and select Edit. Now the Universal Editor for the page will appear.
For any page, you can select text and background colors, and this will override choices made in Settings. Let's change the background color of this Section page, "Surface Views." The Universal Editor displays the page title.
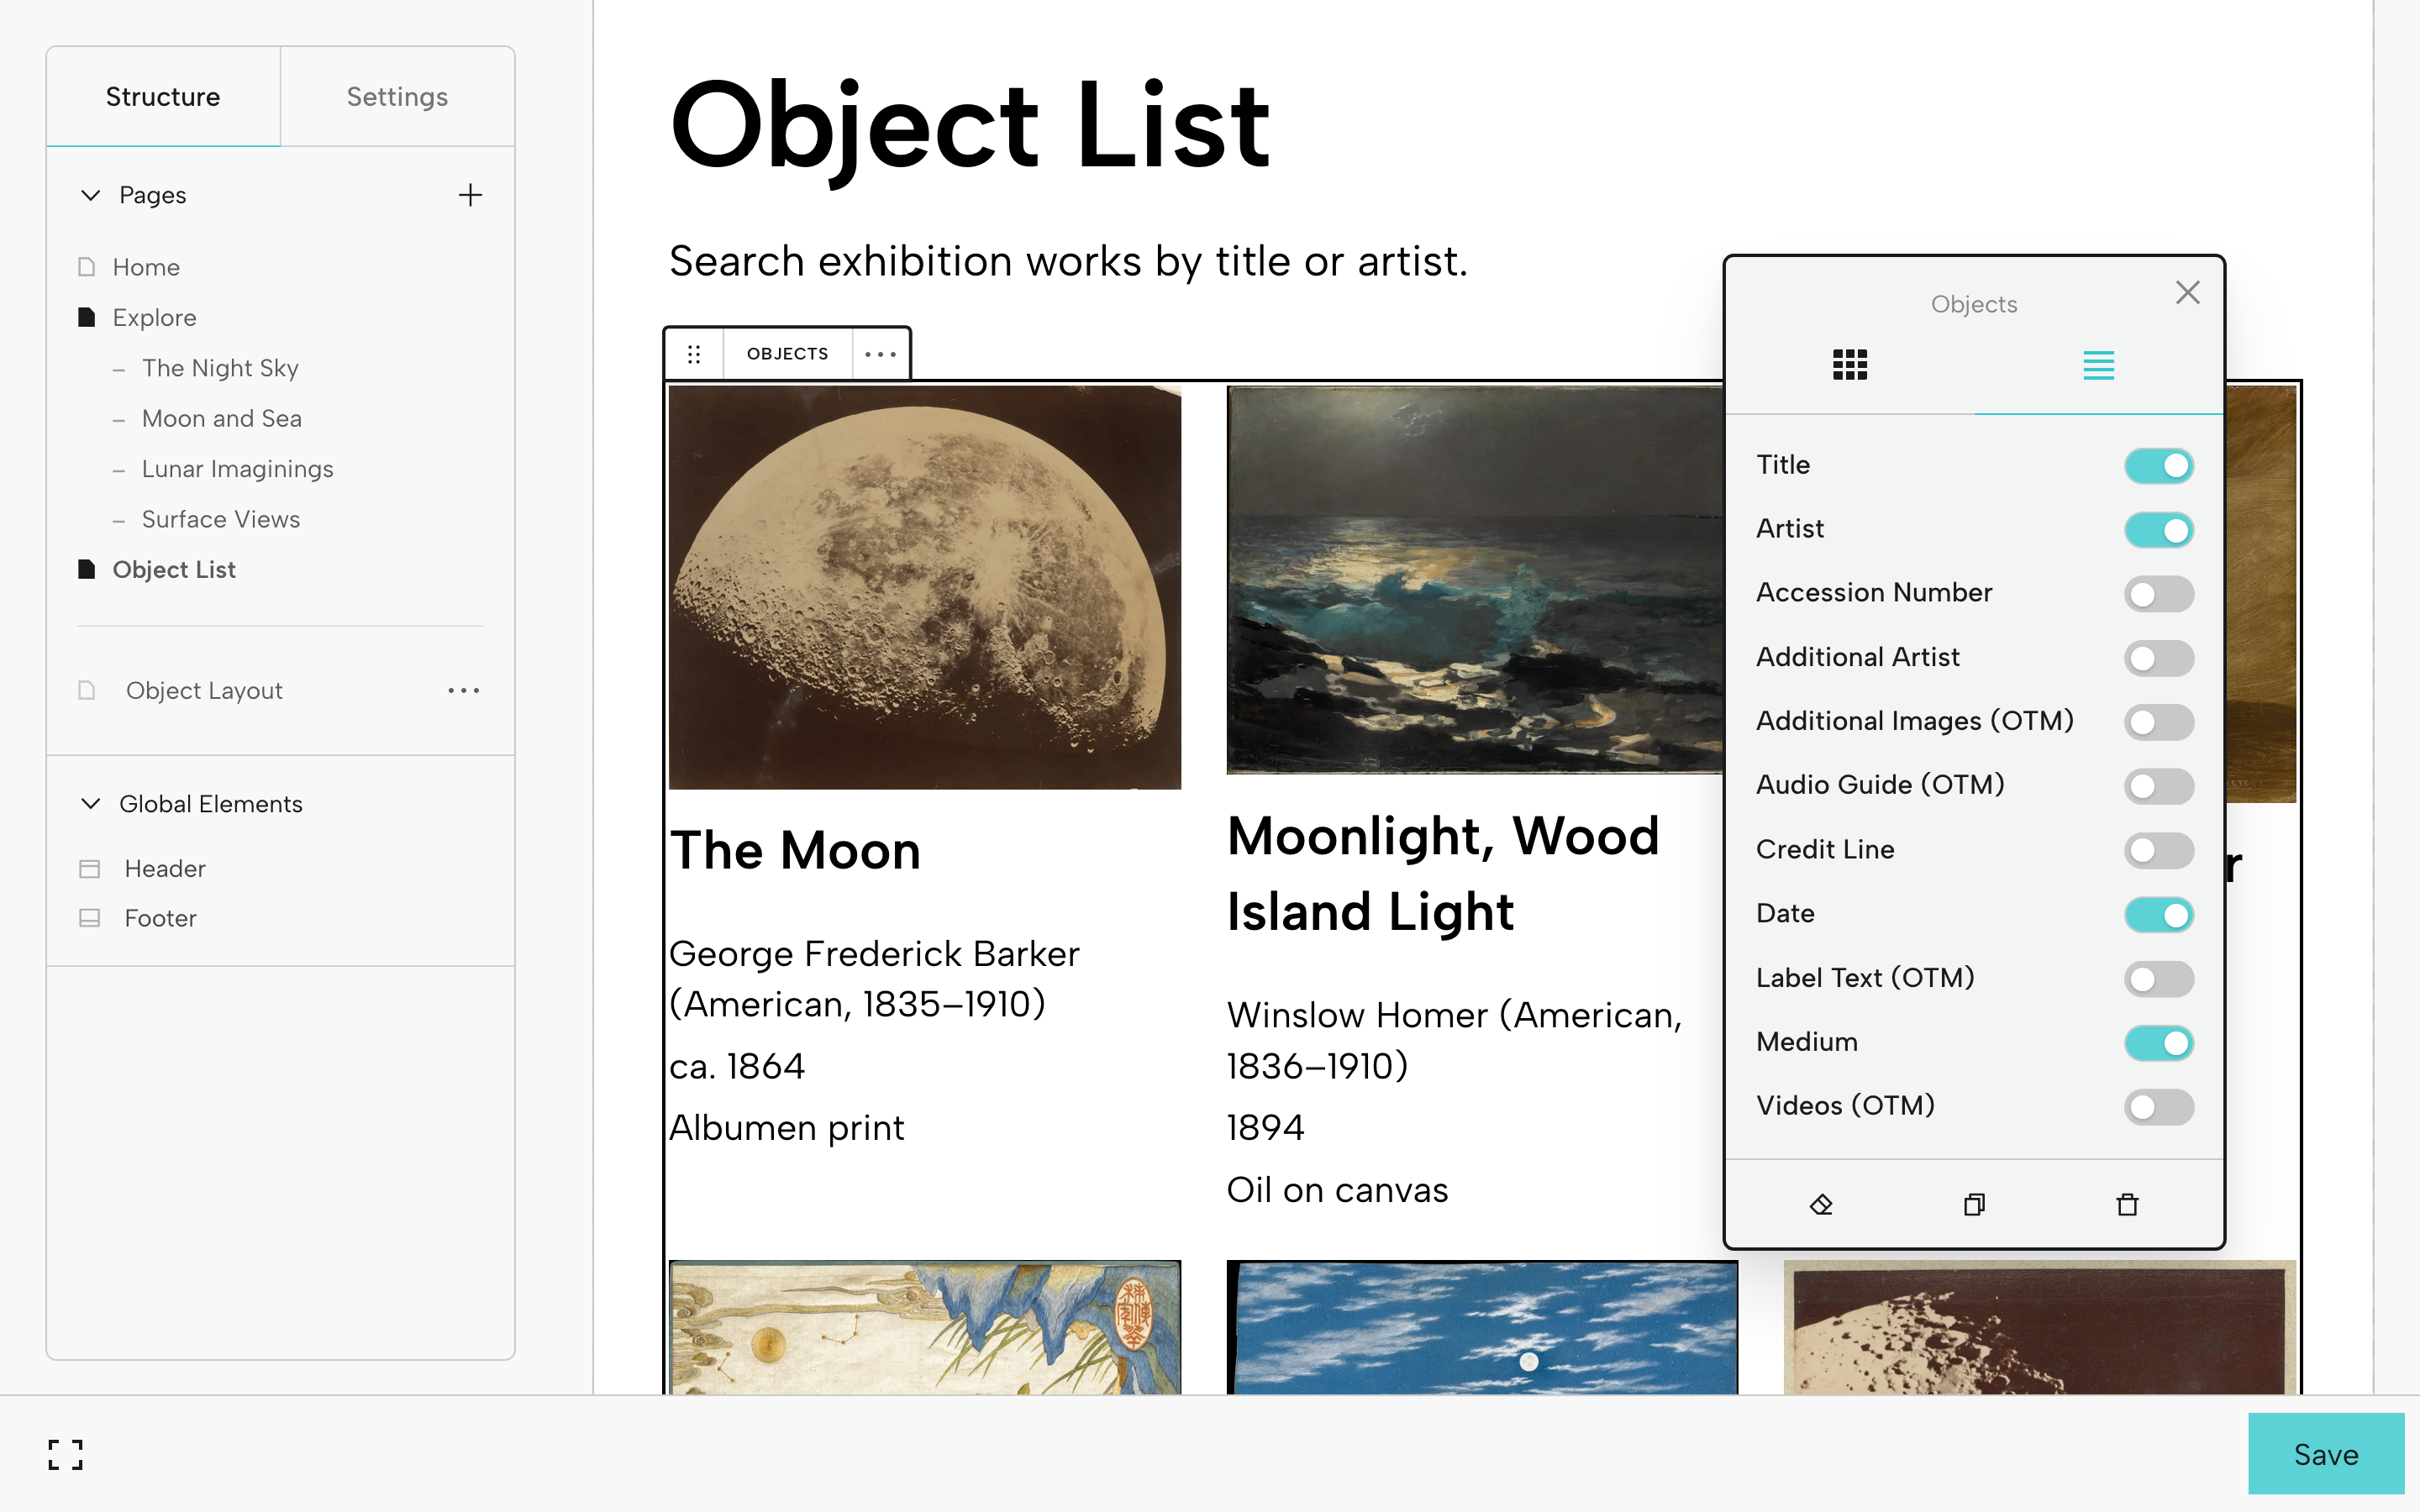
Now let's take a look at the Object List page.
Click the objects to bring up the Universal Editor for the Objects Block. You'll have the option to determine how many columns you want to display and whether you'd like to display images as a grid or a list.
Click the Fields tab (icon with 4 lines near the top of the Universal Editor). You’ll be able to toggle on the information you want to display below each image. Drag and drop fields to reorder.
The options you see are generated by the Exhibition Blueprint.
Remember to Save as you update pages.
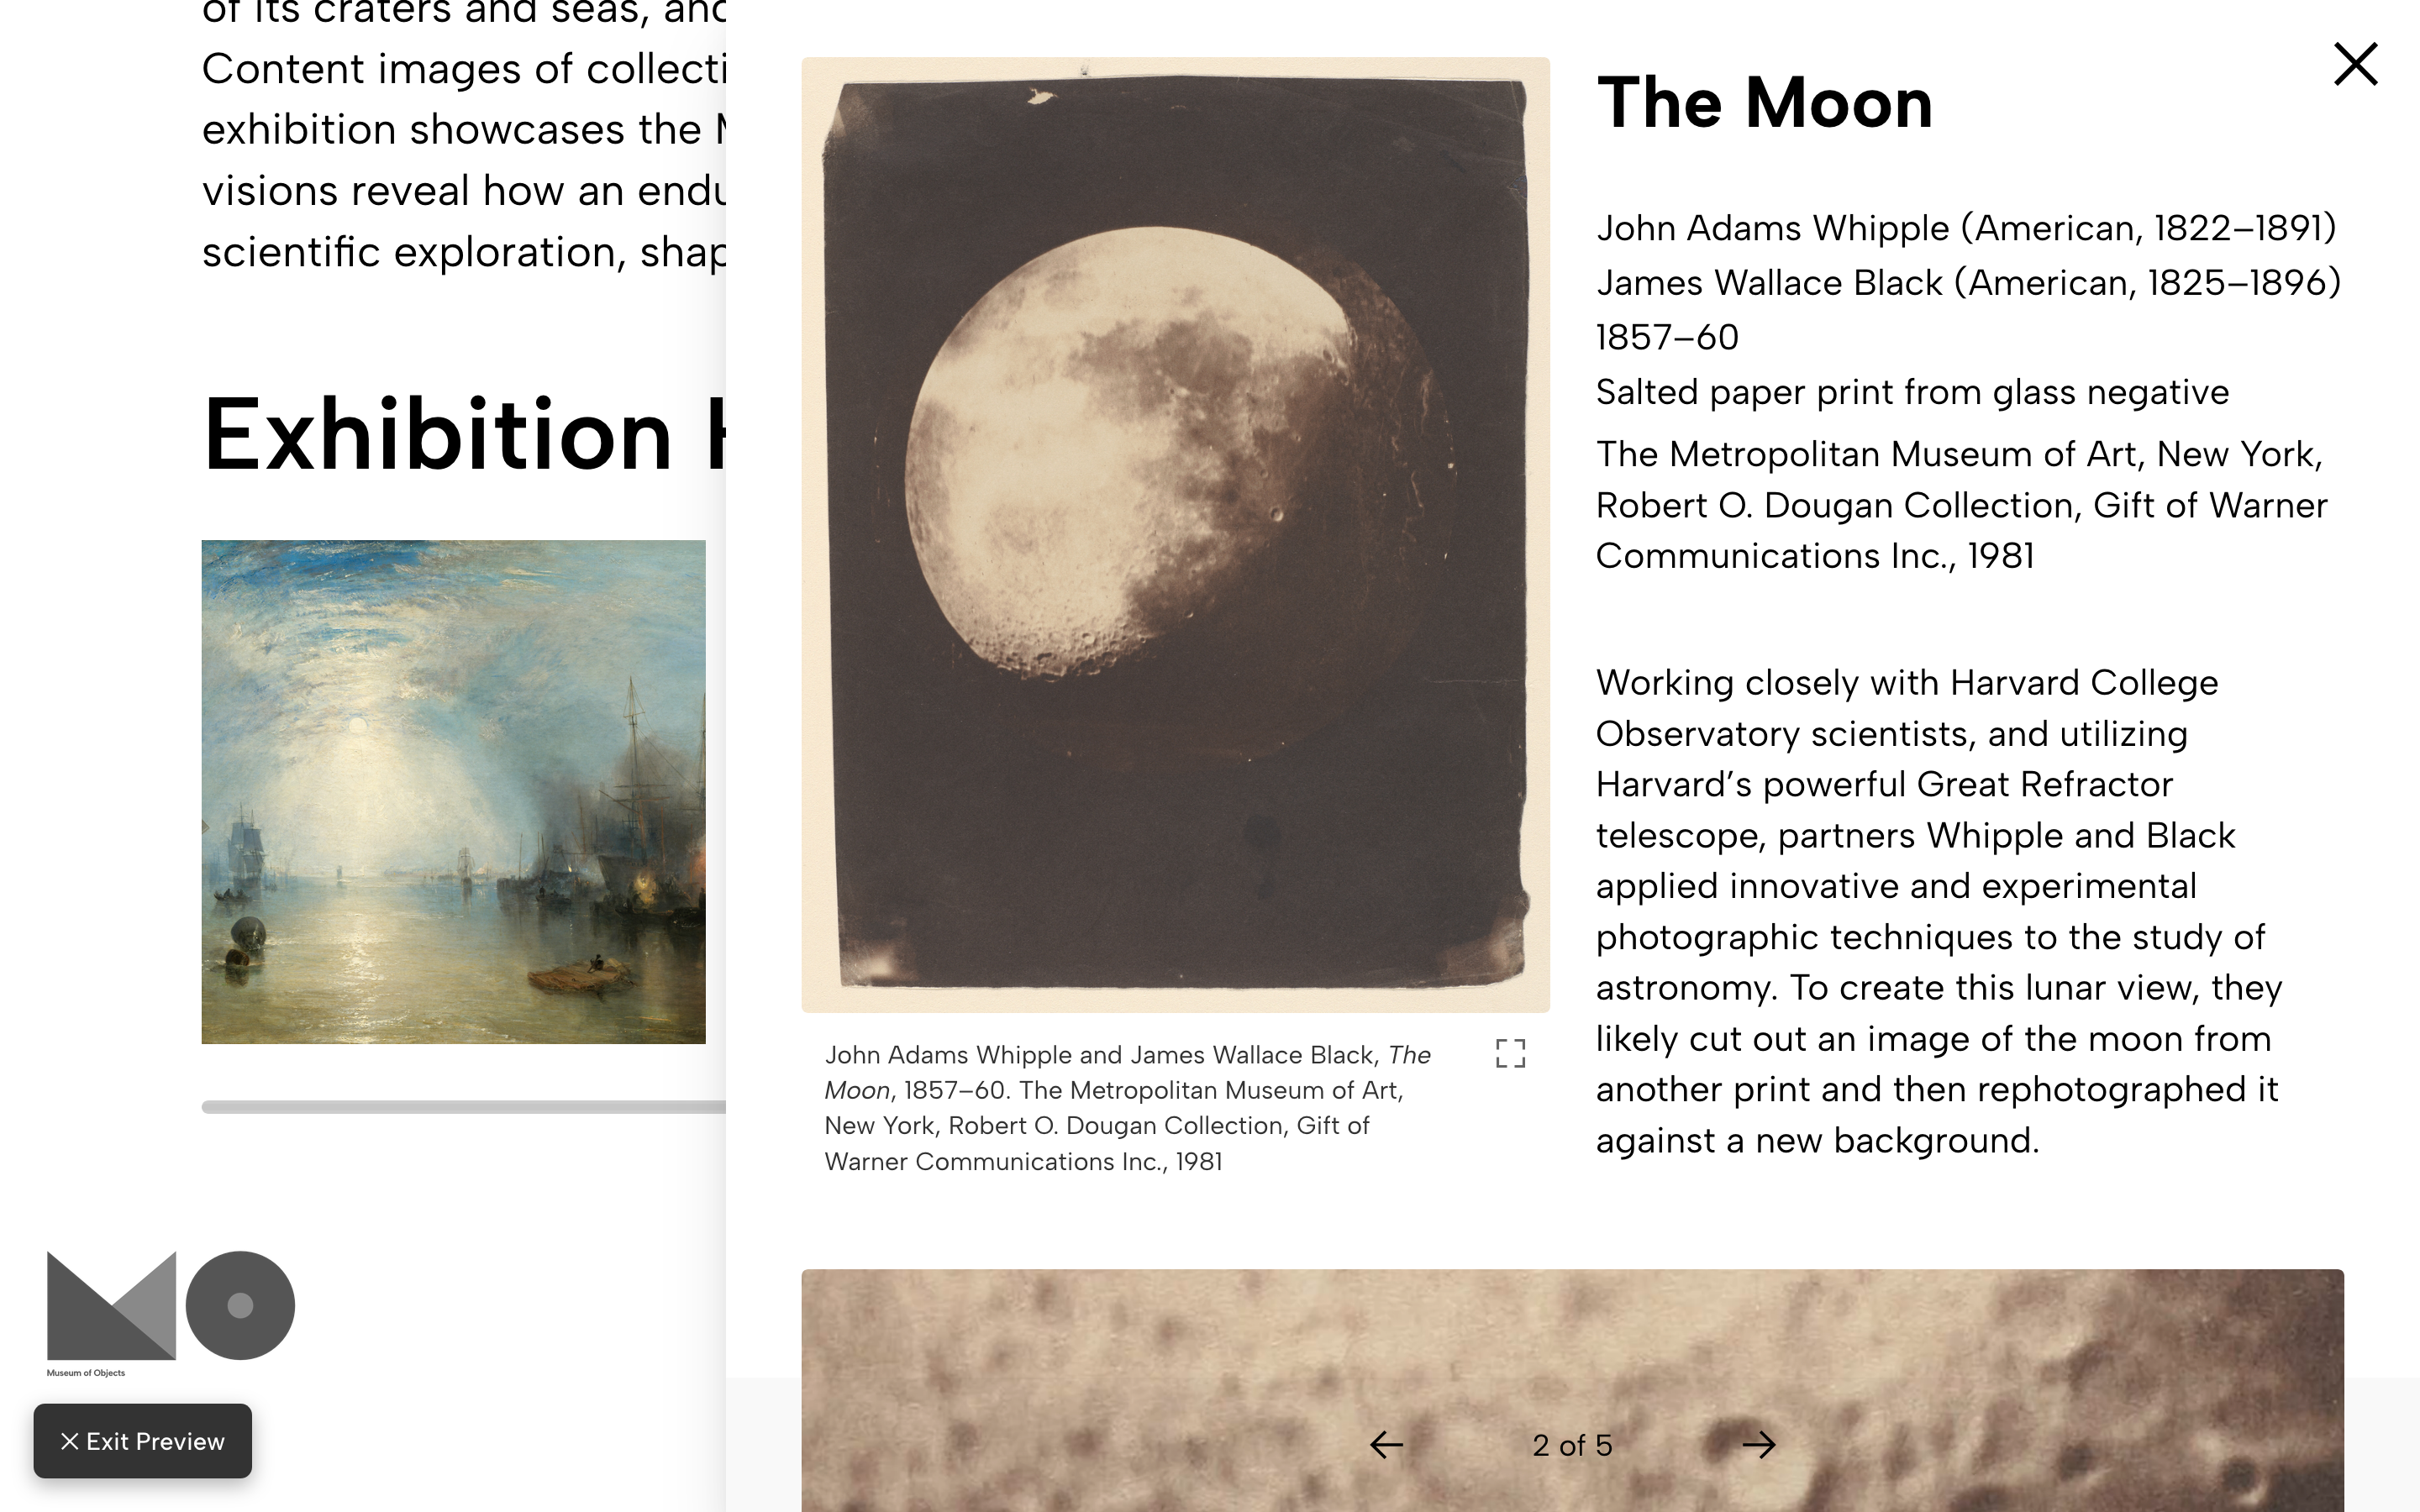
Step 11: View Exhibition in Preview Mode
As you update and style your pages, turn on Preview Mode to explore a full-screen, interactive version of the exhibition. This allows you to navigate pages using the menu, view individual objects (and zoom in if you've made this option available), and play audio and video.
Tip: When previewing, don't use the back button in your web browser; navigate using the menu items, options, and links within the exhibition.
Click Exit Preview in the lower left-hand corner to exit Preview Mode.
As you build, let us know if you have any questions, need some help getting started, get stuck, or if you’d like a quick demo.
When you're ready to share your exhibition with the world, it's time to publish. Check out the Publishing an Exhibition guide.
Digital Exhibitions Glossary
Assets: Files related to the exhibition (for example, a title graphic, a map, or an artist’s portrait)
Analytics: Exhibition analytics
Base: Collaborative space for managing object data and media files and for creating digital content like exhibitions and modules
Block: A customizable component you can add to an exhibition page or inside a Container Block (text, image, video, link, etc.)
Block Bar: Appears when you click a block; it allows you to drag the block, see your block type, and add, duplicate, and delete the block
Blueprint: Customizable, purpose-built form with fields for object information
Builder: Comprised of the Editor, for pages, global elements, and settings (left); and the Viewer, for viewing and updating exhibition content (right)
Container Block: Block type that accommodates other blocks within it
Exhibition Metadata: Data about the exhibition and the individual pages that becomes available when the exhibition is published
File Metadata: Data about an object image, video, or audio file, including caption, alt text, and rights information
Global Elements: Site elements that display on every single page (Header and Footer)
Metadata: See Exhibition Metadata or File Metadata
Object Manager: Where you sort your objects into their respective exhibition sections
Preview Mode: Preview a full-screen, interactive version of the exhibition (turns off editing capabilities)
Universal Editor: Floating, moveable editor for updating pages, blocks, and the header and footer