With Blueprints, you can add and organize data fields for any type of object or project, in the way that makes sense for you and your team, using your own terminology and institutional standards.
You know your objects, and you know what data you need to document. You shouldn’t have to skip over extraneous form fields or try to make objects “fit” into predefined categories. And best of all, Blueprints are flexible and simple to update, whether you're adding, renaming, or deleting fields.
What are Blueprints?
Blueprints are data structures for the objects in your Base. You can create and customize Blueprints for:
- Types of objects
- Exhibitions
- Projects with objects
- Groups of objects
When you set up a Blueprint, you’re setting up custom form fields for your object information.
The Core Blueprint
The first step in organizing your Blueprints is to create the Core Blueprint.
Your Core Blueprint serves two important functions:
- It is the default Blueprint selection for any object added to your Base.
- It is the foundation upon which all your other Blueprints will be built.
Ask yourself: What information will I document for every object?
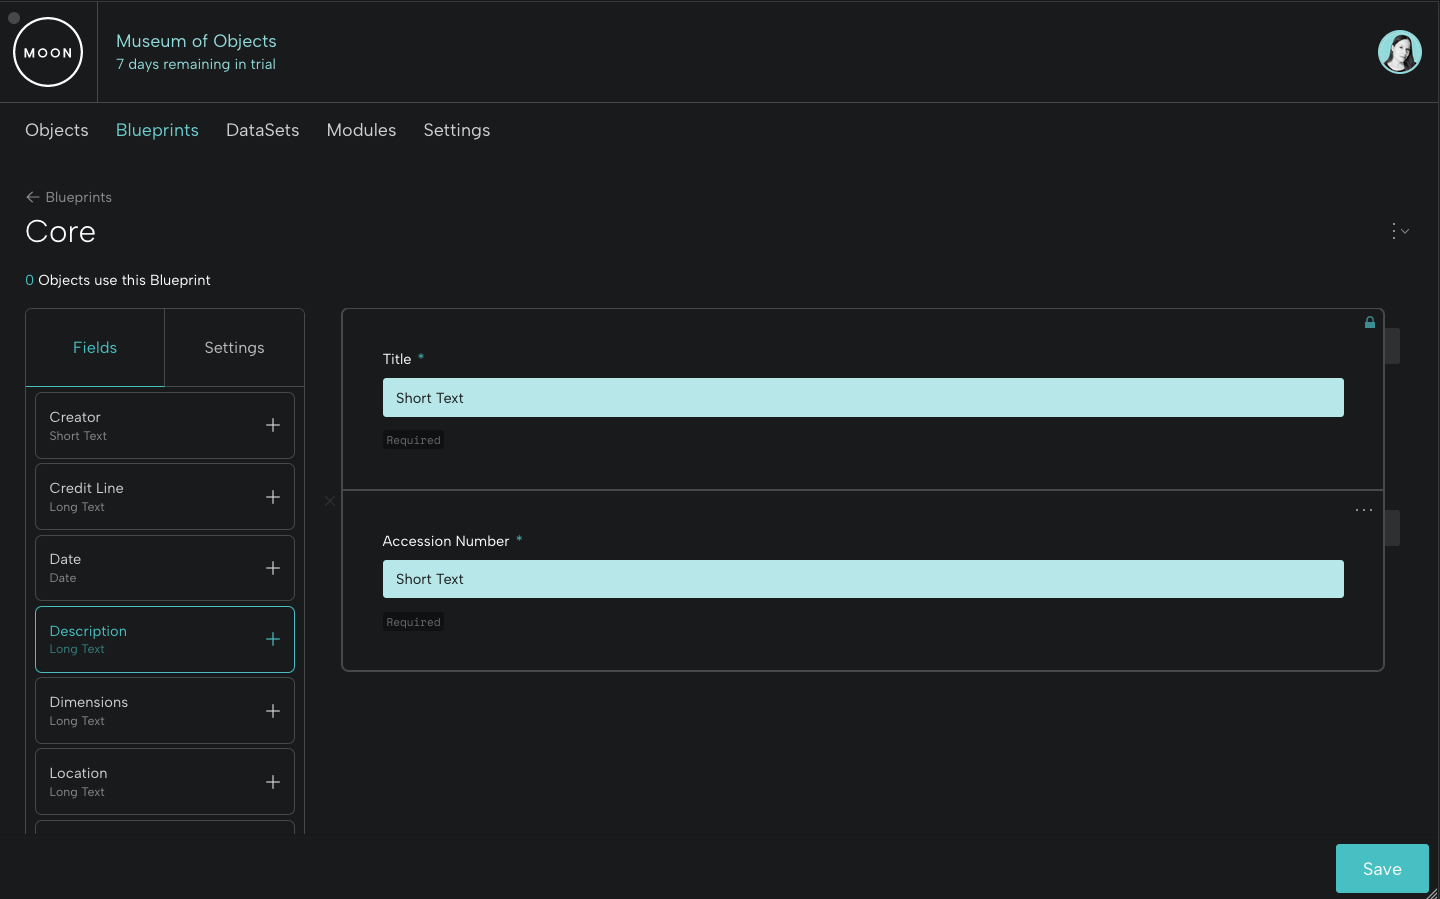
If all your objects have an accession number and a description, you can add these fields to your Core Blueprint (see Adding Fields below). Once added to the Core, these two fields will be included in any other Blueprint you create.
The Core can be as simple or as detailed as you like, with one field or thirty. At minimum, it will always include a title field.
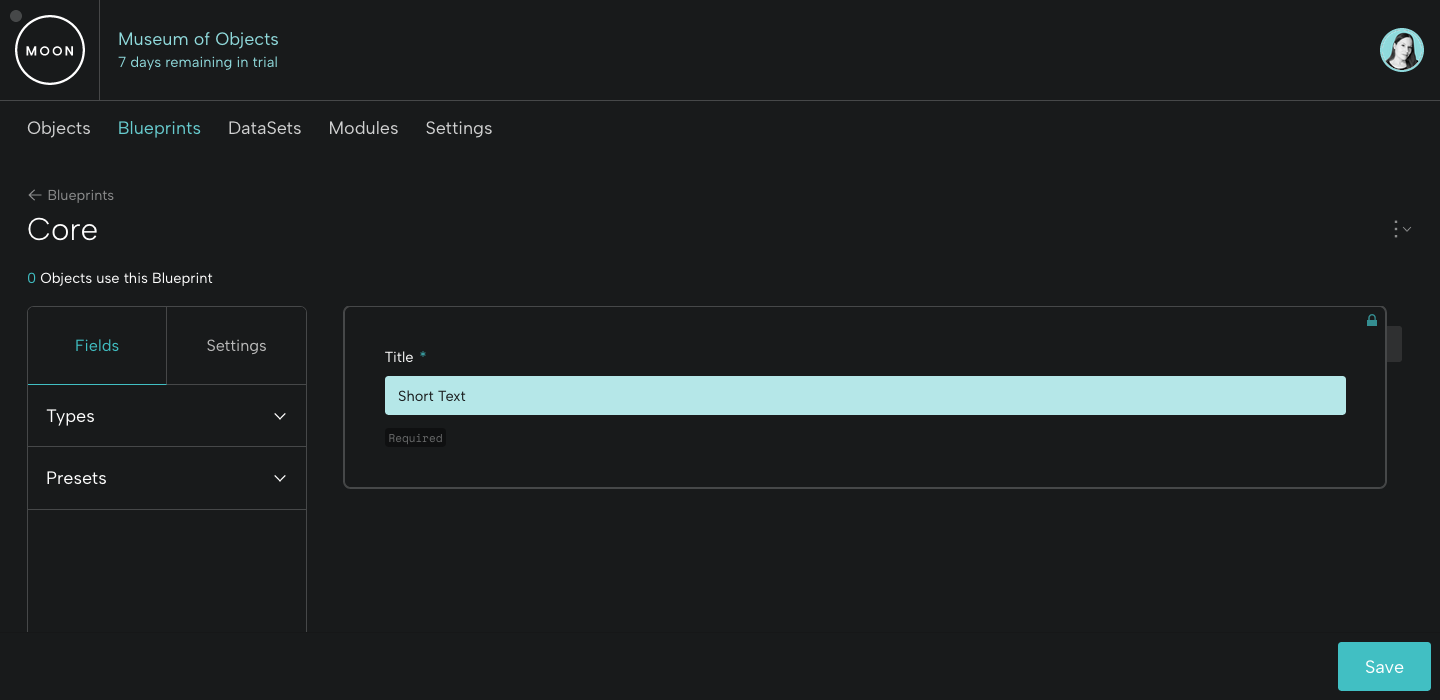
Adding Fields
Let’s add fields to the Core Blueprint.
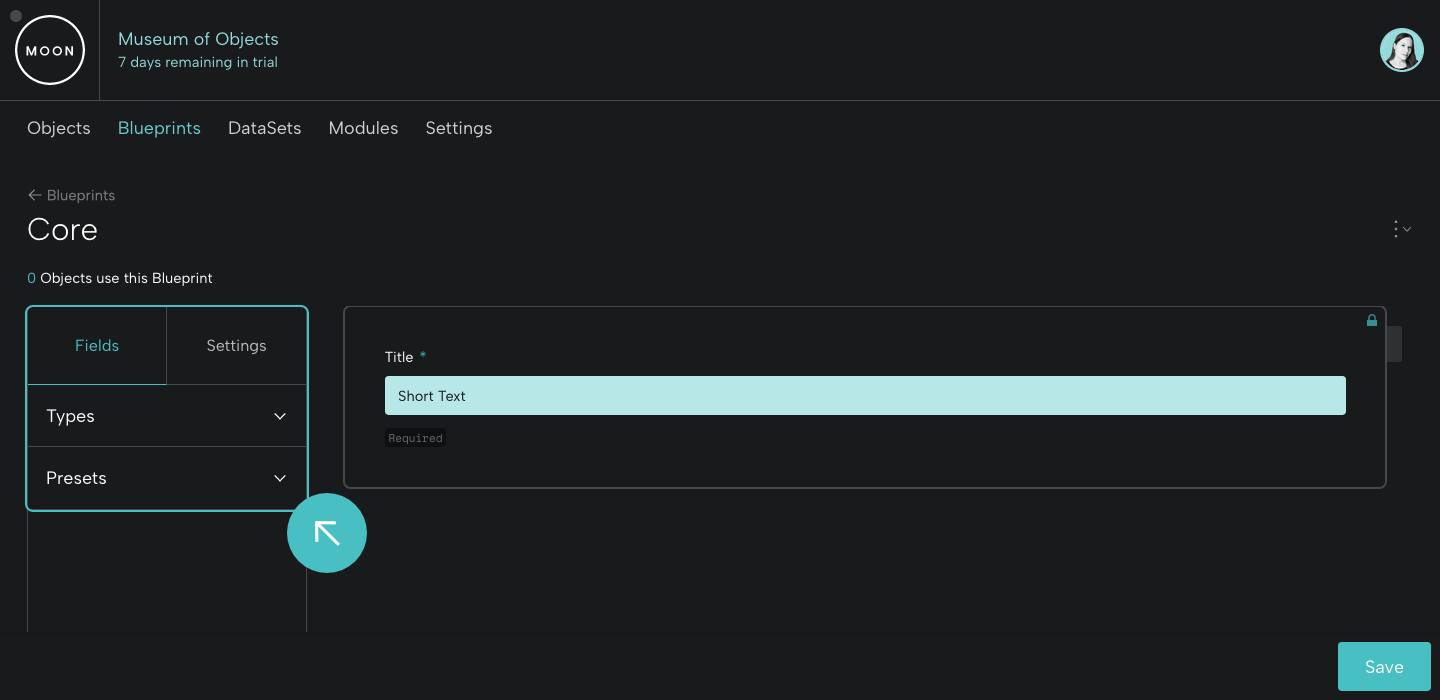
There are two ways to add fields. Below the Fields tab, you’ll see Types and Presets.
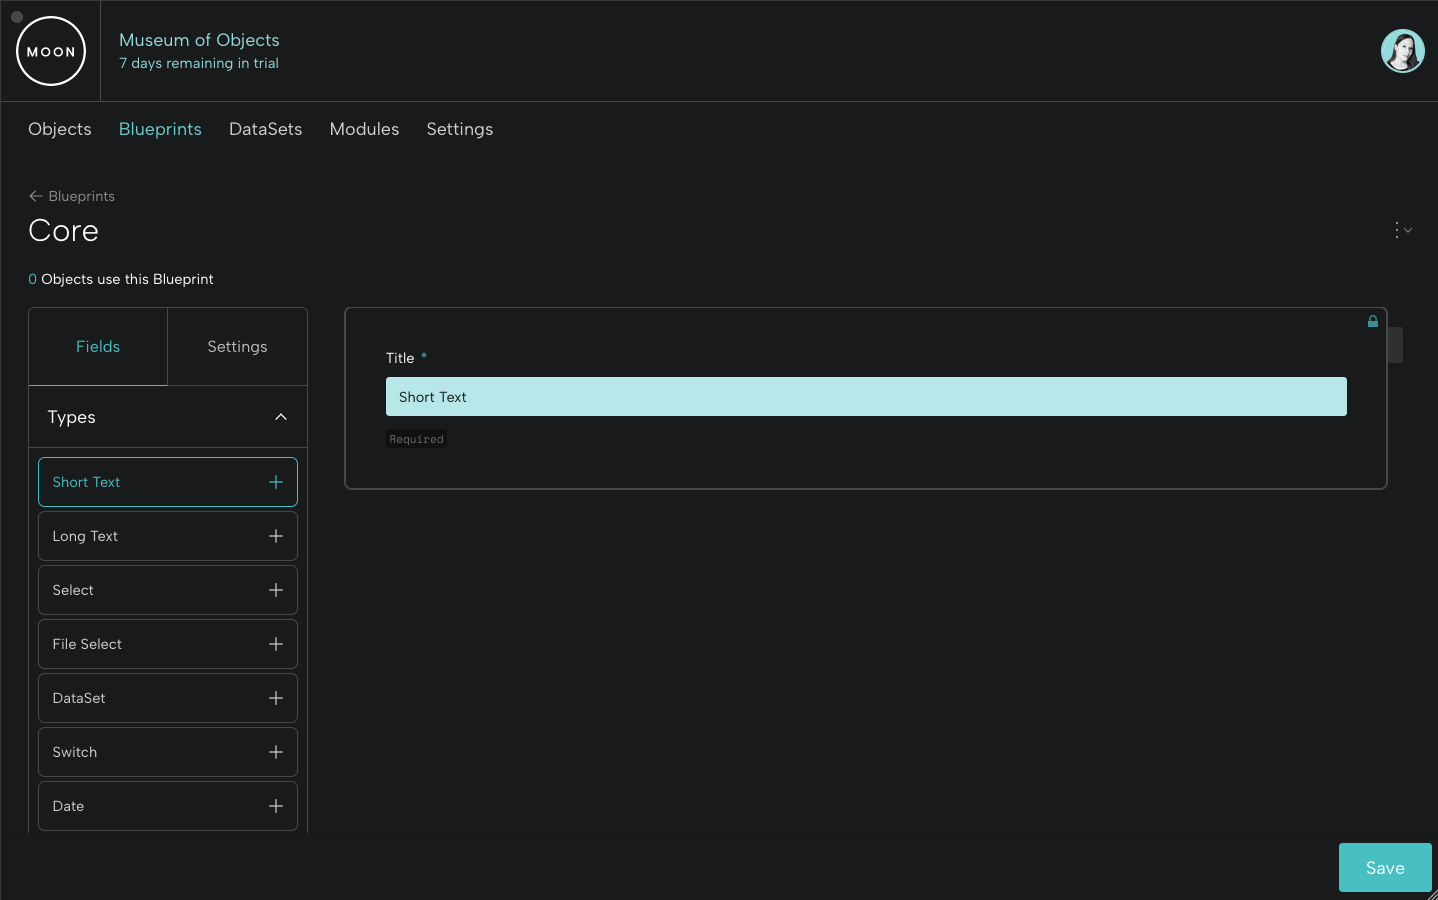
Under Types, you’ll see all the available field types.
Click the + icon to add a field to your Blueprint.
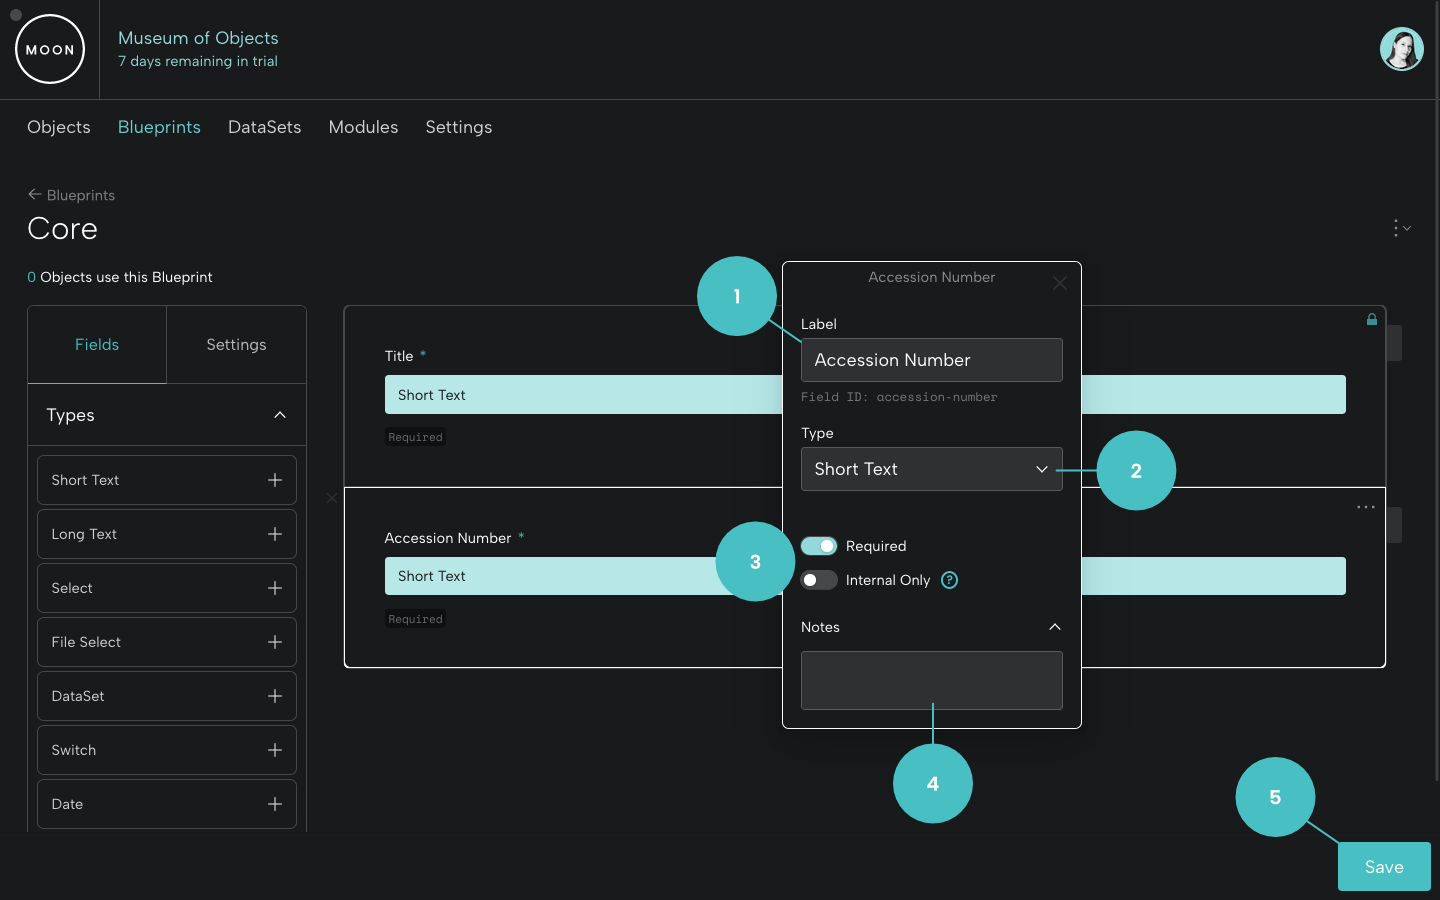
Double click the new field to customize it.
- Add a label (the name of your field).
- You have the option to change the field type.
- Toggle on whether data is required and/or if the data to be entered in this field is internal (more on this below).
- Add data entry notes for users.
- Remember to save.
Under Presets, you’ll see readymade field options.
Click the + icon to add a preset field to your Blueprint.
Presets include: Artist, Creator, Credit Line, Date, Description, Dimensions, Location, Maker, and Medium.
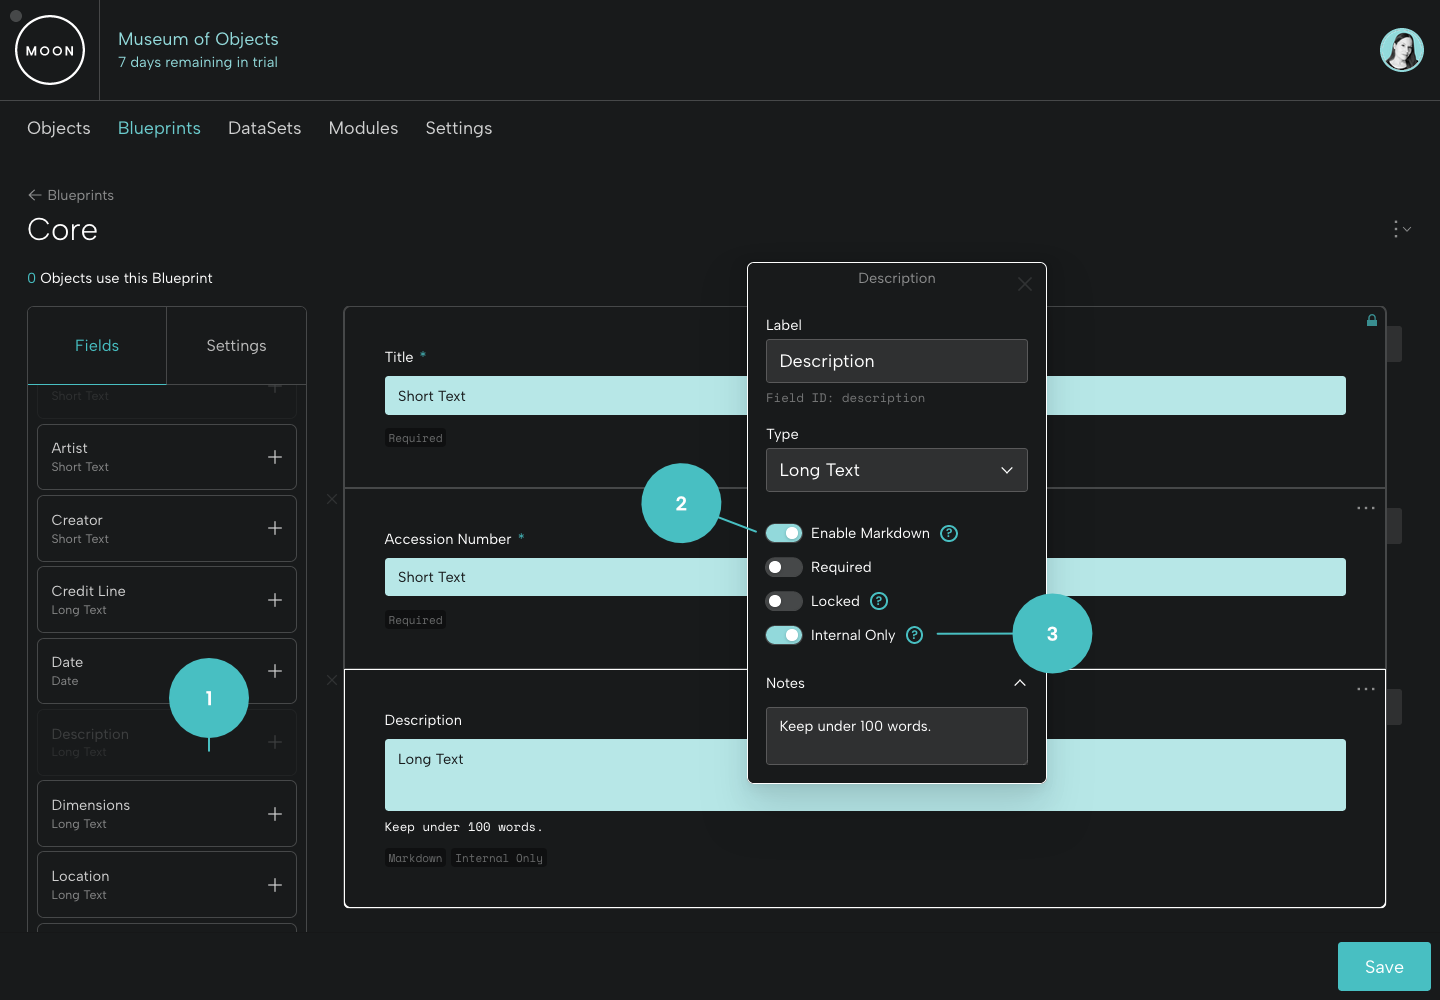
You can still customize and update preset fields. Let's add a Description field, which is a Long Text field type.
Double click the new field to customize it.
- Once you use a Preset field type, it will be greyed out in the list.
- For the Long Text field type, you'll have the option to enable Markdown. Markdown allows you to add special formatting (for example, italics on a title) when you enter object information in the field.
- Here the "Internal Only" field is toggled on. Any data entered in this field will not be displayable in Exhibitions or Modules.
Selecting Field Types
When you add a field, you’ll select a preferred field type (you can update these later, if necessary). These field types determine the type of information you’ll enter when you input data for your objects.
- Short Text: ideal for a single line of information
- Long Text: ideal for multiple lines of text like an object description, with the option to allow Markdown for special formatting (for example, for italicizing titles)
- URL: for including a link to an online collection page or other resource
- Date: allows for the entry of a month, date, and year (for example, 05/25/2025)
- Number: customize numbering with minimum, maximum, and steps
- Auto-Increment: perfect for creating accession numbers or project-specific numbering systems (read more in Field Study: Auto-Increment)
- Select: allows you to enter a list of selectable options like mat colors (can also be multiselect)
- DataSet: allows you to select an existing DataSet to generate a list of selectable options (read more in Using DataSets)
- File Select: allows you to select a preferred file or multiple files from an object’s available files
- Switch: allows you to create a toggle switch
- Tags: ideal for adding searchable keywords for your objects
- Section Heading: headings for organizing your fields (for example, “Display Plans” or “Bibliography and Resources”); you can toggle on the option to collapse the fields within a section
- Spacer: adds an empty space
For more about fields, see Setting Up Blueprint Fields.
Adding Blueprints
Once you’ve set up the Core Blueprint, you can create Blueprints for specific types of objects, projects with objects, or groups of objects.
Remember, every new Blueprint you create will already contain the fields from your Core Blueprint.
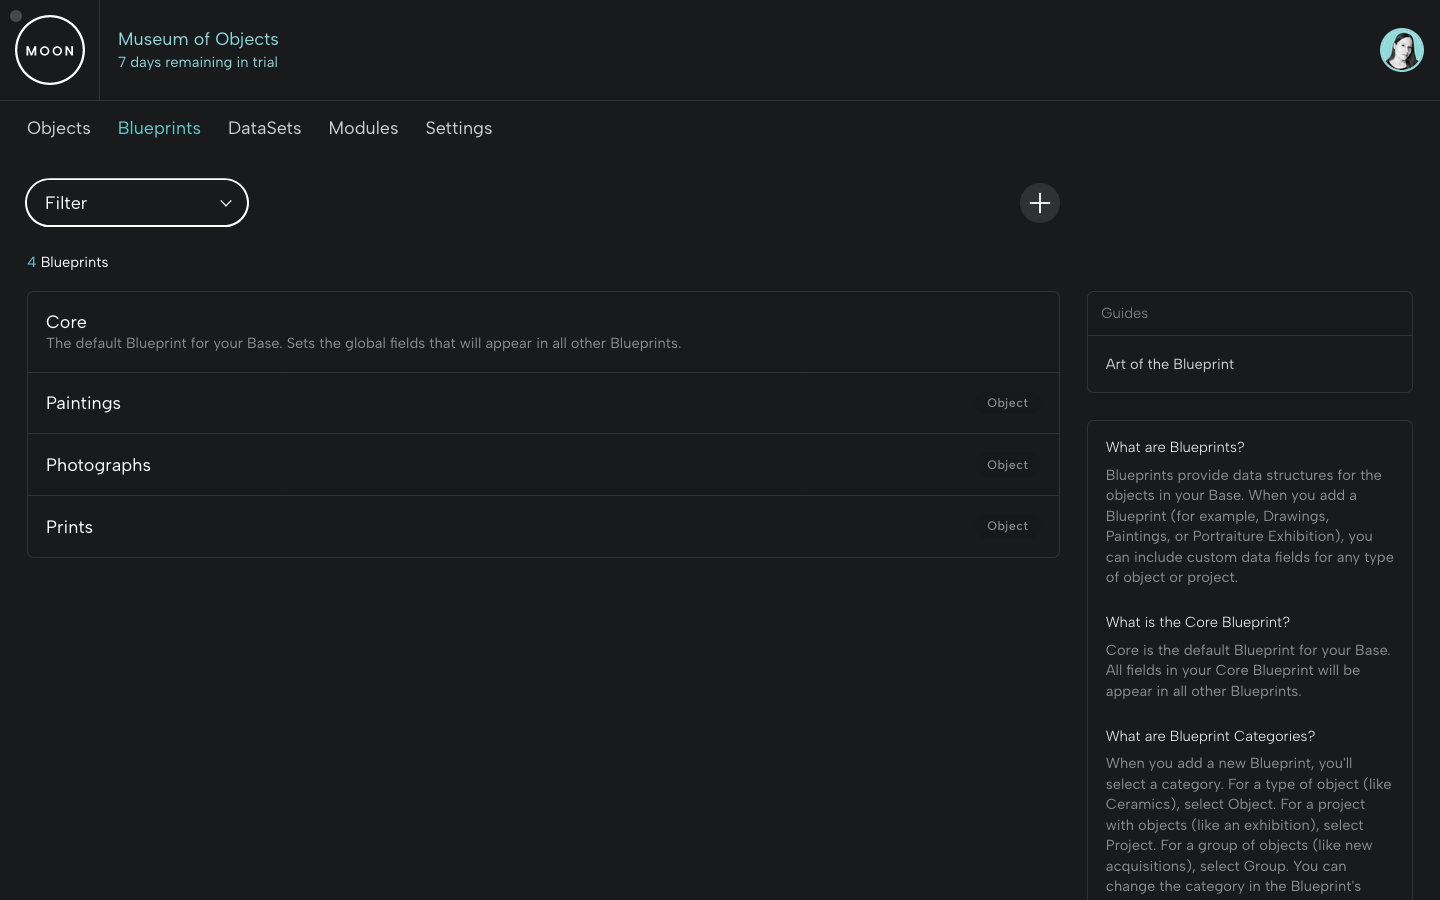
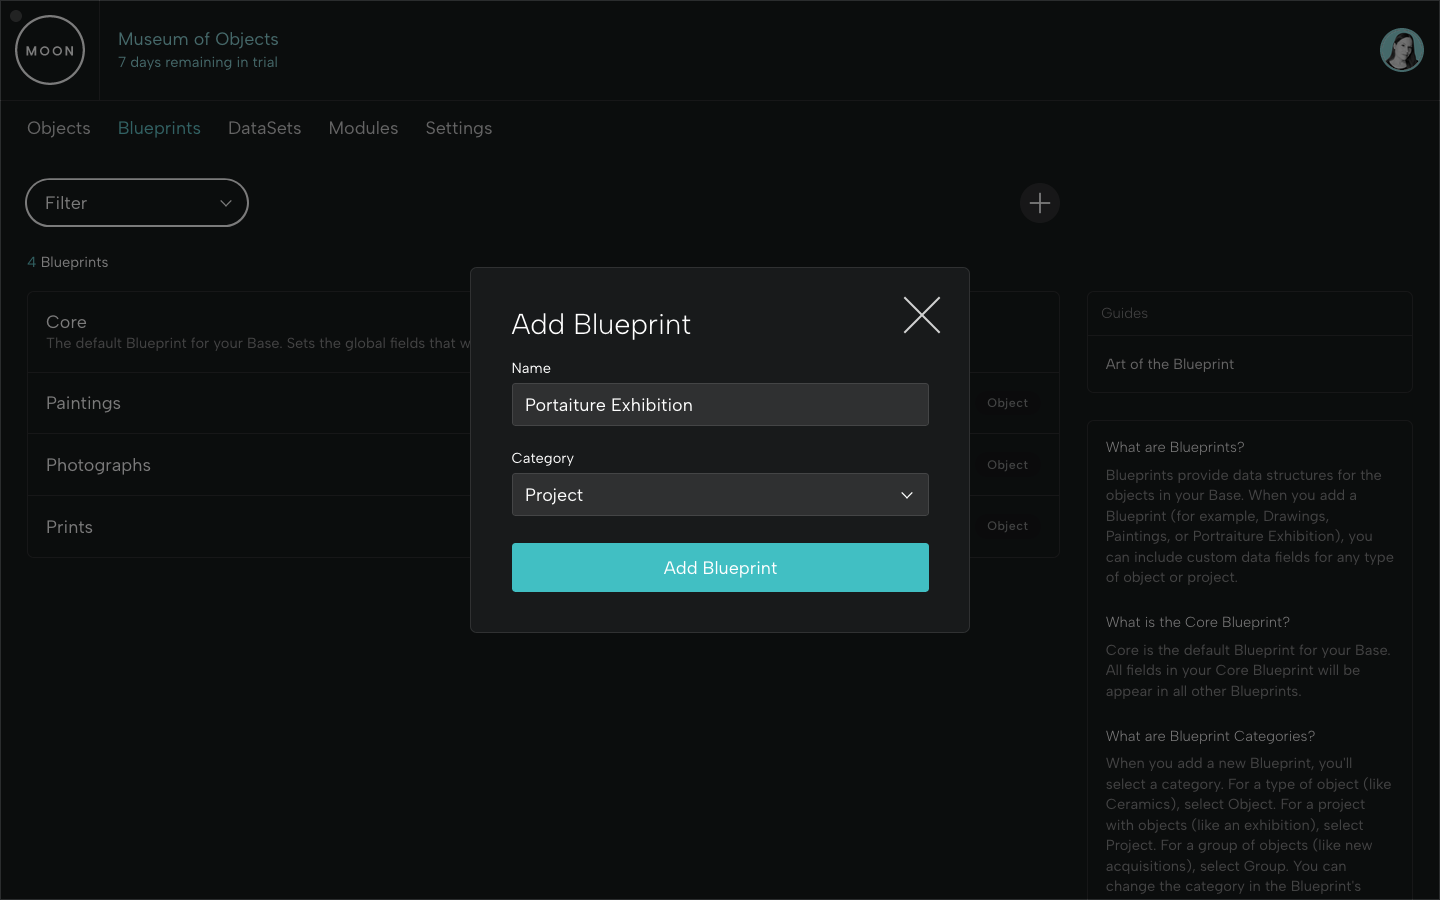
Add a Blueprint by clicking the + icon, giving it a name, and selecting the category (Object for a type of object, Project for a project with objects, or Group for a group of objects).
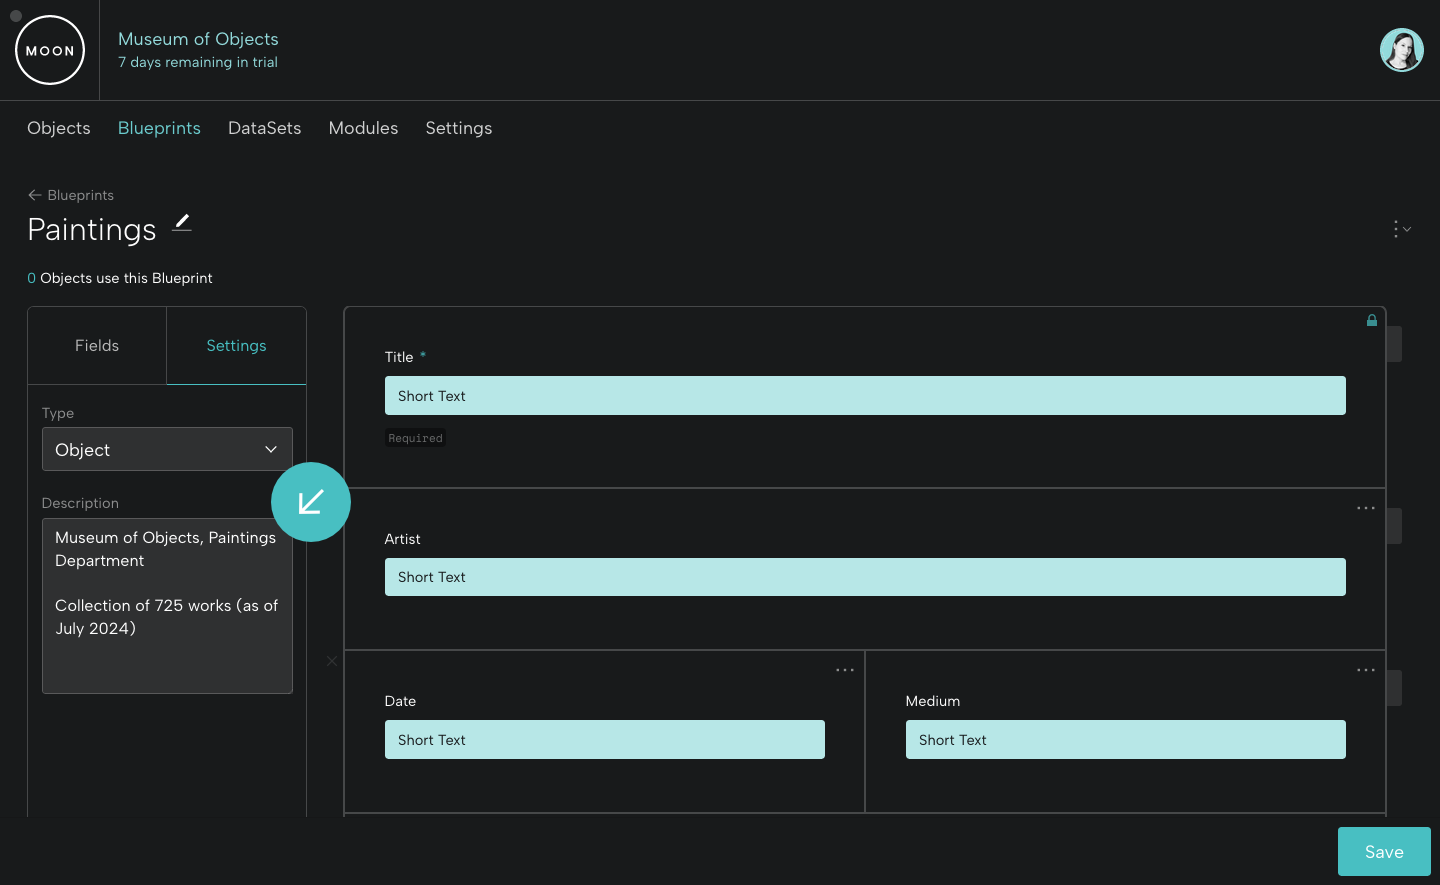
Under the Settings Tab, you can add a helpful description of your Blueprint.
Structuring Blueprints
For each of your Blueprints, you can add and customize the fields for your objects and projects, and it’s simple to update them as your informational needs evolve.
For a Prints Blueprint, you might add fields for Printmaker and State.
For a Photographs Blueprint, you might add fields for Photographer and Negative Date.
For a Portraiture Exhibition Blueprint, you might add a fields for Object Label Text and Mat and Frame Information.
Arranging Rows and Fields
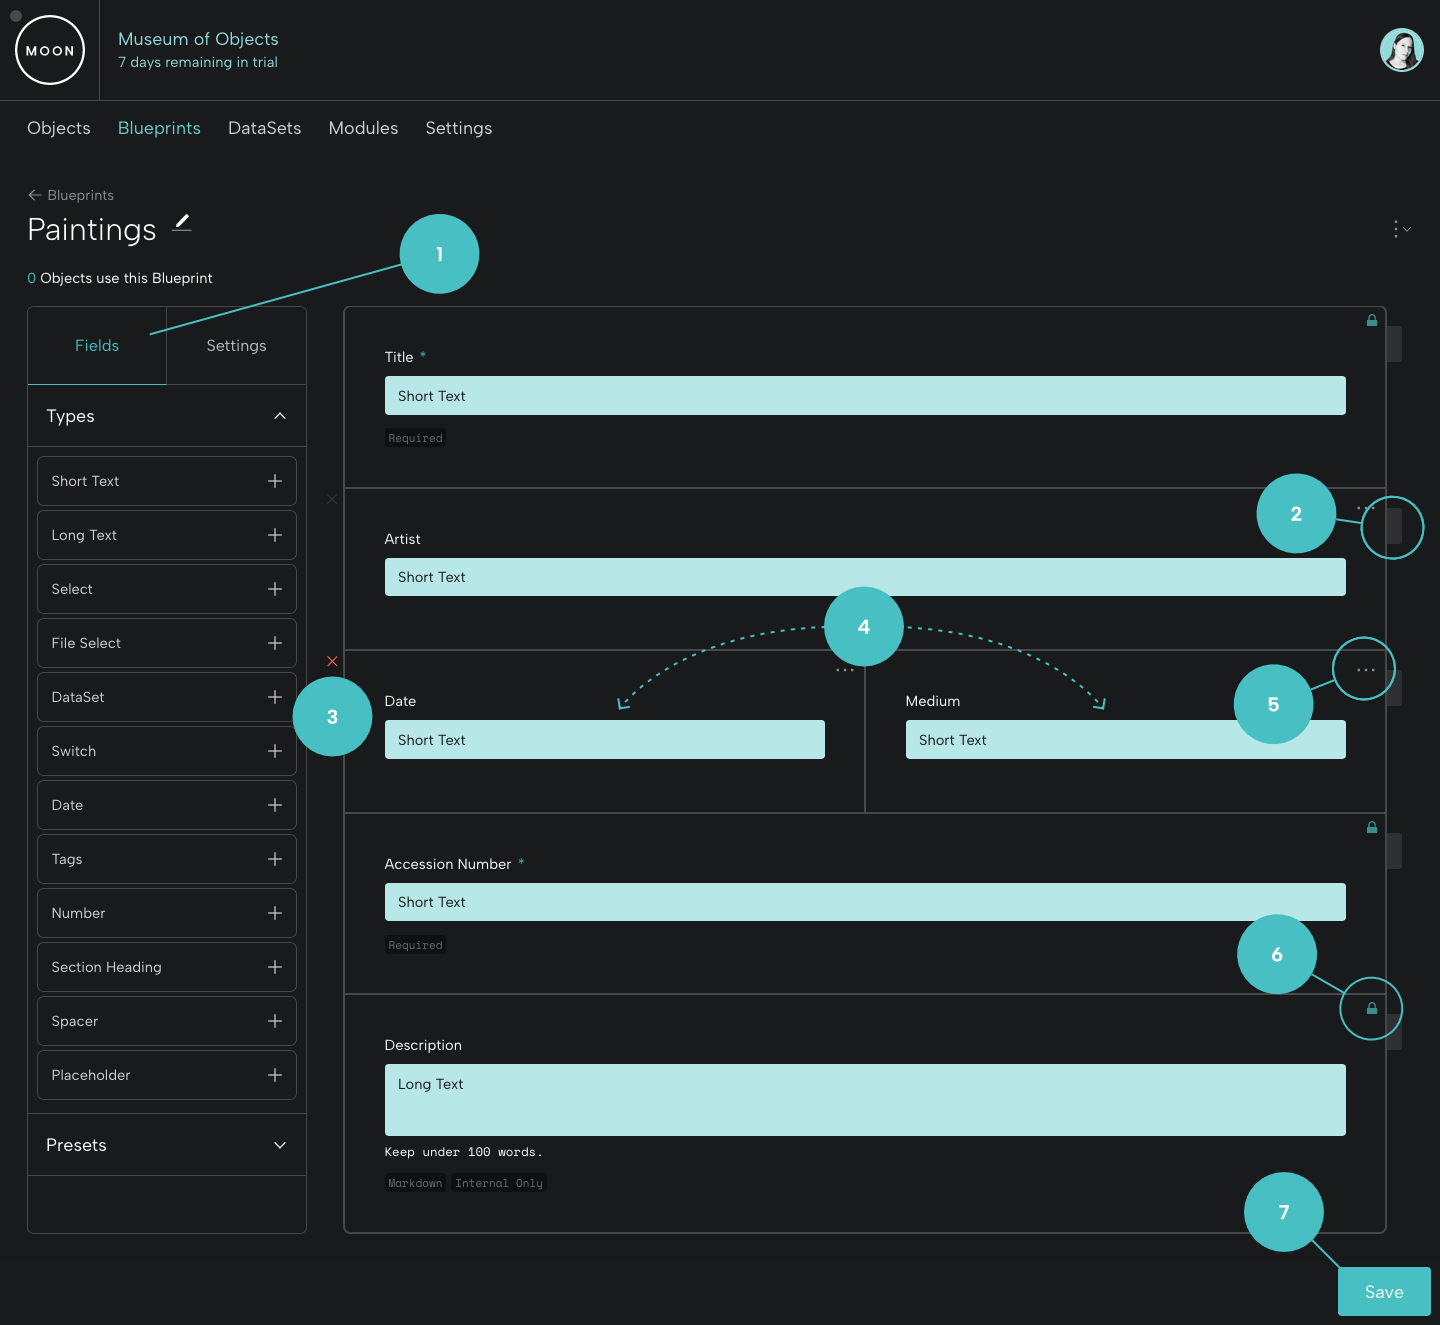
- Under the Fields tab, add new fields. These will appear at the bottom of the Blueprint.
- You can move rows by dragging the tab at right.
- You can delete a row by clicking the “X” to the left of the row.
- You can arrange fields by dragging and dropping (you can have up to three fields in a single row).
- You can edit or delete a single field by clicking the “…” icon.
- Core fields display a padlock – you can only update and delete these in your Core Blueprint.
- Remember to save.
Blueprint Options
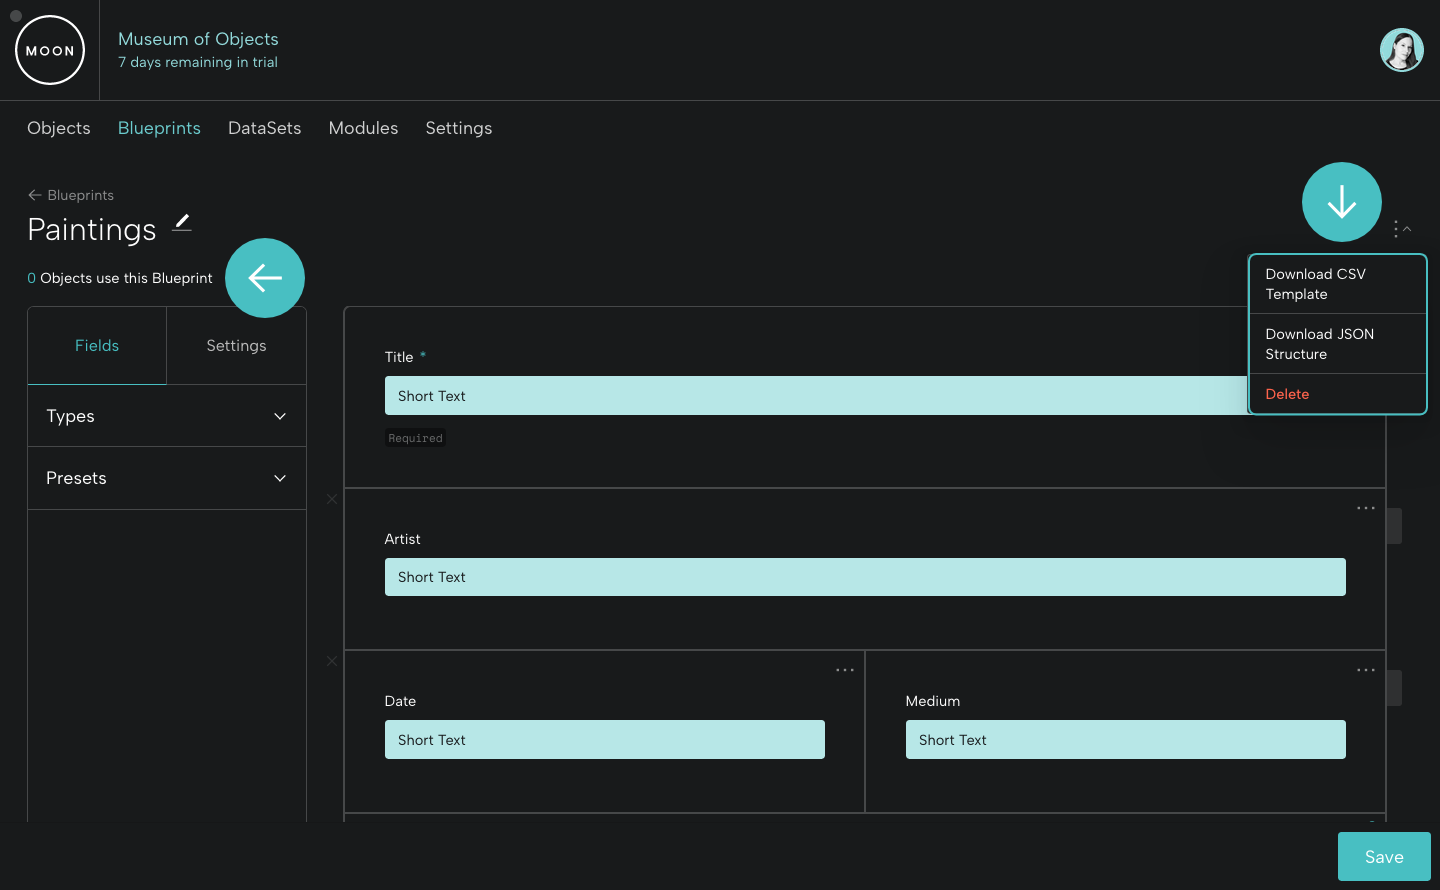
From the drop down menu at right, you'll see several options, including the option to take a tour to help guide you.
If you’d like to duplicate your Blueprint, click Duplicate. This will create a copy.
If you’d like to upload information for a group of new objects for a particular Blueprint, you can do this using a CSV. Select Download CSV Template. The column headings in the CSV will correspond to the fields in your Blueprint. Read more in CSV Guidelines.
If you’d like a record of your Blueprint field structure, you can download as JSON.
When there are no objects using a Blueprint ("0 Objects use this Blueprint"), you can delete it.
Your Blueprints in Action
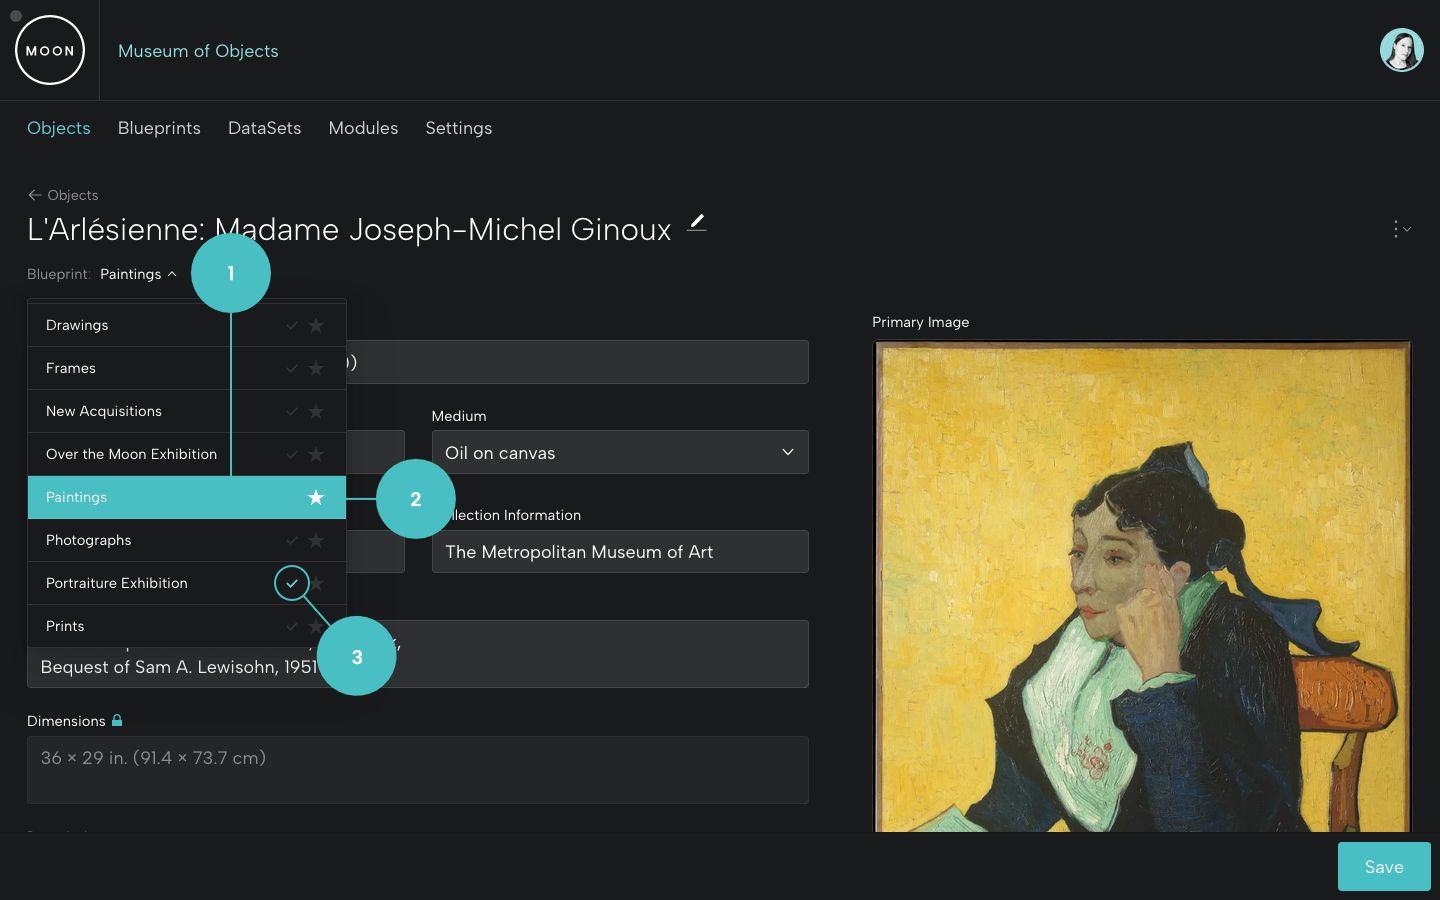
When you add an object, you’ll select a Primary Blueprint. You can also associate your object with additional Blueprints (if they’re included in a project or group).
For this painted portrait:
- We’re viewing the fields for the Paintings Blueprint. This is indicated by the Blueprint name below the object's title and the highlighted selection in the dropdown menu.
- Paintings is the primary Blueprint – indicated by the star.
- Portraiture Exhibition is an associated Blueprint – indicated by the check.
Locking a Blueprint Field
After you enter object information in a field (for example, an accession number or dimensions) you can go back to your Blueprint and toggle on the option to lock that field.
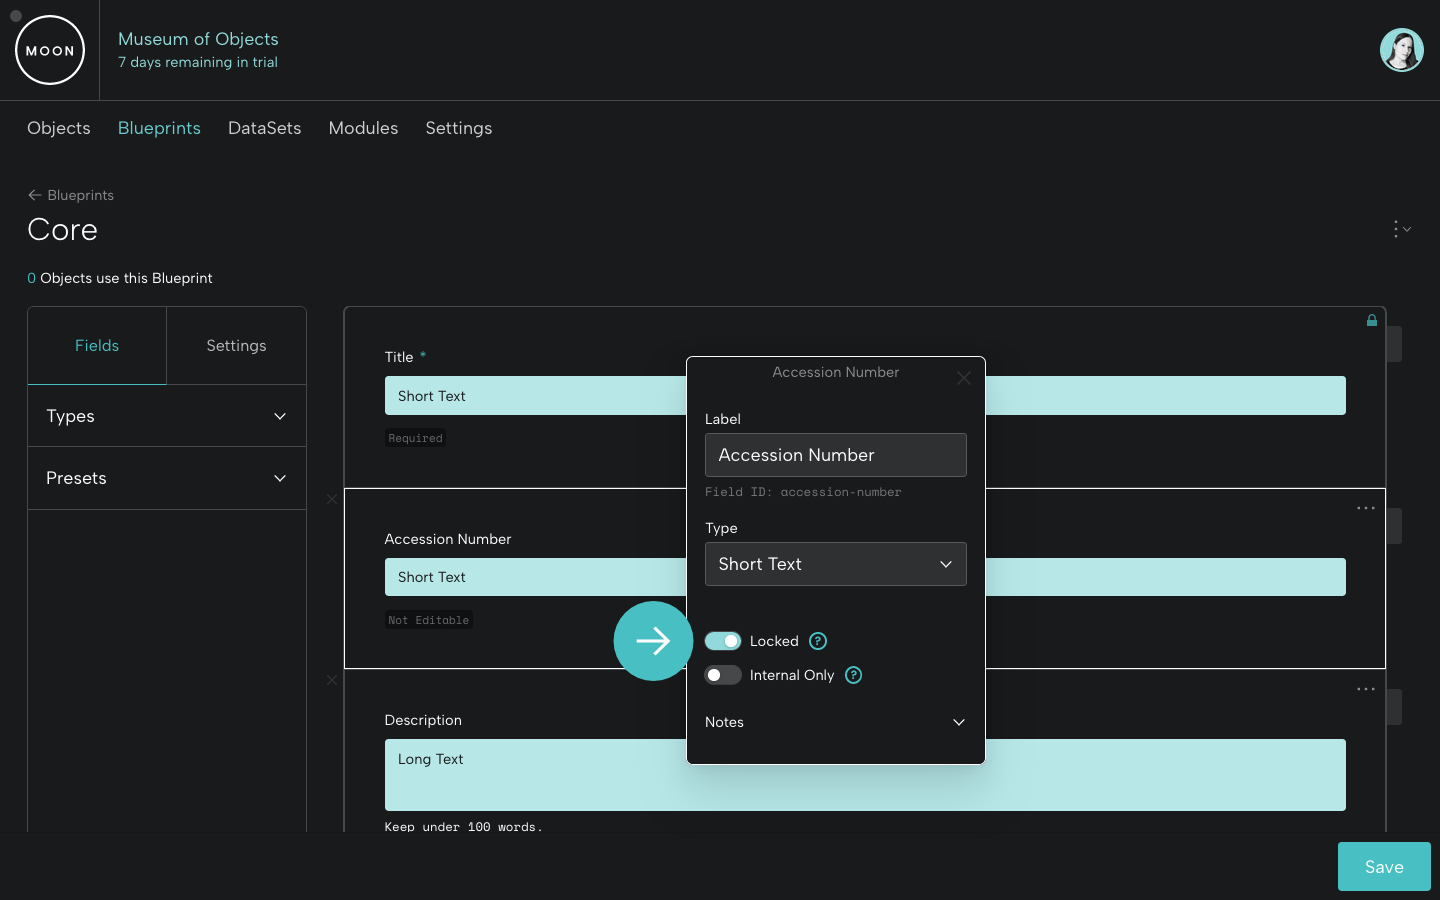
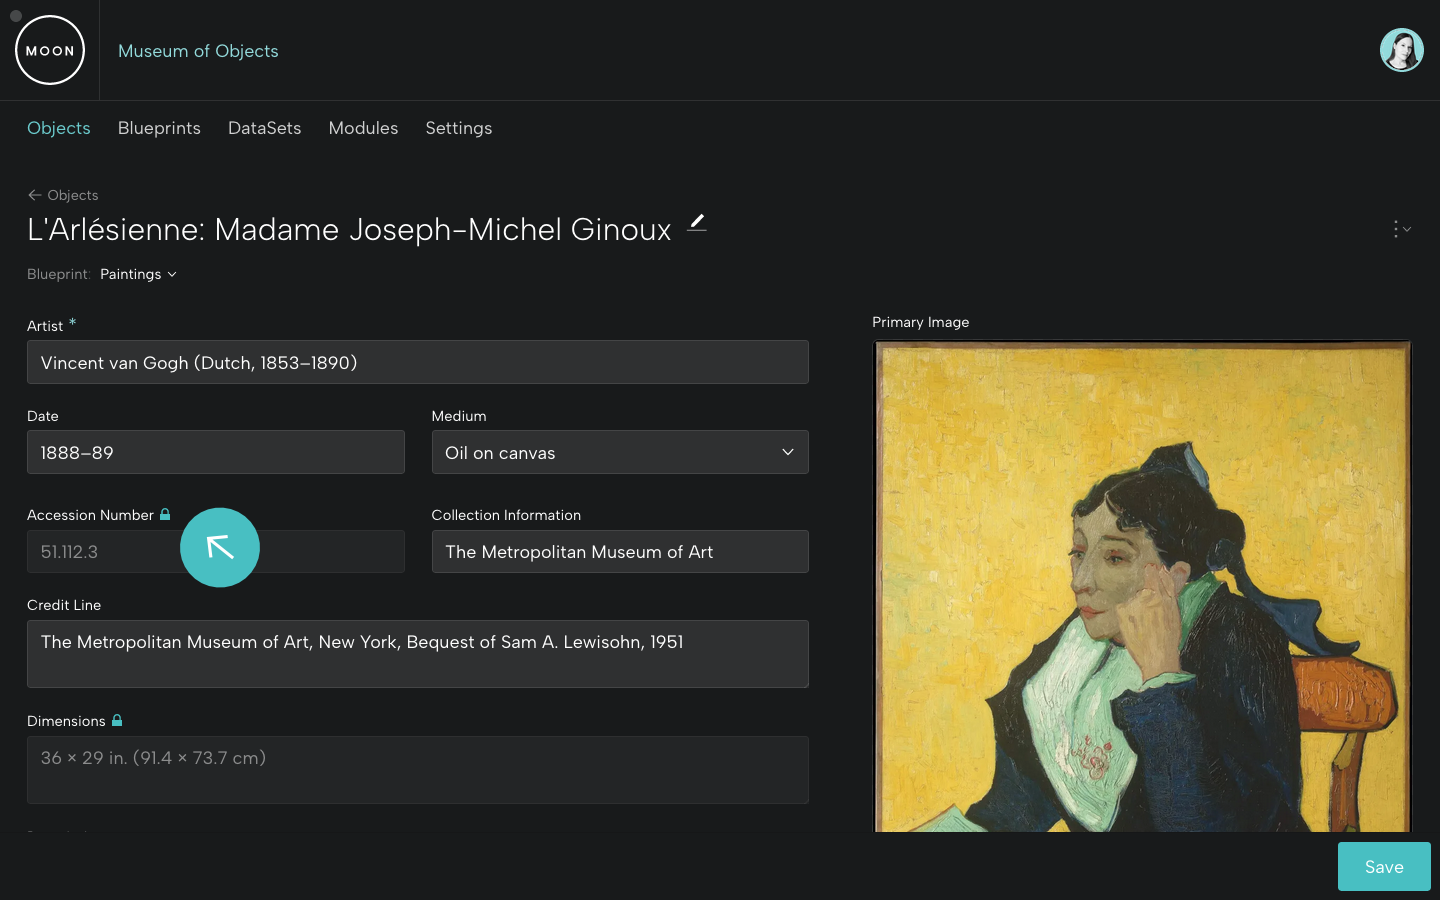
Locked fields will display a padlock.
No data can be entered or updated in a locked field unless that field is unlocked in the Blueprint.
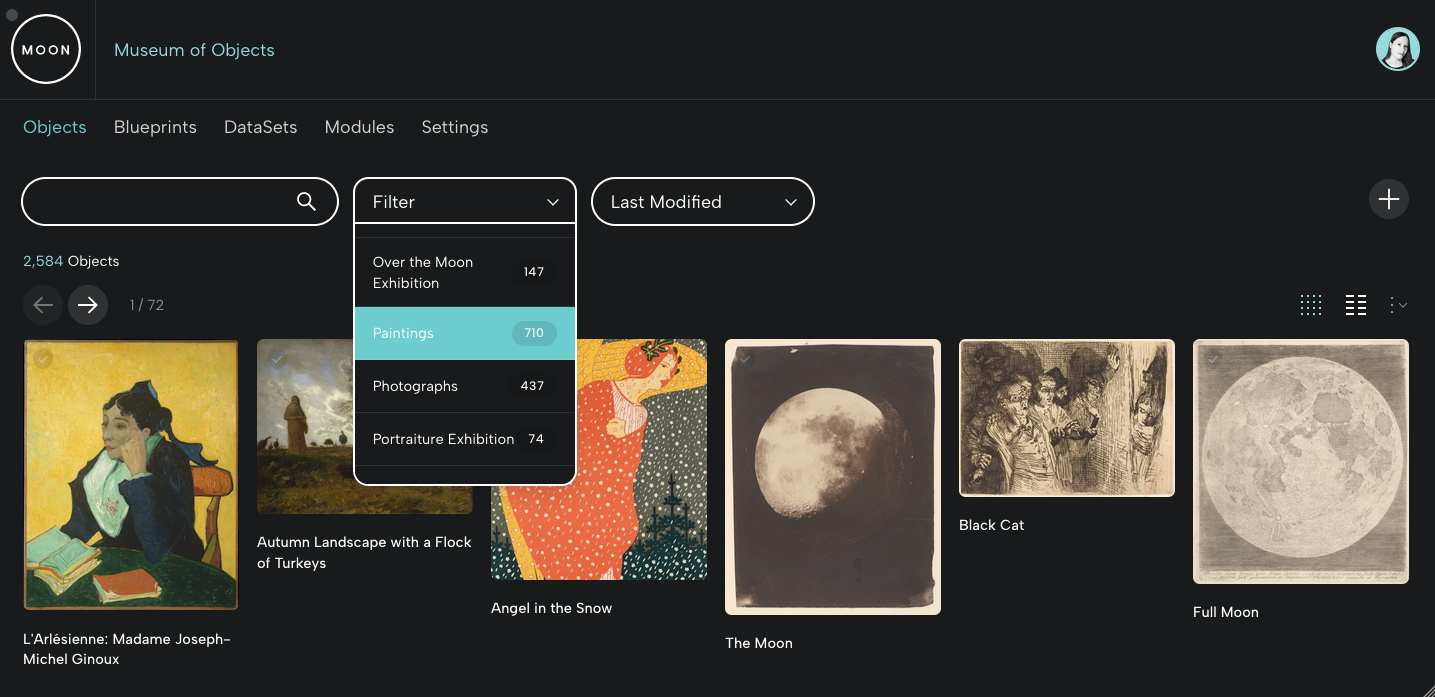
Filtering Objects by Blueprint
From your objects page, you can filter by Blueprint.
Blueprints empower you and your team to structure and prioritize data that matters for your objects and your projects. That’s pretty exciting!
Want to discuss Blueprint strategies and goals with us? Do you have questions about setting up your Blueprints?