Want to add object data for a new group of objects or update data for existing objects? You can do that via CSV.
Anyone who works with CSVs knows they are, let’s say… finicky. And if you've never worked them, you may be asking yourself "What's a CSV?". Please don’t hesitate to reach out if you’d like some help downloading, formatting, or uploading a CSV (just click the Get in touch tab on the right).
General CSV Information
A CSV is a comma-separated values file. CSVs can be viewed in spreadsheet format, with columns and rows, or as lines of plain text, wherein each data element is separated by a comma (for example: title,artist,date).
To help you get started, our object system generates helpful, downloadable CSVs based on the fields in your Blueprints.
It's best to upload a CSV with object data for a single Blueprint type. For example, if you’d like to add a group of 20 oil paintings, you’d upload the new object information using the CSV template for your "Paintings" Blueprint.
Our CSV upload is limited to 500 objects at a time.
If you’re uploading more than 500 objects, you’ll need to upload multiple CSVs.
The CSV must be encoded in UTF-8 format.
PLEASE NOTE: To preserve special characters like diacritics in a CSV, we recommend viewing, updating, or exporting using Google Sheets, Apple Pages, Airtable, or a plain text editor. Microsoft Excel may not preserve special characters.
Downloading a Blueprint’s CSV Template
The first step to uploading a group of new objects is to download a handy CSV template for your Blueprint. There are two ways to do this.
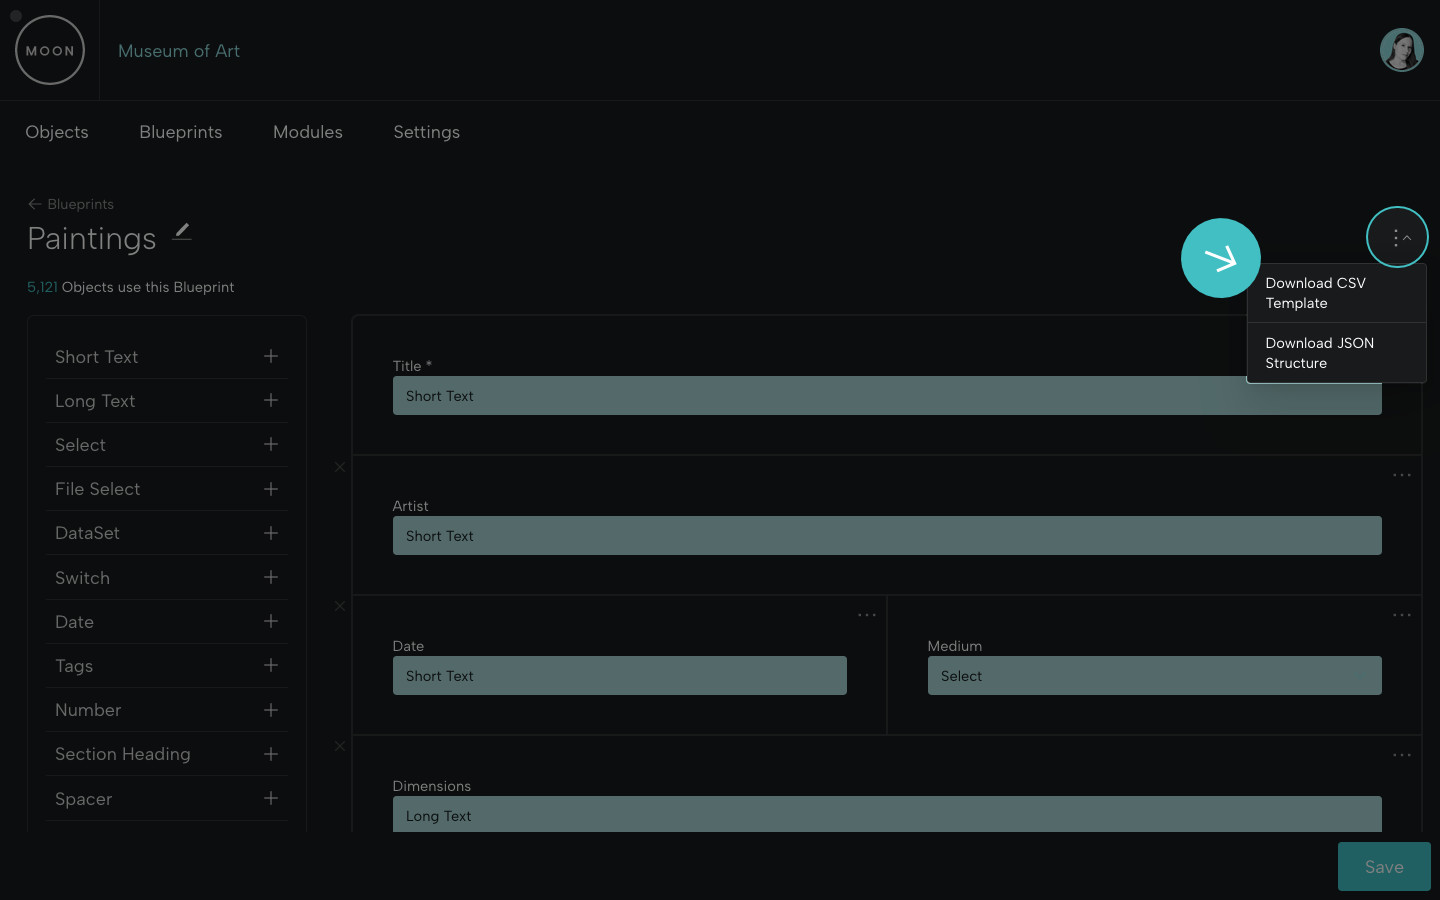
From your selected Blueprint, expand the action menu at far right. Select Download CSV Template.
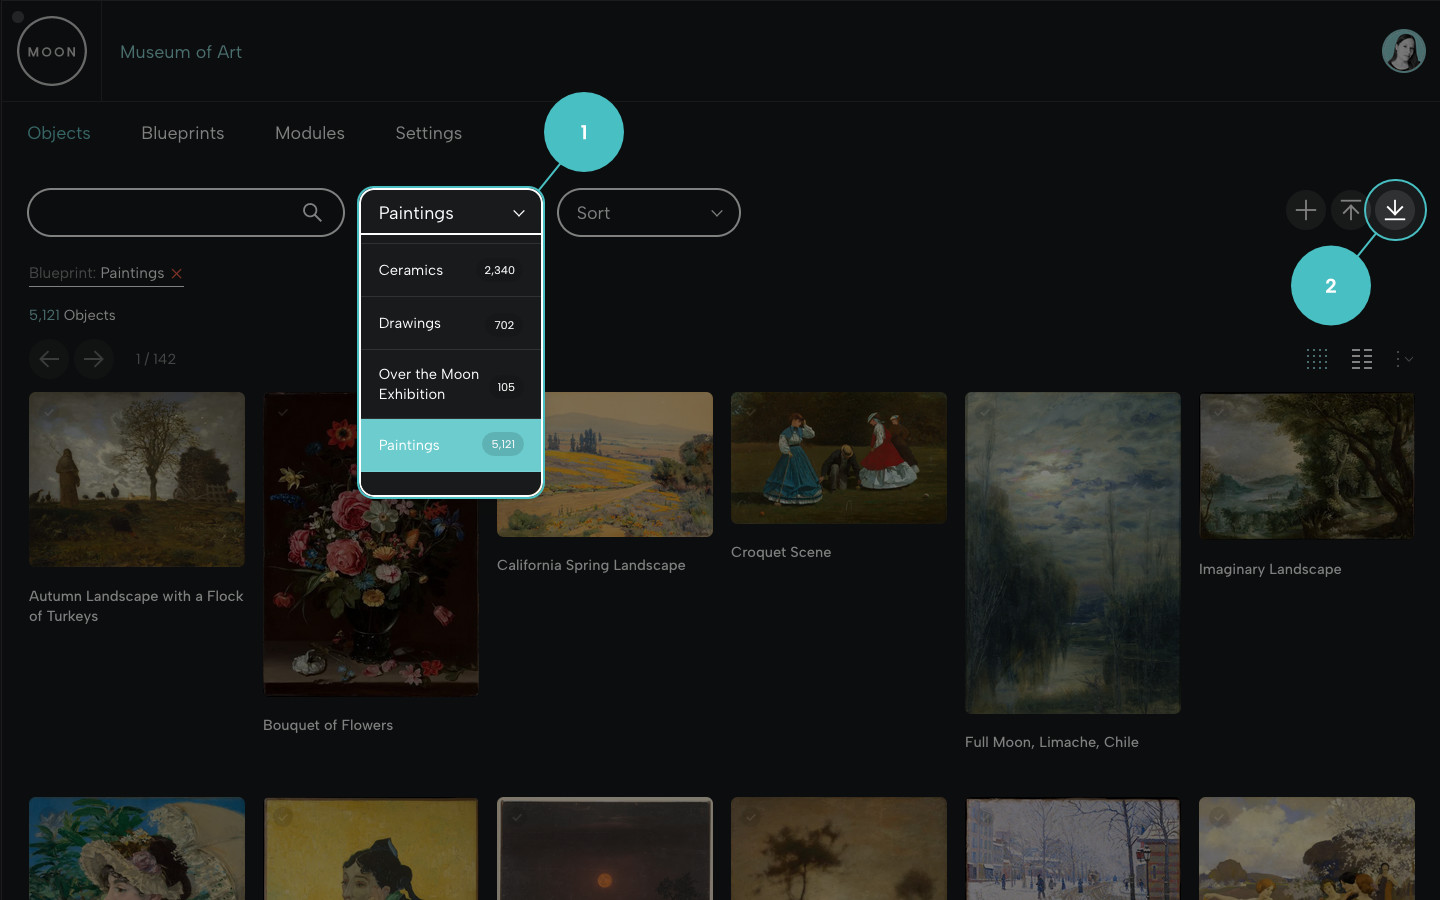
Or, from your Objects page:
- Filter objects by the selected Blueprint. In this example, we’ll choose Paintings.
- Icons for uploading and downloading will appear at right. Click the downward pointing arrow.
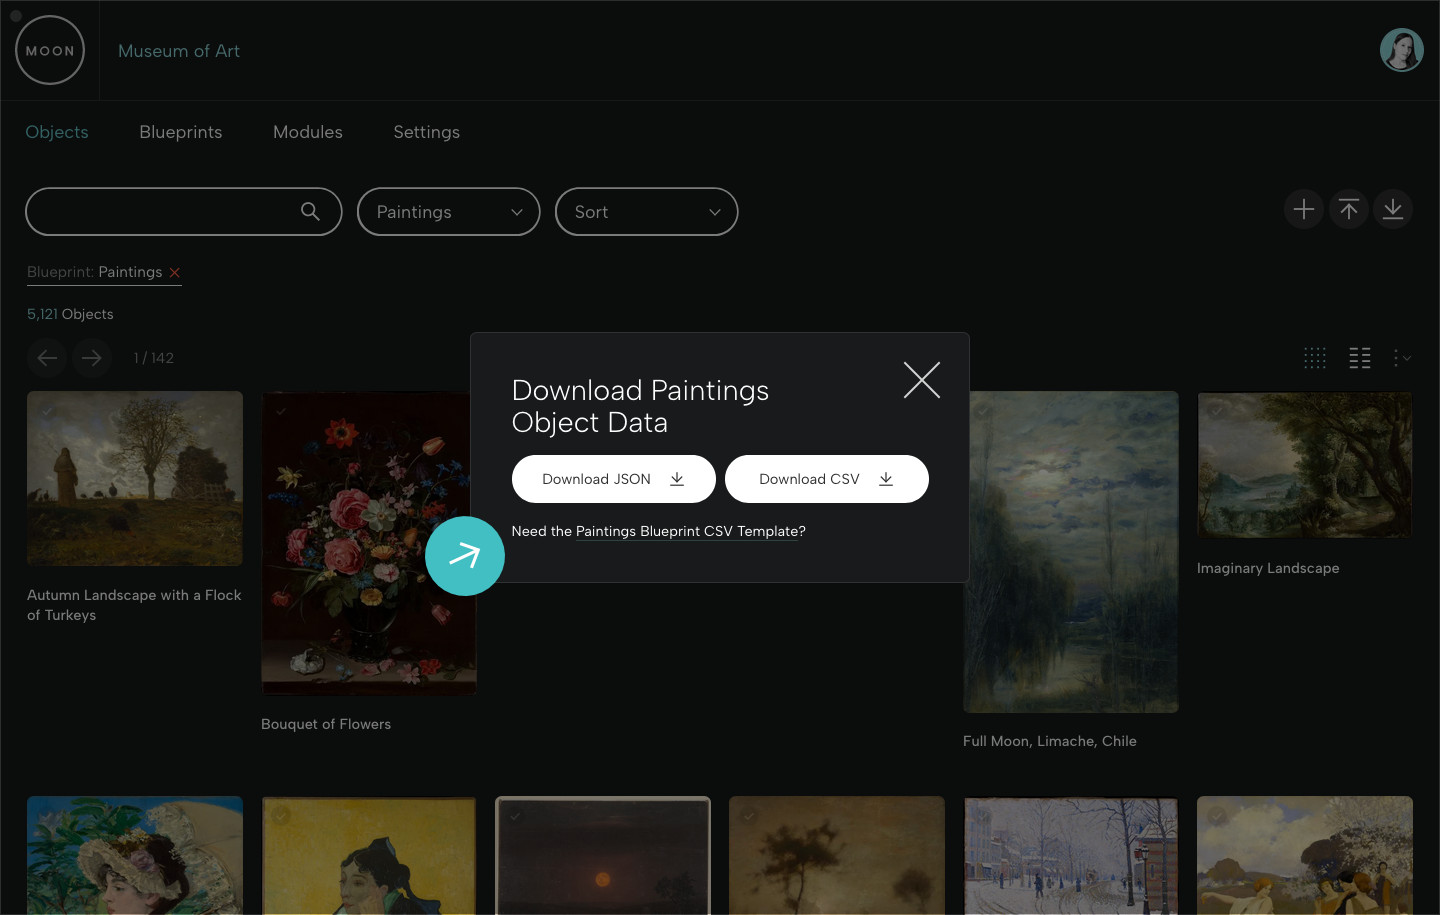
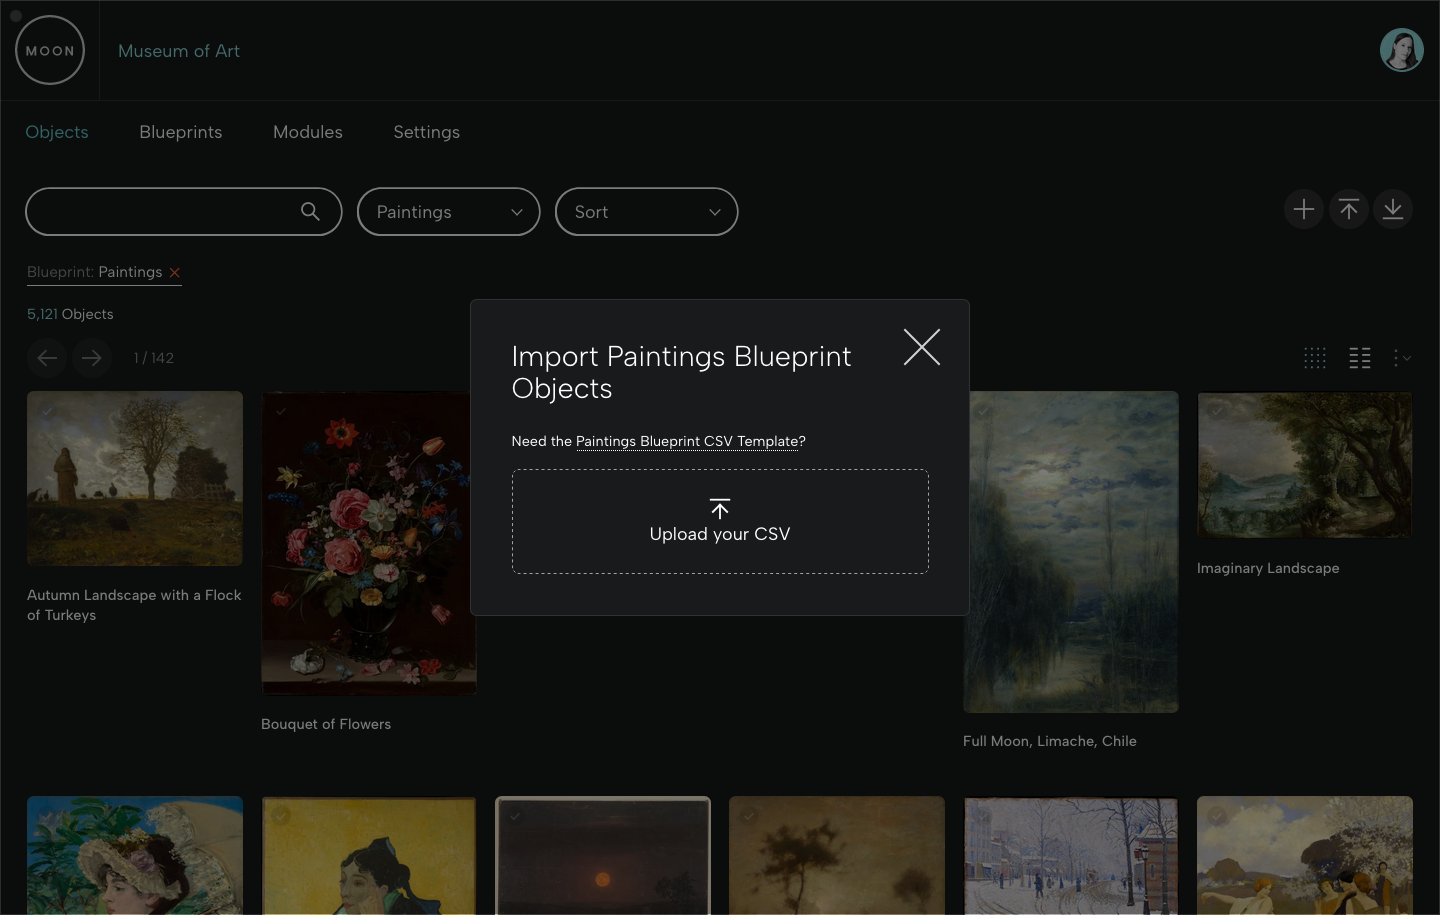
You’ll be asked if you need the Blueprint CSV Template. Click to download it.
Import New Objects
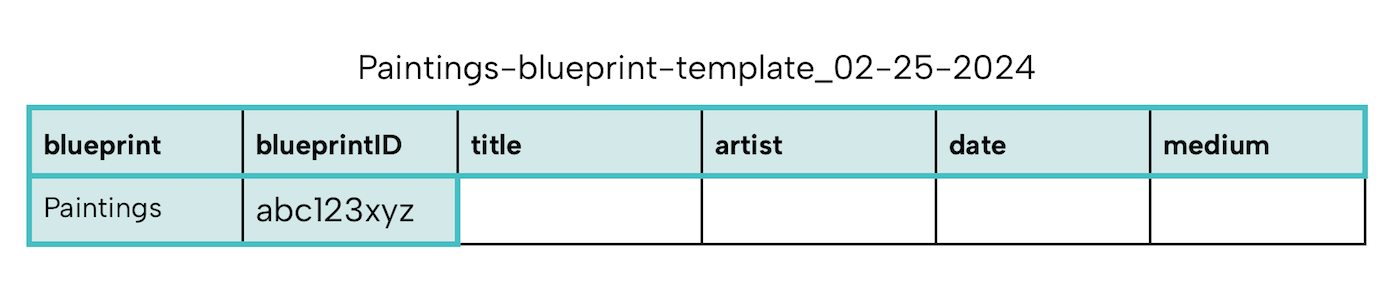
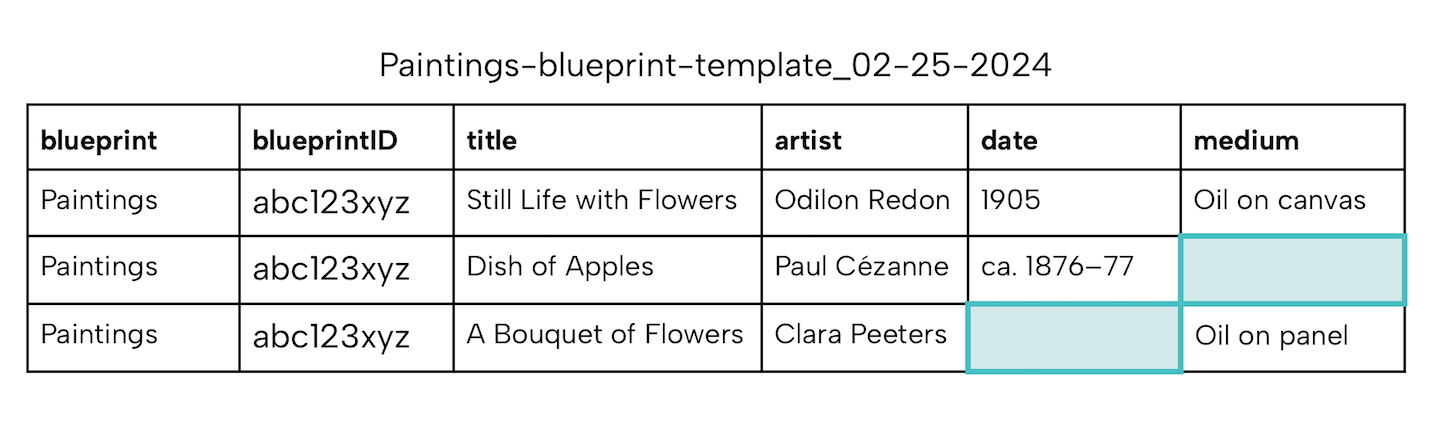
The first line in the CSV template (the column headings) will correspond to the field ids in your selected Blueprint. DO NOT alter these headings.
The template will also display the Blueprint Name and the Blueprint ID in the first row.
Now it's time to add your object information values to the CSV template. Remember we mentioned CSVs are finicky?
Here are the rules:
Add the name of your Blueprint and the Blueprint ID for every object you add.
Every object must have a title.
If a field other than title has no data, leave it empty.
When you've entered all the information for your new objects, save your CSV, and go back to the Objects page. Filter your objects by the same Blueprint.
Click on the upload icon (the upward facing arrow) to import. Click Upload your CSV.
You’ll receive a message letting you know the objects were added successfully.
PLEASE NOTE: When you upload a CSV with new objects, make sure to upload it only once – otherwise duplicate objects will be created.
Add, Update, and Delete Objects
To edit information for a group of objects (with the option of adding new ones), go to the Objects page and filter your objects by the desired Blueprint. Then click on the download option for that Blueprint.
You’ll be given an option to download the Object Data for the Blueprint as JSON or CSV. Choose Download CSV.
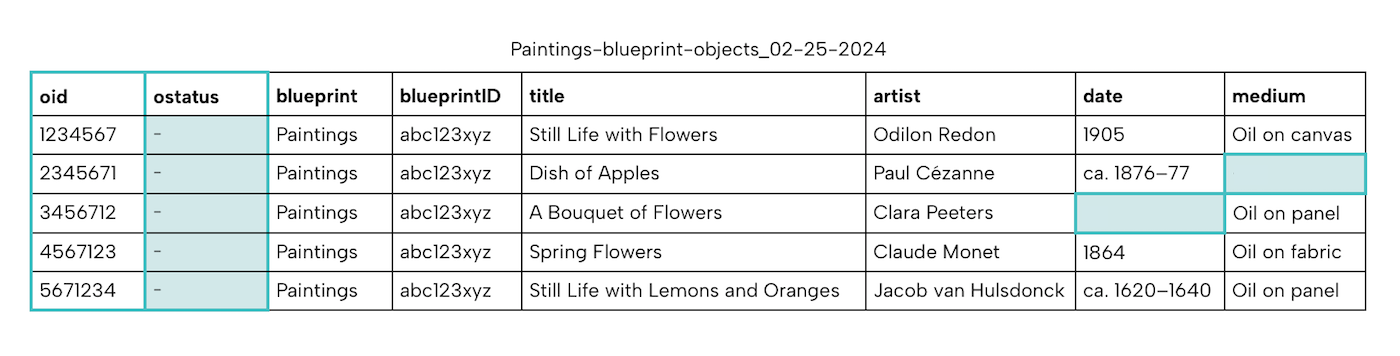
The CSV will include your existing object data for all objects using that Blueprint. In this example, five objects use the Paintings Blueprint.
The column headings will correspond to the field ids in your selected Blueprint. DO NOT alter these headings.
The CSV will display the unique Object ID (oid) for each object in the oid column. DO NOT alter the oids.
The CSV will also include an Object Status for each object (the ostatus column, more on this later). This field will be auto-populated with hyphens.
Where there are no information values, fields will be empty.
Adding a New Object
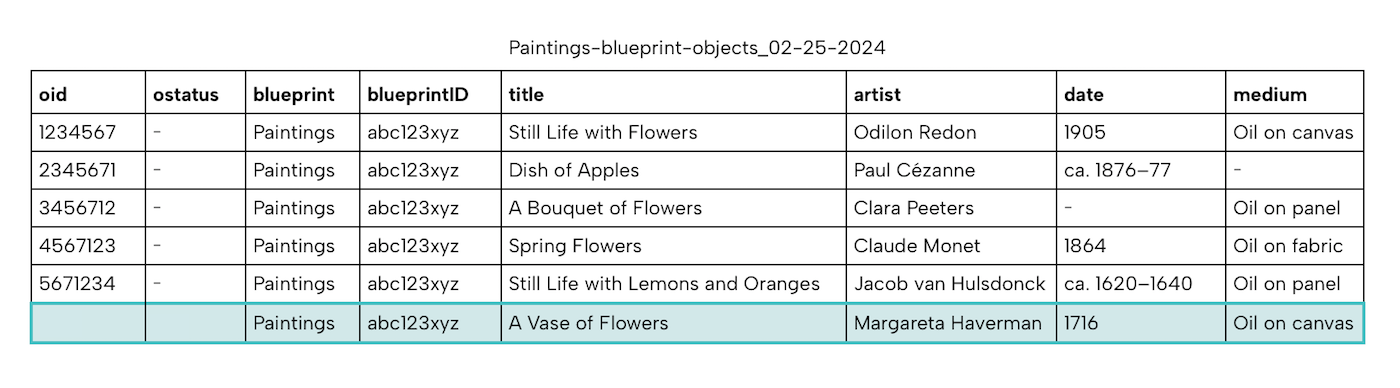
Here we've added a new row for an object titled A Vase of Flowers.
Because it's a new object, it will not have an Object ID (oid) or an Object Status (ostatus).
We input data in the fields for blueprint, blueprintID, title, artist, date, and medium.
Leave the fields under oid and ostatus empty.
Updating Object Information or Deleting an Object
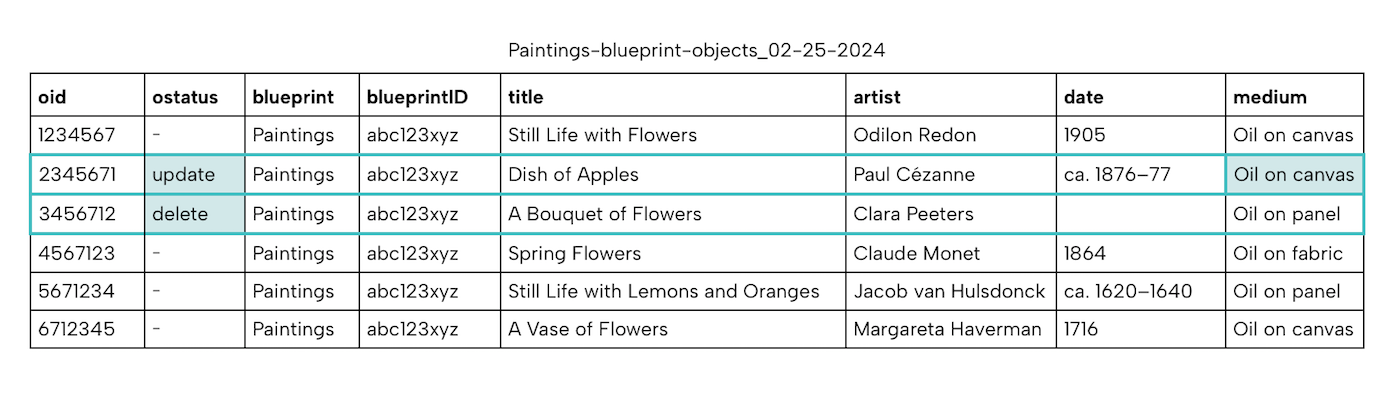
To update or delete an object, you'll enter information in the object's Object Status (ostatus) field.
To update object data, enter the word update (lowercase) into the object's ostatus field, and add the updated information for that object. Here, for Dish of Apples, we've added "Oil on canvas" to a field that was previously empty.
To delete an object, enter the word delete (lowercase) into the object's ostatus field.
PLEASE NOTE: For all other objects, leave the auto-generated hyphens in the ostatus fields.
When you've updated the information in your CSV, save and upload it. You’ll receive a message letting you know the objects were added and/or deleted successfully.
PLEASE NOTE: When you upload a CSV with new objects, make sure to upload it only once – otherwise duplicate objects will be created.
Questions about CSVs? Don't hesitate to ask.