Did you know that with Objects and Order, you can organize objects for an onsite exhibition and create a complementary online version in one flexible, collaborative space?
- Keep track of everything that happens around your exhibition objects, across departments.
- Stop hunting for jpgs and captions.
- Avoid getting lost in messy email chains.
- Forget squinting at teeny thumbnails in outdated spreadsheets.
In this guide, we'll explore how your organization can use Objects and Order to plan and present outstanding exhibitions, onsite and online.
The Exhibition Blueprint
Exhibition projects, physical and digital, start taking shape when you set up an Exhibition Blueprint.
Blueprints are customizable, purpose-built forms for all the object data you need to plan and present an exhibition.
You probably already use project planning software for managing an onsite exhibition (to keep track of multi-departmental meetings, milestones and due dates, vendors and couriers, etc.). This is ideal for top-level planning, but not for capturing what's happening at a more granular level. An Exhibition Blueprint can help you can document everything that happens around your objects.
Our sample exhibition is called Over the Moon. When you add a new Blueprint, you can start with the Exhibition template.
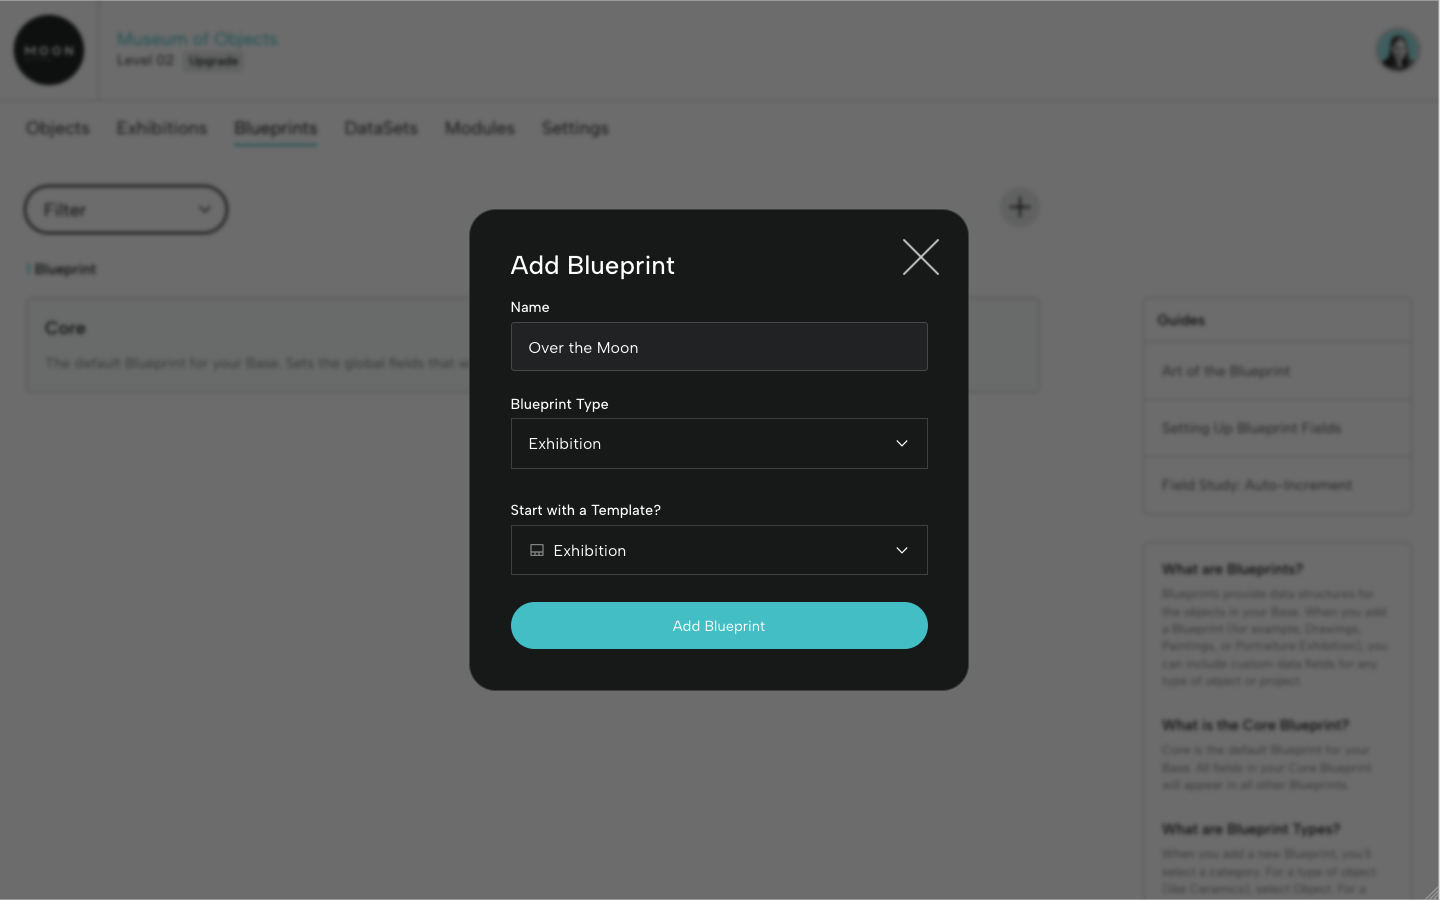
If you begin with a template, you can still rename, customize, and arrange fields for your exhibition. And, you can add and delete fields as your project evolves.
For example, you can set up fields for:
Tombstone information
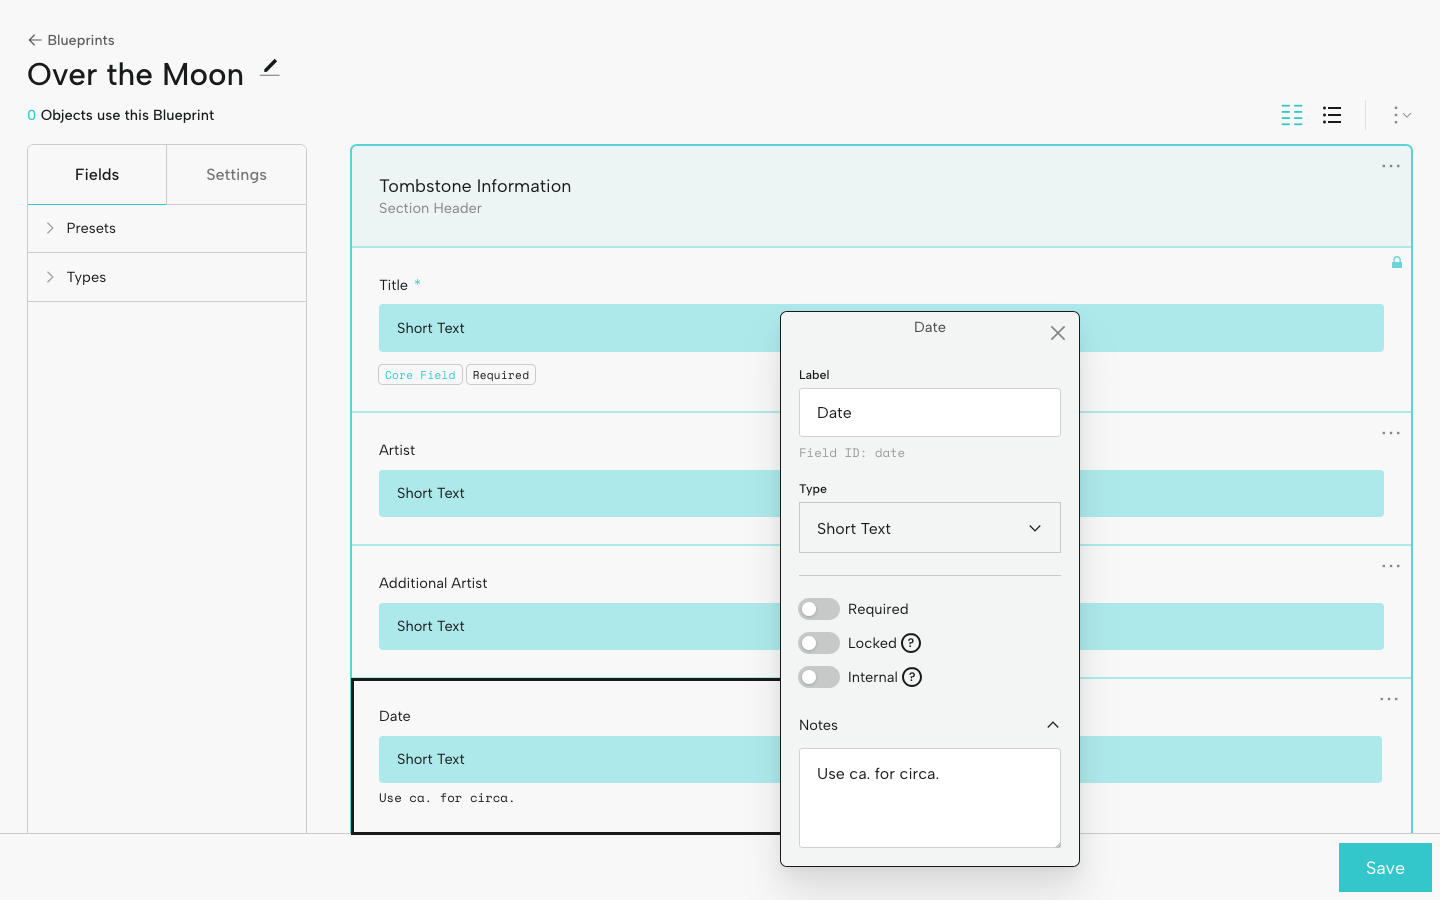
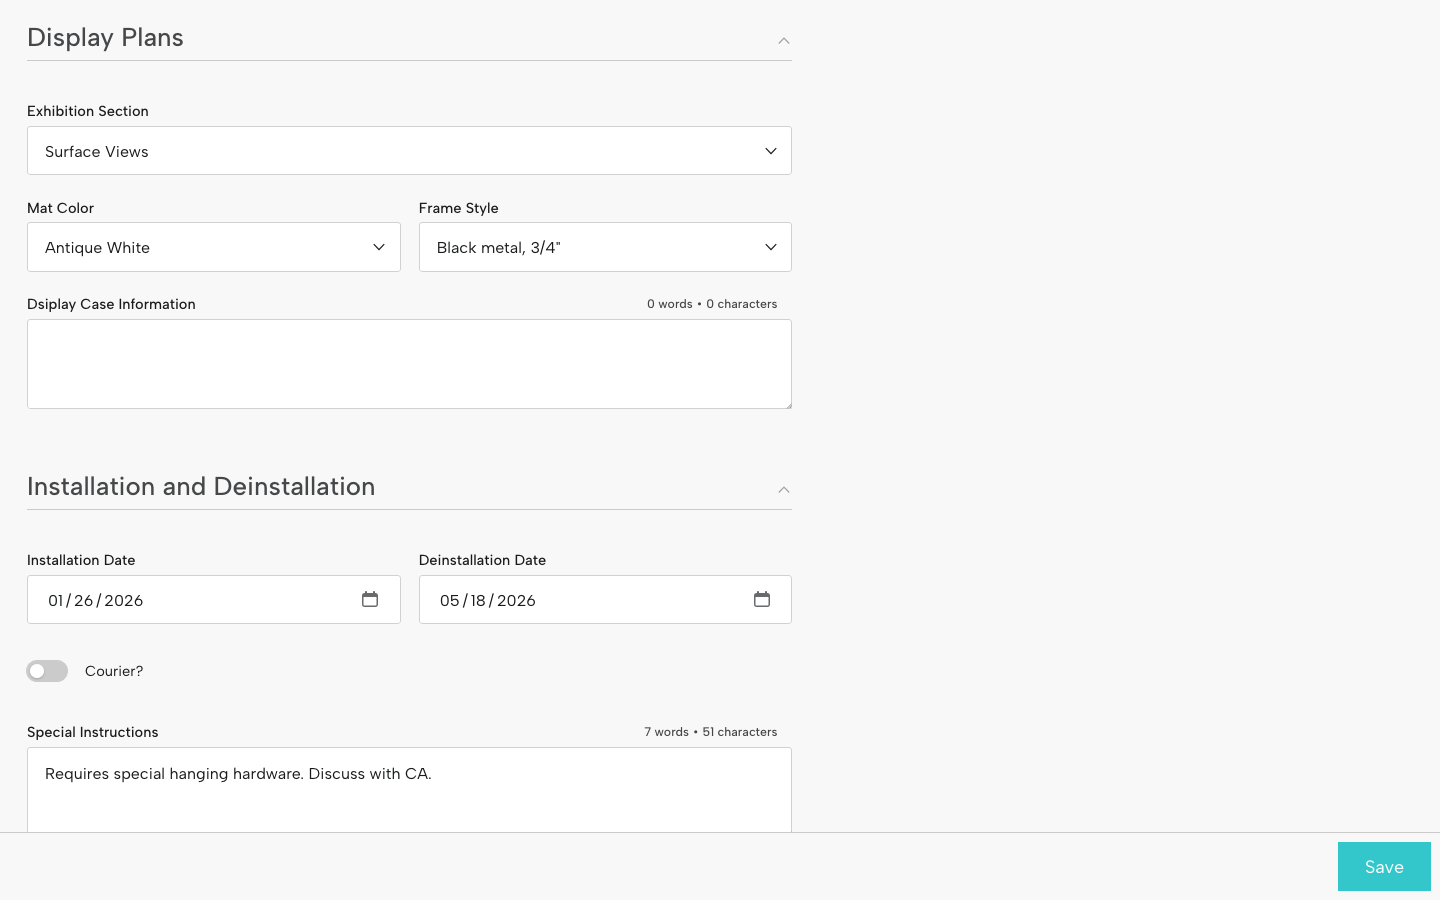
Display Plans
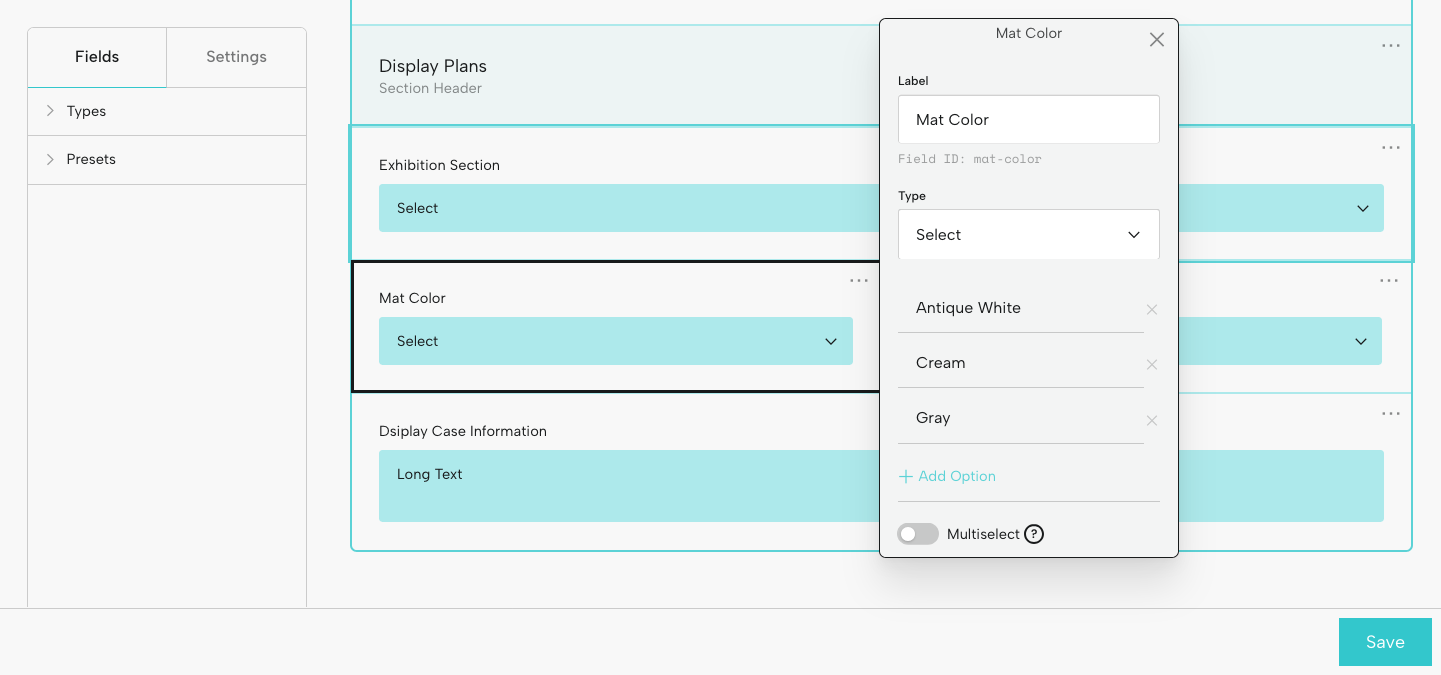
Installation and Deinstallation
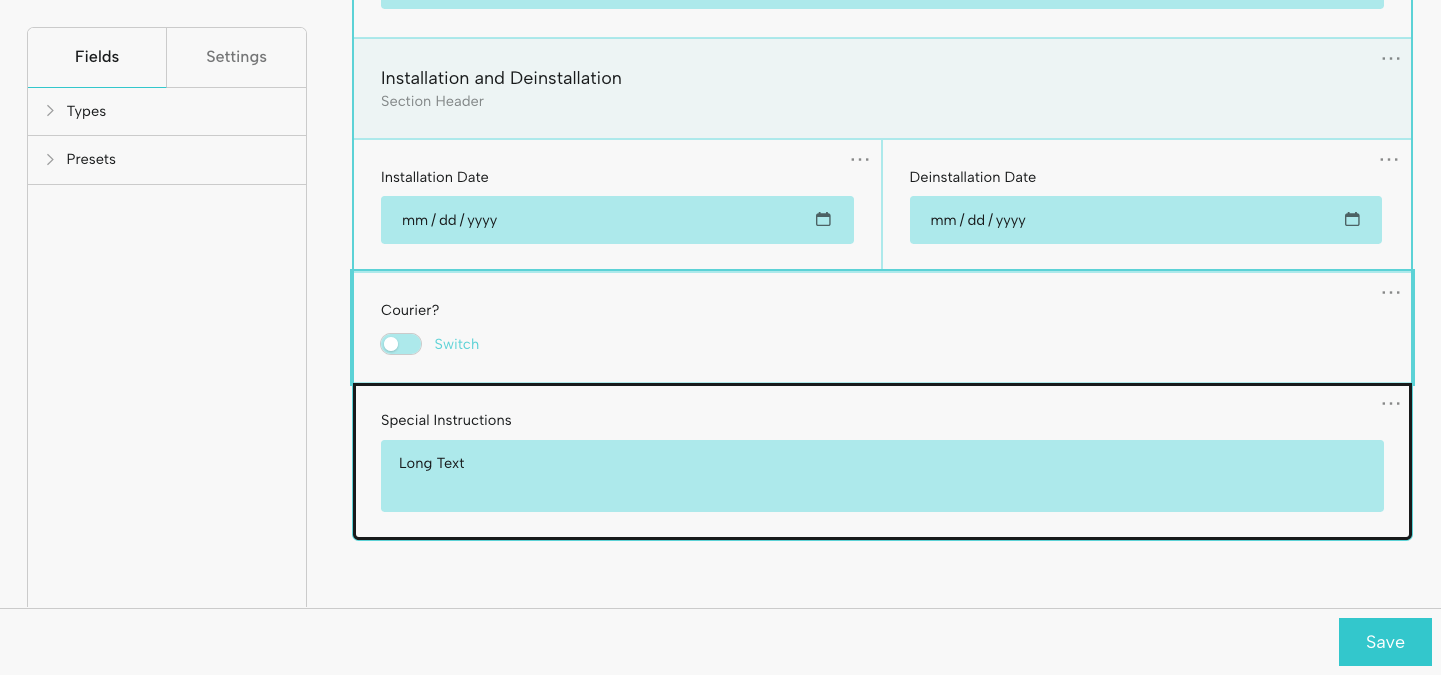
You can also set up fields related to Conservation, Publications, Photography, and Communications and Marketing, etc, so you can capture all the information that's critical for your team.
For data that doesn’t need to be available for display in an online exhibition, like mat color or installation date, you can designate these fields as “Internal" when you set up the Blueprint.
It's important to keep in mind that you don't enter information in a Blueprint; instead, this is done at the object level. The Blueprint generates the form fields in which you'll input the data for each object.
Here's what our sample Blueprint fields look like on an object page:
Exhibition-Specific Fields
In any Blueprint fields for object information that will be specific to a single exhibition (for example, Label Text or Audio Guide), we recommend including the exhibition title (or a short version or other identifier) in the field label.
For example:
- Label Text - Portraits in Paint
- Label Text (OTM)
- Audio Guide (Over the Moon 2025)
Why? Because you might create multiple exhibitions in your Base. If you include the same object in two different exhibitions, it will likely have its own label text or audio file in each. Whatever format you choose, be consistent in how you name your fields across Blueprints.
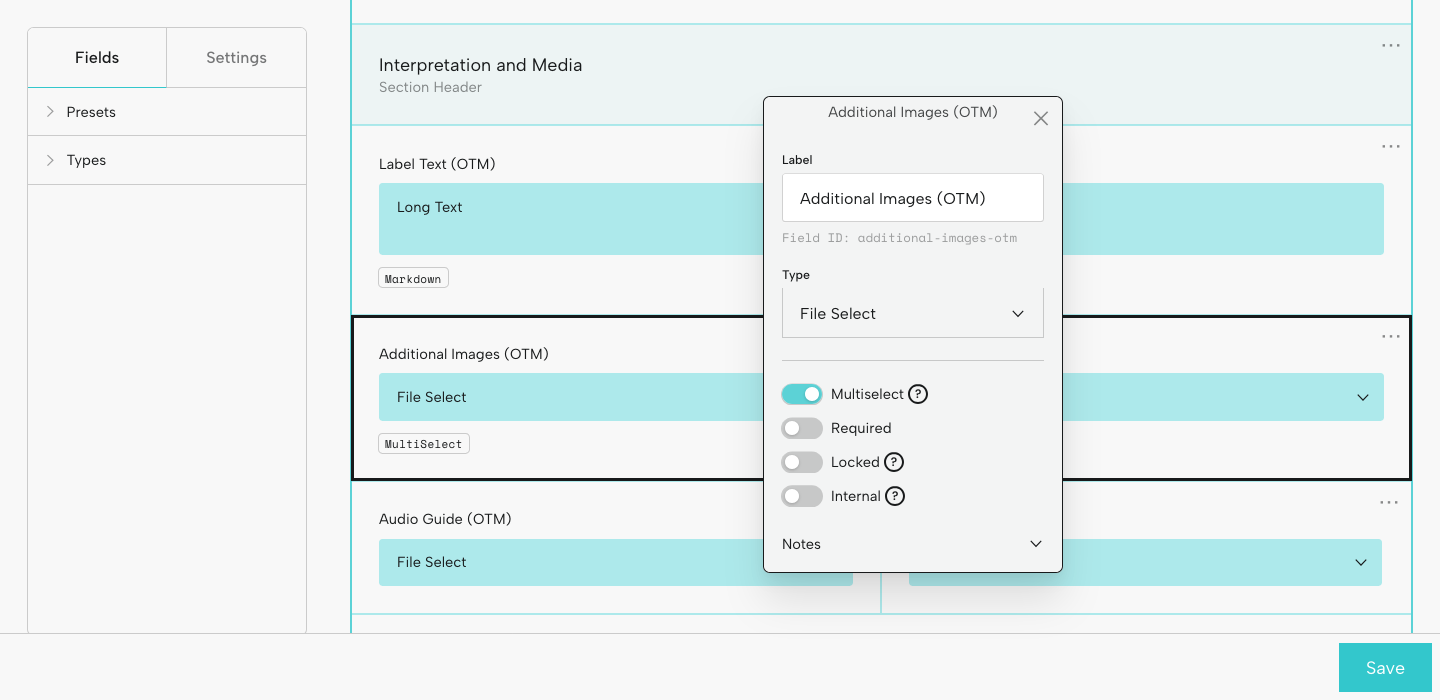
File Select Fields
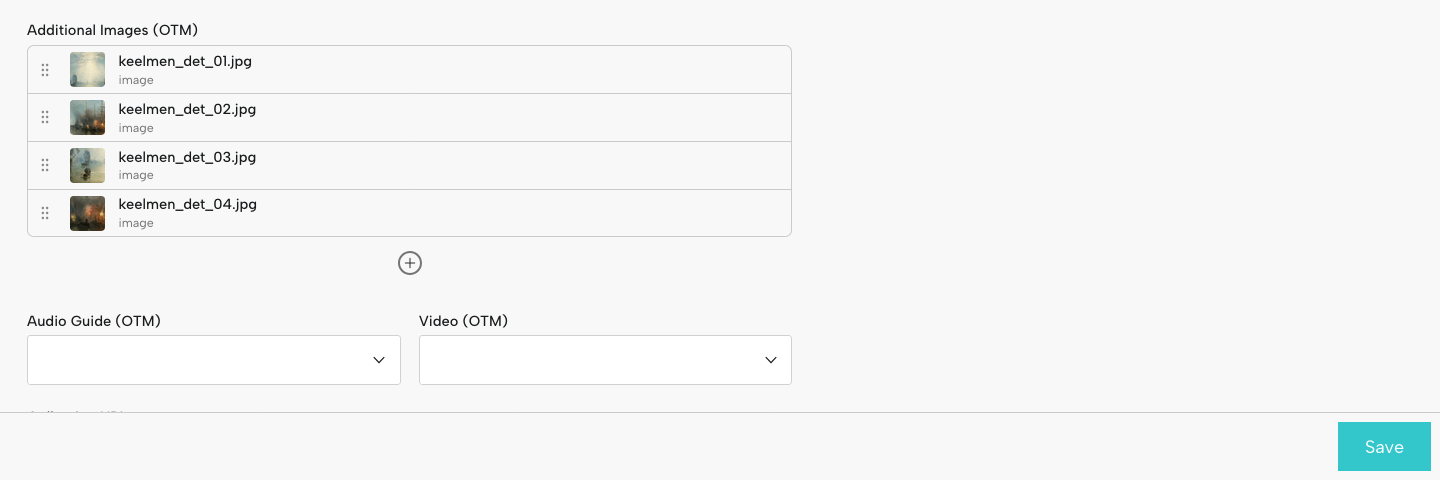
Use the File Select field type if you need to designate image, audio, or video files for exhibition use. These fields can be single or multiselect.
For example:
- Additional Images (OTM): here you might choose the multiselect option to select several details.
- Audio clip (Portraits in Paint): for an audio guide file.
- Video - Over the Moon: if some of your objects have a related video.
File select fields play an important role in a digital exhibition, as they allow you to select assets to display at the object level. See more about this below under Object Layout.
For more information, check out Art of the Blueprint and Setting Up Blueprint Fields.
Add Objects
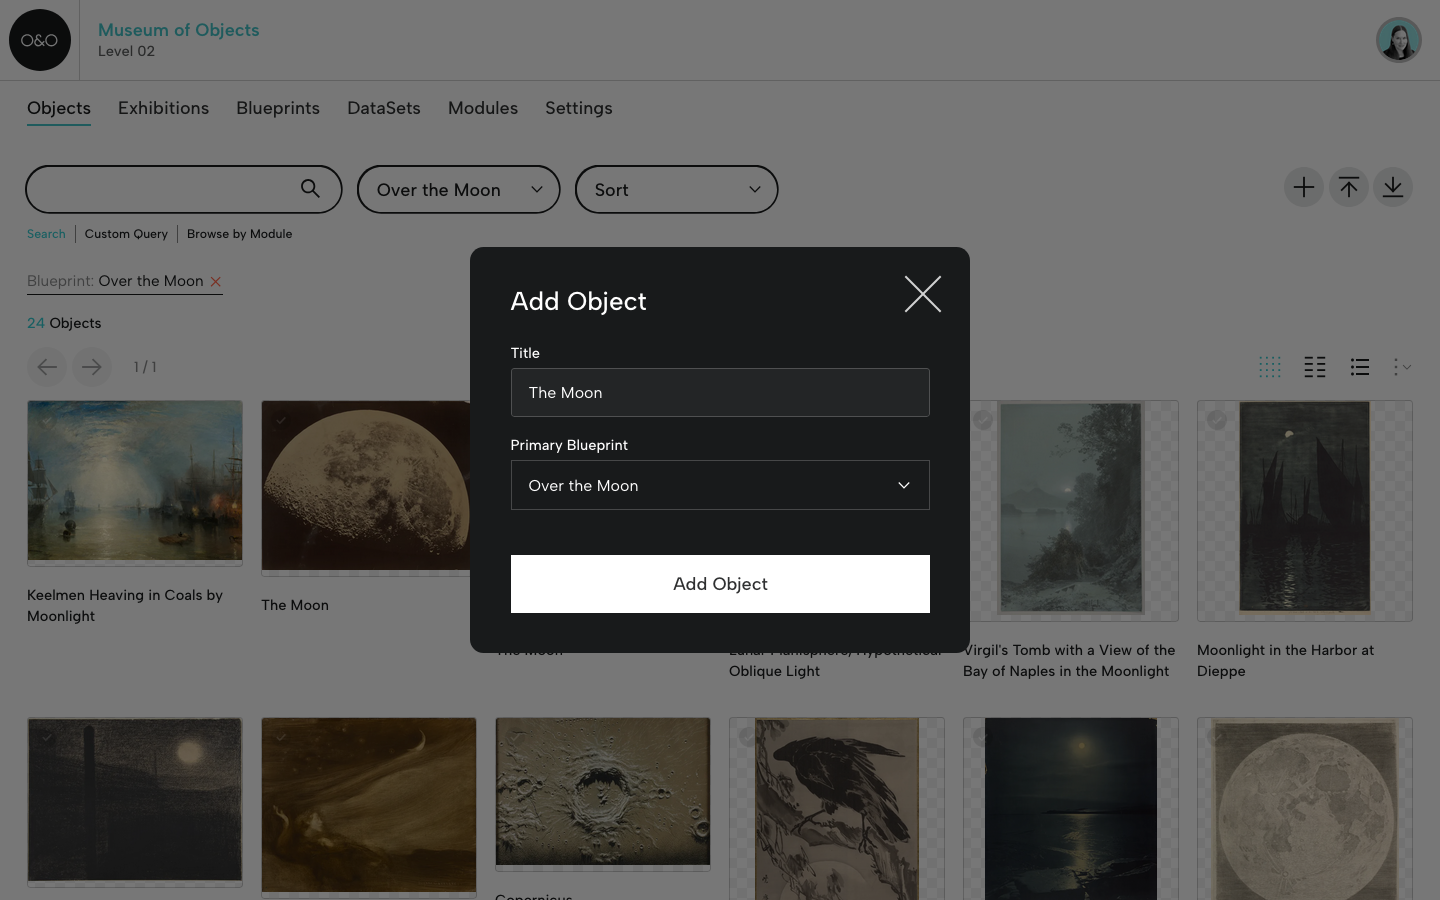
From the Objects page, you can add individual exhibition objects by clicking the + icon and selecting your Blueprint.
You can also add a group of exhibition objects via CSV (using the CSV template for your Exhibition Blueprint). For more on CSVs, see CSV Guidelines.
Add Object Data
For each object, you can designate your Exhibition Blueprint as Primary (indicated by the blue star) or Secondary (indicated by the blue check). Click the Blueprint name to display the related fields.
You and your team can enter or update object information as your project progresses. If you need to add other types of information, go back to the Exhibition Blueprint and add new fields.
When you create a digital exhibition, this object data will be available for display (unless you designated a field as Internal when you set up the Blueprint).
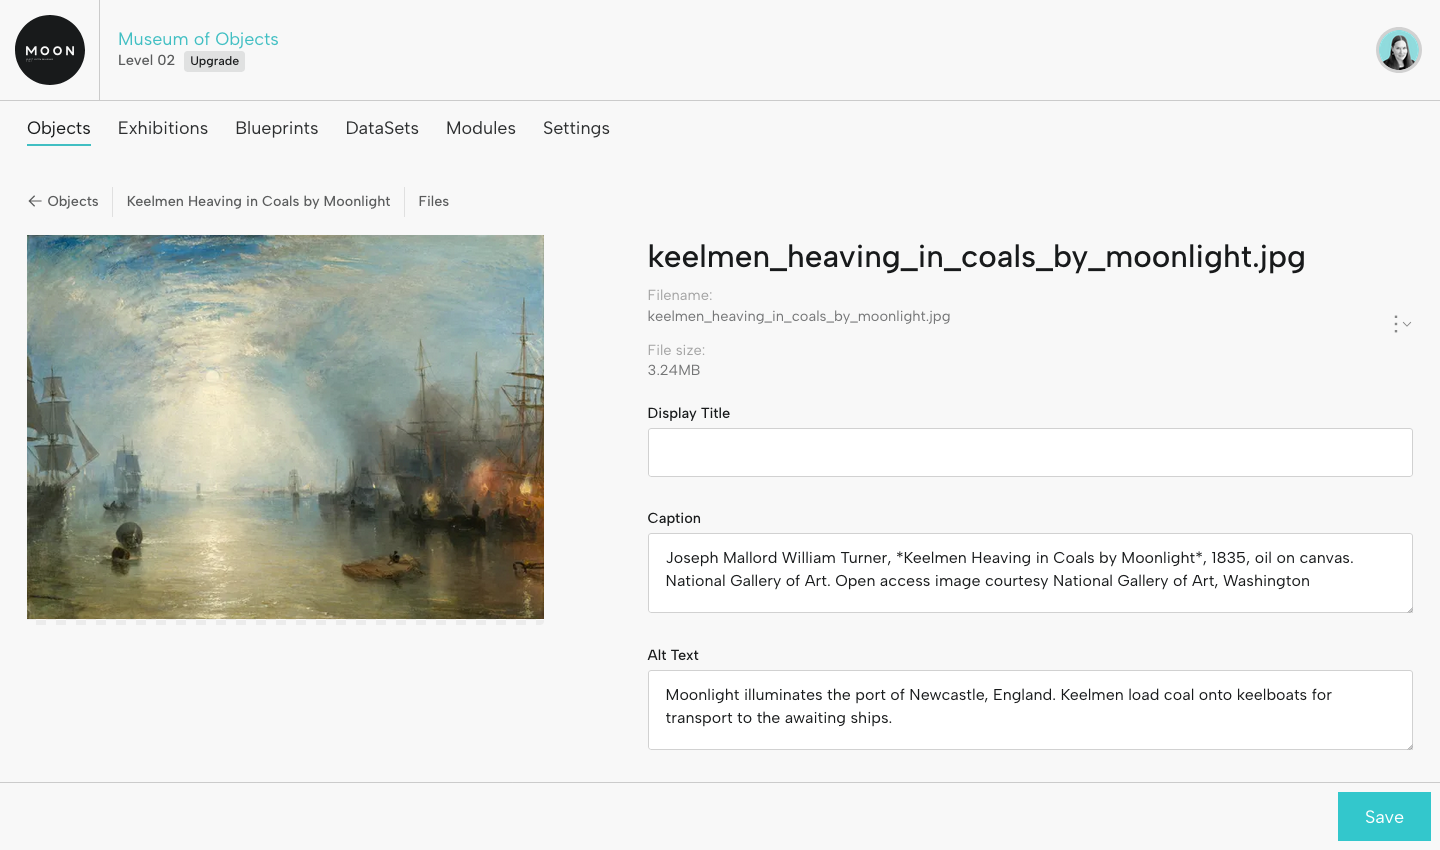
Add Object Files
Add image, audio, video, and other files for each object. Object files are not Blueprint-specific (you'll always have access to all your object assets, regardless of Blueprint).
When you have multiple image files, select a primary image. This will be the representative image you'll see on the Objects page. It will also be the image that appears in the digital exhibition (for example, in the object list).
Image, audio, and video files will be available for use when you create an exhibition.
For each file, you can add caption, alt text, and rights information. Here, in the caption, we're using Markdown to italicize the title (by adding asterisks around it).
Captions and alt text will be available in the digital exhibition.
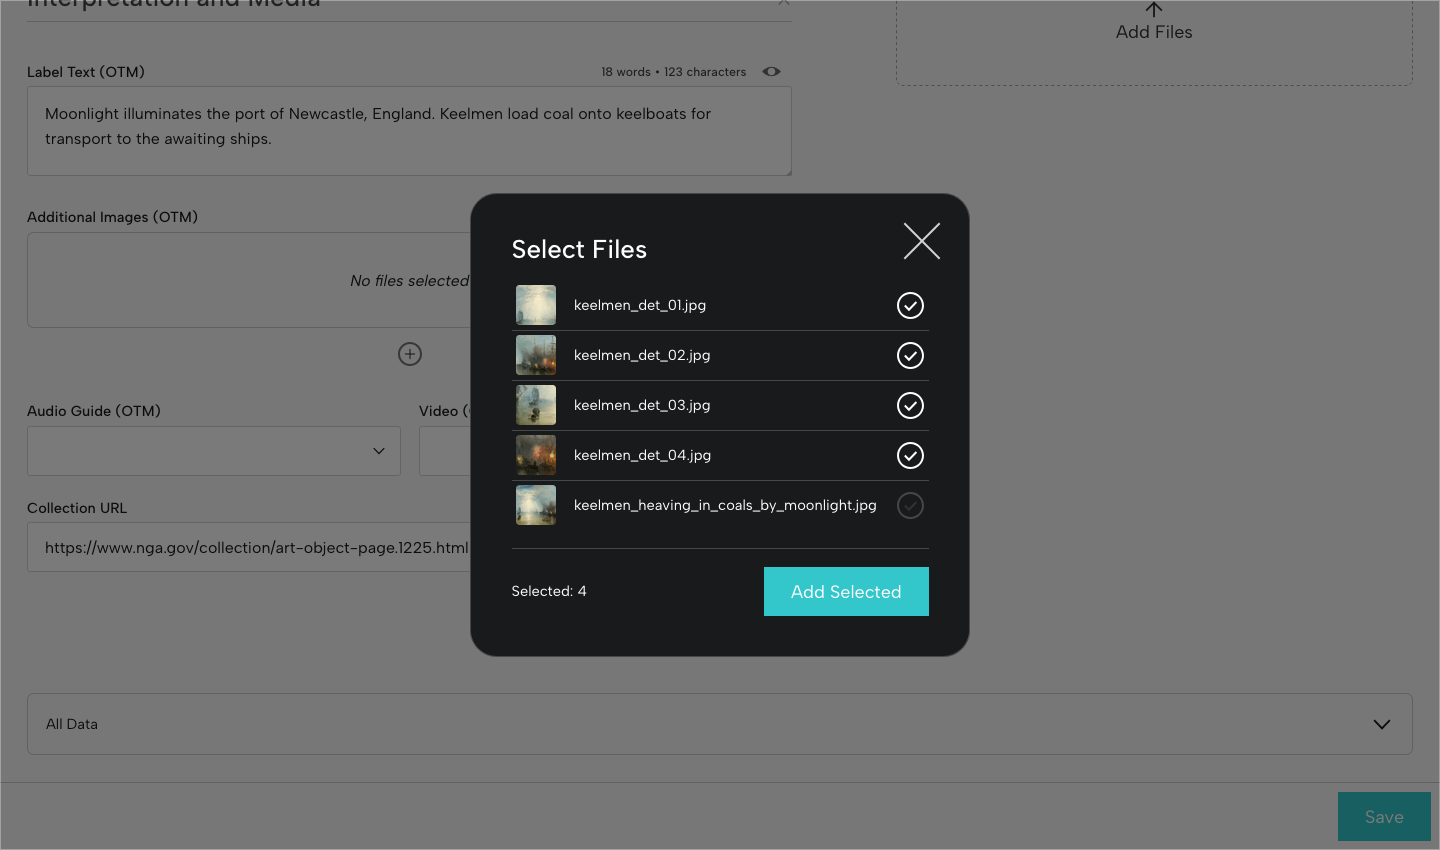
Exhibition-Specific Media
If you added any File Select fields to your Blueprint (for image, audio, or video files), make your selections for each object. These assets will be available at the object level in the digital exhibition.
In this example, we're selecting 4 details of this painting for the Additional Images (OTM) field.
Access Object Data
How can you access and use the object data you've entered for your exhibition?
From the Objects page, filter by Blueprint. This gives you the option to download a CSV with exhibition object data.
You can also build a custom PDF, and select the fields you want to display for your objects.
For more on what you can do with objects, see Object Actions.
Create A New Exhibition
Now that you’ve entered object data and media, you're ready to create an exhibition. You can do this whether or not you plan to present a digital version. You can use the tools in the Exhibition Builder to help visualize your project, organize objects into sections, generate an object checklist, or present your exhibition-in-progress to colleagues.
Go to Exhibitions in the menu, then click the + icon at upper right. Follow the steps to set up a new exhibition. The selections you provide here can be updated later.
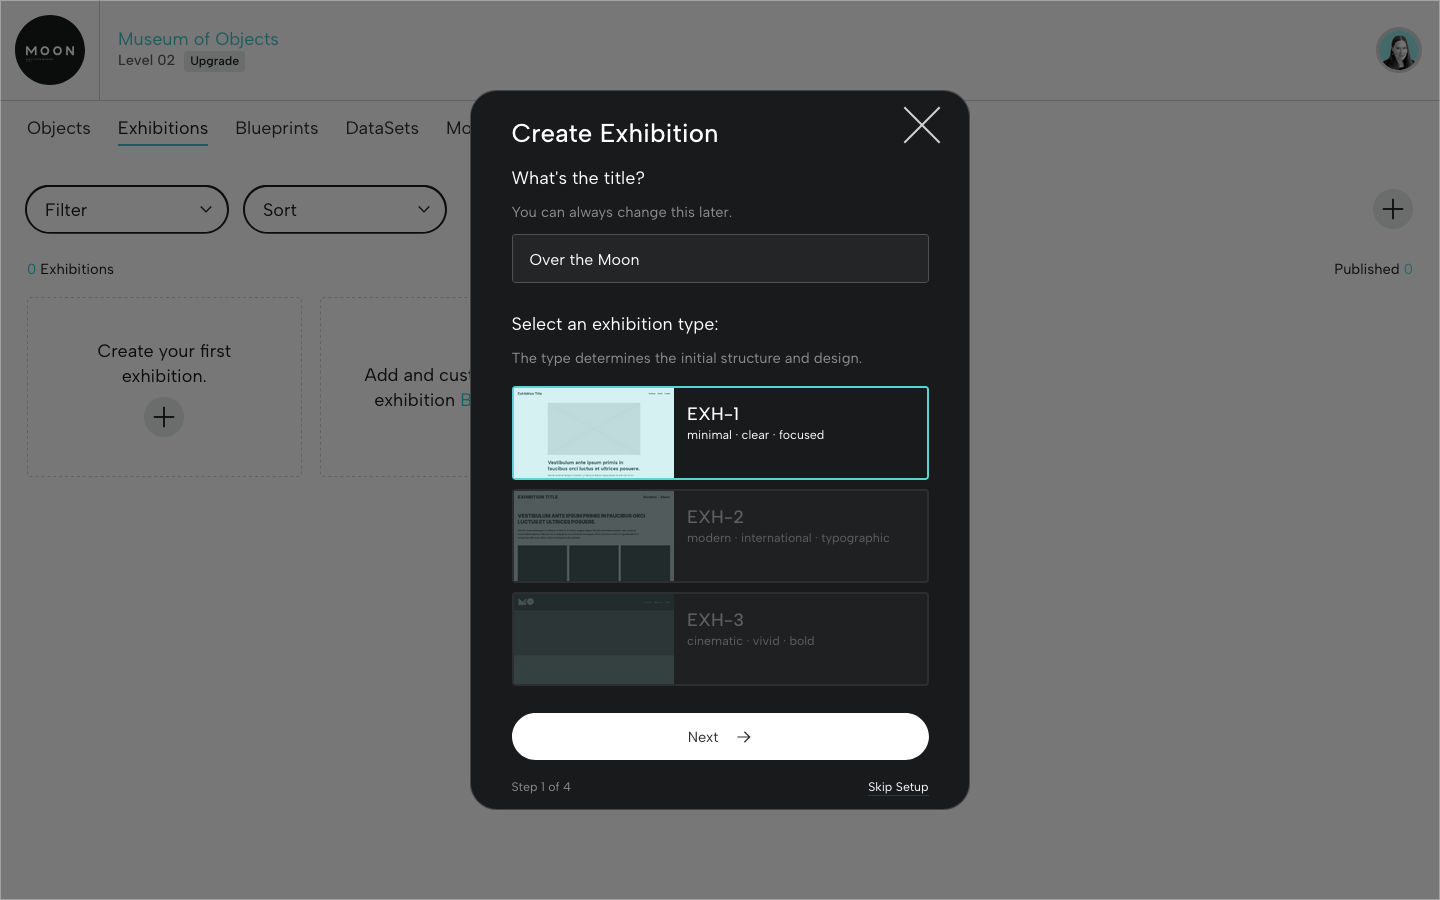
Step 1 of 4: Add your title and select an exhibition type. More types coming soon!
Step 2 of 4: Select your Exhibition Blueprint.
Step 3 of 4: Add exhibition sections (if you have them).
Step 4 of 4: Add exhibition pages (you can change these names and add other pages later).
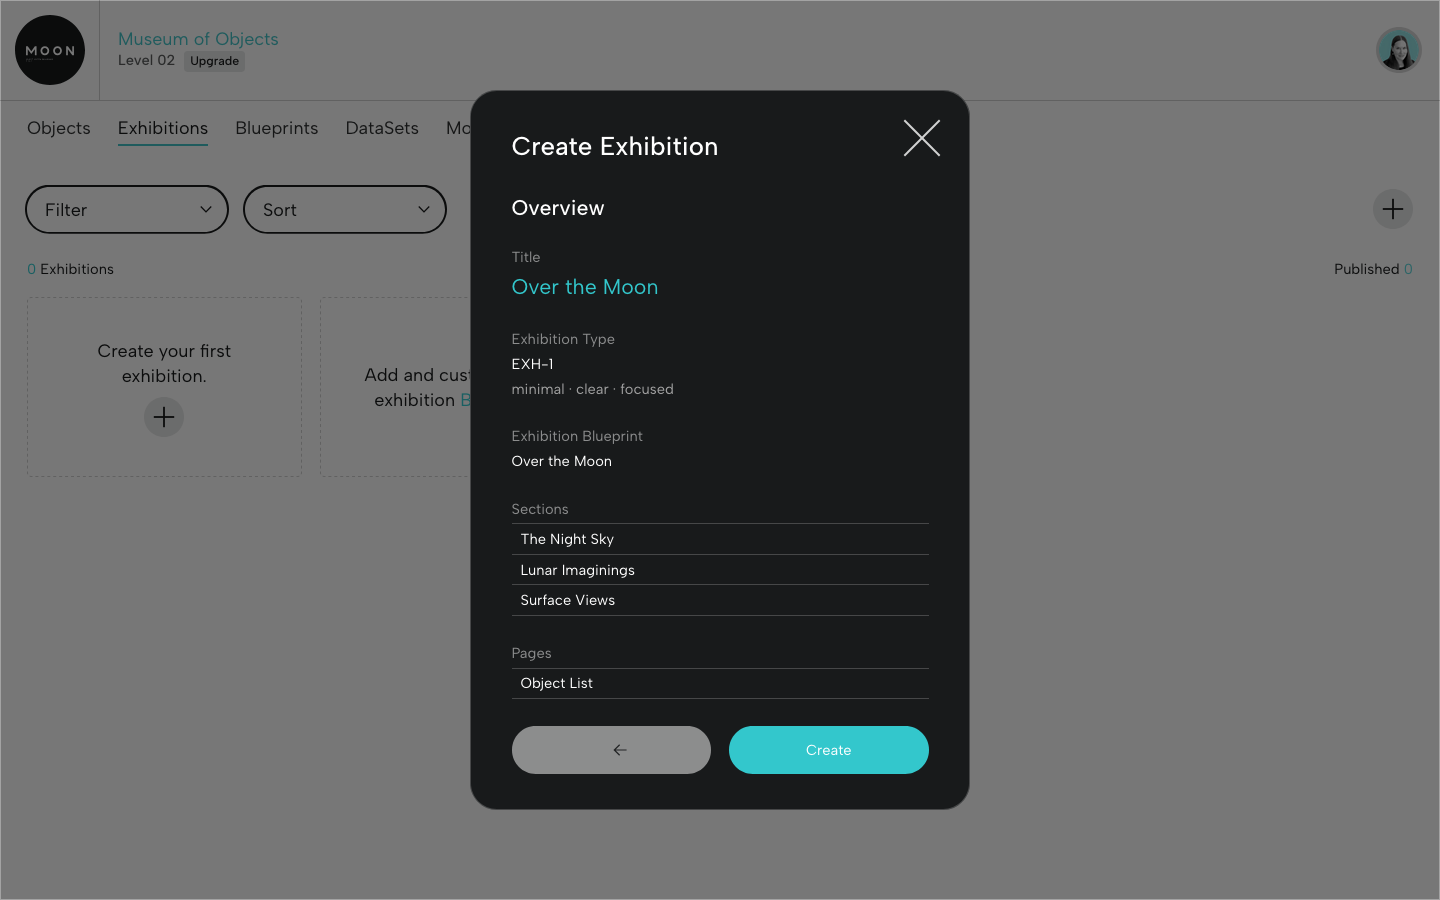
Review your exhibition information and click Create.
Exhibition Objects
When you create the exhibition, all the objects associated with the Exhibition Blueprint will be automatically available in the exhibition. Let's look at several areas where you can customize the display of object images and data.
Object Manager
In the Object Manager, sort exhibition objects into their respective sections by dragging and dropping. The order you select here will inform object order on the Section pages.
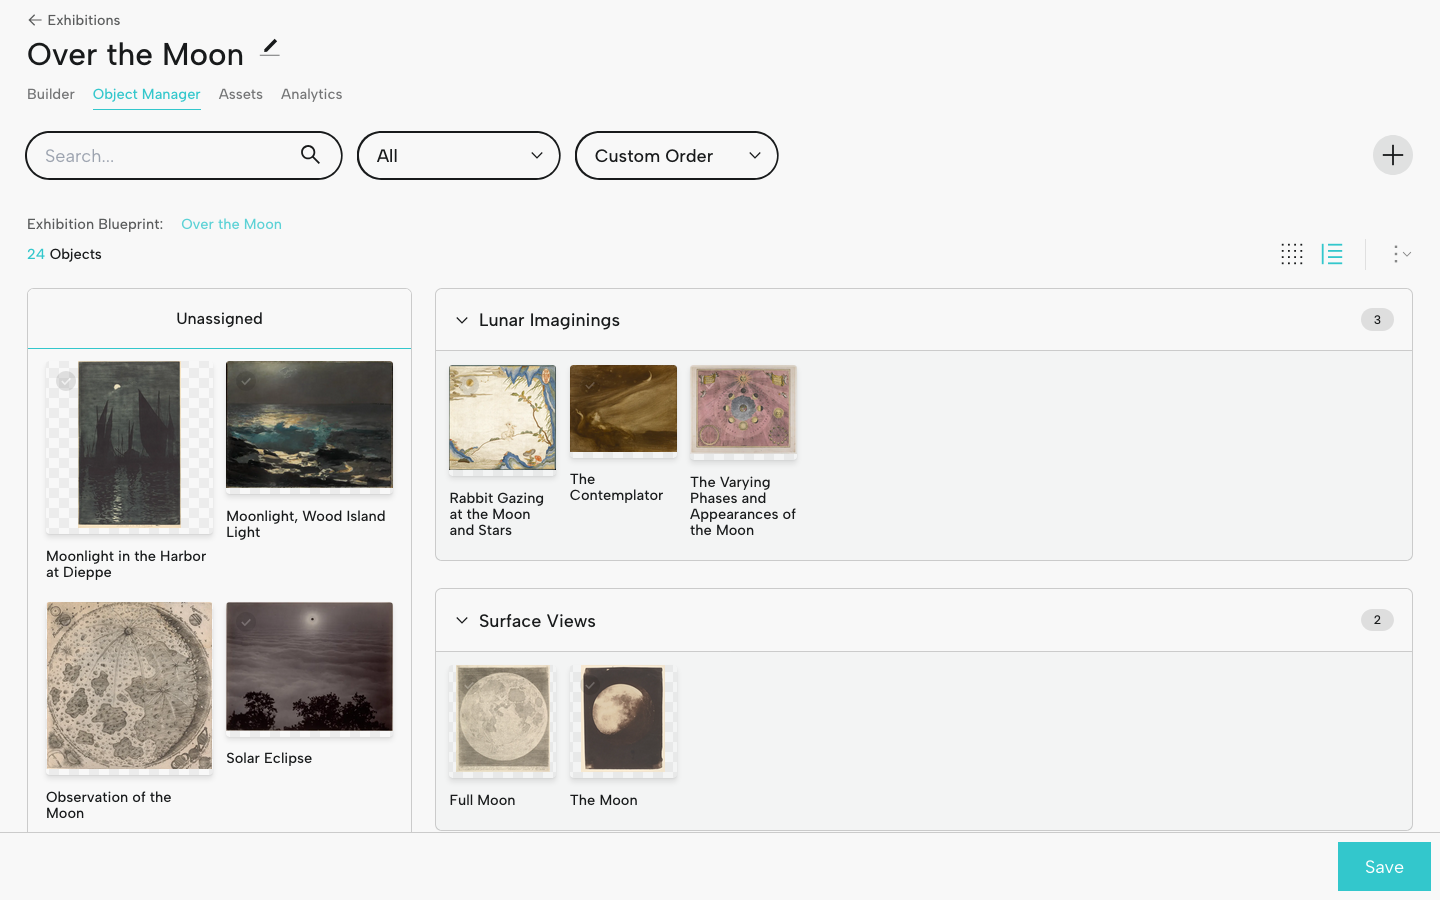
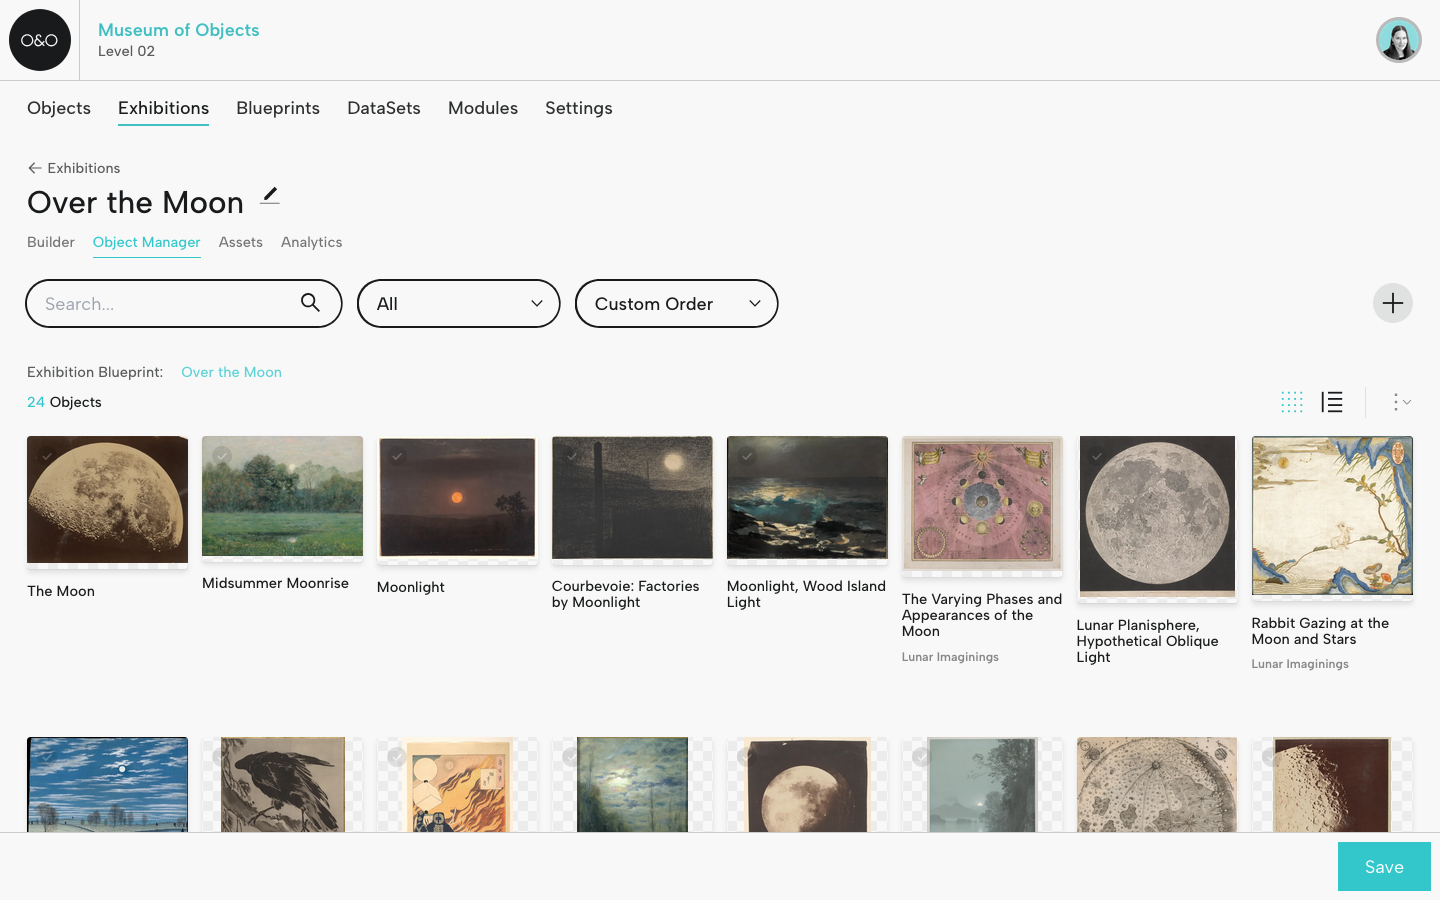
Click the grid icon to view all the exhibition objects and arrange by dragging and dropping. The order you select here will inform object order on the Object List.
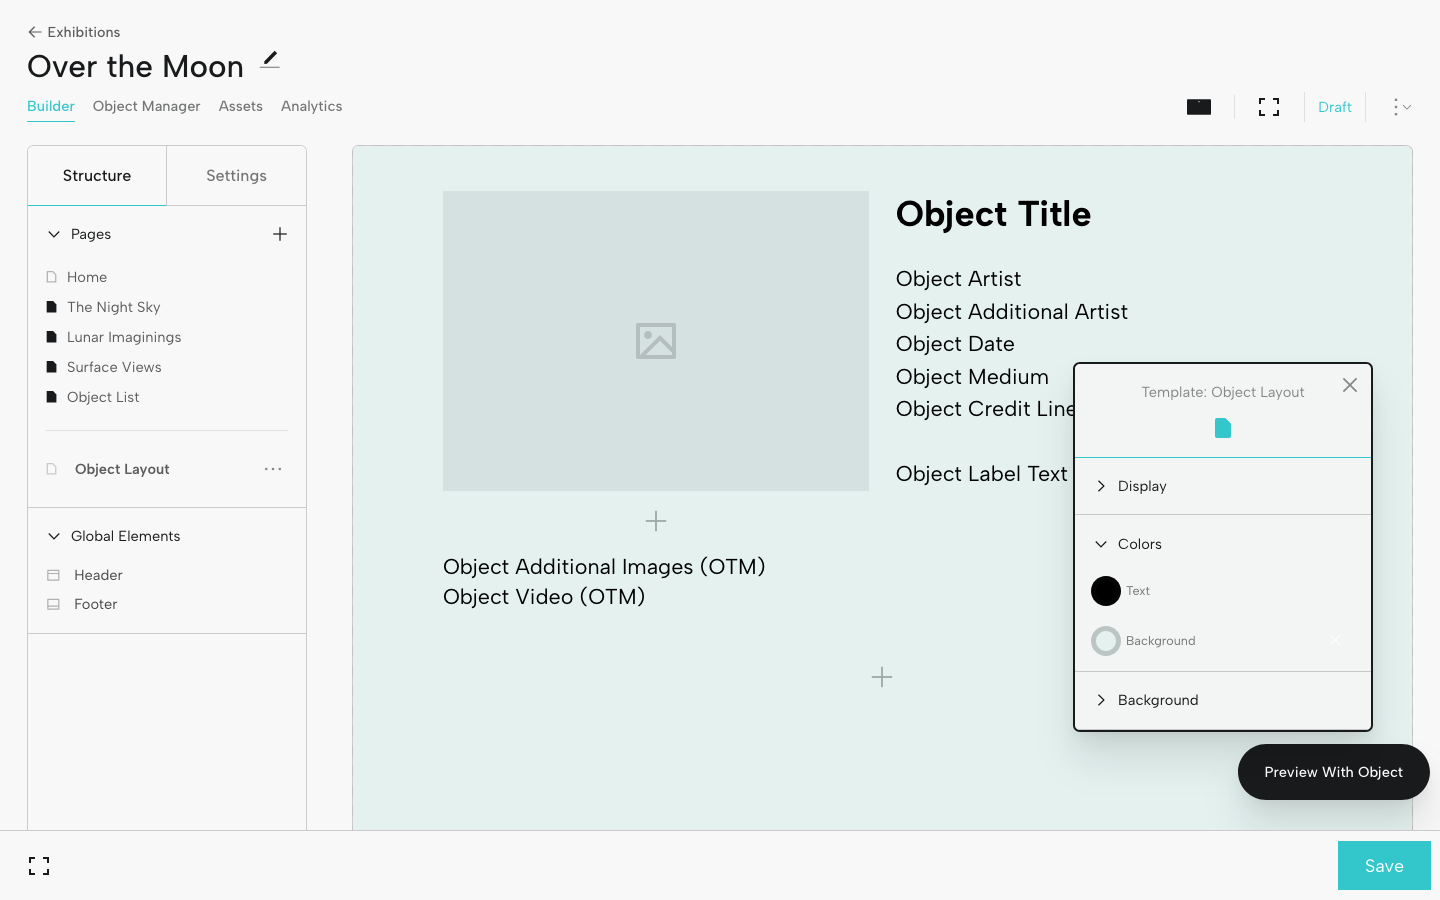
Object Layout
Think of Object Layout as a customizable template for displaying data and media for individual objects. You'll select and arrange the fields you want to display (these come from your Exhibition Blueprint). You can also adjust the look and feel and preview the layout with specific objects.
Here, we've added fields for Additional Images and Video. If files were selected for an object (see File Select Fields above), they'll display in Object Layout.
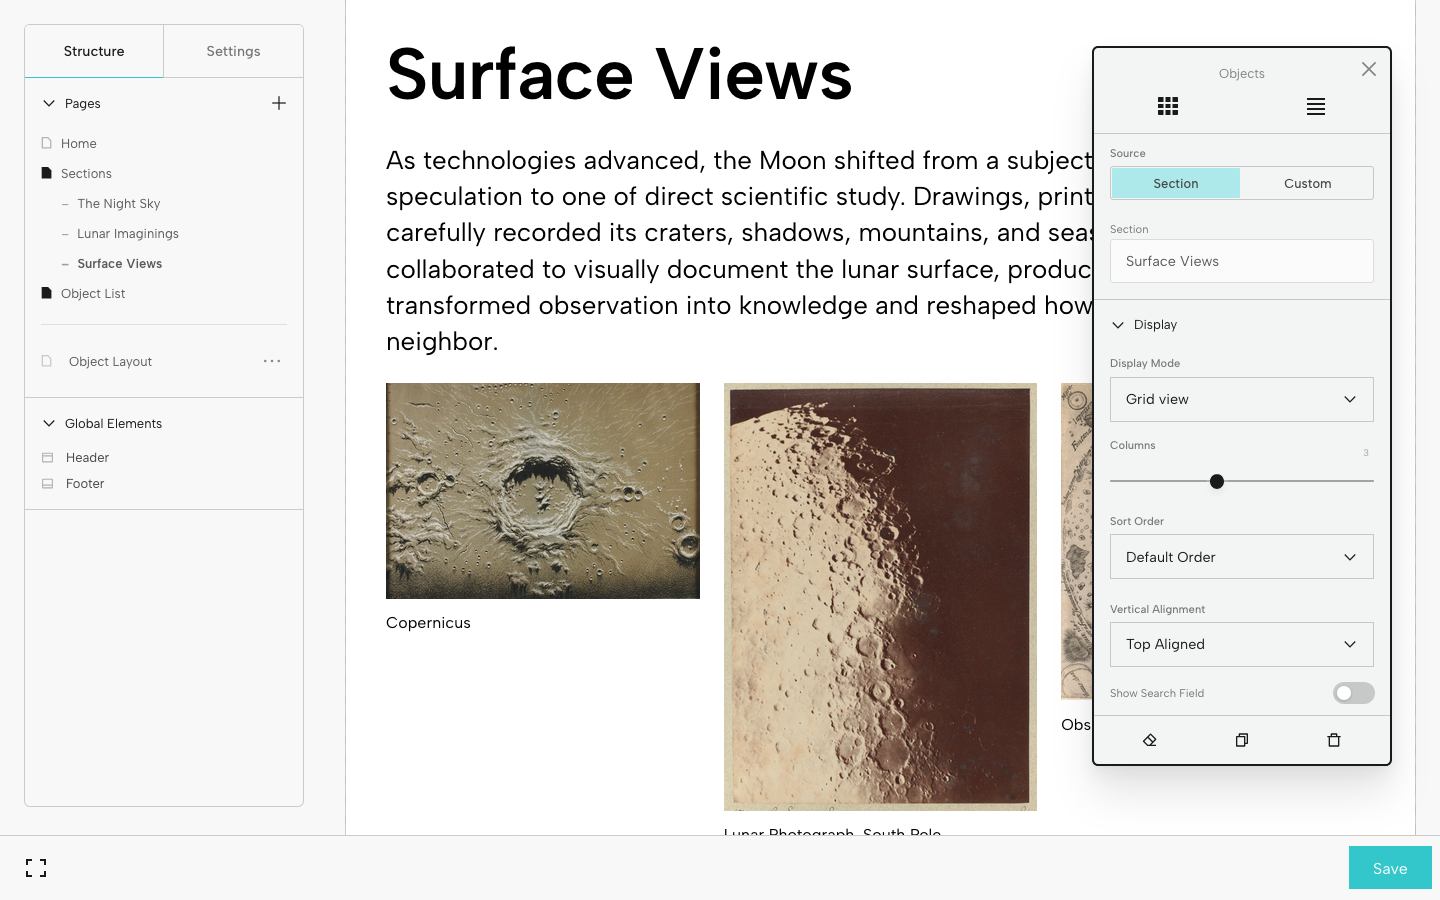
Objects in Sections
In the Structure tab, under Pages, click a section page (if you have one).
When you assign objects to a section using the Object Manager, object images will automatically appear on that section page in a grid format. Click the grid of images and the Universal Editor will pop up.
- Under Display, select the preferred Display Mode: Grid view, List view, or Carousel view. For Grid view, you can reduce or expand the number of columns by using the dragger. Here we've selected 3 columns.
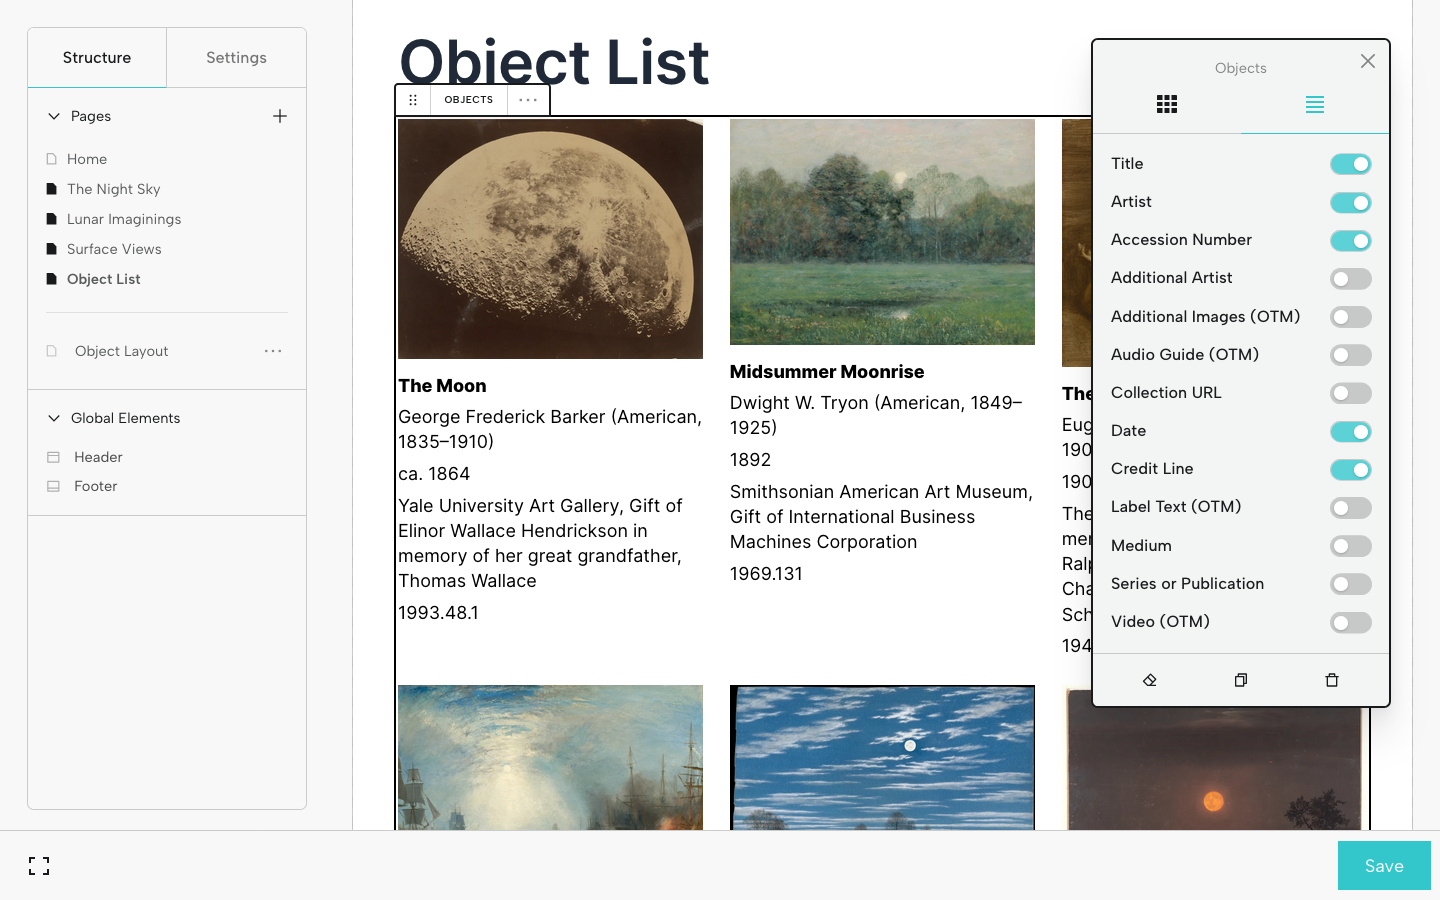
Object List
If you added an Object List when you created your exhibition, all objects will be automatically displayed on this page.
For object data, click the Fields tab (icon with 4 lines near the top of the Universal Editor). You’ll be able to toggle on the information you want to display below each image. Drag and drop fields to reorder. The options you see are generated by the Exhibition Blueprint.
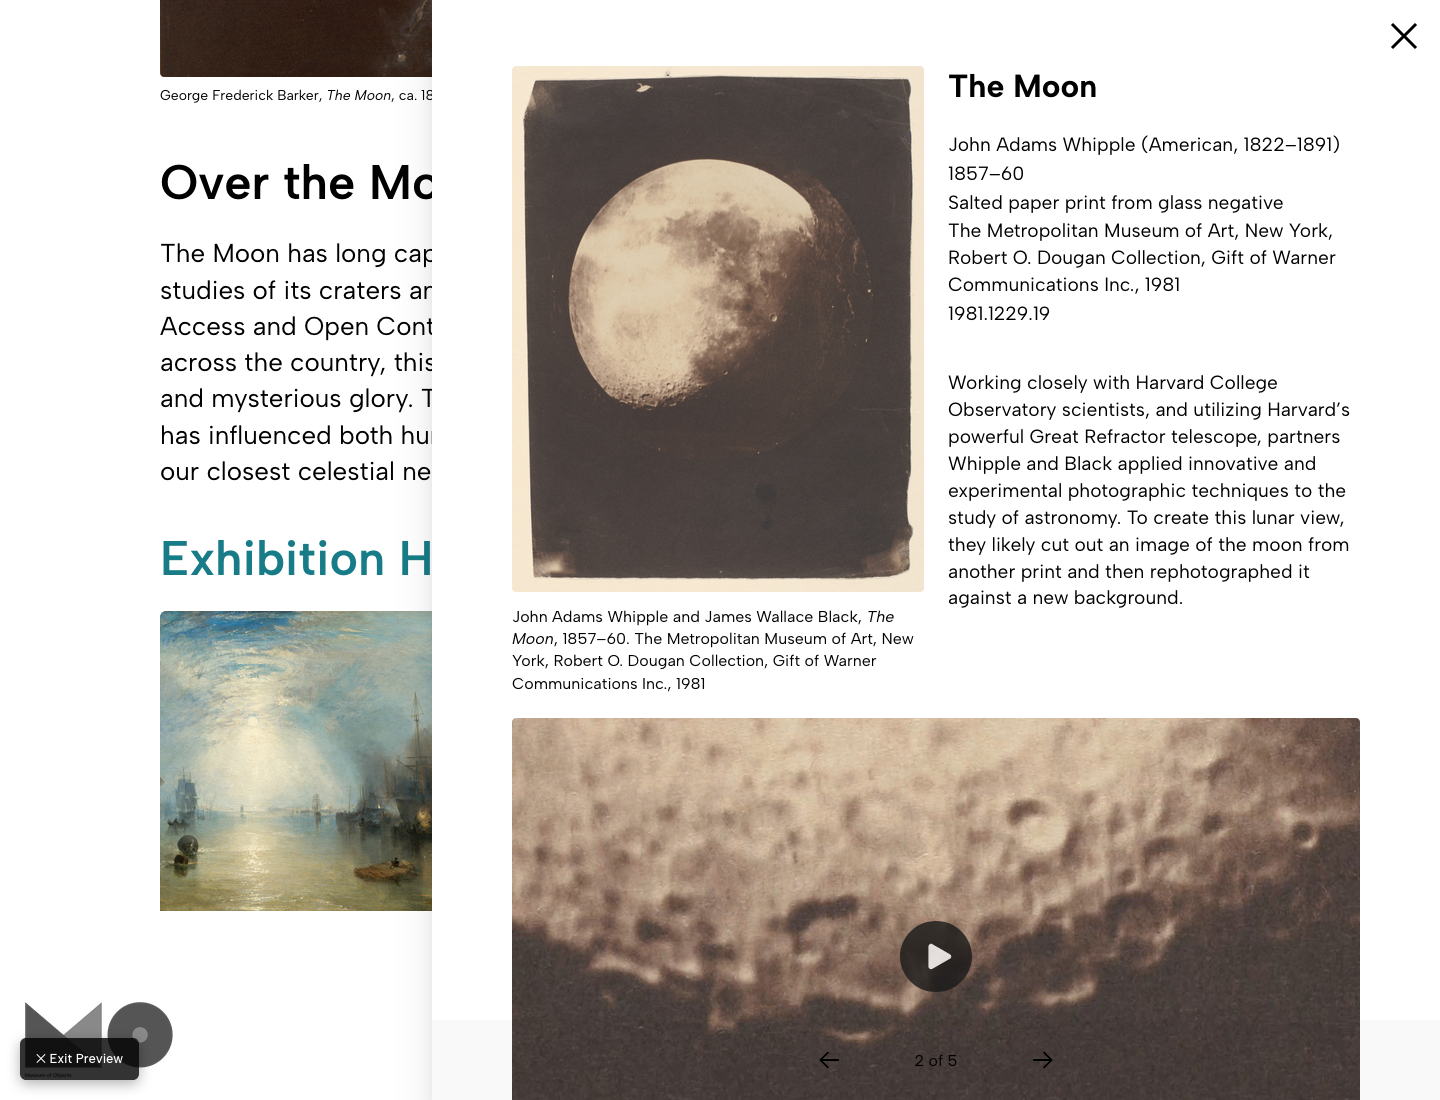
View in Preview Mode
After you’ve updated and styled the pages in your exhibition, turn on Preview Mode to explore a full-screen, interactive version of the exhibition. Navigate pages using the menu.
Even if you're not planning on publishing the exhibition, this view can help you visualize and structure your exhibition.
Publish Your Exhibition
If you decide to publish the exhibition, start a Base Subscription. You can share the exhibition at an Objects and Order URL or at your own domain.
Launch it anytime: before, during, or after an onsite presentation. This extends the reach of the exhibition to audiences who couldn't attend in person.
Once it's published, you can still make updates, for example, if you decide to add a video of a curatorial interview or highlight upcoming programming. Just make your edits, save, and then republish when ready.
For an in-depth look at the creation process, check out the Creating an Exhibition guide.
See a sample digital exhibition created with Objects and Order on the Museum of Objects site: Meow What? Cats in Prints.
You're ready to plan and build incredible exhibitions with Objects and Order.
Let us know if you have questions, need some help getting started, or if you’d like a quick demo.