Once you've created your exhibition, styled the look and feel, and added all the content, it's time to publish. We’ll walk you through the process step-by-step.
- Still working on your exhibition? View the Create an Exhibition guide.
- Check out the handy Digital Exhibitions Glossary.
- Have a question? Use the Get in touch tab at right.
- To publish an exhibition, you'll need to have an active subscription plan for your Base.
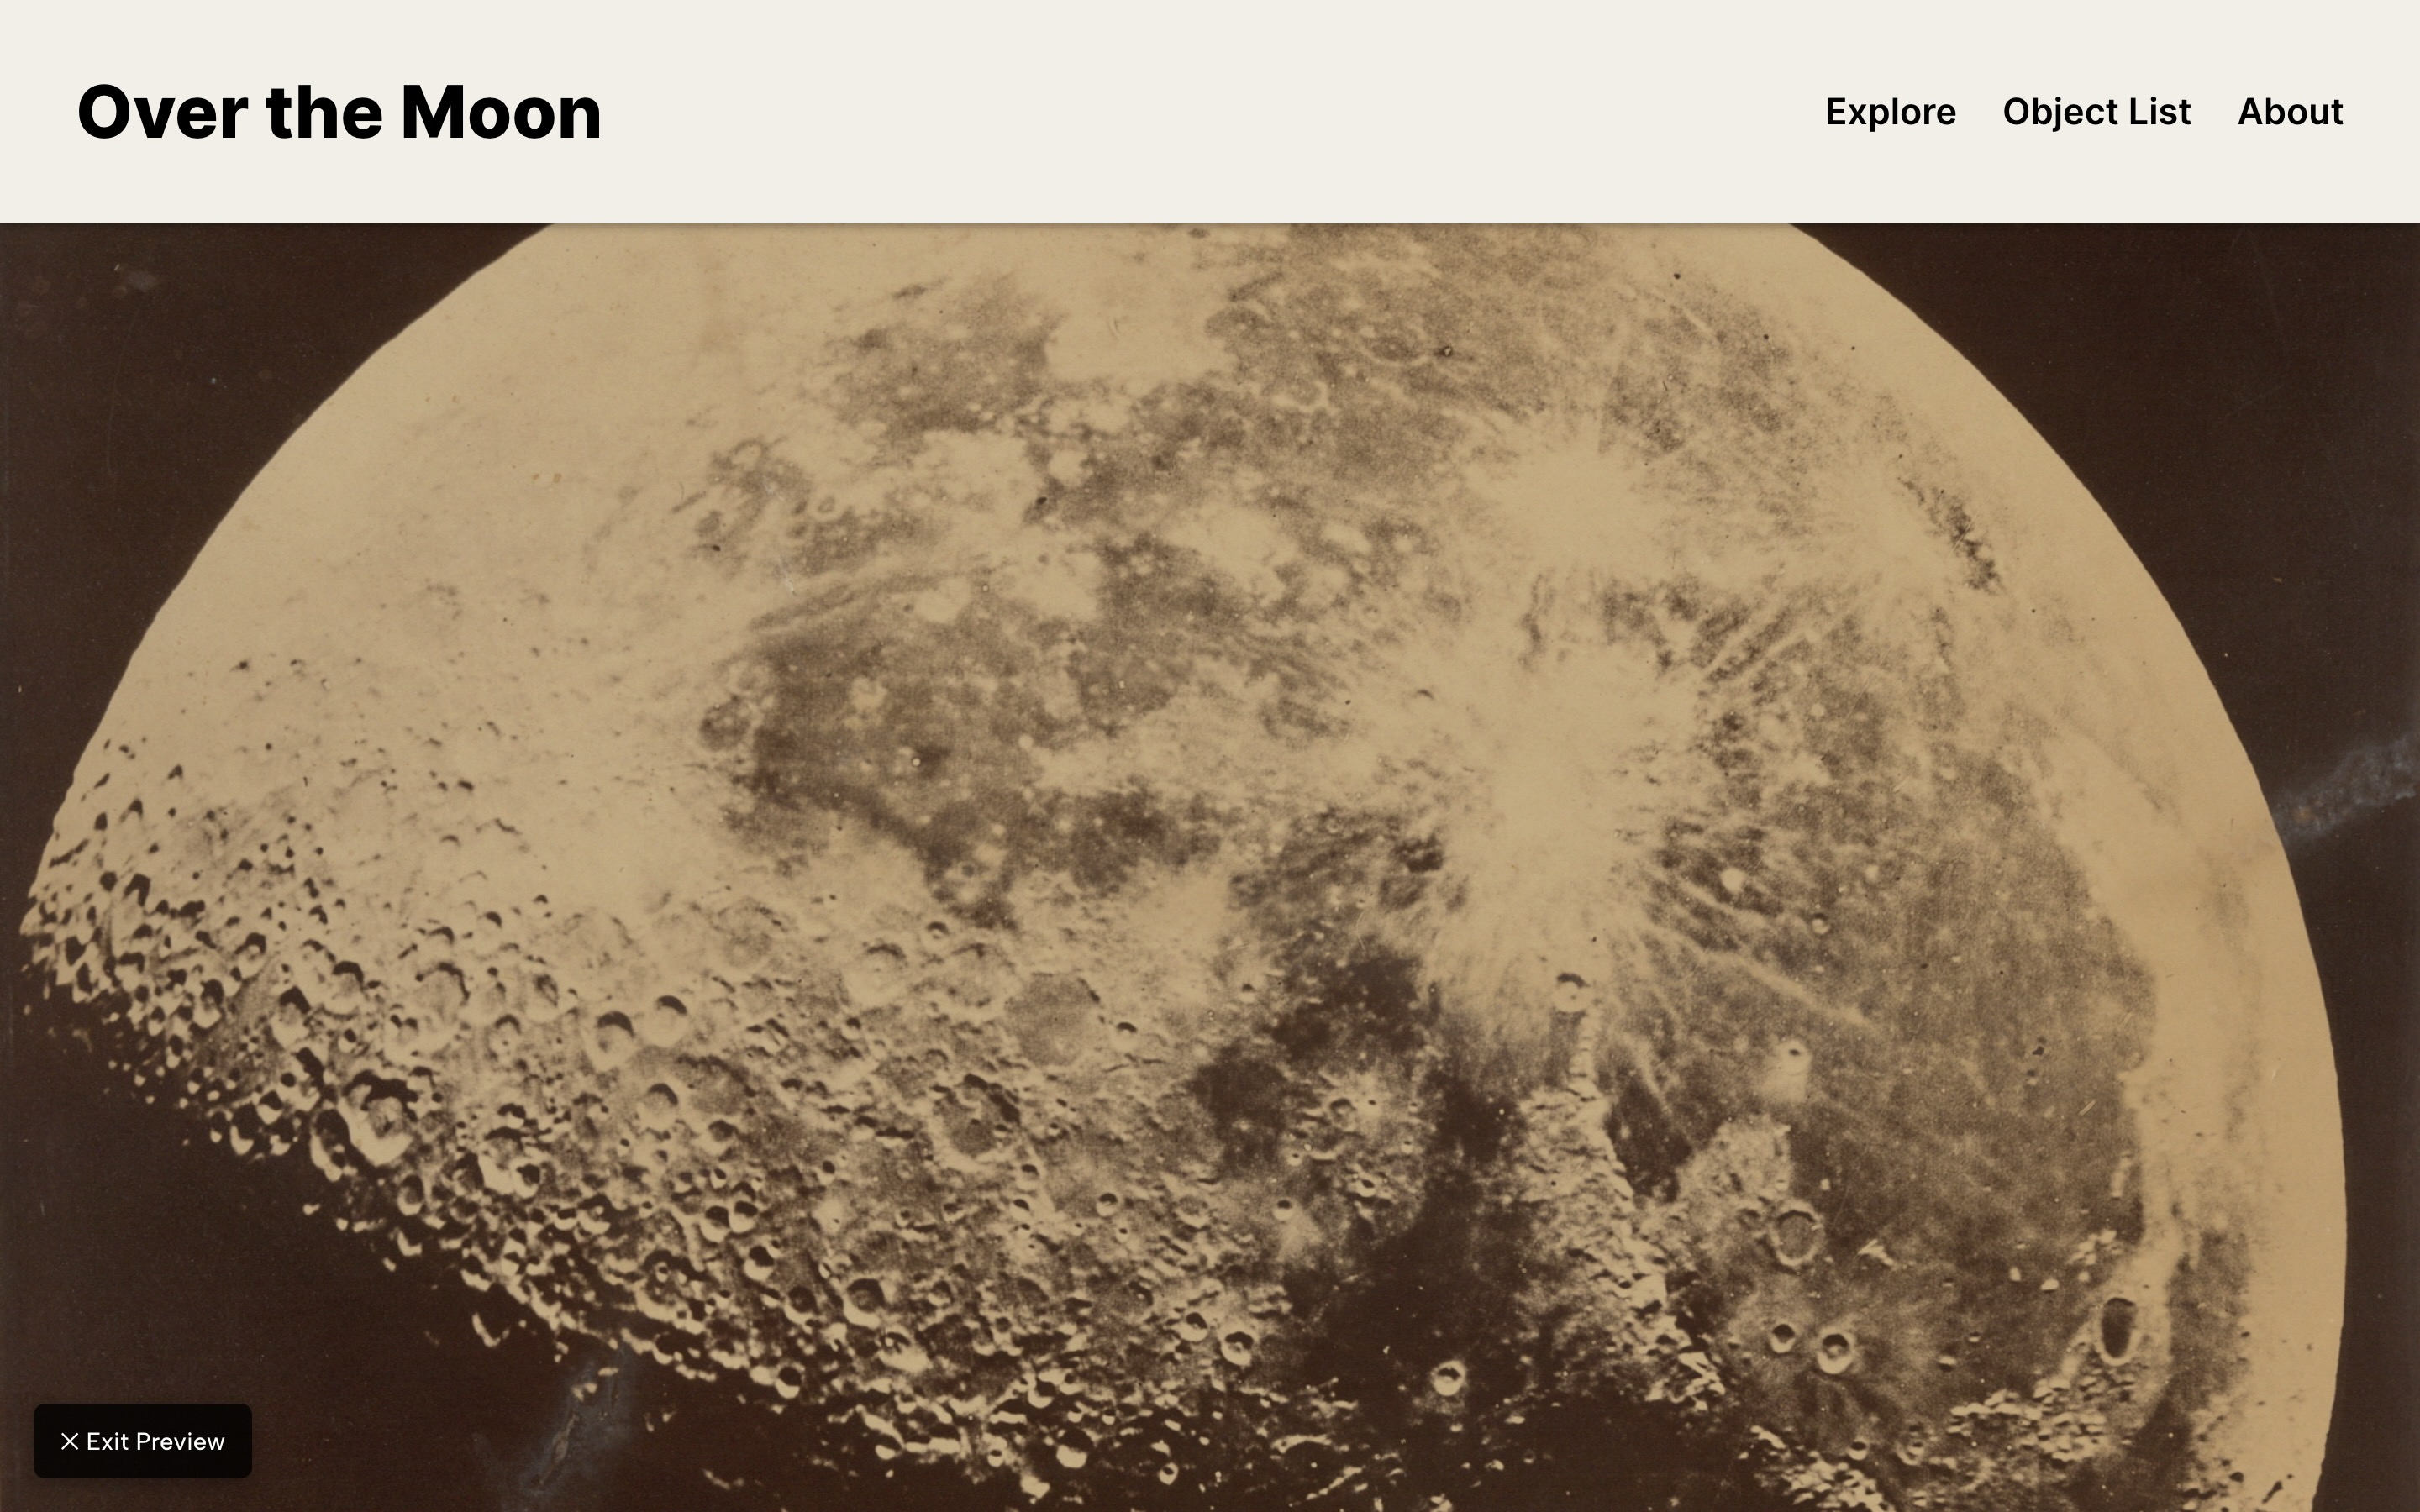
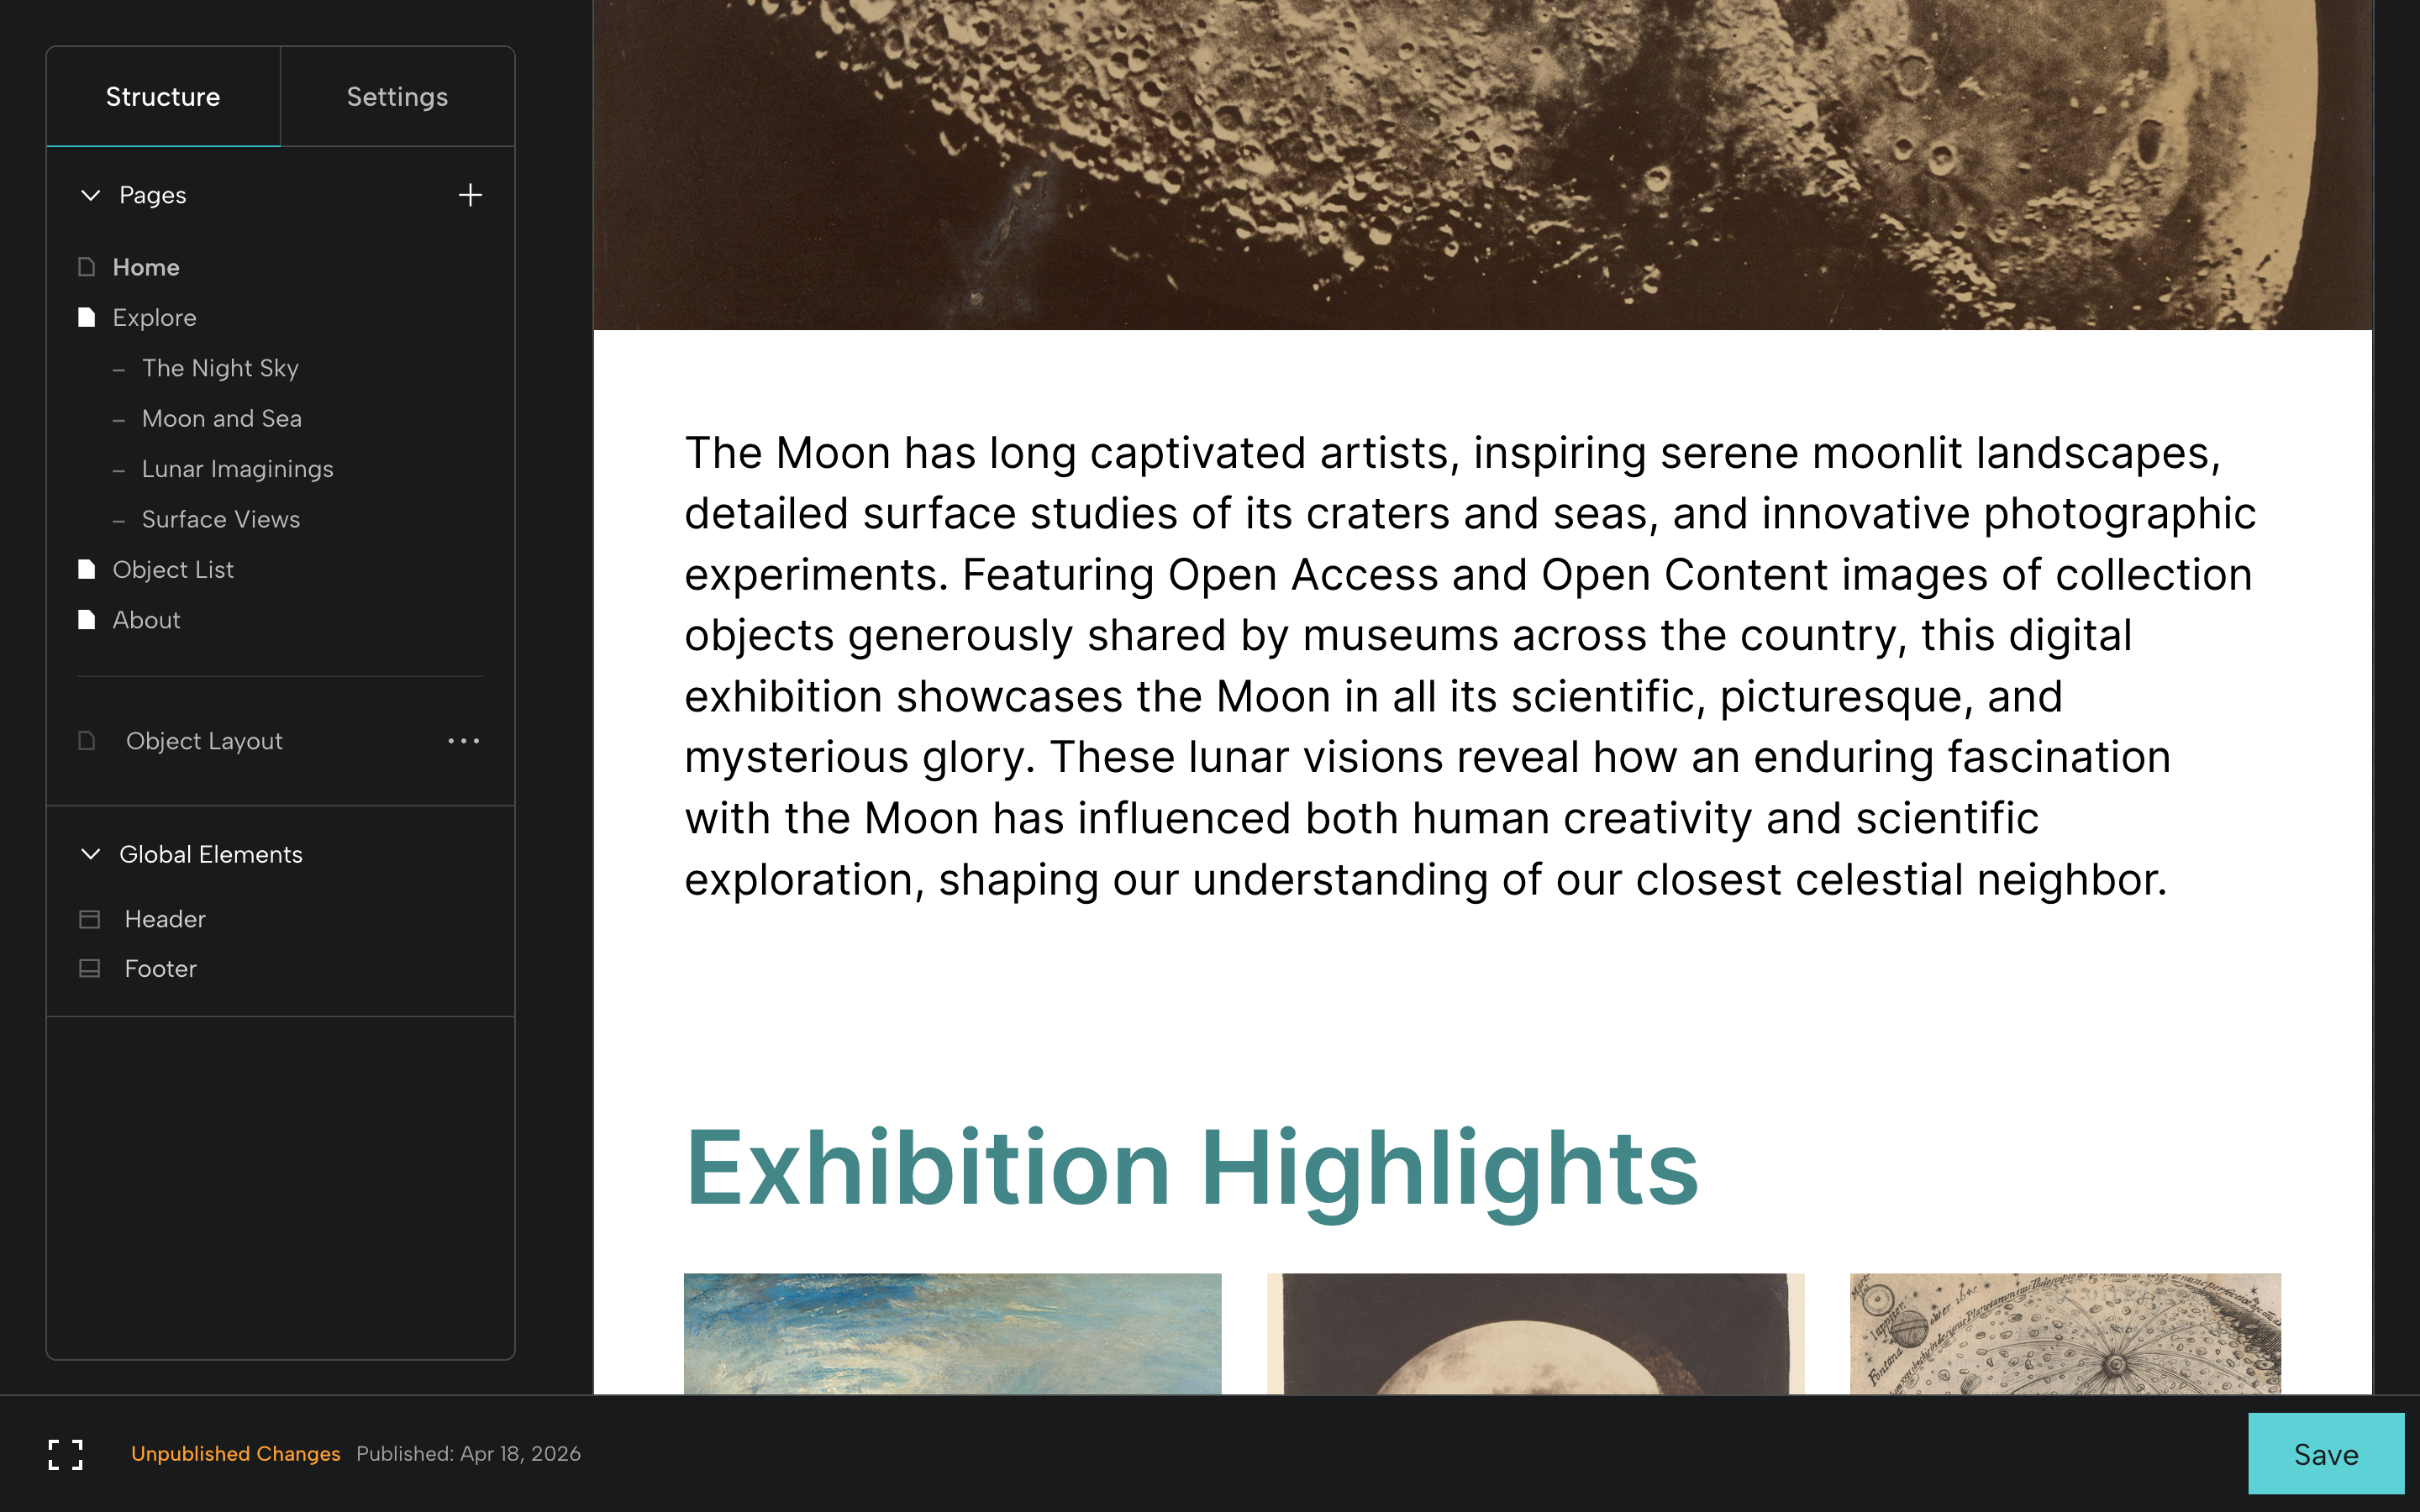
Step 1: Review the Exhibition in Preview Mode
Once all your pages have been set up and styled, we recommend viewing the entire exhibition in Preview Mode.
Review all your pages, check colors, spacing, and display choices. Check buttons, animations, and links. Review your header, and your footer,
and your menu options. Make and save any necessary updates along the way.
We also recommend reviewing your media files and other assets:
- Are all image, audio, and video files correct?
- Has alt text been entered for all images?
- Have all necessary rights and permissions been secured?
- Are all captions, including copyright and credit lines, complete and correct?
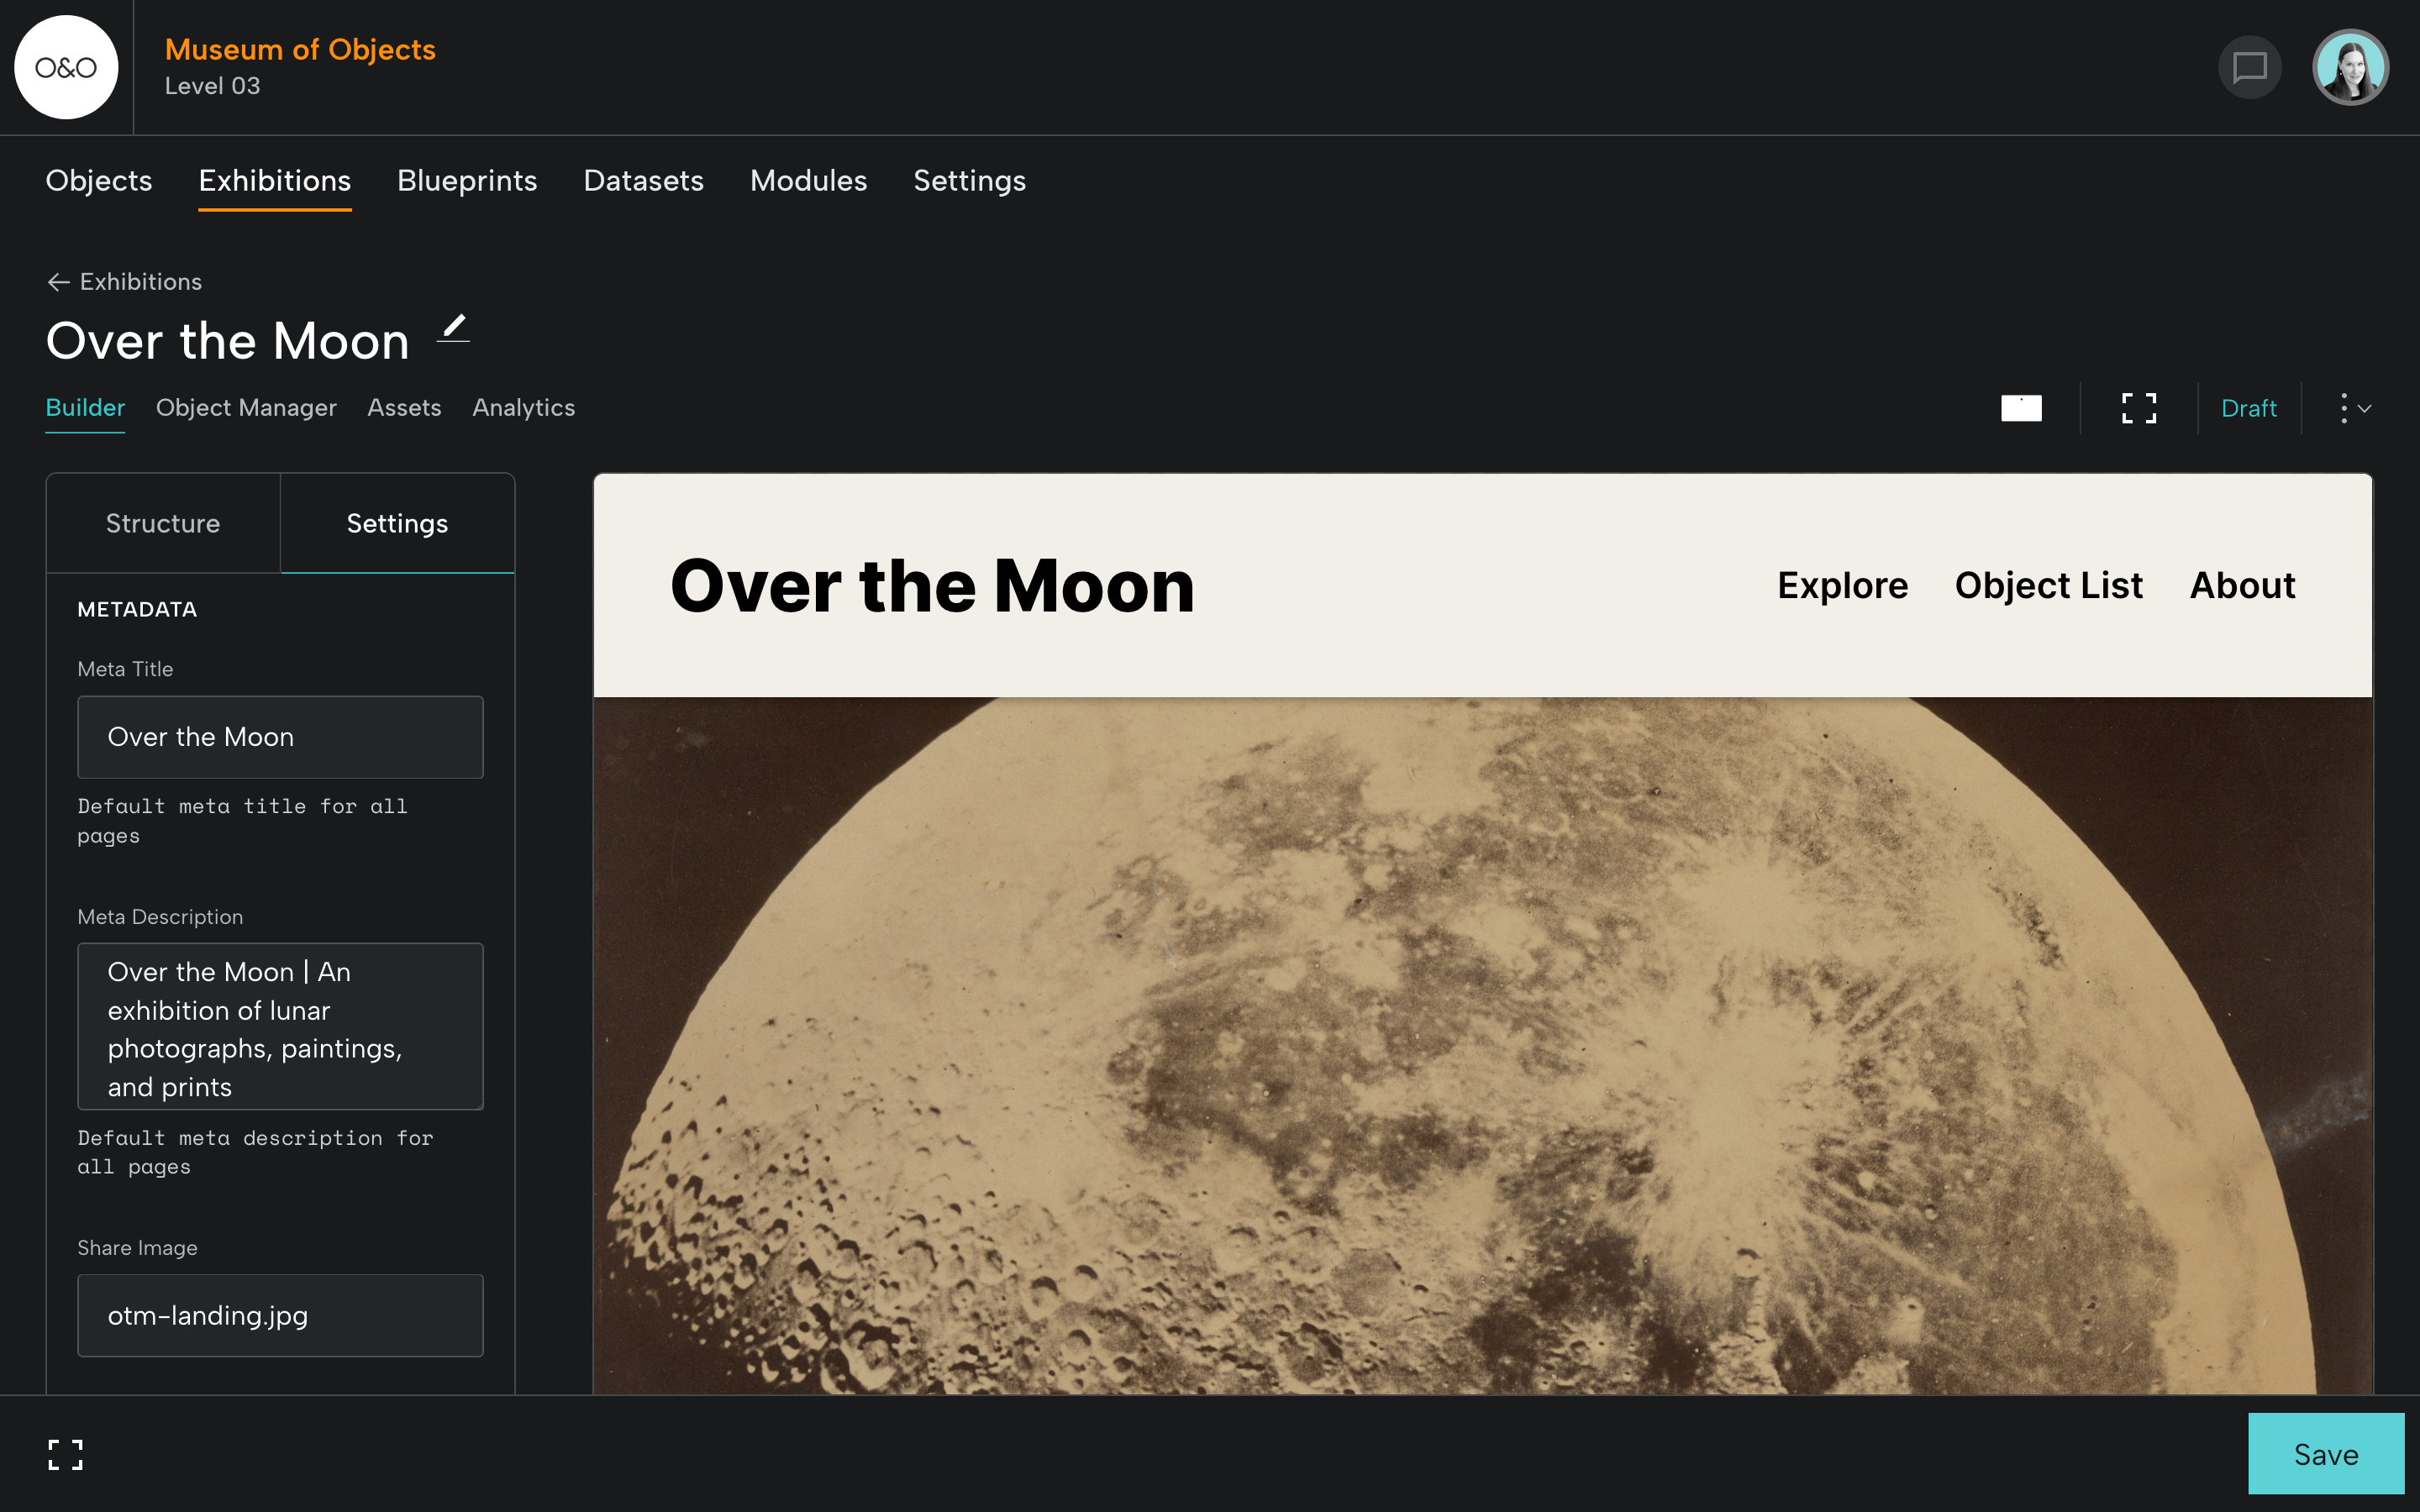
Step 2: Review and Update Exhibition Metadata
This is a good time to update metadata for the full exhibition and for individual pages.
Under Settings, in Metadata, you can update the meta description and add a share image. You can also add information about the author or institution and indicate how you want search engines to crawl and index the exhibition.
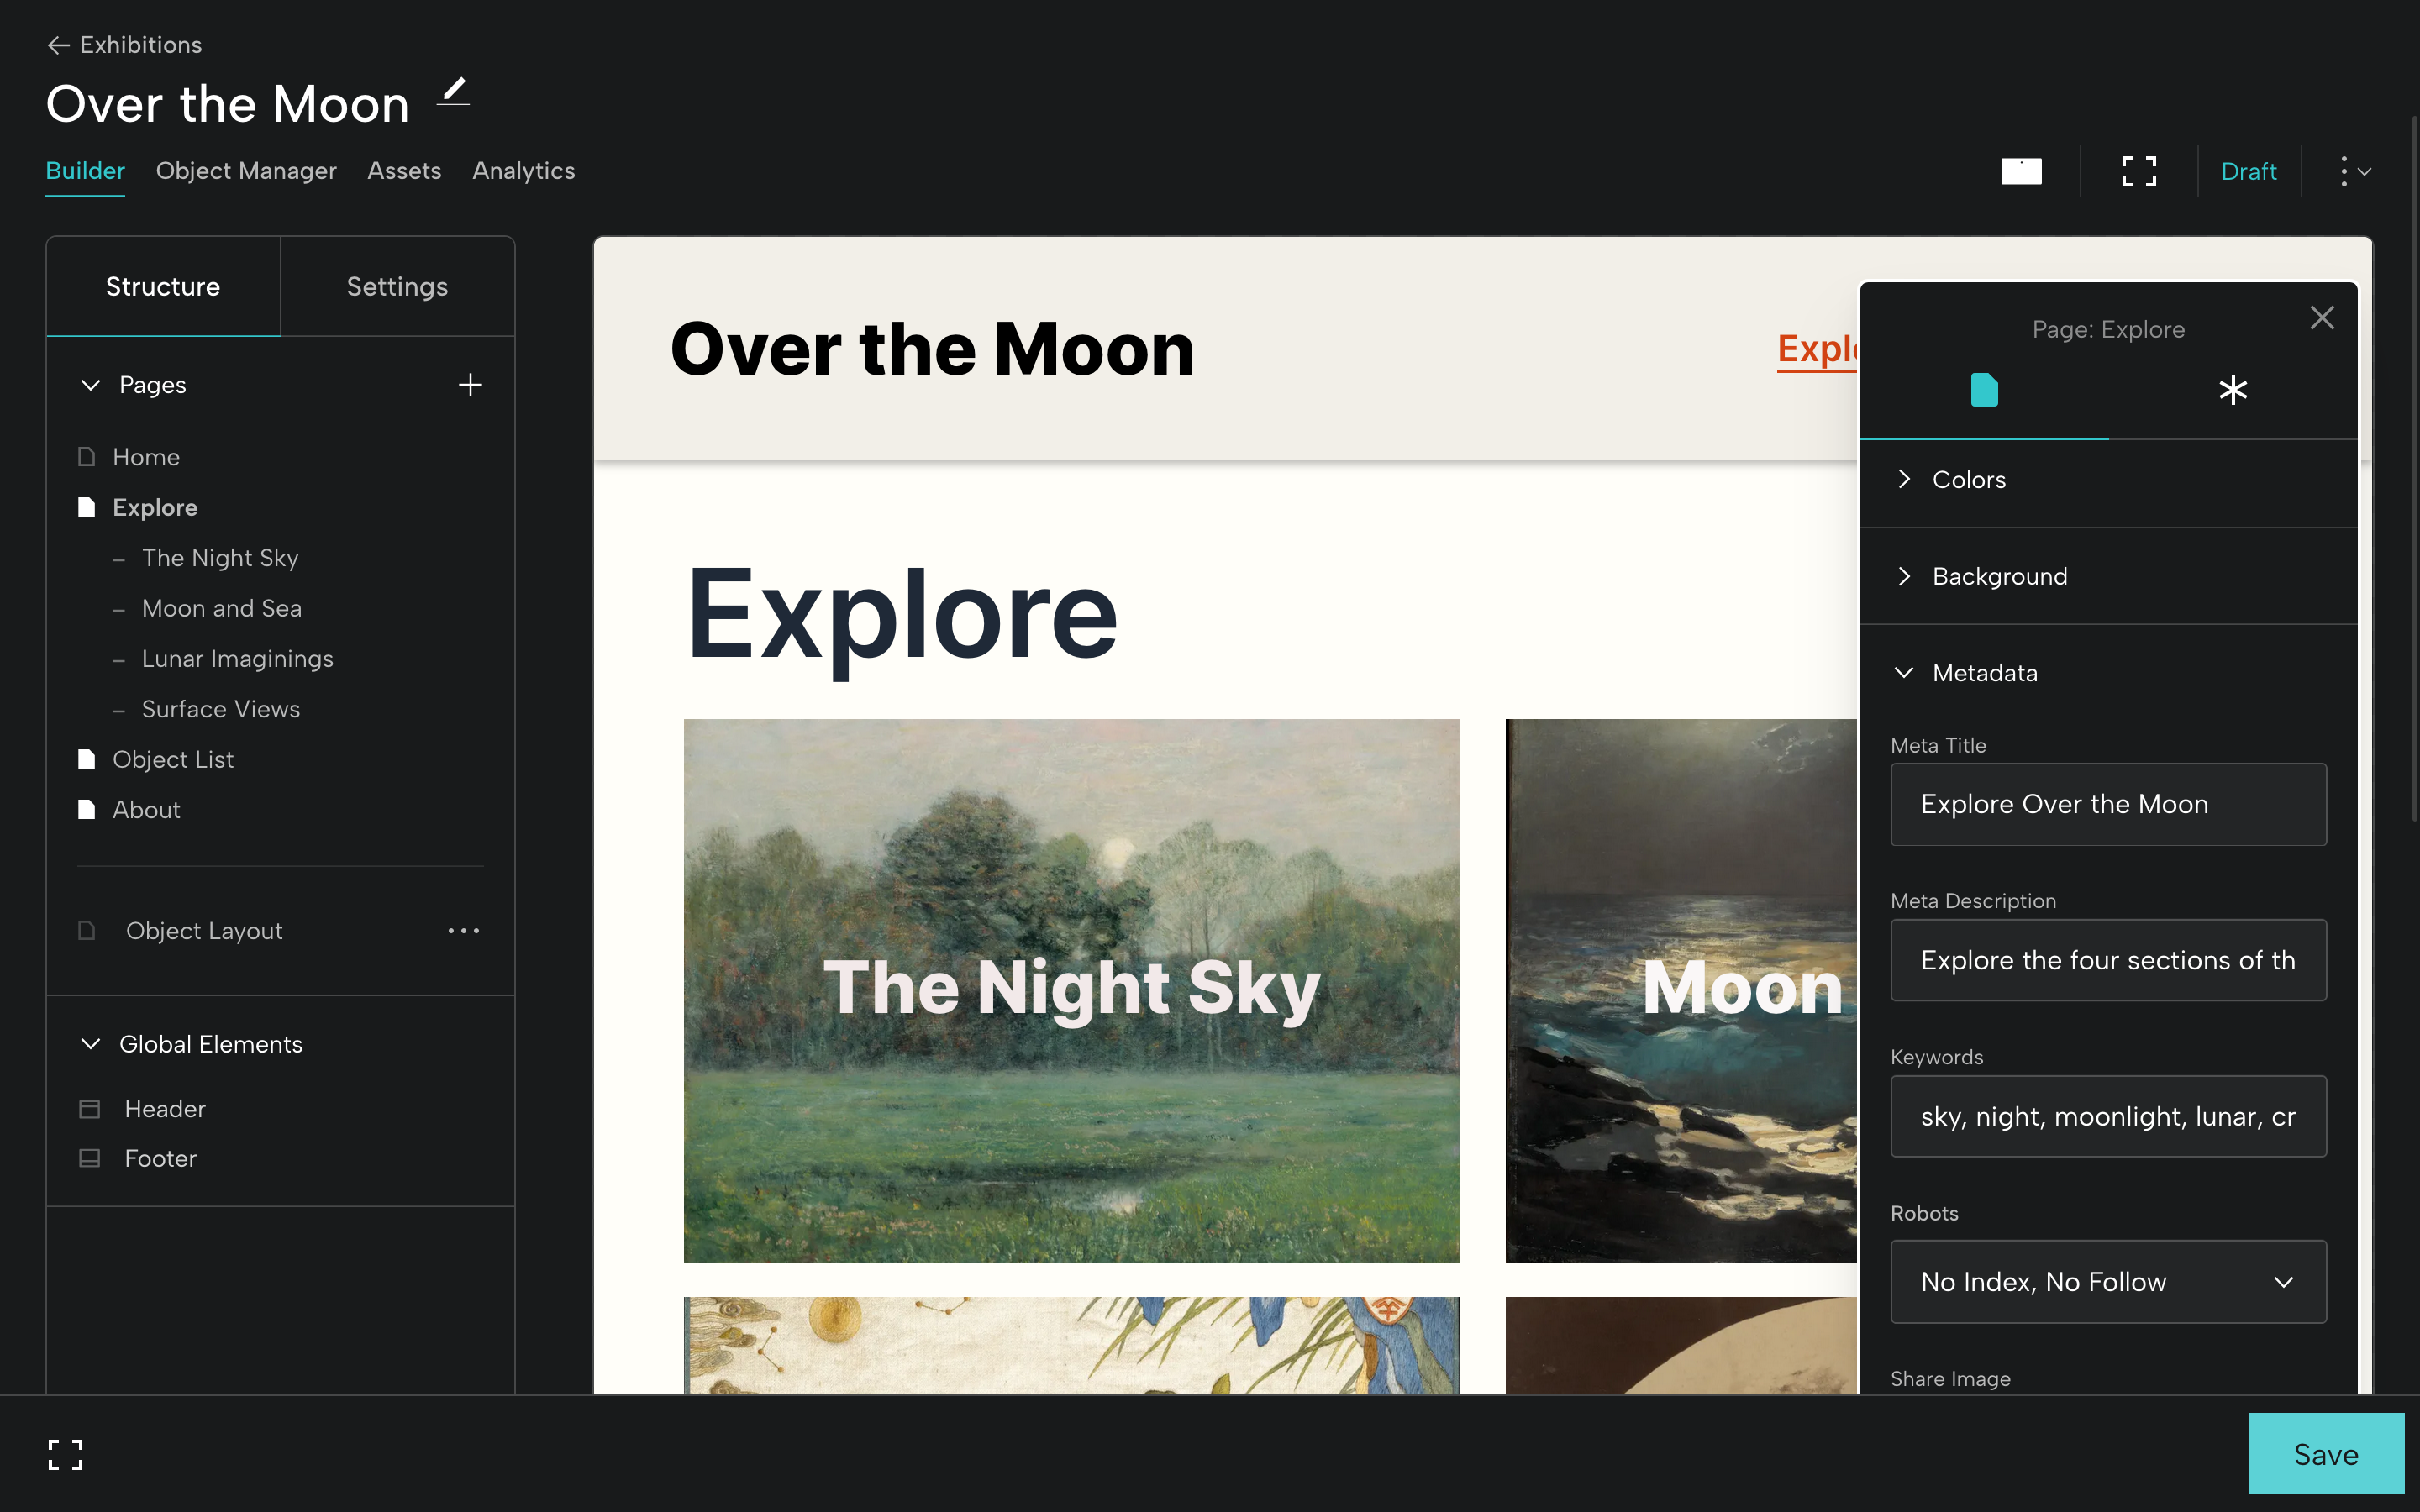
To update metadata for individual pages, just click to edit a page.
In the Universal Editor for that page, select Metadata to update the meta title and description, add keywords, and provide crawling and indexing preferences under Robots.
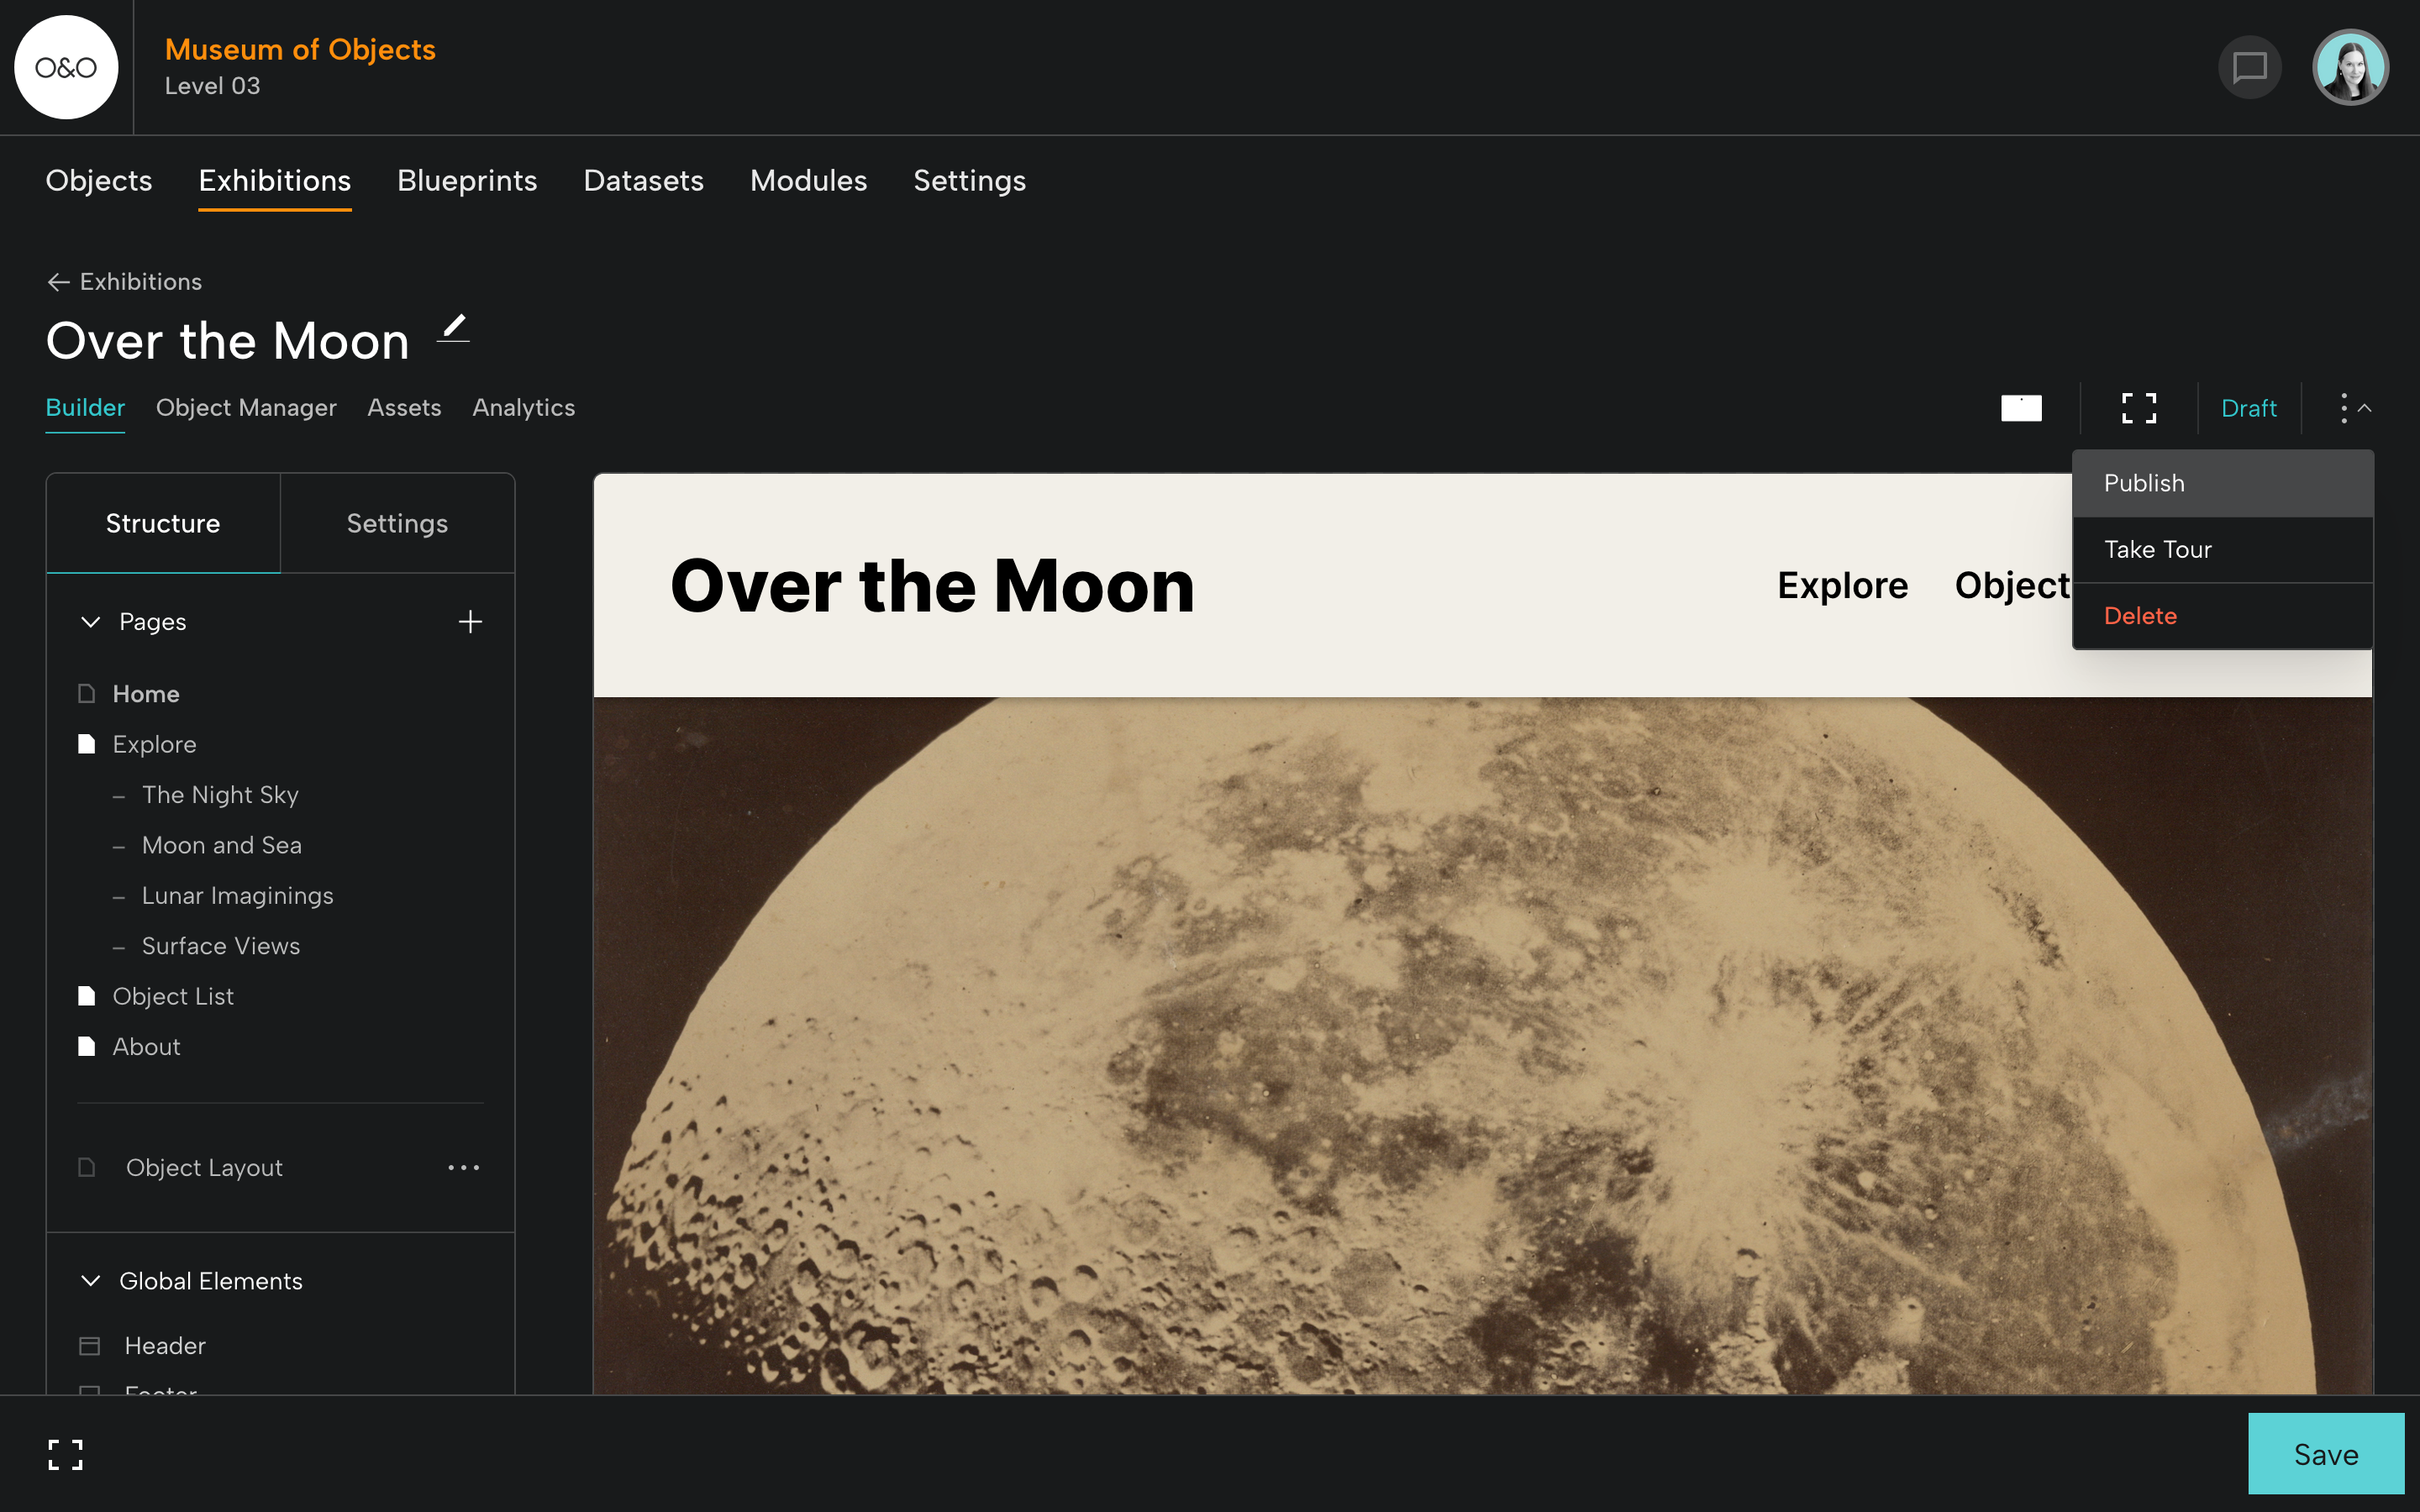
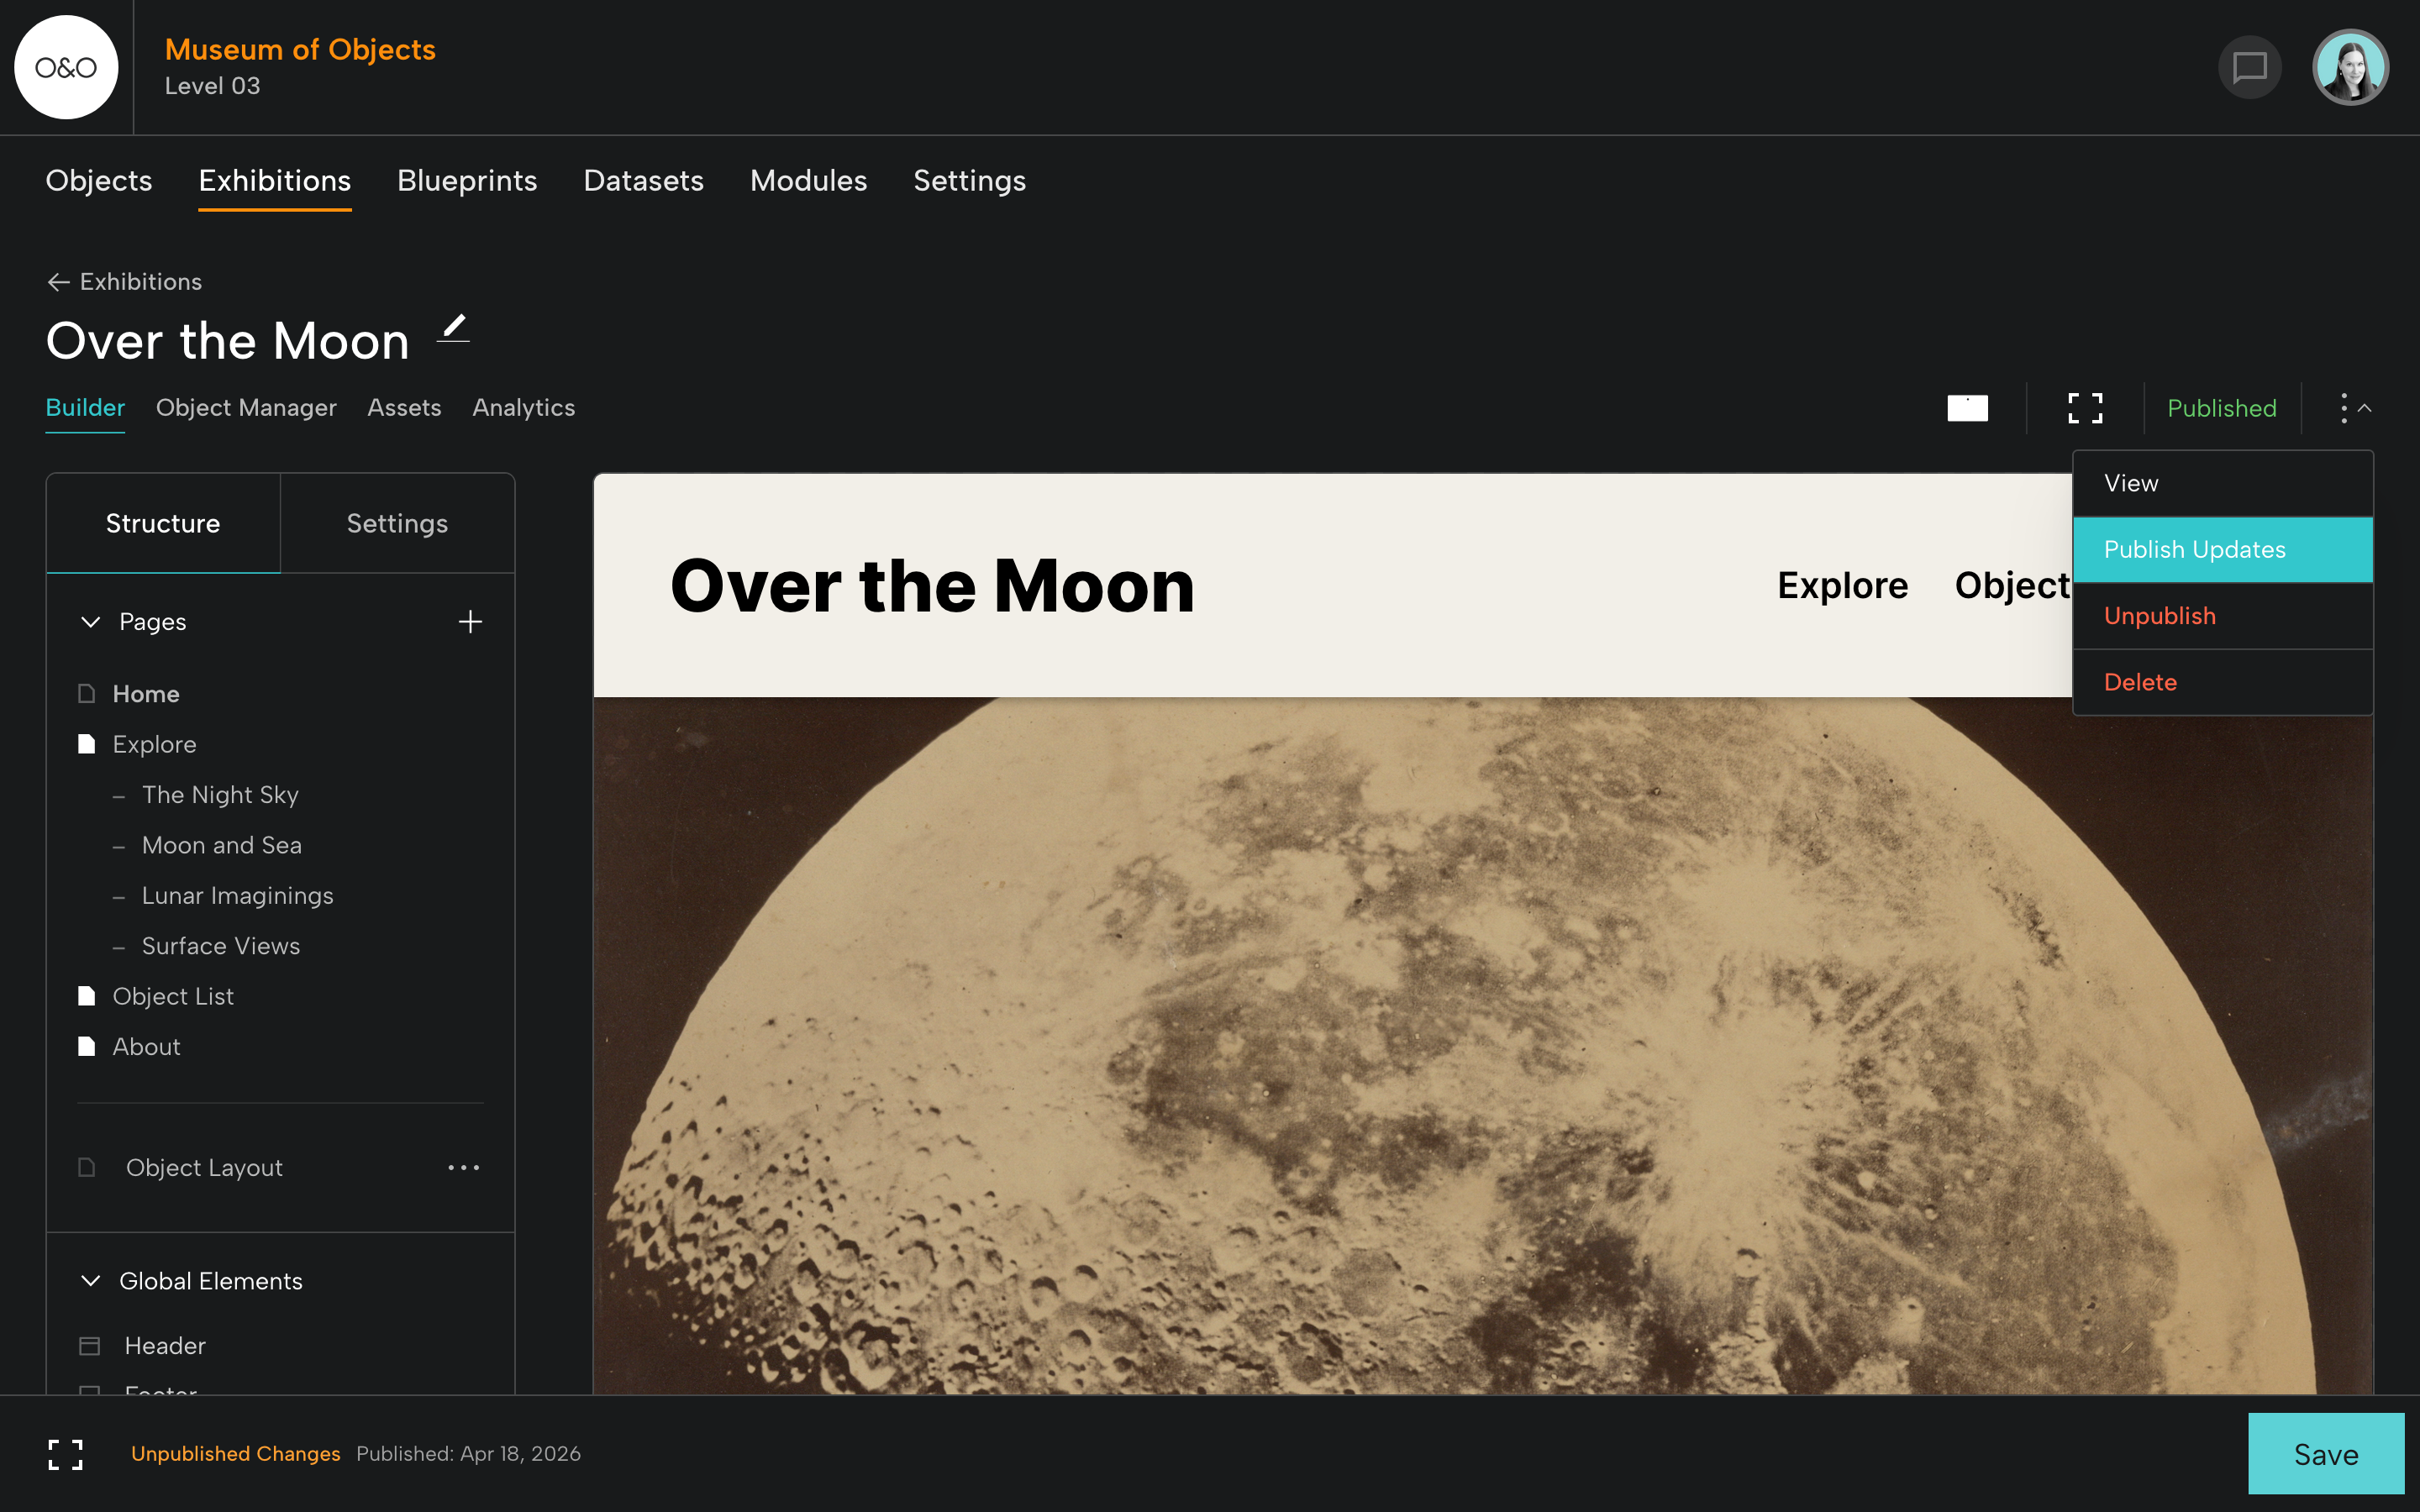
Step 3: Publish Your Exhibition
When you're ready, and when everything in your exhibition is in order, go to the menu at upper right and select Publish.
You'll see information about the progress of the exhibition as it builds. Soon you'll receive a message that the exhibition has published successfully.
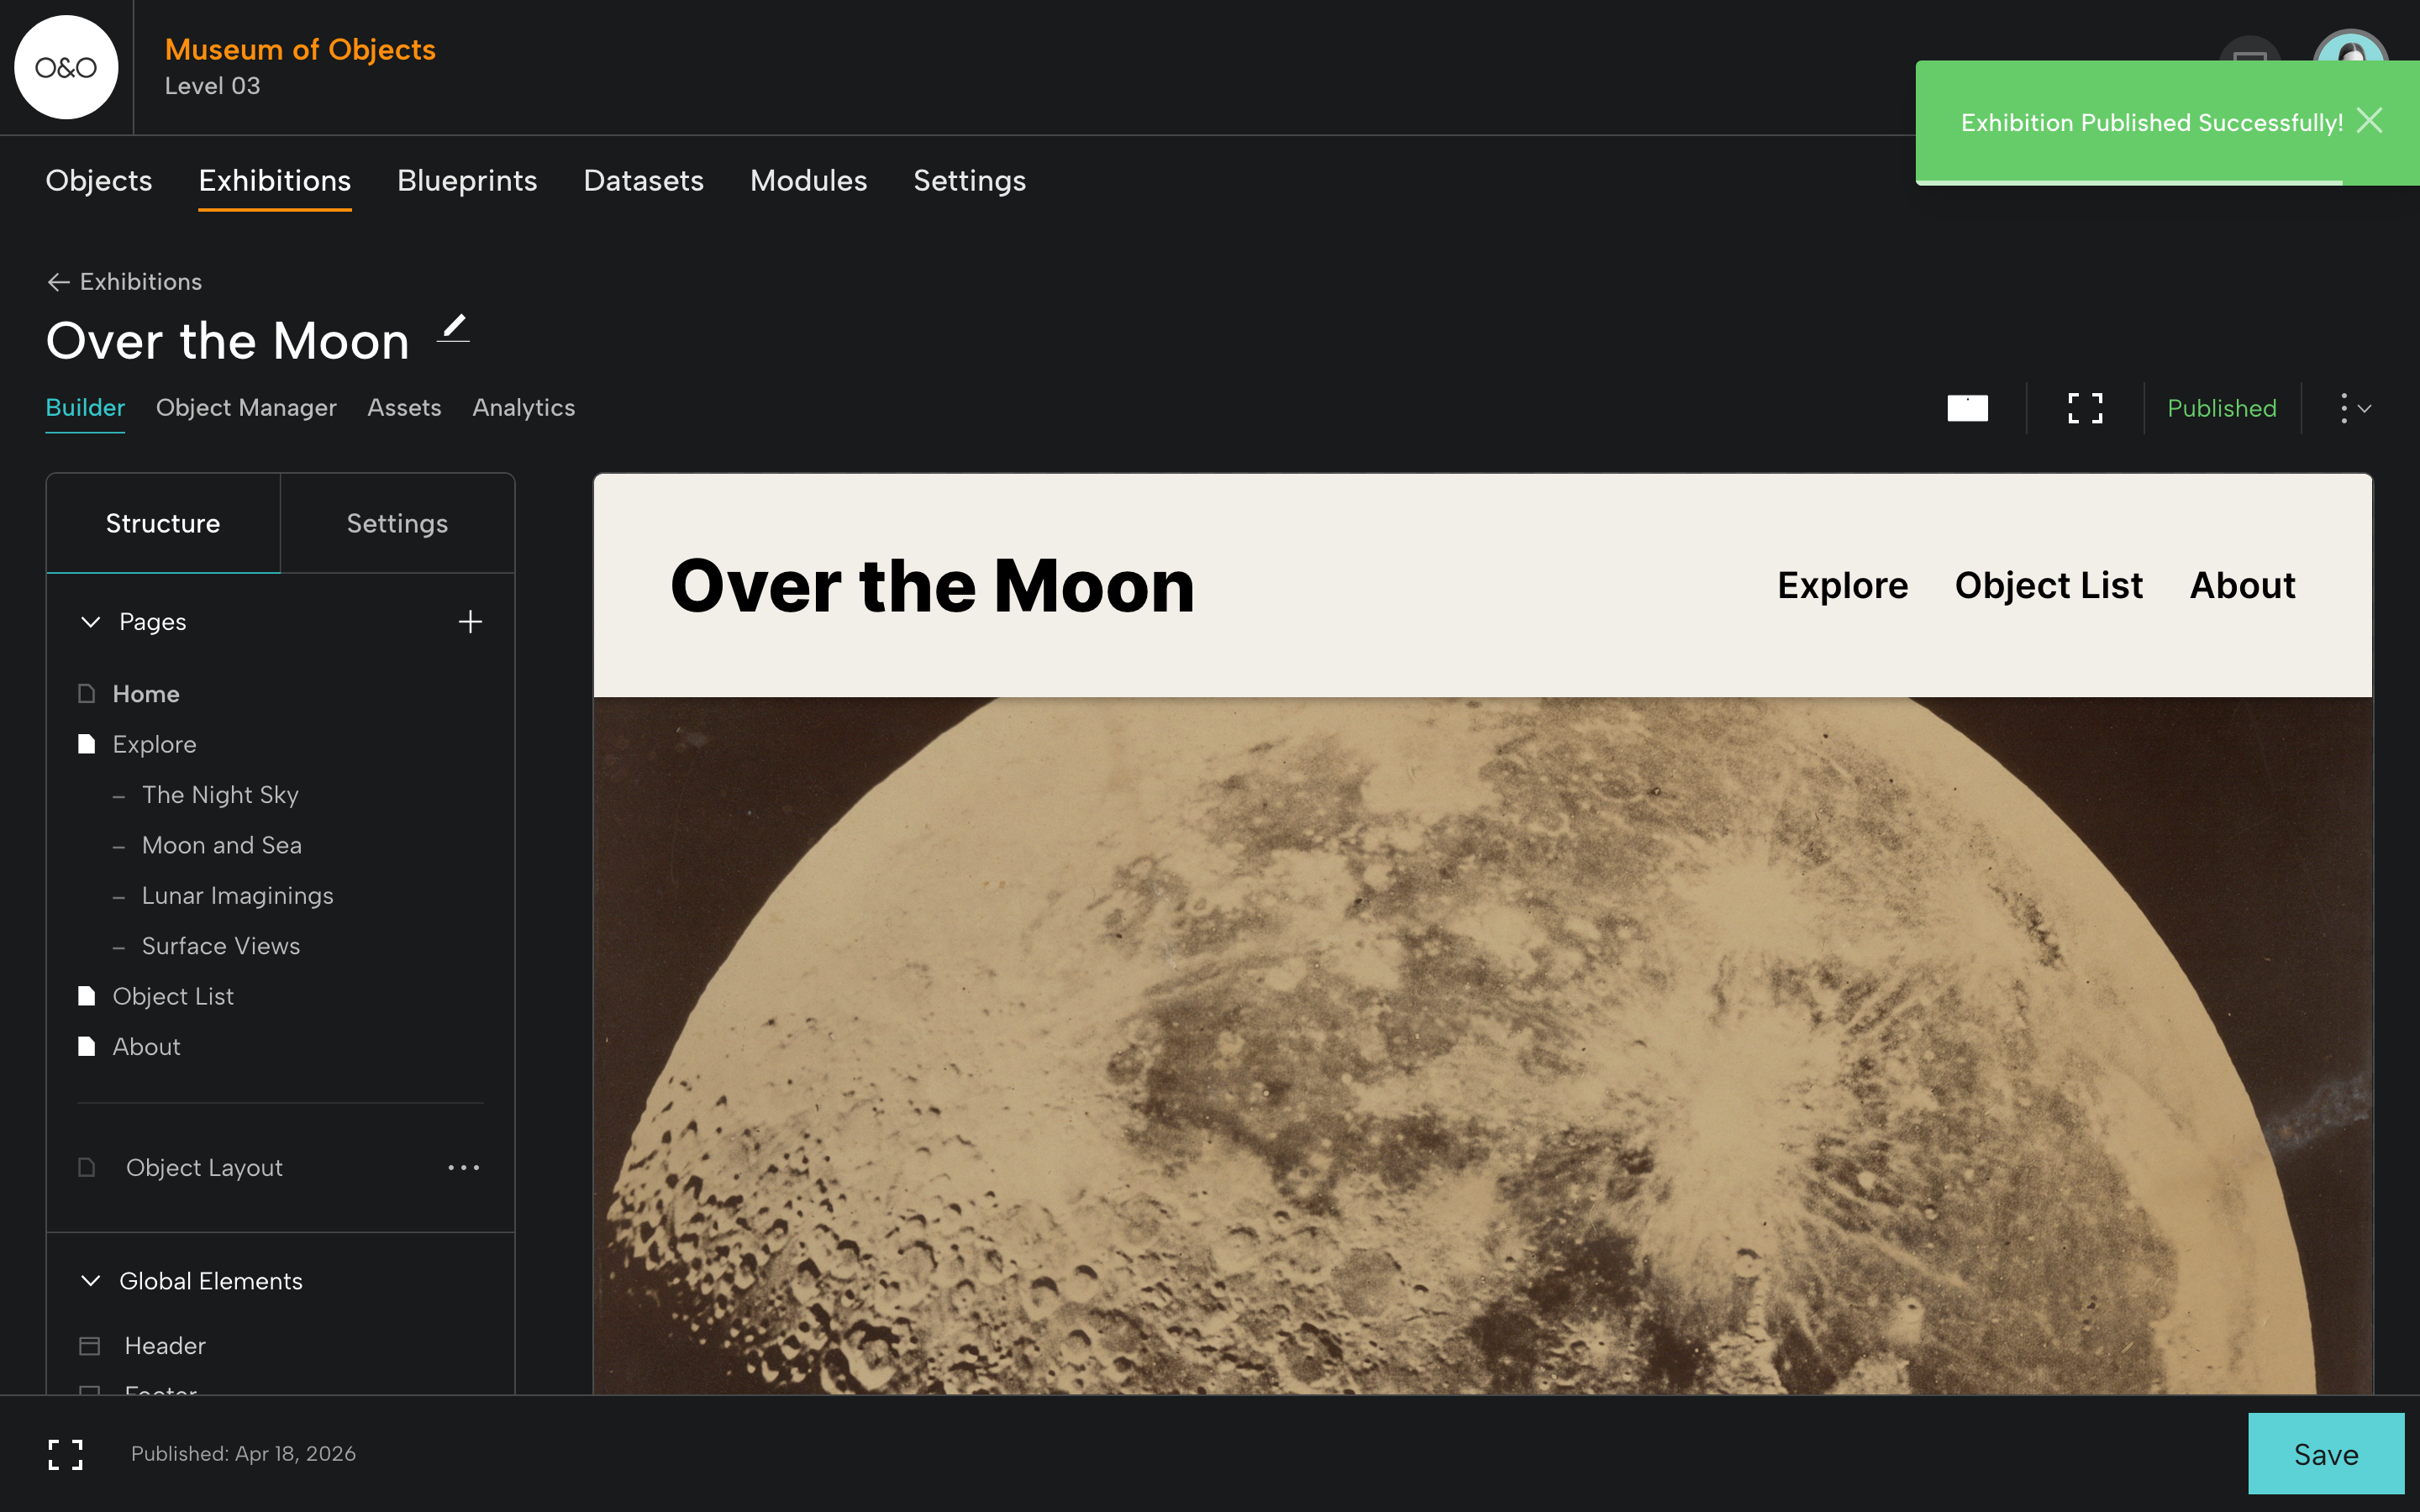
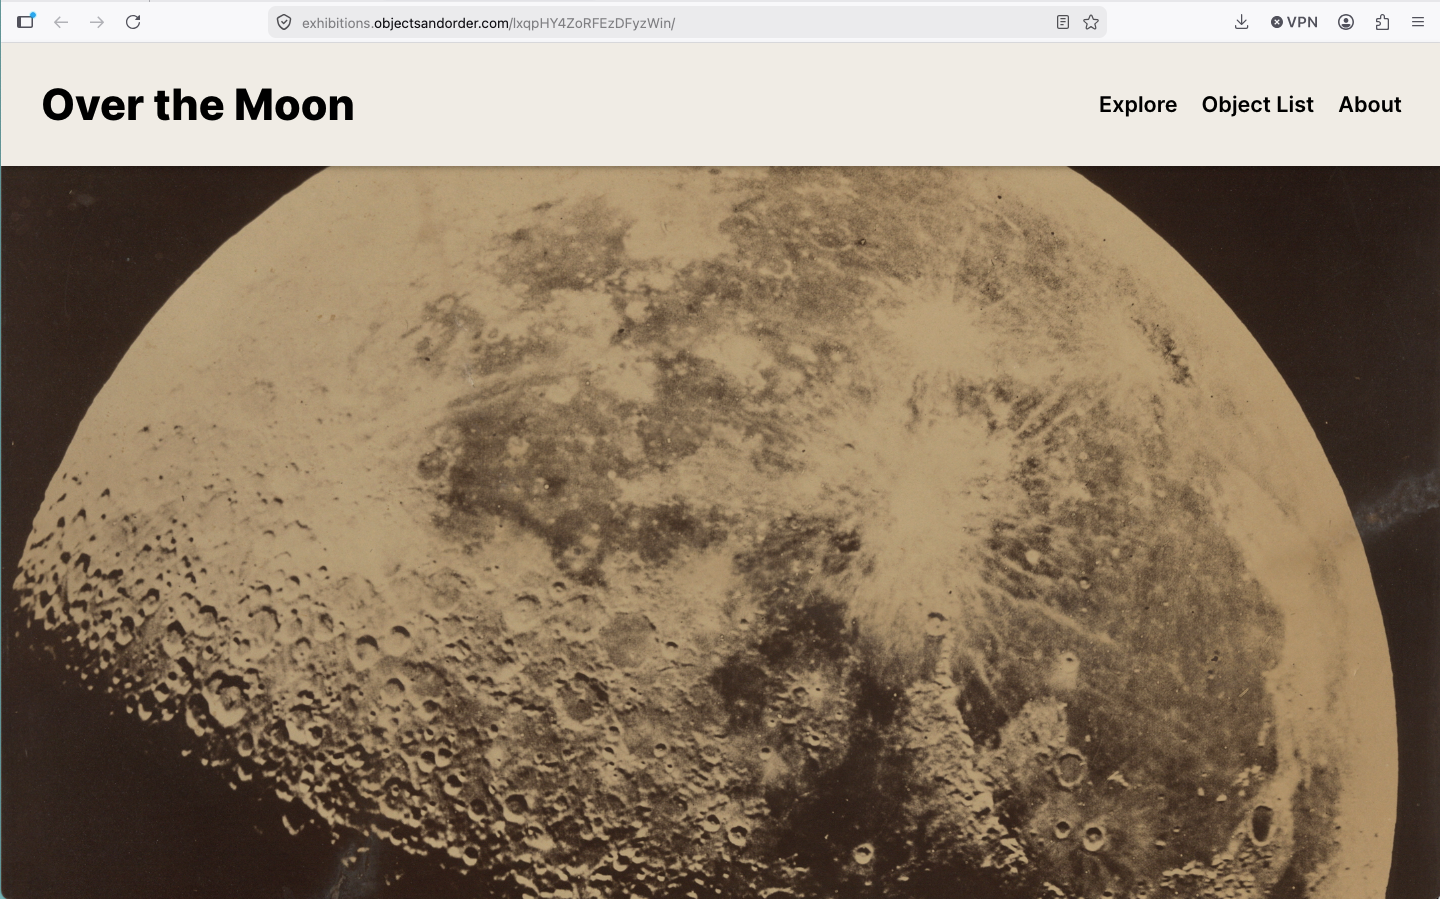
Click Published or View to view your exhibition at its exhibitions.objectsandorder URL.
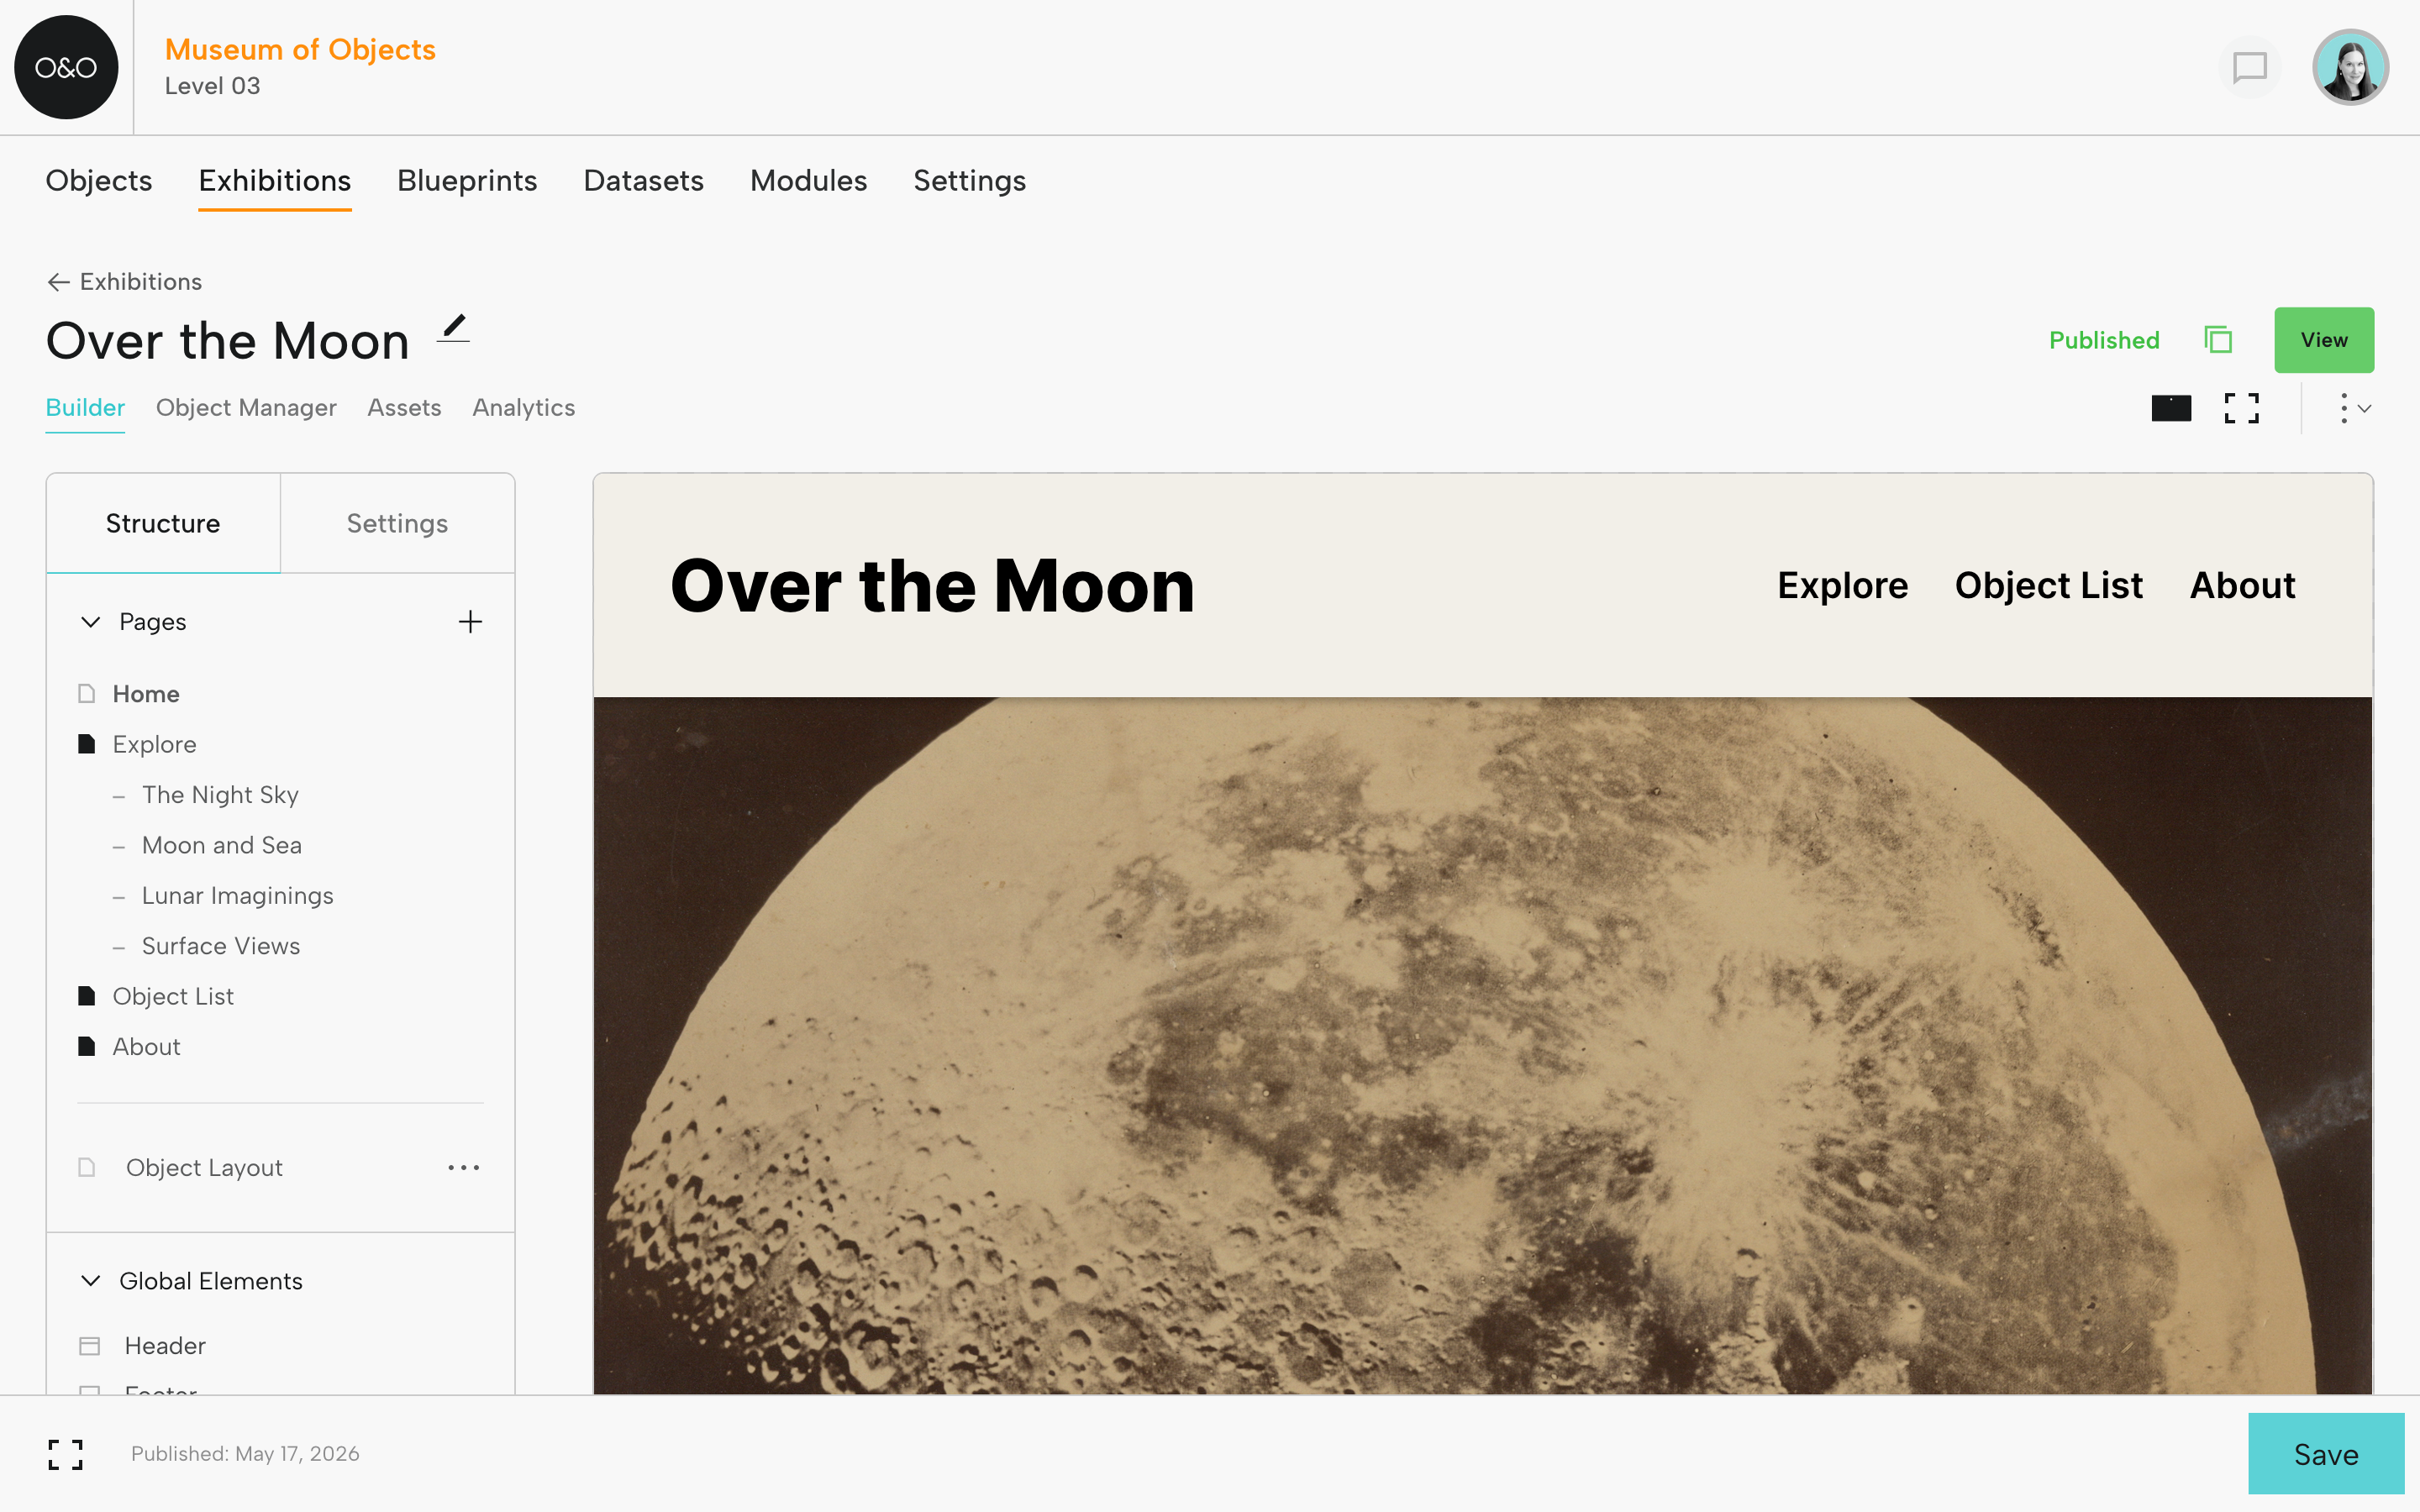
Step 4: Review Your Published Exhibition
We strongly recommend reviewing all pages and links and testing the exhibition site for accessibility compliance.
If you need to make any updates, see Publishing Updates below.
Step 5: Choose Your Exhibition URL
You have three URL choices for your published exhibition. You can set up your exhibition URL under Settings, under Publishing URL.
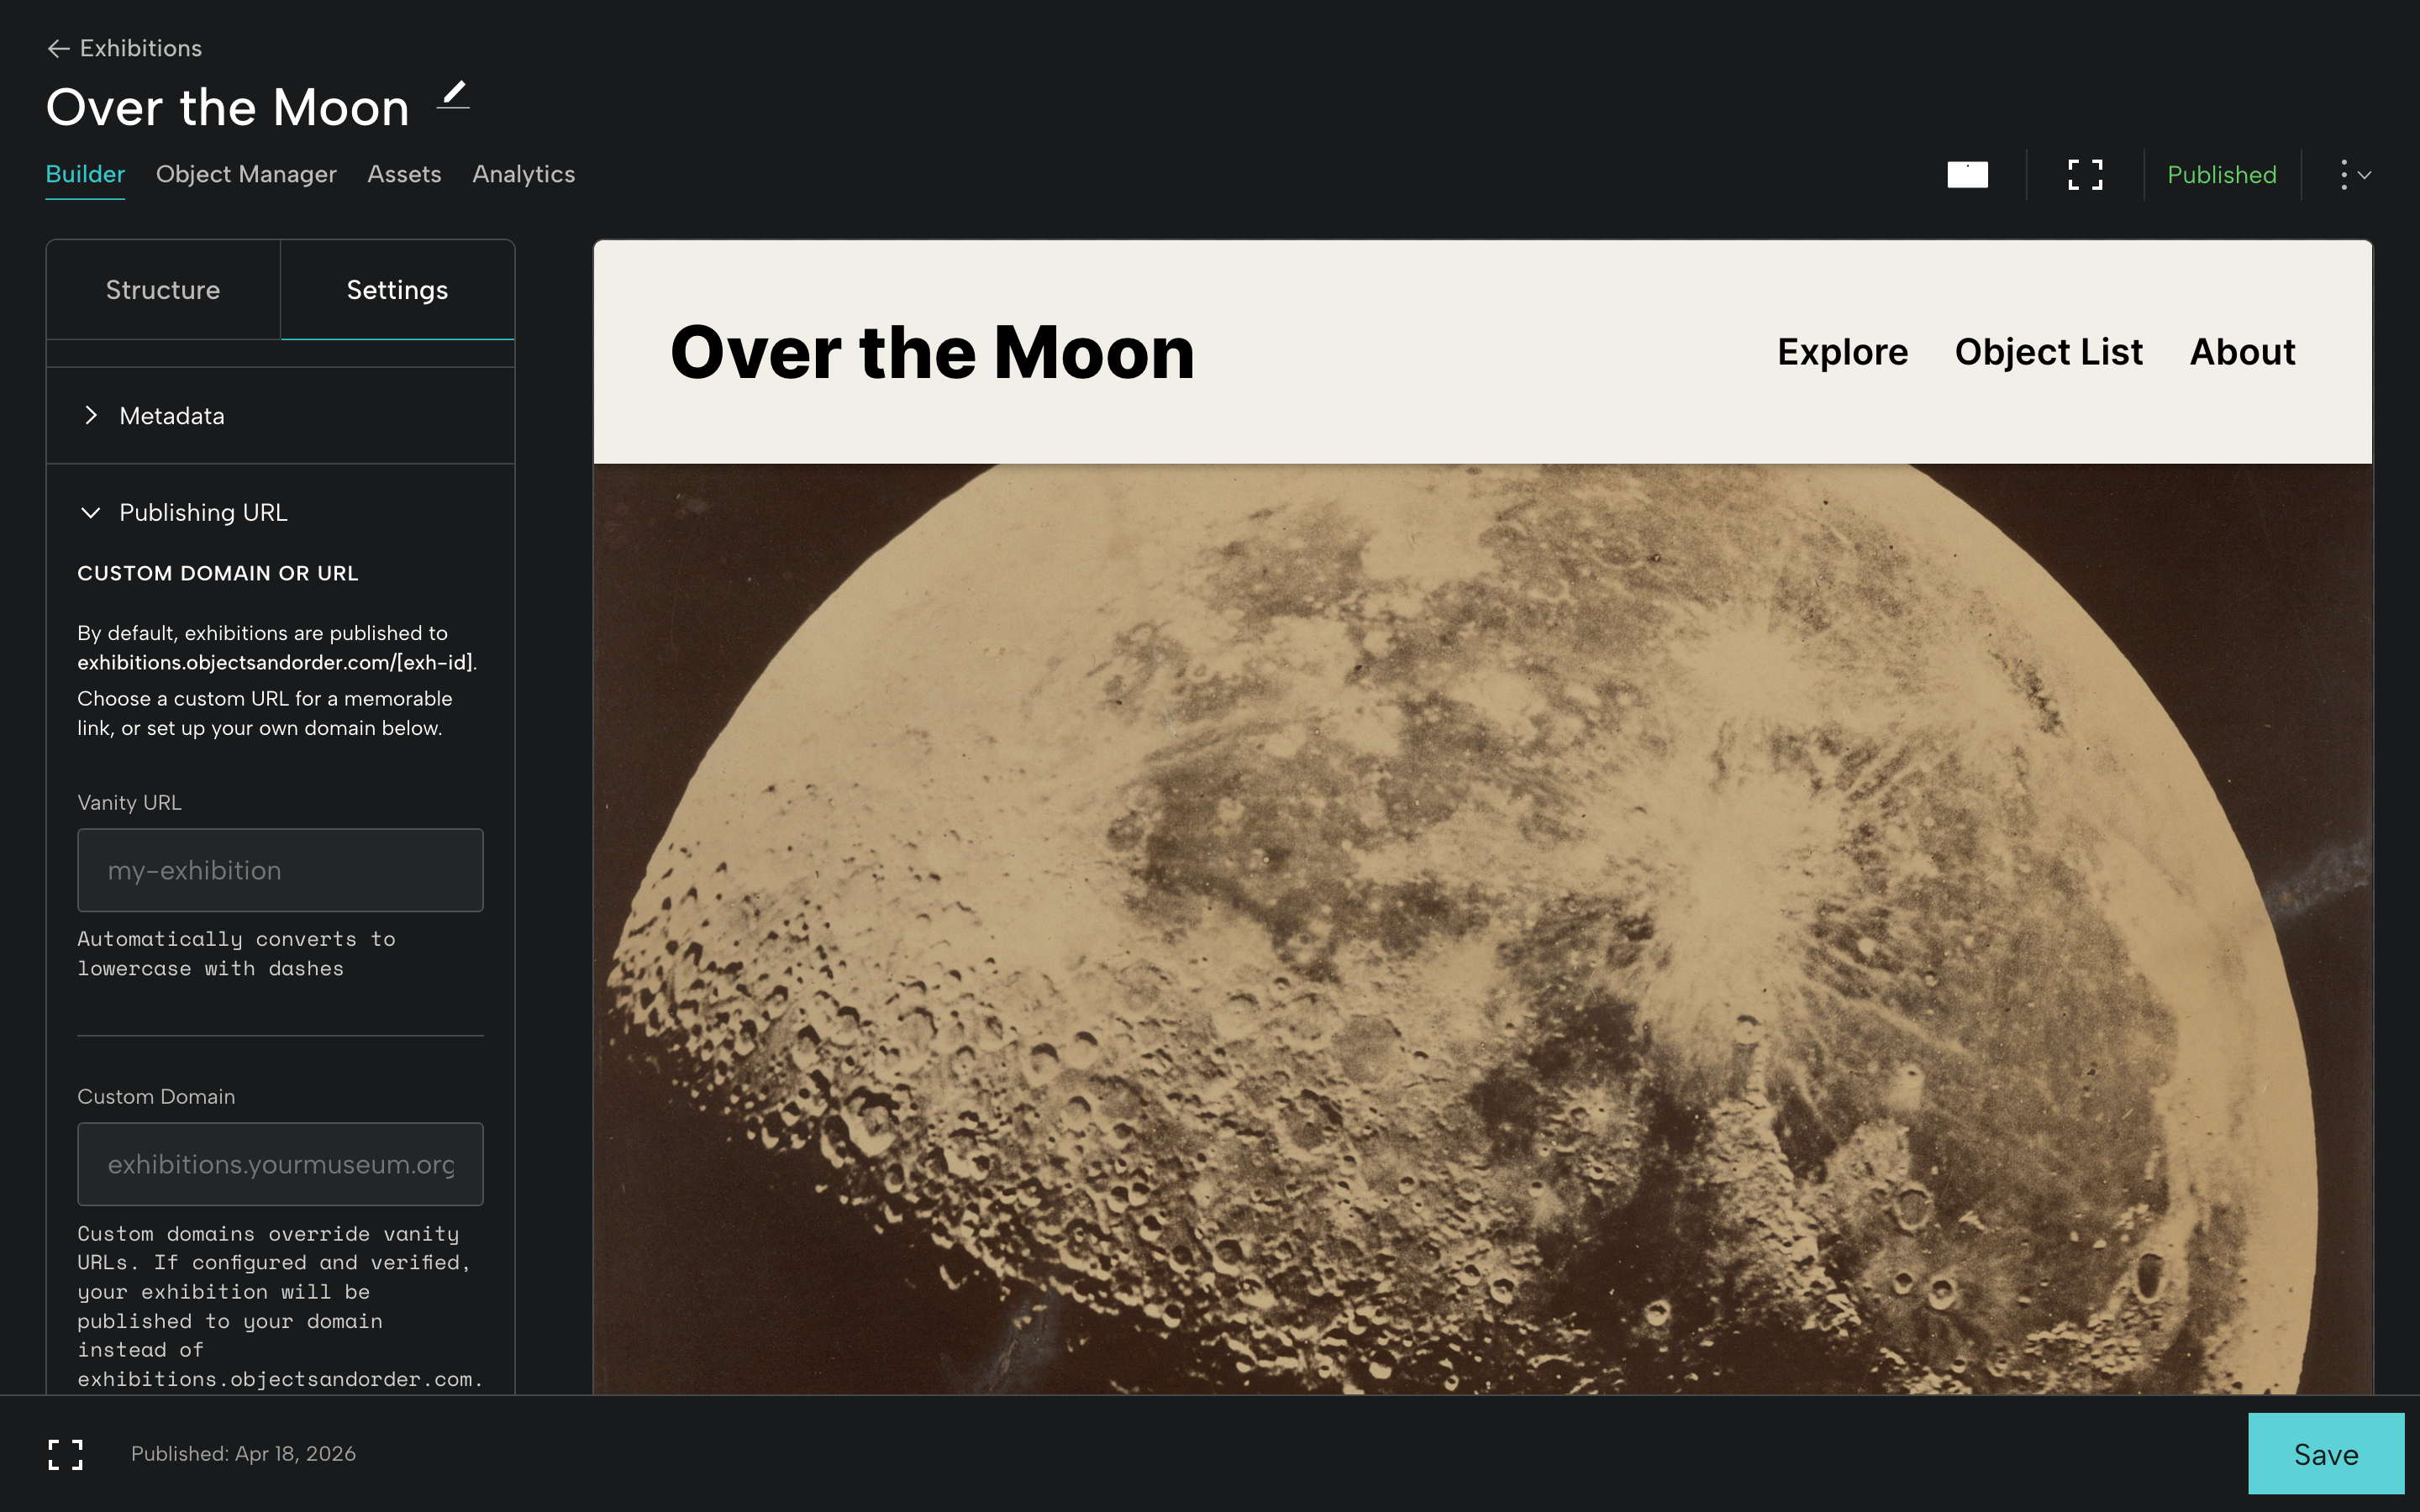
Objects and Order URL
When you first publish an exhibition, your exhibition will be available at an Objects and Order URL with this format:
exhibitions.objectsandorder.com/seriesoflettersandnumbers
This URL works well for reviewing and sharing with any additional stakeholders.
Vanity URL
You can enter a vanity URL for your exhibition in Settings, under Vanity URL.
The exhibition URL will look like:
exhibitions.objectsandorder.com/my-exhibition-title
Custom Domain or Subdomain
You can also enter a custom domain or subdomain. For example:
myexhibitiontitle.com OR myexhibitiontitle.museumofobjects.com
Enter the domain and click Verify. Then follow the DNS instructions to publish the exhibition at your own domain by adding an A record and TXT record through your DNS provider.
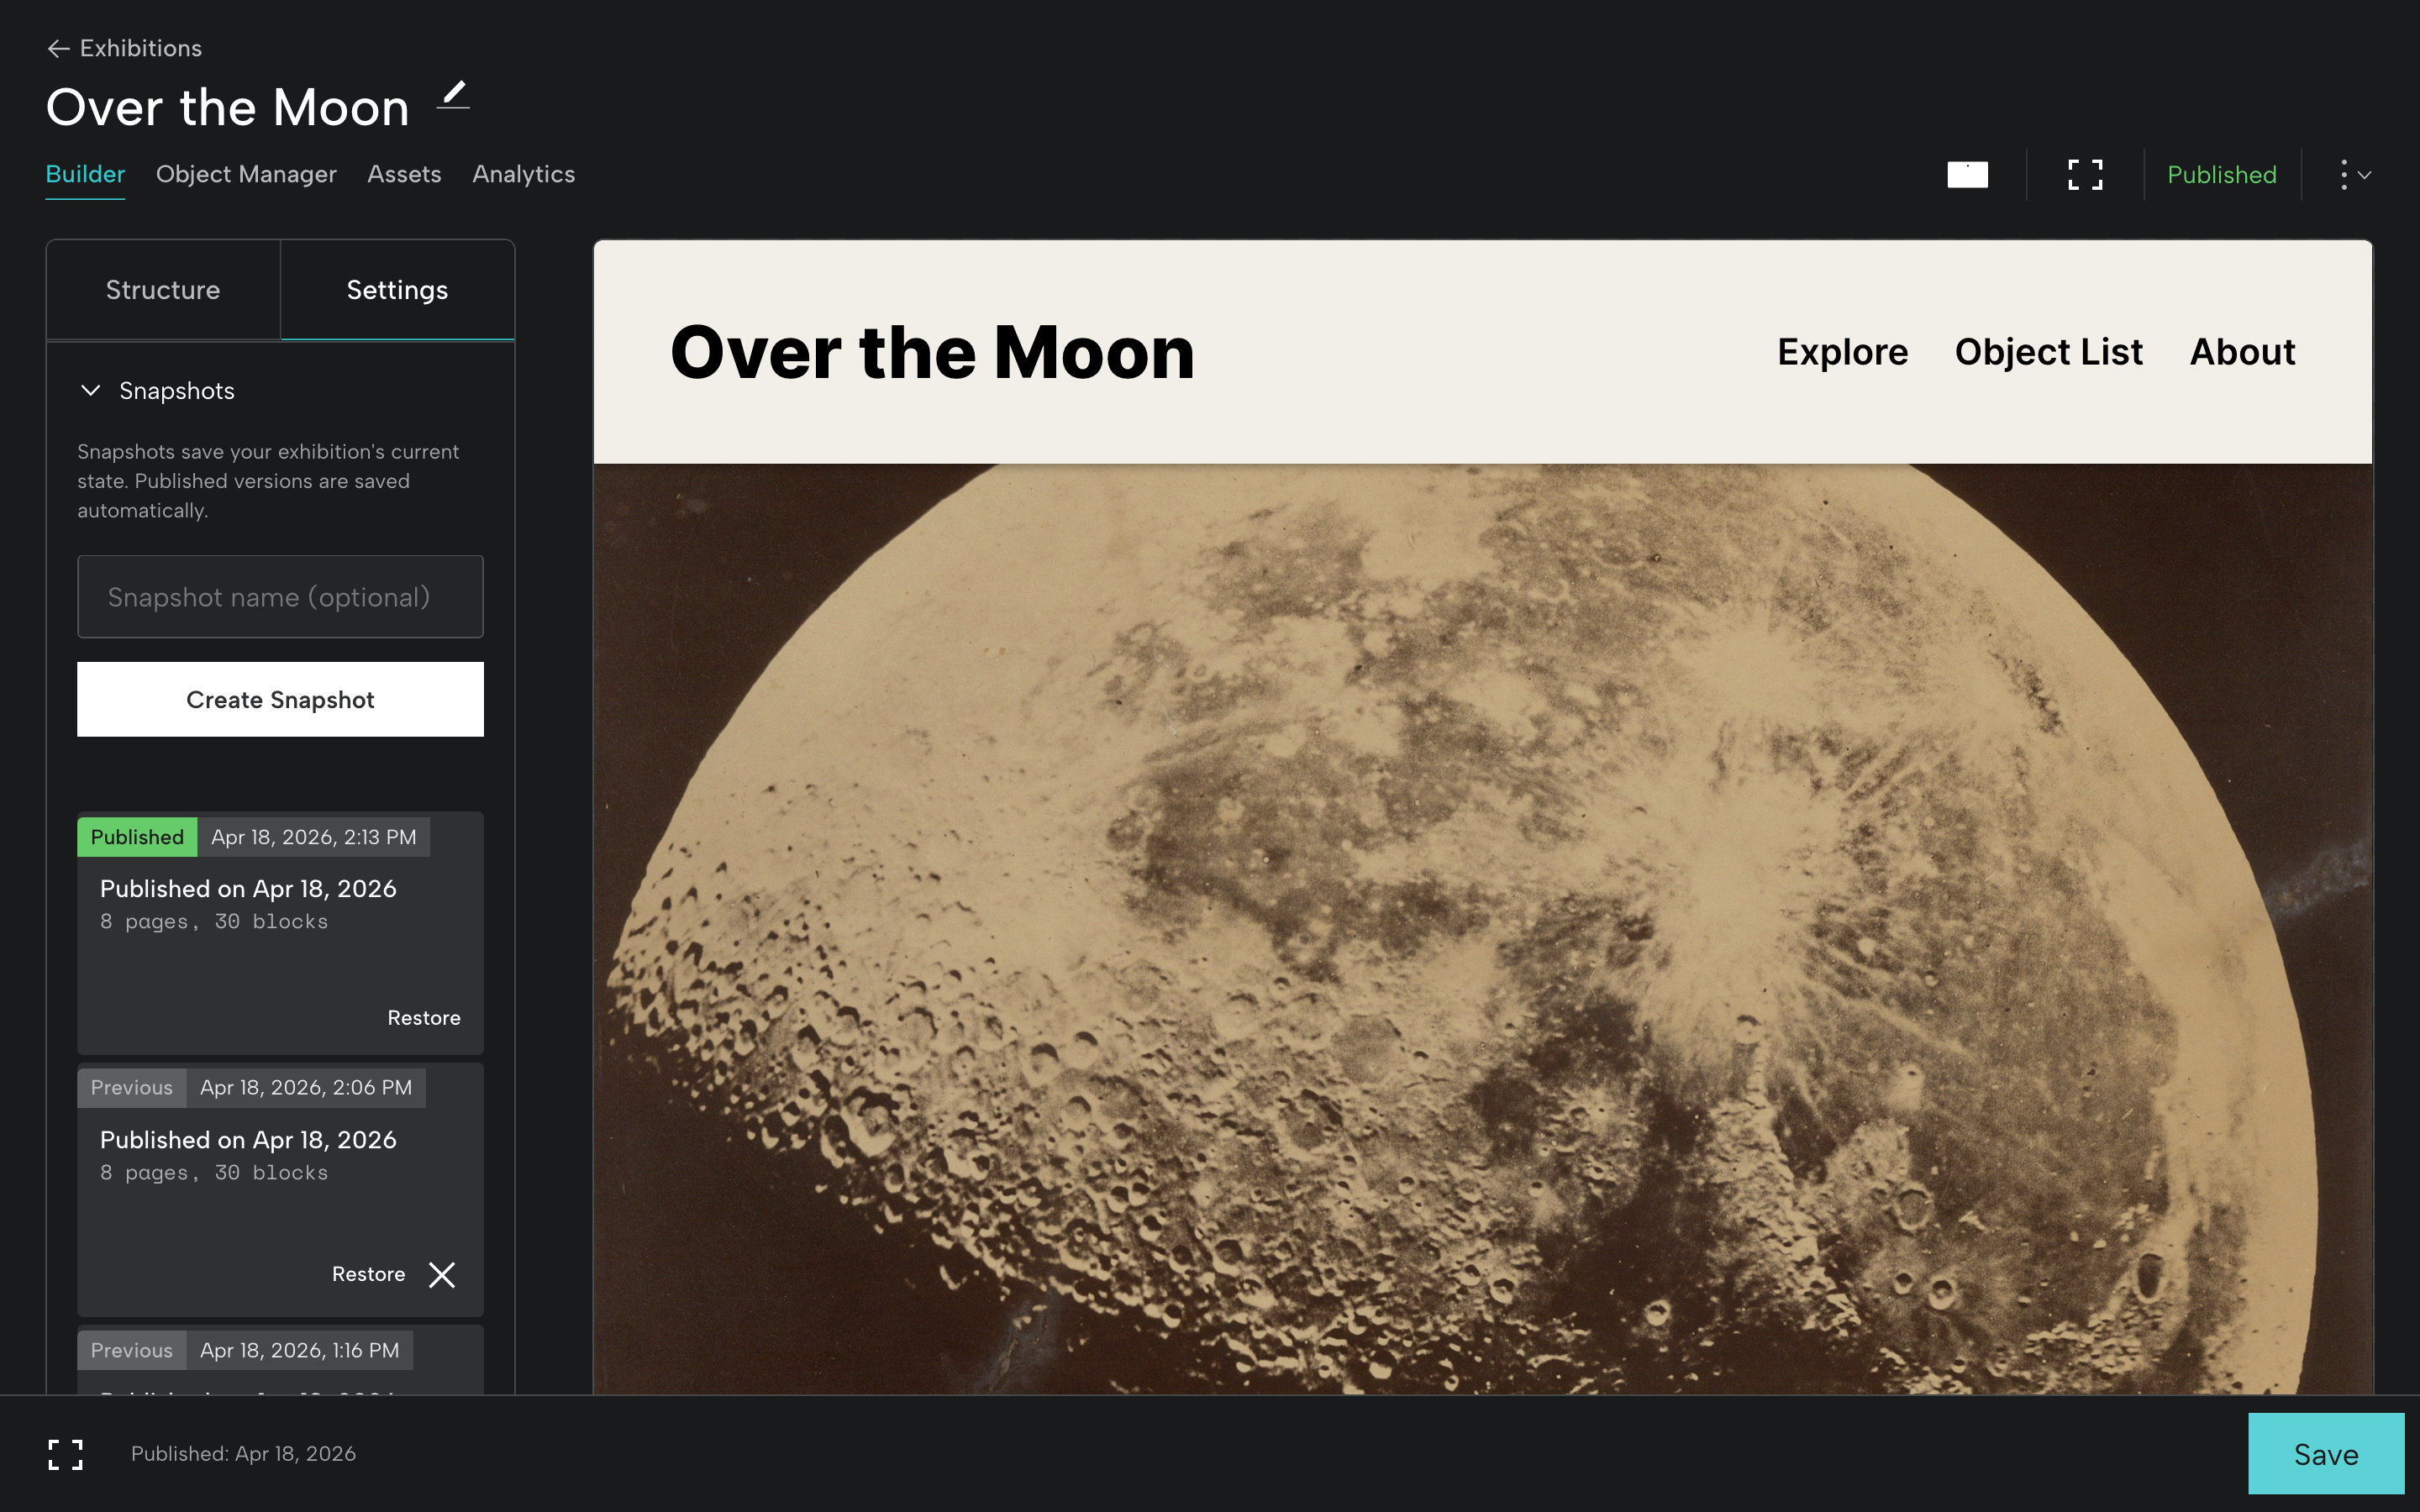
Publishing Updates
Once your exhibition is live, it's simple to make edits or updates. You may notice a typo, decide to change a page color, or want to add a new curatorial video.
Go back to the Exhibition Builder to make and save the changes. At lower left, you'll see a message that there are Unpublished Changes.
When you're ready, click Publish Updates. The exhibition will rebuild and the new version will replace the previous one.
As you publish, you'll be creating Exhibition Snapshots, viewable from the Settings tab, under Snapshots. If you need to restore a previously published version, click Restore.
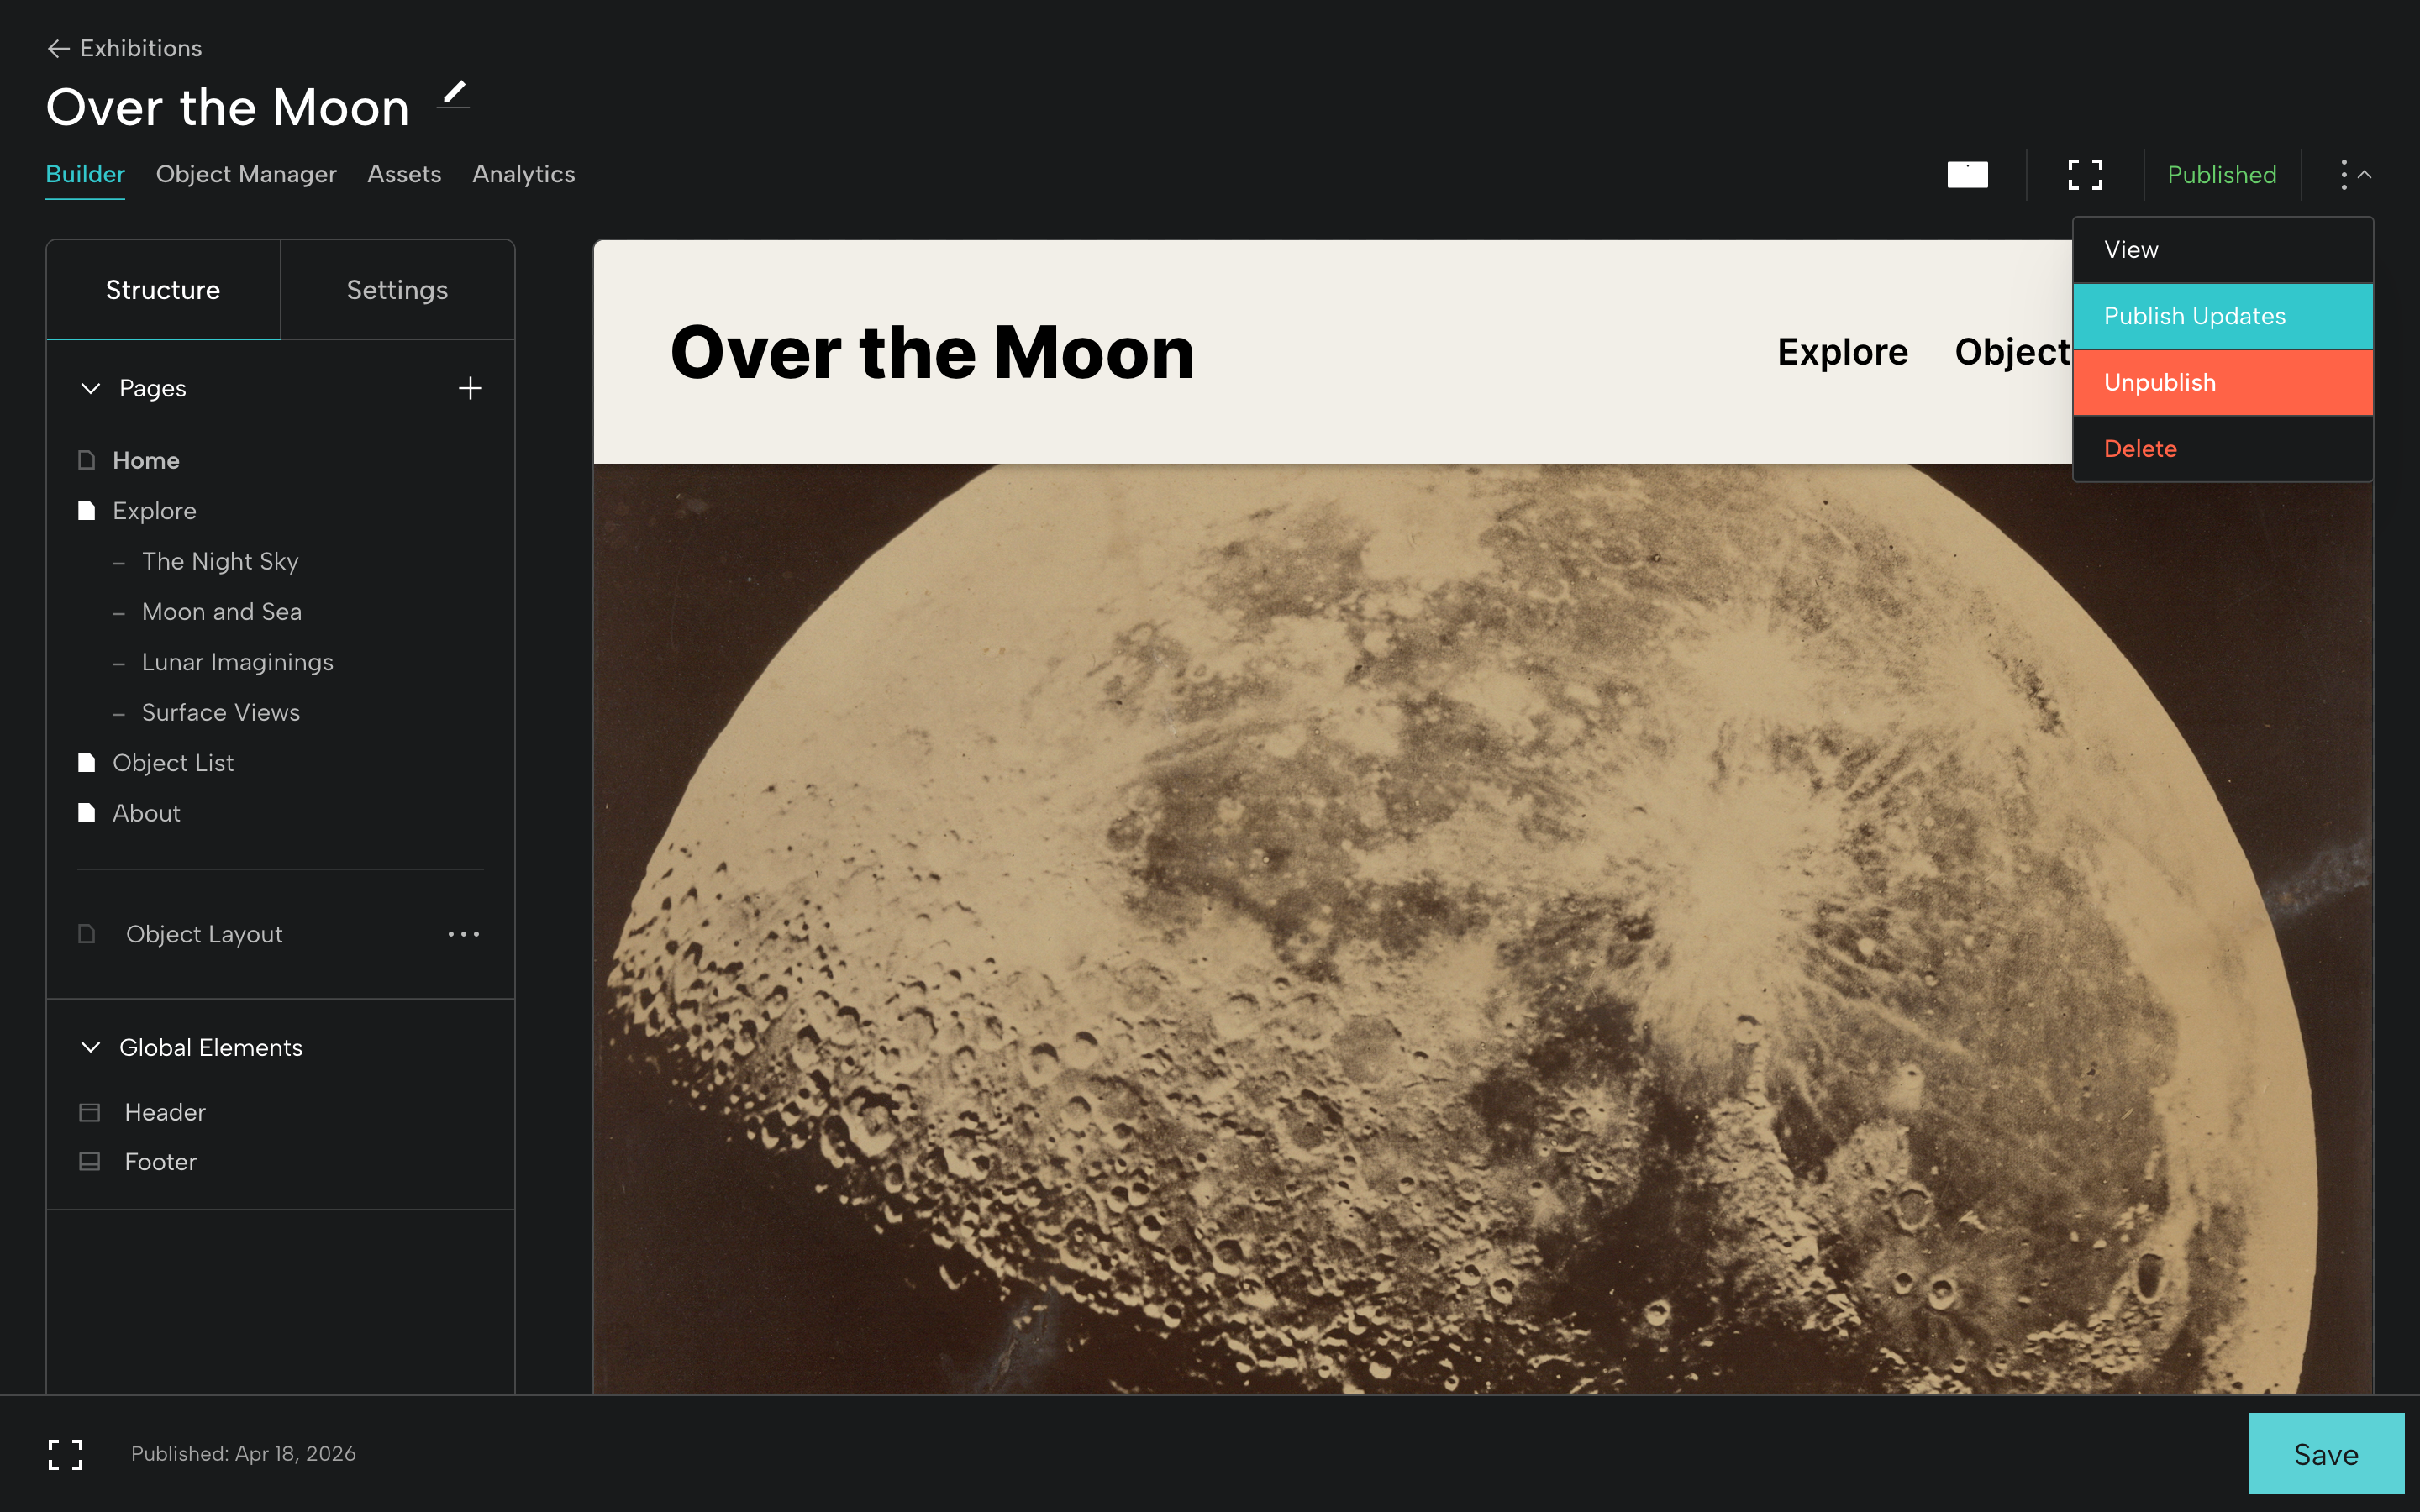
Unpublishing an Exhibition
If your digital exhibition ends after a period of time, or if you decide to take it down for any reason, from the dropdown menu, click Unpublish.
If someone visits the exhibition, they will encounter a 404 page.
If you decide to republish the unpublished exhibition, it will be available at the same URL.
Prior to canceling a Base Subscription, you must unpublish any published exhibitions.
Congratulations on publishing your exhibition!
Let us know if you have any questions or need some help along the way.
Digital Exhibitions Glossary
Assets: Files related to the exhibition (for example, a title graphic, a map, or an artist’s portrait)
Analytics: Exhibition analytics
Base: Collaborative space for managing object data and media files and for creating digital content like exhibitions and modules
Block: A customizable component you can add to an exhibition page or inside a Container Block (text, image, video, link, etc.)
Block Bar: Appears when you click a block; it allows you to drag the block, see your block type, and add, duplicate, and delete the block
Blueprint: Customizable, purpose-built form with fields for object information
Builder: Comprised of the Editor, for pages, global elements, and settings (left); and the Viewer, for viewing and updating exhibition content (right)
Container Block: Block type that accommodates other blocks within it
Exhibition Metadata: Data about the exhibition and the individual pages that becomes available when the exhibition is published
File Metadata: Data about an object image, video, or audio file, including caption, alt text, and rights information
Global Elements: Site elements that display on every single page (Header and Footer)
Metadata: See Exhibition Metadata or File Metadata
Object Manager: Where you sort your objects into their respective exhibition sections
Preview Mode: Preview a full-screen, interactive version of the exhibition (turns off editing capabilities)
Universal Editor: Floating, moveable editor for updating pages, blocks, and the header and footer