Projects with objects are usually iterative. They evolve over many months or years as teams prepare, refine, and disseminate information. But with iteration comes versions and revisions galore, leading to wasted time searching in frustration through shared folders, emails, and hard copies.
Working on a project with objects can lead to a file clutter nightmare. You've probably been there before:
- There are multiple versions of a shared doc and so many spreadsheets floating around, and they’re all marked “Final.”
- Your research and to-do notes are everywhere: post-its, pdfs, photocopies, emails, screenshots.
- You’re tired of squinting at tiny thumbnails and scrolling through field after field to track down the information you need.
- You spend a ton of effort locating and resizing images and wrangling and formatting captions again and again.
File frenzy is the worst. But it doesn’t have to be that way.
Meet Objects and Order
Whether you’re preparing an exhibition, research project, social media campaign, or a collection survey, you can collaborate with your team and streamline contributions.
- See a well-ordered, visual presentation of your objects
- Organize information that’s important to your team in one space
- Easily access images and audio & video files
- Add captions, alt text, and rights information to images
- Download object data as PDF, CSV, or JSON files
- Highlight and share objects in engaging digital content modules
Can I plan just one project?
Yes! While you can use our system to organize tens of thousands of collection objects, you can also use it for a single project.
Collections management systems weren't designed to offer the flexibility and versatility that object-based projects require, and standard project management software wasn't designed for organizing object data, media, and content.
Objects and Order always keeps flexibility and versatility top of mind. Teams are empowered to create and customize their ideal space for objects and project content.
Here’s how to get started:
Step 1: Sign up for a free Objects and Order Account.
Step 2: Start a Base. A Base is the space for your object information and files.
Step 3: Add a Blueprint for your project.
Blueprints are composable forms that determine data structures for your objects. You'll create and customize a Blueprint especially for your project. And best of all, you can update and evolve your Blueprint over the project's lifespan.
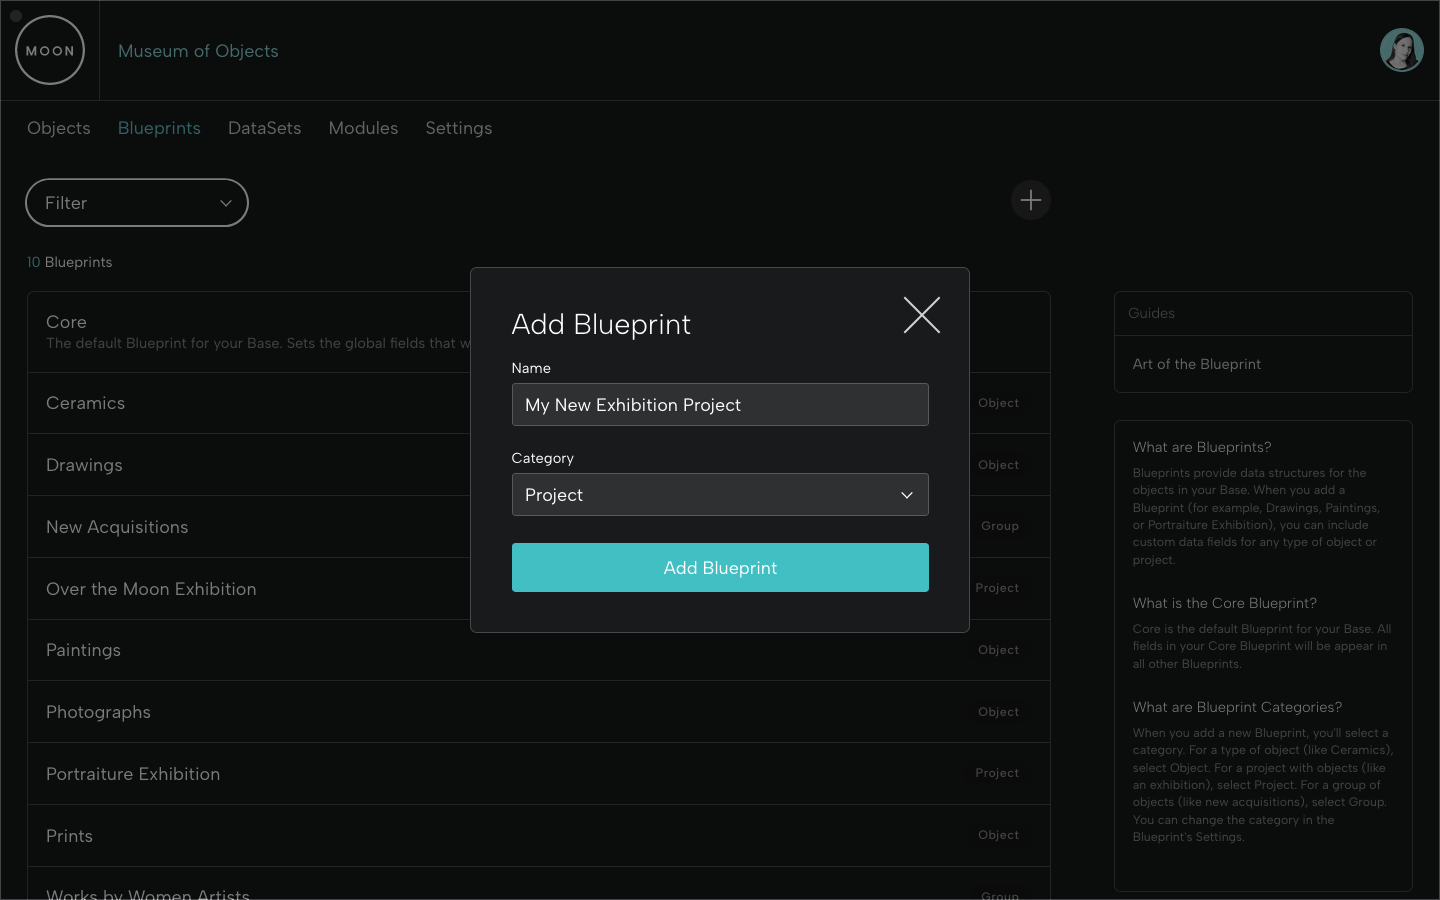
Step 4: Customize your project Blueprint.
Create and customize your Blueprint. Add the fields that matter to you and your team. Here are a few examples of how you could set up Blueprint fields:
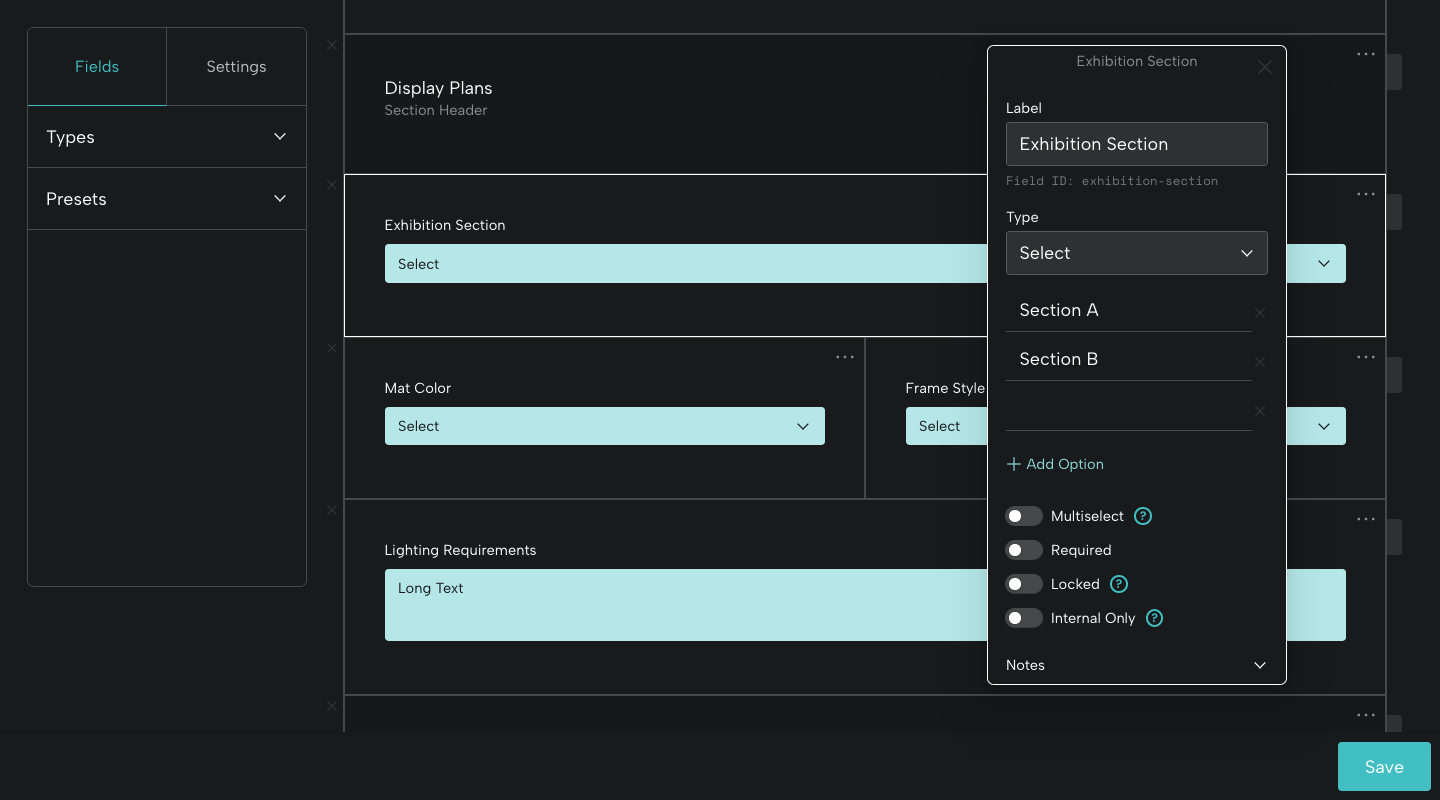
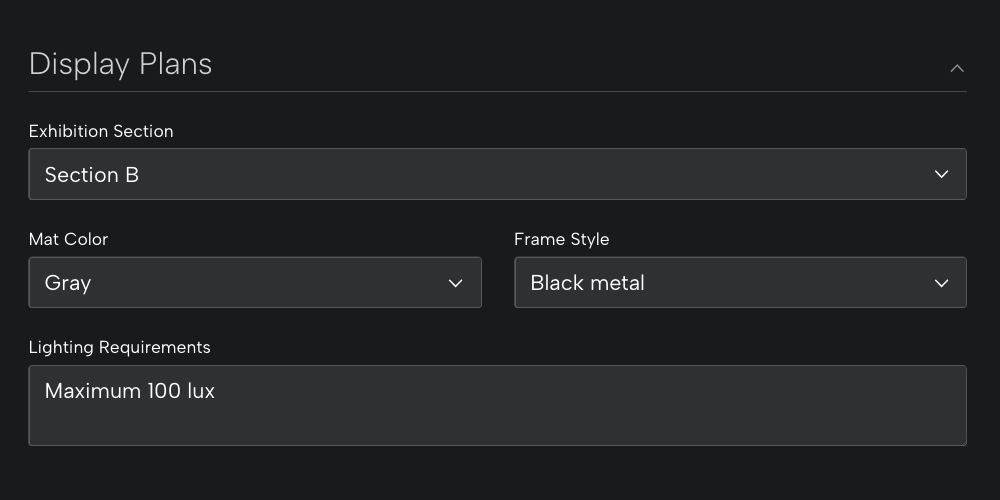
For organizing an exhibition, you might add a Display Plans section header and add fields about framing and lighting.
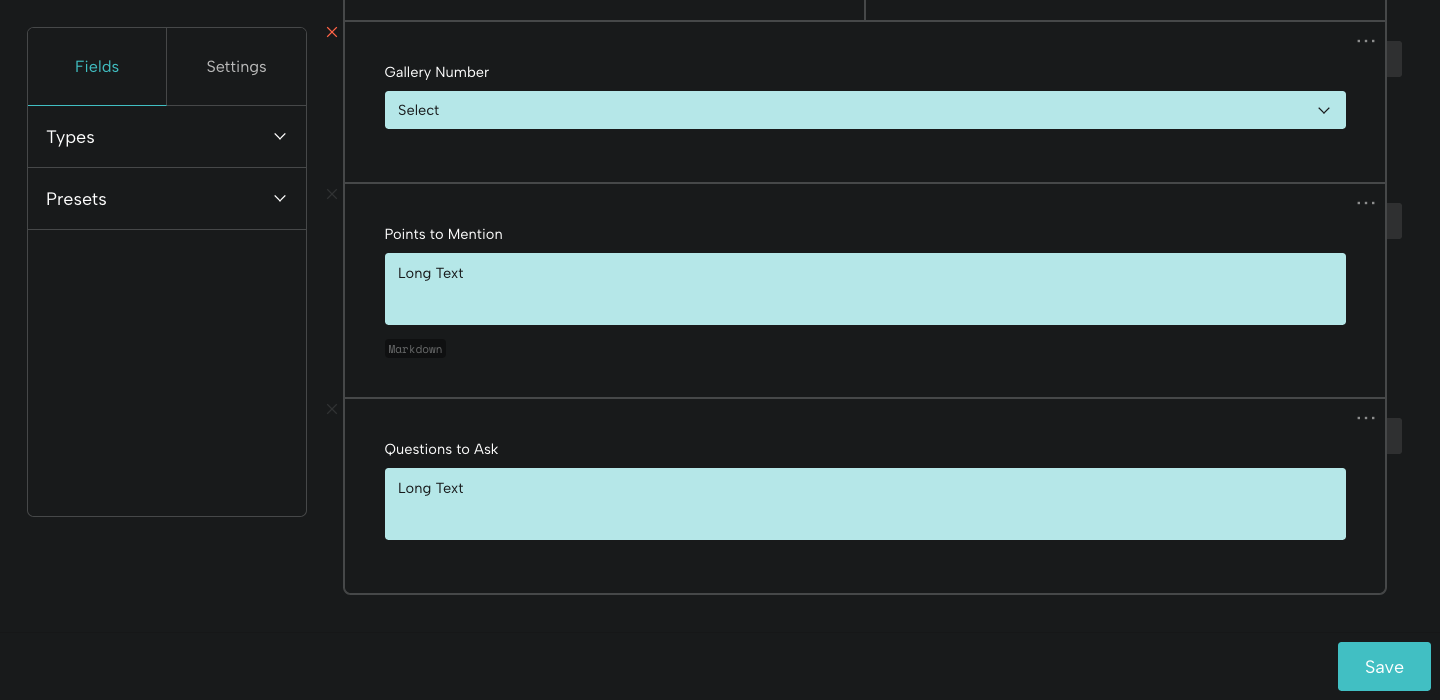
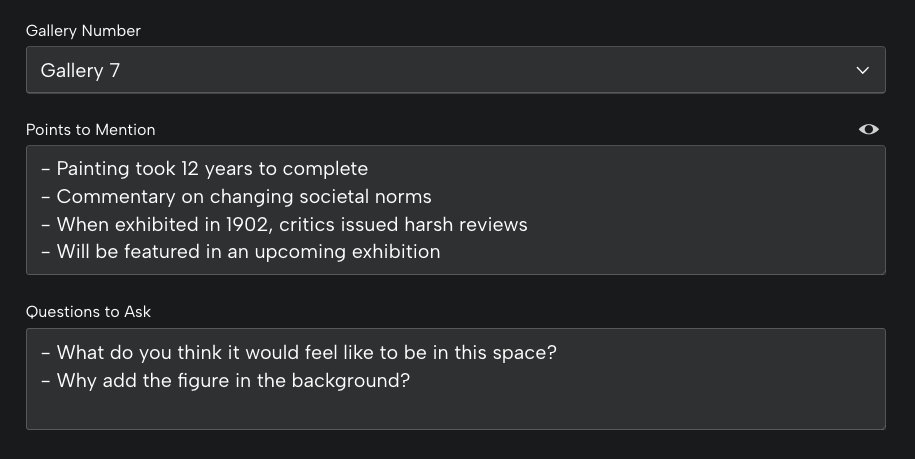
For planning a collection highlights tour, you might add fields for Points to Mention and Questions to Ask.
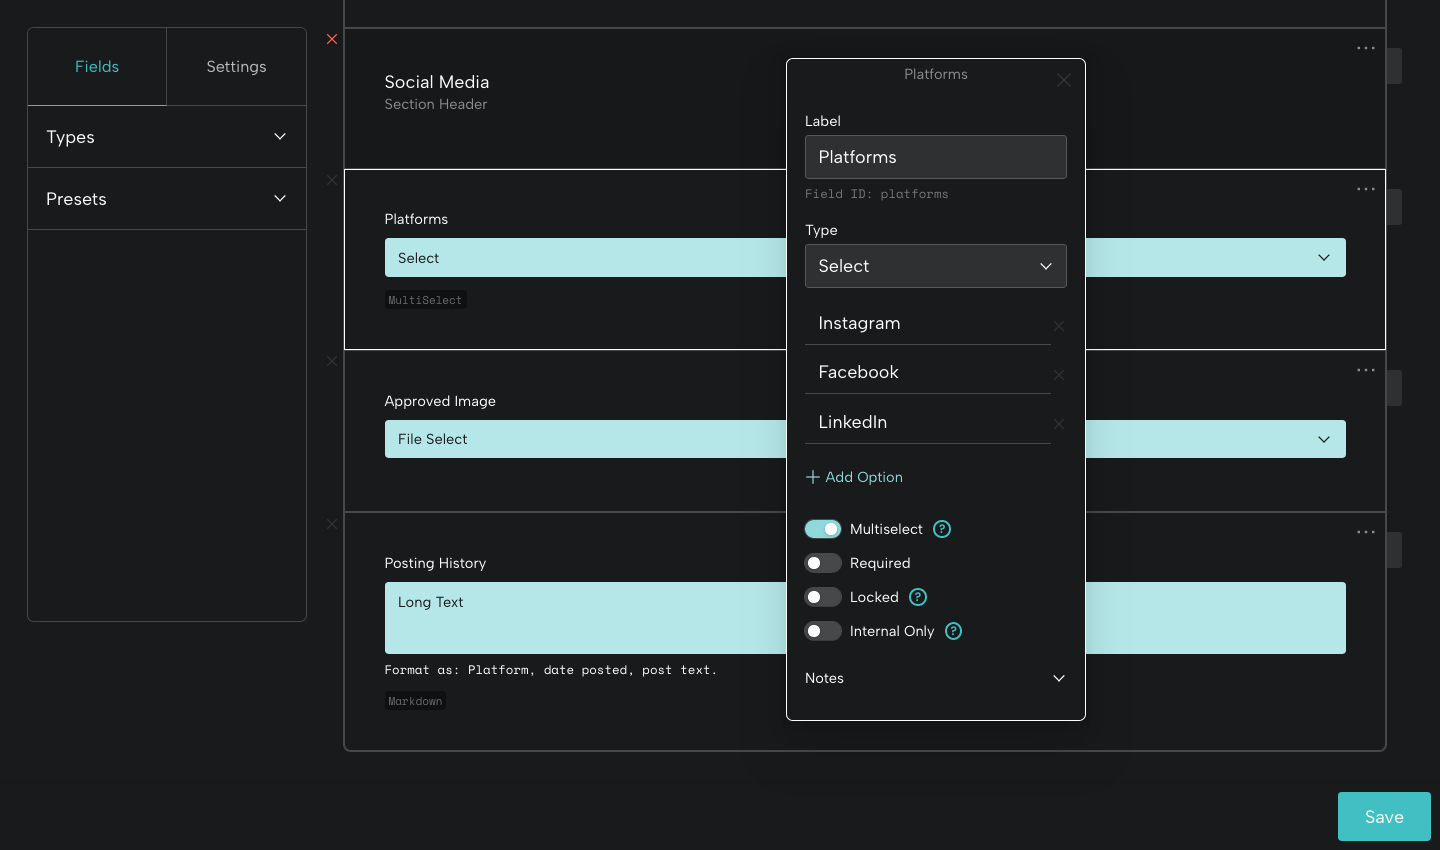
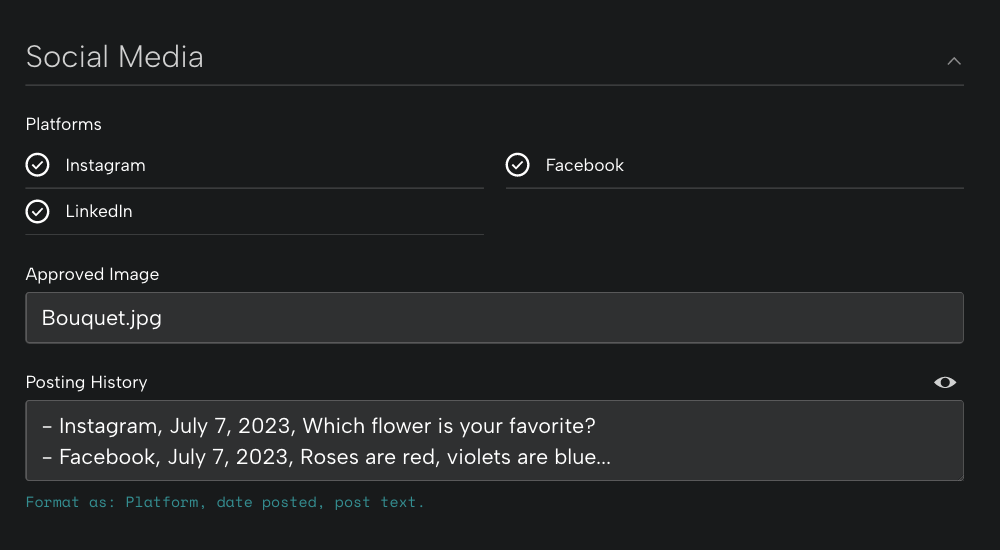
For coordinating a social media campaign, you might add fields for Platforms, Approved Image, and Posting History.
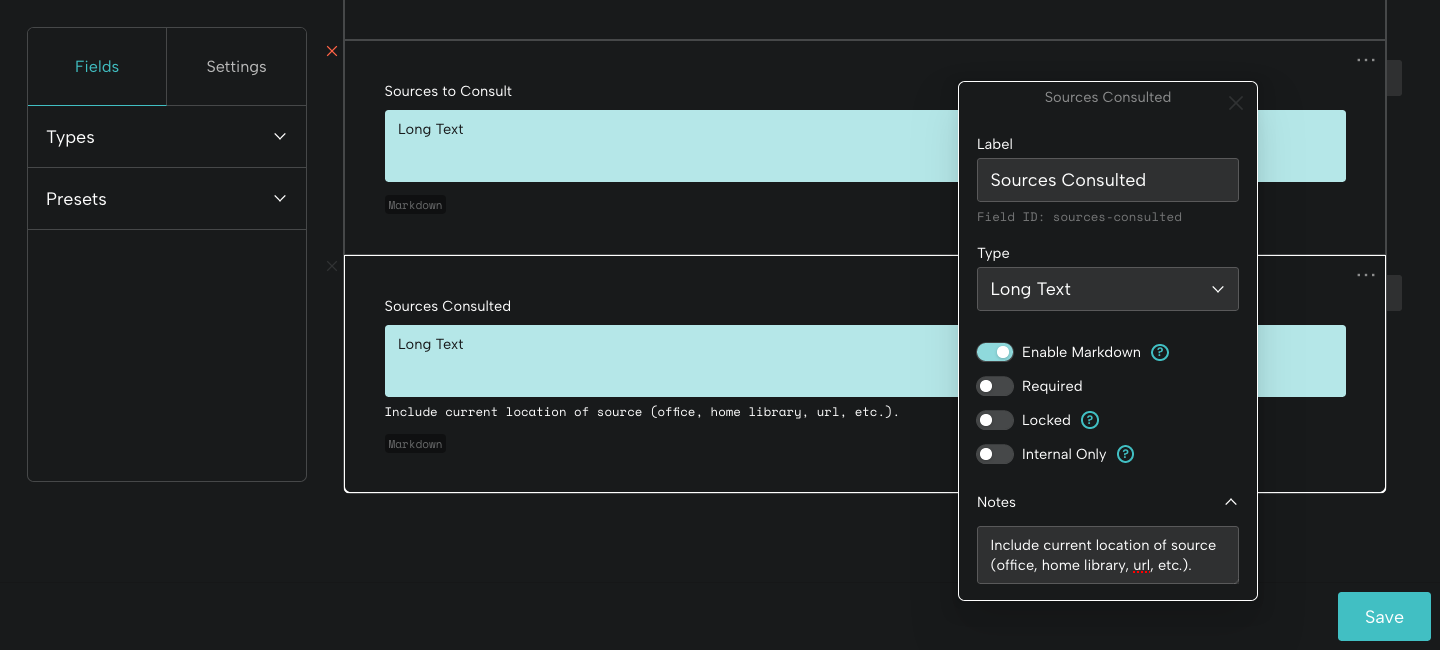
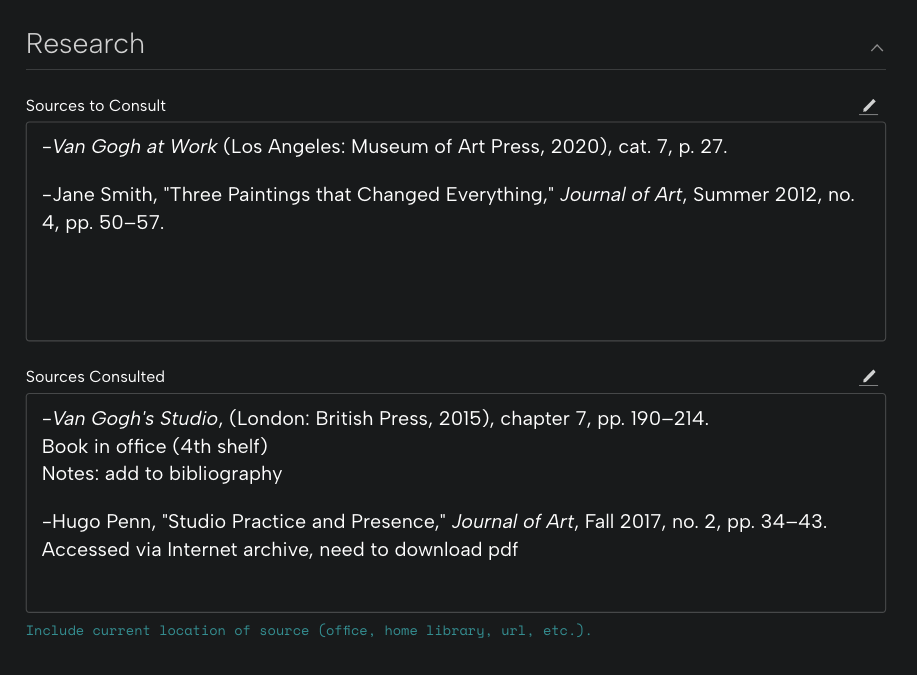
For organizing curatorial research, you might add fields for Sources to Consult and Sources Consulted.
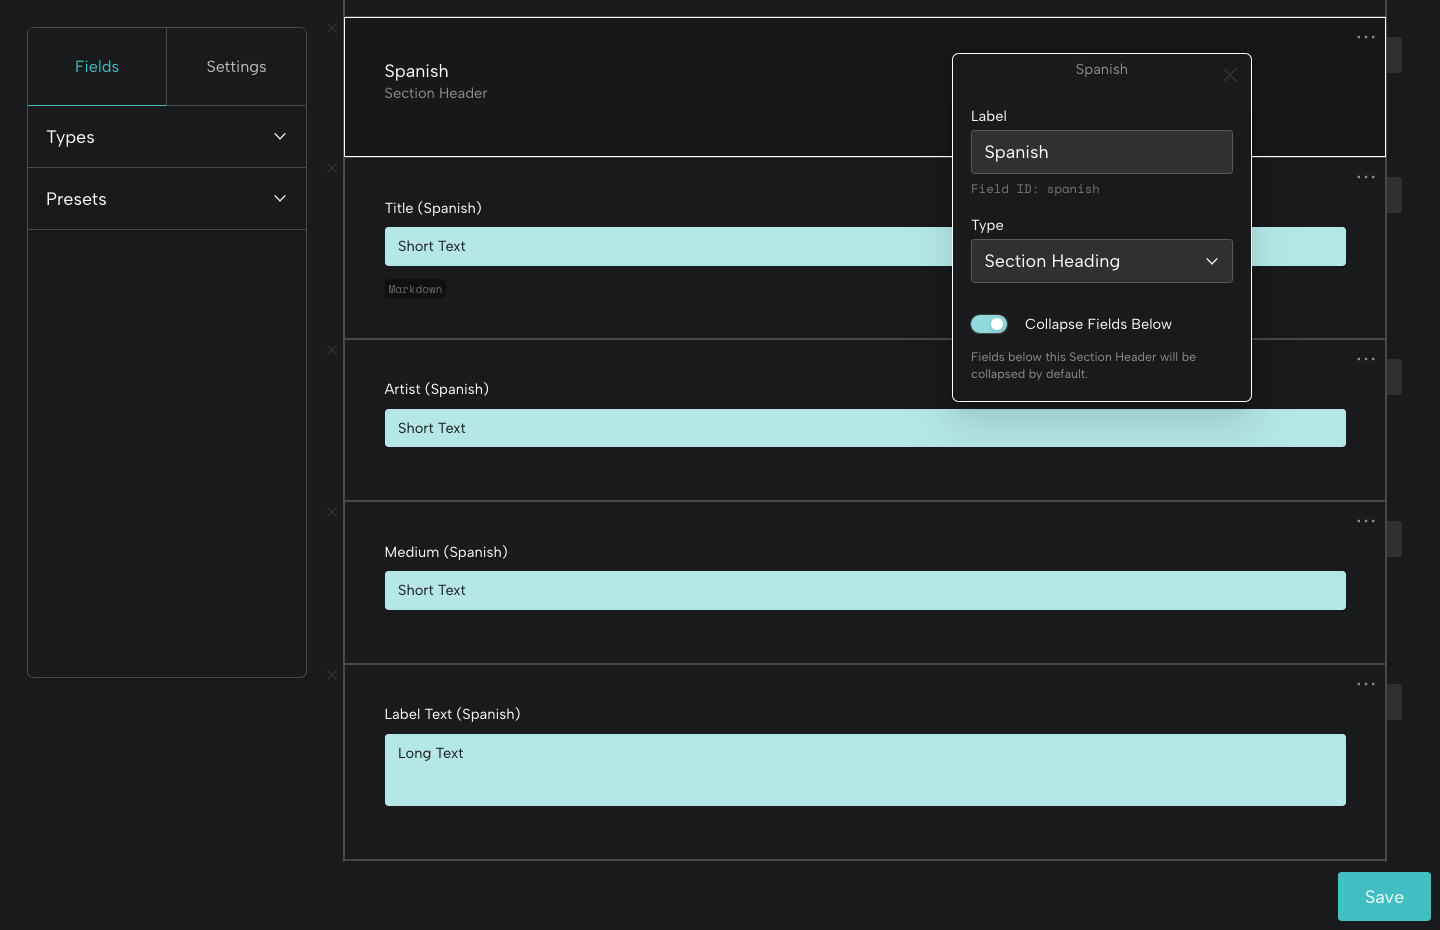
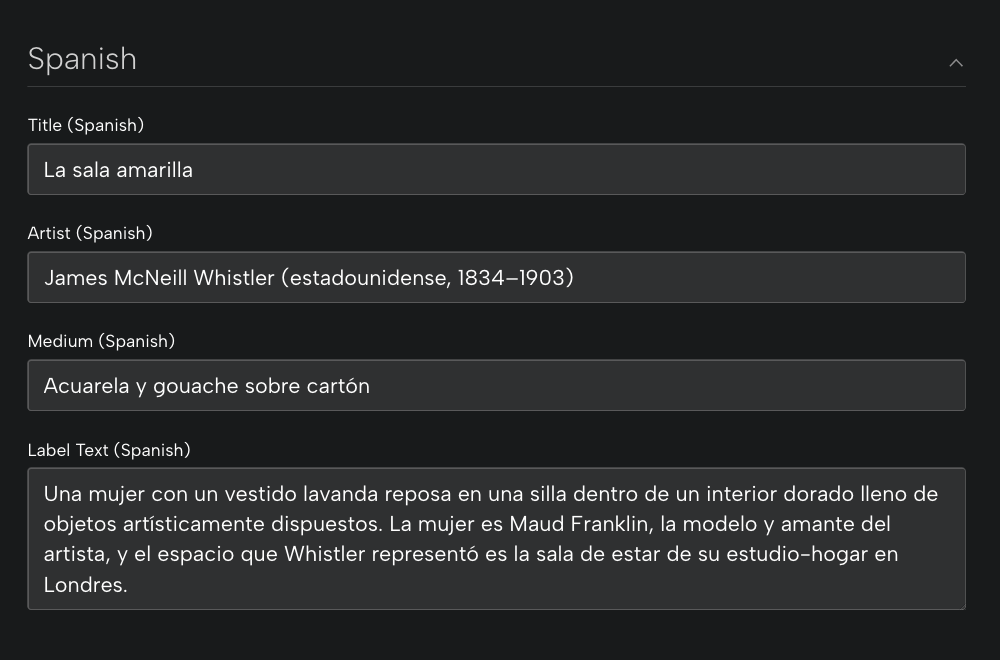
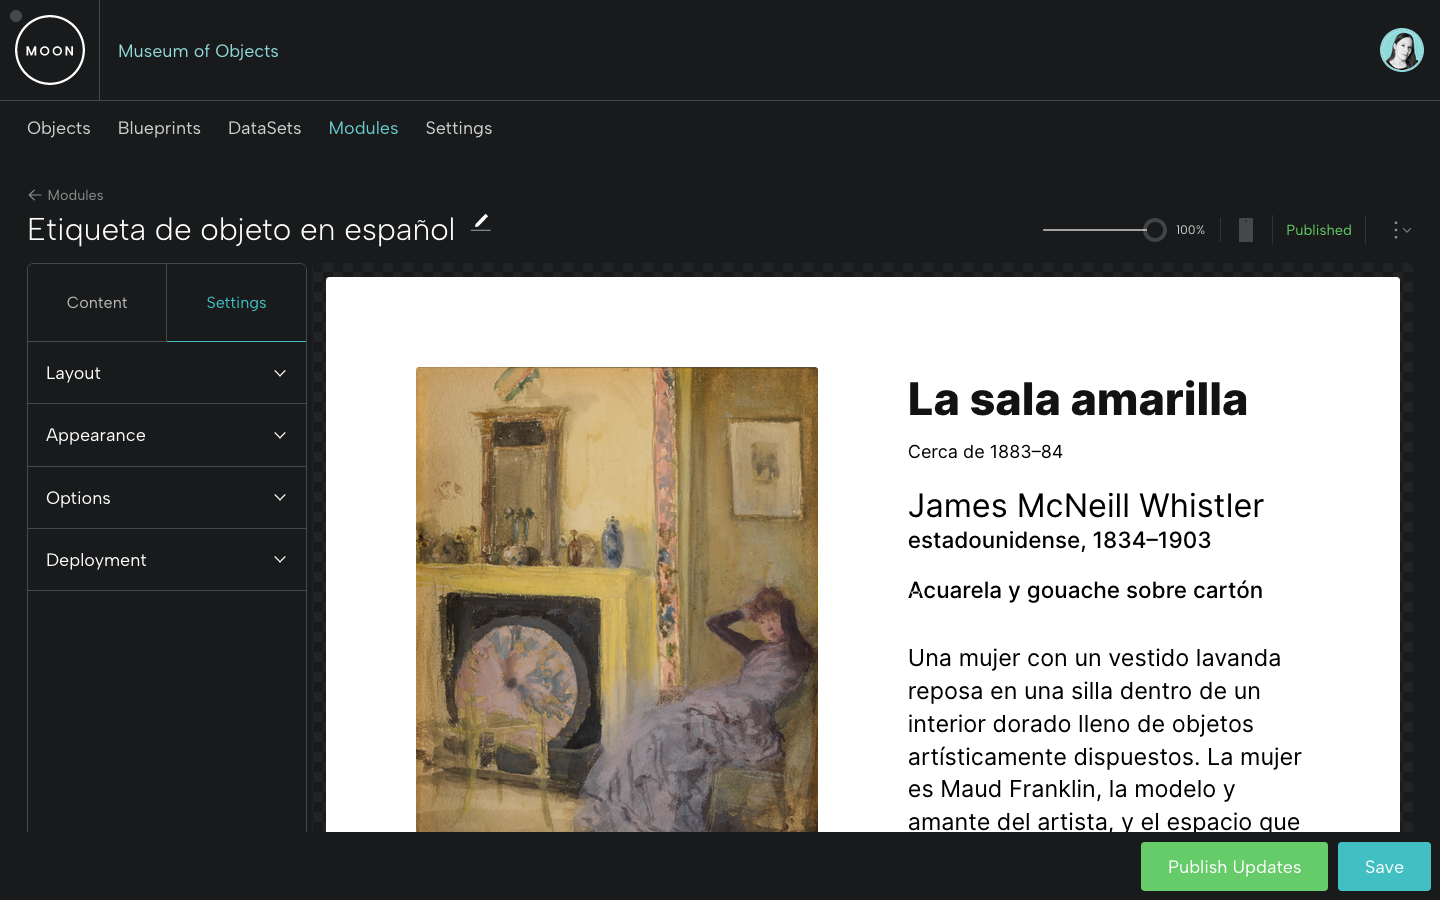
For bilingual object labels, you might add a Spanish section header and fields for Title (Spanish), Artist (Spanish), Medium (Spanish), and Label Text (Spanish).
Step 5: Add your objects and enter information.
Your project Blueprint is a work of art. Now it's time to add your objects and start inputting data. Your Blueprint generates the fields in which you'll enter information for each object in your project. By the way: if you realize you need to update, add, or relocate a field, just go back to your project Blueprint and edit it.
These sample form fields were generated from the Blueprint examples above:
Under the section heading Display Plans, you can select information for the exhibition section, mat color, and frame style, and add add lighting requirements in a text field.
To plan a tour, select the gallery number of the work you're discussing, and add points to mention and questions to ask.
Under the section heading Social Media, select multiple platforms, add the file name or the approved image, and keep track of your posting history.
If you're organizing research, you might add the sources you're going to consult and those you've consulted, along with helpful notes.
Under the section heading Spanish, you can organize translated information for the title, artist's nationality, and medium, along with the translated label text.
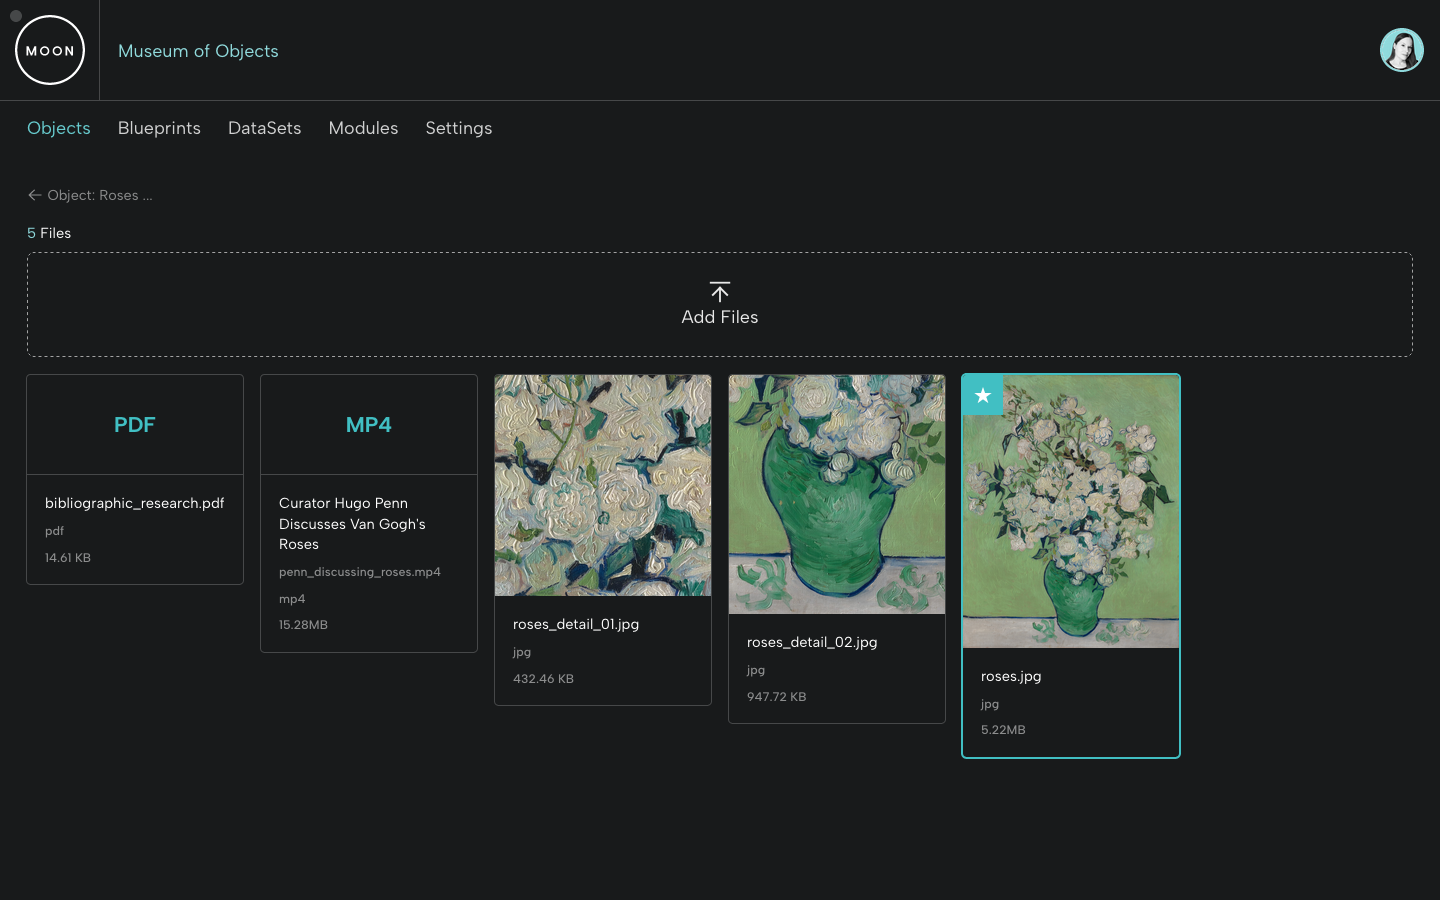
Step 6: Add project-related files.
Add image, audio, video and other files to each of the objects in your project. You can also add a caption, alt text, and rights information, and you'll be able to download the file in its original size and format.
Step 7: Highlight your project by sharing a module.
You and your team have planned and launched an outstanding project. Want to feature an object or a group of objects? Create a Module!
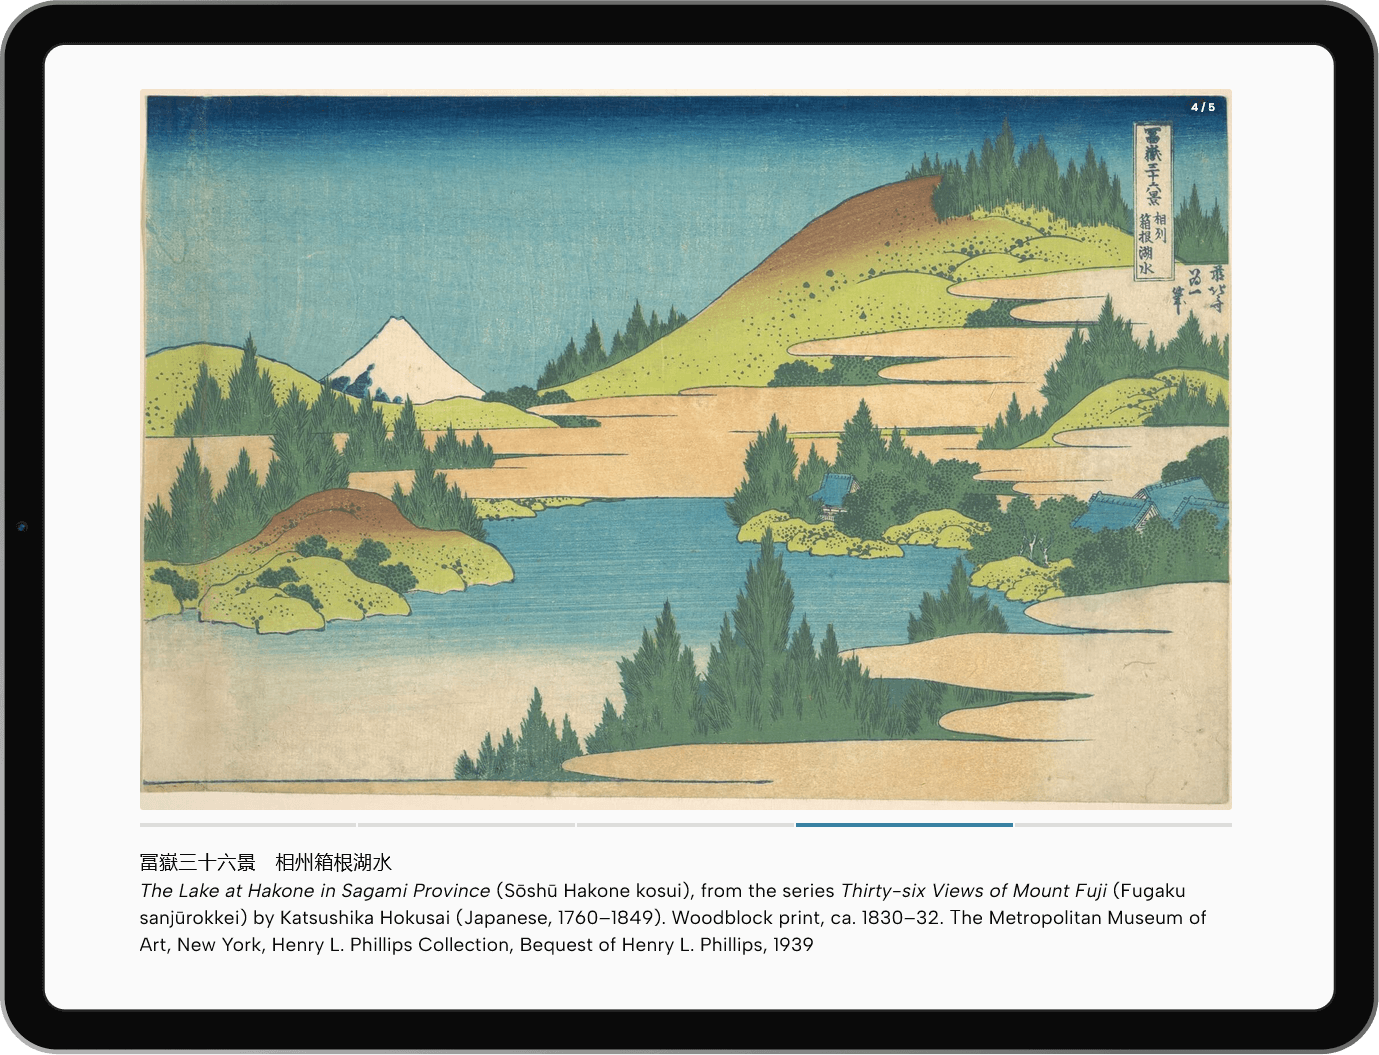
Add a Featured Object Module to showcase a collection highlight or share a bilingual object label, or add a Slideshow Module to display additional works from a series. You select the text and media files you want to display and style the look and feel. With a Base subscription, you can publish a Module and share it via url or embed it on your own site.
Featured Object Module - Module Builder View
Slideshow Module
The Project’s Over
Your project was a resounding success. Good work! As long as your Base subscription is active, keep the project information in your Base for as long as you need it. You can also download your data (as CSV or JSON) and your project files.
Want to strategize about projects? Reach out!